How to Push a Branch (or Anything) Out of Your Subject's Space in Photoshop

How to Push a Branch (or Anything) Out of Your Subject's Space in Photoshop

There’s a specific kind of frustration I feel when I nail a shot compositionally — good light, great subject, clean background — and then notice that some branch, pole, or random object is practically breathing on my subject. Not close enough to remove without wrecking the composition, but close enough to look like a mistake. I used to either crop aggressively (losing the frame I wanted) or spend 20 minutes cloning and healing until it looked almost right.

10 Photoshop Tips I Wish I'd Known Before I Wasted Years Doing Things the Hard Way

10 Photoshop Tips I Wish I'd Known Before I Wasted Years Doing Things the Hard Way

There’s a specific kind of pain that comes from watching someone else work in Photoshop and realizing they’re doing in three clicks what takes you fifteen. I’ve been there more times than I’d like to admit. Back when I was just starting to take freelance work seriously, a friend watched me edit over my shoulder for about two minutes before quietly asking if I’d ever heard of layer masks. Reader, I had not.

Photoshop Selections Explained: The One Skill That Makes Everything Else Click

Photoshop Selections Explained: The One Skill That Makes Everything Else Click

Here’s a confession: for an embarrassingly long time, I was just painting over things I didn’t want in my images. Like, literally using a brush and hoping for the best. My early freelance work looked fine on screen and absolutely fell apart the second a client zoomed in. The problem wasn’t my eye for design. It was that I had no real grip on selections, which meant every edit I made was either global (affecting the whole image) or a crime scene.

Stop Cropping Your Photos to Fit — Use These Photoshop Tricks Instead

Stop Cropping Your Photos to Fit — Use These Photoshop Tricks Instead

Every working photographer or designer hits this wall eventually. You’ve got a great shot, you need it to fill an 11x14 print (or a photo book spread, or a square social tile), and the aspect ratio just doesn’t cooperate. Your options feel like a bad multiple-choice question: crop out the part of the image you actually care about, or live with white bars on the sides like you’re watching a DVD on a 2003 flatscreen.

Lightroom First, Photoshop Second: Why Your Edit Order Is Wrecking Your Photos

Lightroom First, Photoshop Second: Why Your Edit Order Is Wrecking Your Photos

There’s a version of me from a few years ago who would open every photo straight in Photoshop. Raw file, JPEG, screenshot of a meme — didn’t matter. Photoshop was the big tool, so obviously that’s where the real work happened, right? Wrong. It took embarrassingly long for me to figure out that jumping past Lightroom (or Camera Raw) wasn’t a power move. It was leaving quality on the table before I’d even started.

Building Rain From Scratch in Photoshop: What I Learned From Aaron Nace's Motorcycle Edit

Building Rain From Scratch in Photoshop: What I Learned From Aaron Nace's Motorcycle Edit

There’s a specific kind of frustration that comes from spending an afternoon on a composite that still looks fake, and you can’t quite put your finger on why. For me, it’s usually the atmosphere. The subject is sharp, the lighting is close enough, but the scene feels like a cutout dropped onto a background. Rain, when it’s done right, is one of the fastest ways to sell a scene as real.

How to Make Dramatic Black & White Photos in Photoshop (Without Guessing)

How to Make Dramatic Black & White Photos in Photoshop (Without Guessing)

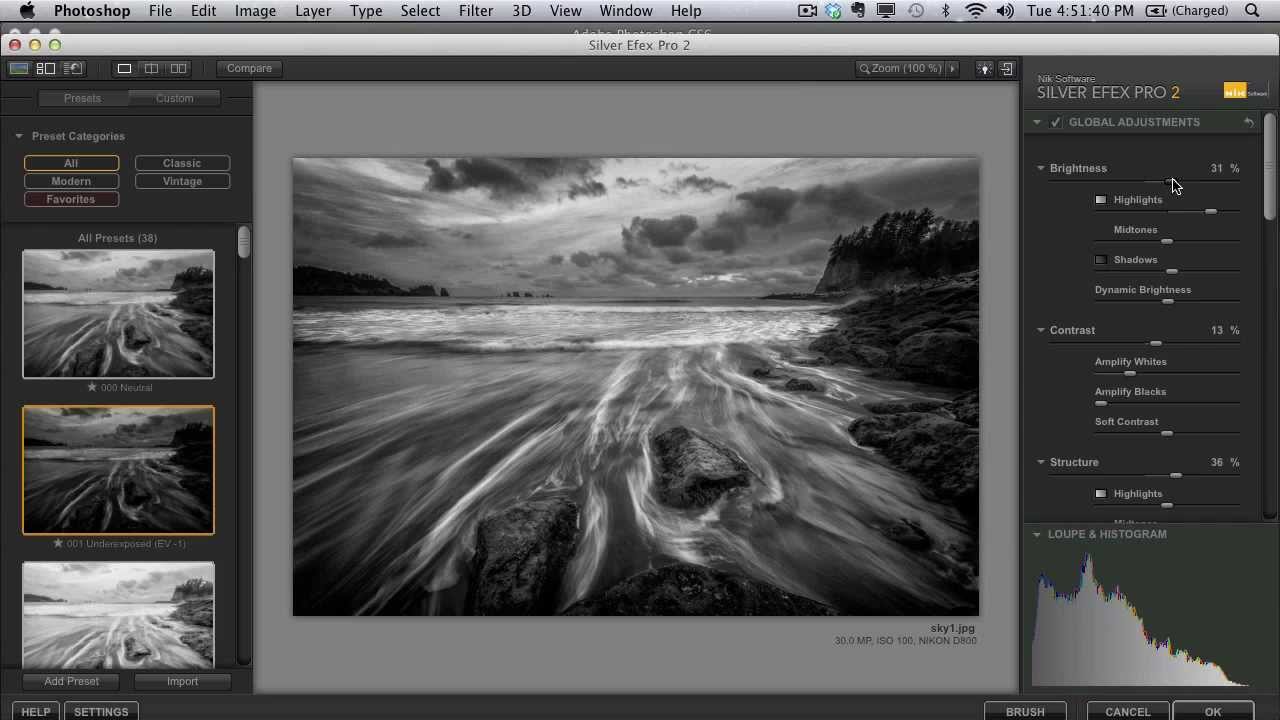
There’s a particular kind of black and white photo that stops you mid-scroll. Deep shadows, bright highlights, real tension between the two. Then there’s the other kind, which is just a color photo with the saturation turned off and a vague sense of disappointment. For a long time, most of what I was producing fell into that second category. I’d desaturate, maybe nudge the contrast slider, call it done. The results looked flat, lifeless, and honestly kind of embarrassing given how much time I’d spent on them.

Build a Repeating Lightning Bolt Background in Photoshop (The Step-and-Repeat Method)

Build a Repeating Lightning Bolt Background in Photoshop (The Step-and-Repeat Method)

There’s a specific kind of panic that hits when a client asks for “something more interesting” in the background of a portrait shot that’s already been edited, color-graded, and basically signed off. You don’t want to blow up the existing work. You just need to add a layer of visual energy without rebuilding the whole thing from scratch. This is exactly the situation Aaron Nace tackles in this PHLEARN tutorial, and the approach he takes is genuinely clever.

Content Aware Scale: The Photoshop Feature I Keep Forgetting I Need (Until I Desperately Need It)

Content Aware Scale: The Photoshop Feature I Keep Forgetting I Need (Until I Desperately Need It)

There’s a specific kind of design panic that hits when you’re building a thumbnail, a print layout, or a client deliverable and the photo just doesn’t fit the canvas the way you need it to. The subject is dead center, you need room on one side for text, and if you just scale the whole image you’ll either crop something important or squash the person in the frame into a funhouse mirror version of themselves.

Stop Fighting Your Colors: How Color Range Masking Gives You Surgical Control

Stop Fighting Your Colors: How Color Range Masking Gives You Surgical Control

There’s a specific flavor of frustration I know too well: you brighten a photo, and suddenly everything looks like it’s been left out in the Texas sun for three days. The thing you actually wanted to pop, say a product, a piece of clothing, a neon sign, gets lost in the wash because you were editing the whole image instead of just the part that needed it. For a long time, my answer was to mess around with the HSL panel, nudge a slider, and hope for the best.

Stop Guessing Your Exposure: A Camera Raw Workflow That Actually Works

Stop Guessing Your Exposure: A Camera Raw Workflow That Actually Works

Exposure problems are the dirty secret of a lot of client work. You get a great shot, the composition is solid, the subject looks fantastic, and then you open it in Photoshop and realize half the image is either blown out or buried in shadows. I’ve been there more times than I care to admit. The temptation is to reach for Curves or Levels and start dragging things around until it looks “good enough” — which usually means you’ve overcorrected the highlights trying to save the shadows, or vice versa.

Two-Layer Vignettes in Photoshop: The Technique That Makes Your Subject Pop

Two-Layer Vignettes in Photoshop: The Technique That Makes Your Subject Pop

I used to add vignettes the lazy way. Throw a black-to-transparent radial gradient on top, drop the opacity to taste, call it a day. It worked well enough for meme graphics back when I was just making stuff for friends’ band pages, but the moment I started doing actual client work, that flat gradient approach looked exactly like what it was: a shortcut. The edges felt pasted on. Photographers noticed. Art directors noticed.