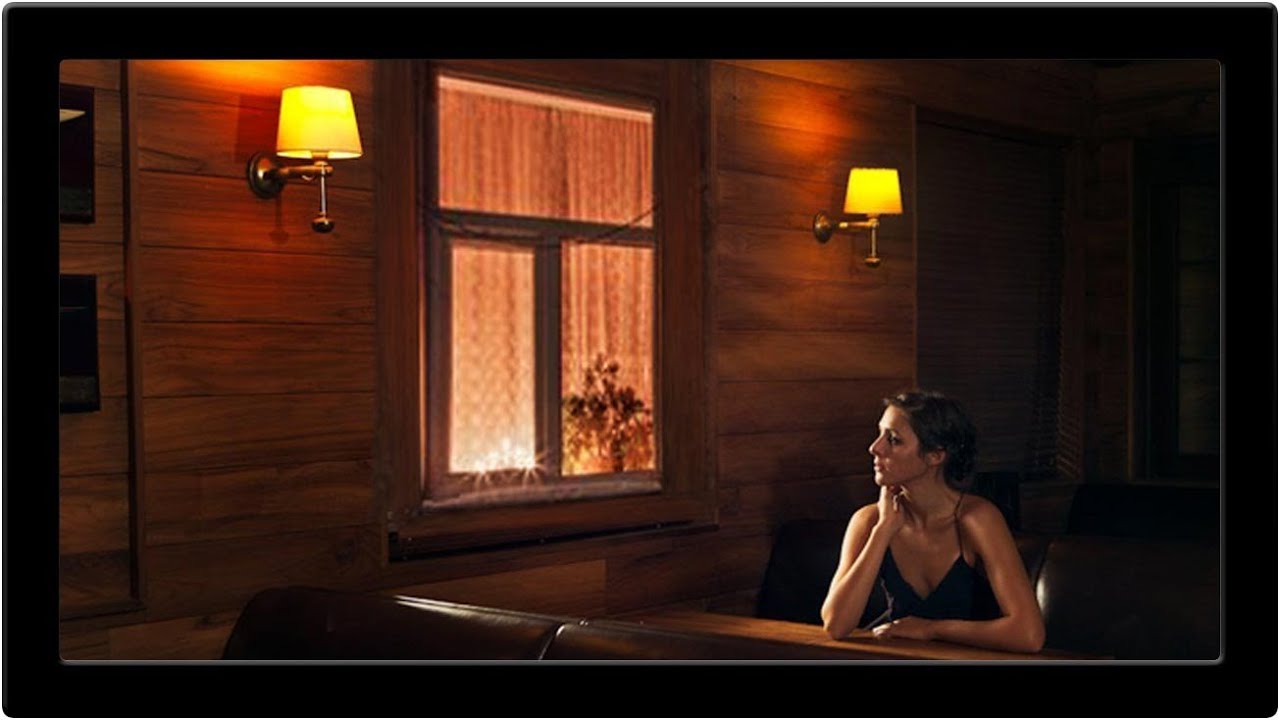
There’s a certain kind of Photoshop problem that looks simple from the outside and turns into a two-hour nightmare once you’re actually inside it. Venetian blinds are exactly that problem. Uneven slats, inconsistent shadows, awkward gaps. You think “I’ll just clone stamp this out” and then forty-five minutes later you’re still at it, questioning your life choices, while the coffee you grabbed at the start of the session goes cold on the table beside your laptop.
That’s the exact scenario Aaron Nace tackles in this PHLEARN tutorial, and his solution is the kind of thing that makes you smack the table. Watch the full tutorial on YouTube before or after reading this, it’s worth your time. Instead of painstakingly fixing the damaged blinds, Aaron just replaces the entire window by pulling one in from a completely different photo. Not a similar photo. A different one entirely. And he makes it work. That reframe alone – “why fix it when you can replace it” – is worth internalizing, because it changes how you approach a whole category of retouching problems.
Step 1: Assess the Problem and Decide to Replace Instead of Repair
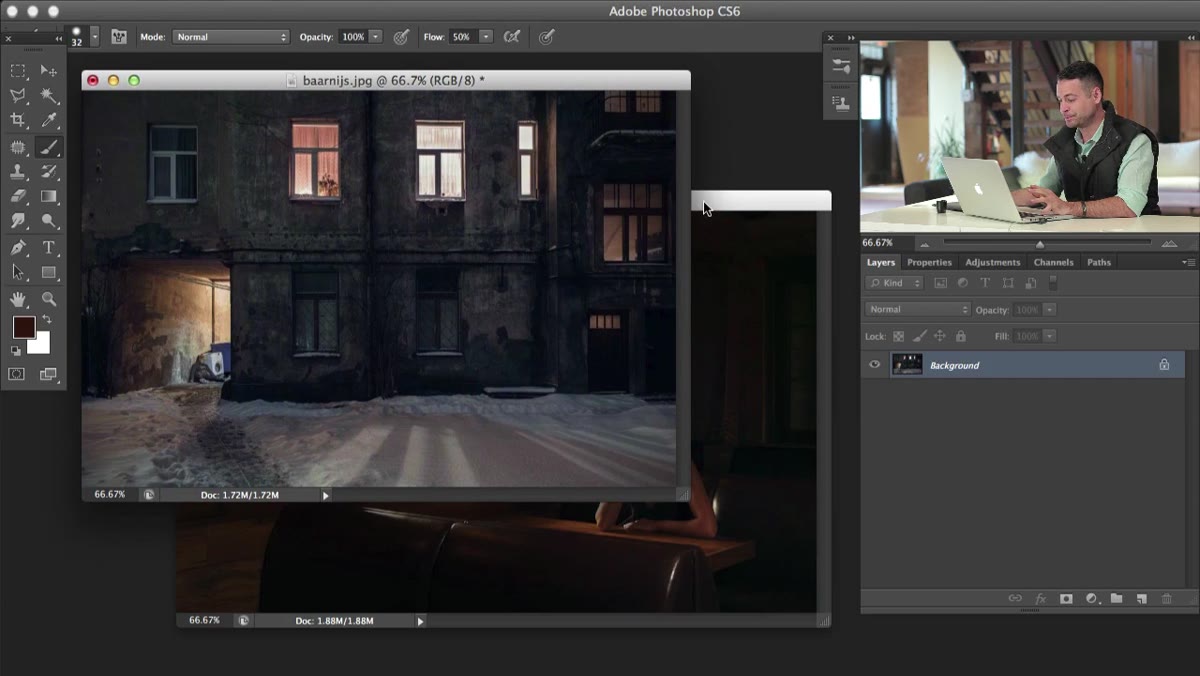 Original photo with broken venetian blinds visible in window
Before you touch a single tool, the real skill here is recognizing when you’re fighting a losing battle. In the tutorial, the original photo has blinds that are unevenly spaced and inconsistently lit. Aaron’s point is honest: you could use the Polygonal Lasso Tool to painstakingly select each gap between the slats and paint it out one section at a time. It would technically work. It would also take forever and probably look slightly wrong in ten different ways.
Original photo with broken venetian blinds visible in window
Before you touch a single tool, the real skill here is recognizing when you’re fighting a losing battle. In the tutorial, the original photo has blinds that are unevenly spaced and inconsistently lit. Aaron’s point is honest: you could use the Polygonal Lasso Tool to painstakingly select each gap between the slats and paint it out one section at a time. It would technically work. It would also take forever and probably look slightly wrong in ten different ways.
The smarter move is to ask whether you have a second image, or could shoot one, that contains a cleaner version of the same element. In professional work this comes up more than you’d think – a shoot day where one frame has perfect light but a car in the background, and another frame has a cluttered foreground but a clean background. Same principle applies here. Identify the problem area clearly before you start, and ask yourself whether fixing or replacing is the more efficient path.
Step 2: Select the Replacement Window with the Marquee Tool
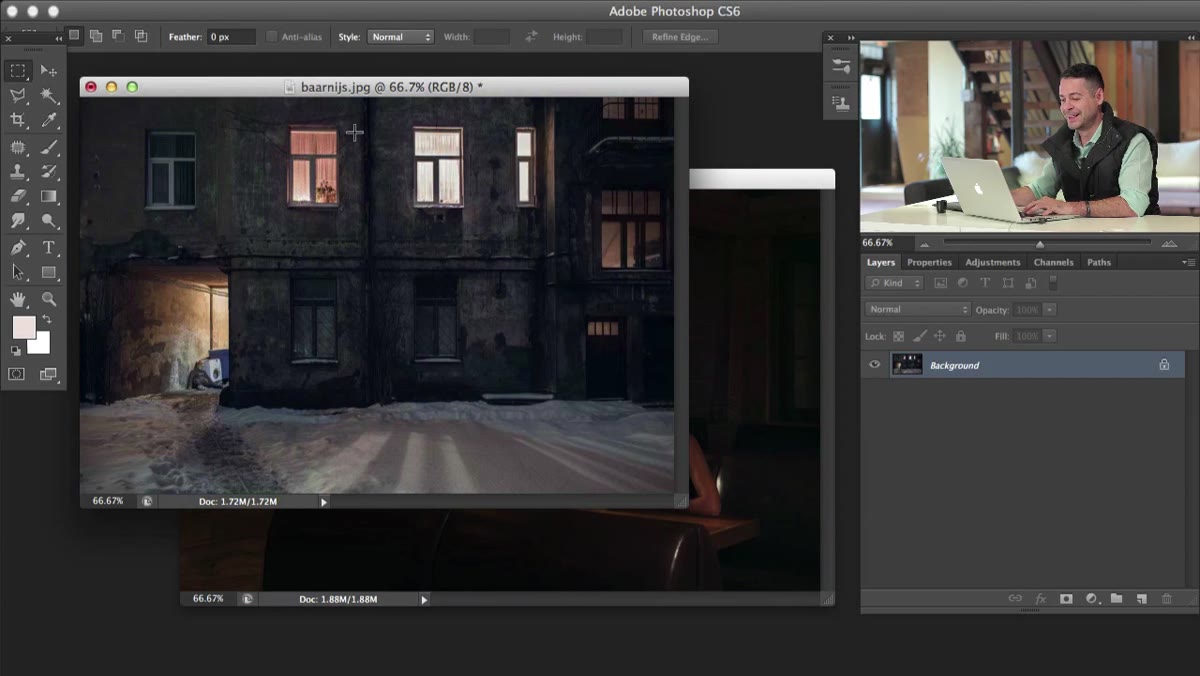 Marquee Tool selection drawn around the replacement window
Open both images in Photoshop so they’re visible as separate documents. In the source image (the one with the clean window you want to use), grab the Rectangular Marquee Tool by pressing
Marquee Tool selection drawn around the replacement window
Open both images in Photoshop so they’re visible as separate documents. In the source image (the one with the clean window you want to use), grab the Rectangular Marquee Tool by pressing M. Draw a selection around the window you want to transplant, and give yourself a little breathing room. Include a small border of wall or frame around the window itself. This extra material will become useful when you’re blending the edges later.
Don’t stress about making this perfect at this stage. You’re not doing a precision extraction – you’re doing a rough cut that you’ll refine. Think of it like cutting fabric before you sew. You want more than you need, not less.
Step 3: Move the Selection to the Target Image
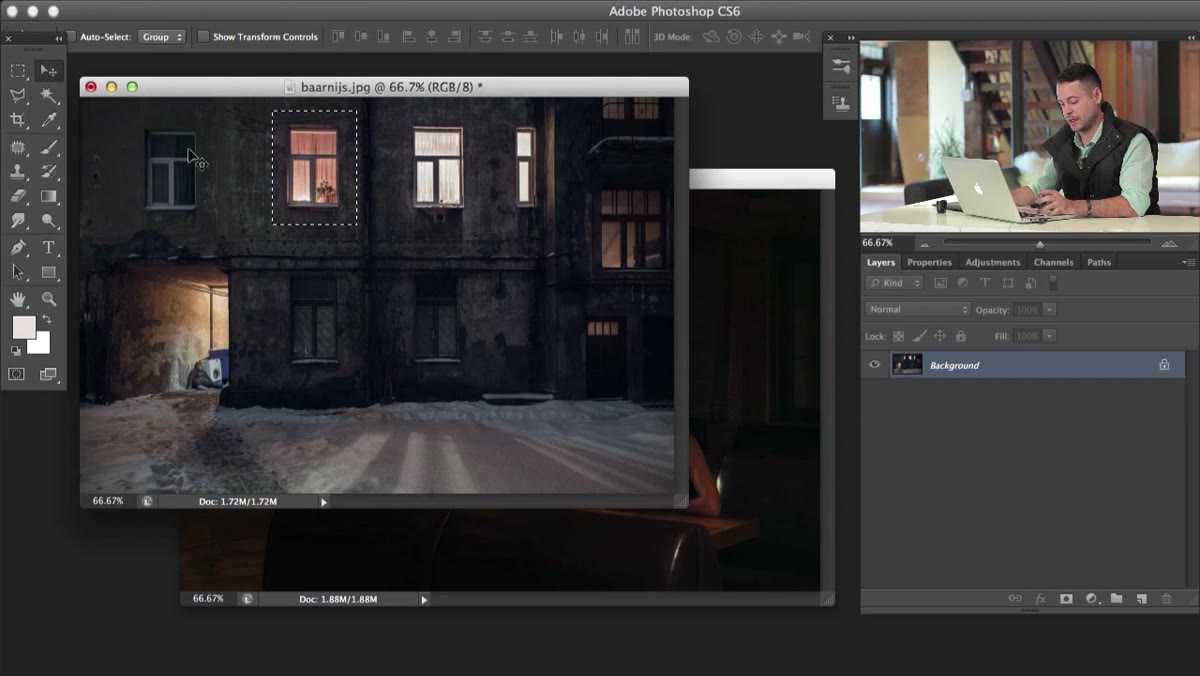 Move Tool dragging selection from source image into target image
With your selection still active, switch to the Move Tool by pressing
Move Tool dragging selection from source image into target image
With your selection still active, switch to the Move Tool by pressing V. Now hold down the Shift key and click-drag the selected area from the source image directly into the target image (the one with the bad blinds). Holding Shift while dragging centers the pasted content on the canvas, which saves you an extra repositioning step.
You’ll now have your replacement window sitting as a new layer inside the target document. It almost certainly won’t be the right size – in the tutorial Aaron’s replacement window comes in much smaller than it needs to be. That’s completely normal and not a problem. Size mismatches are fixable. Missing detail isn’t.
Step 4: Handle the Scale Difference
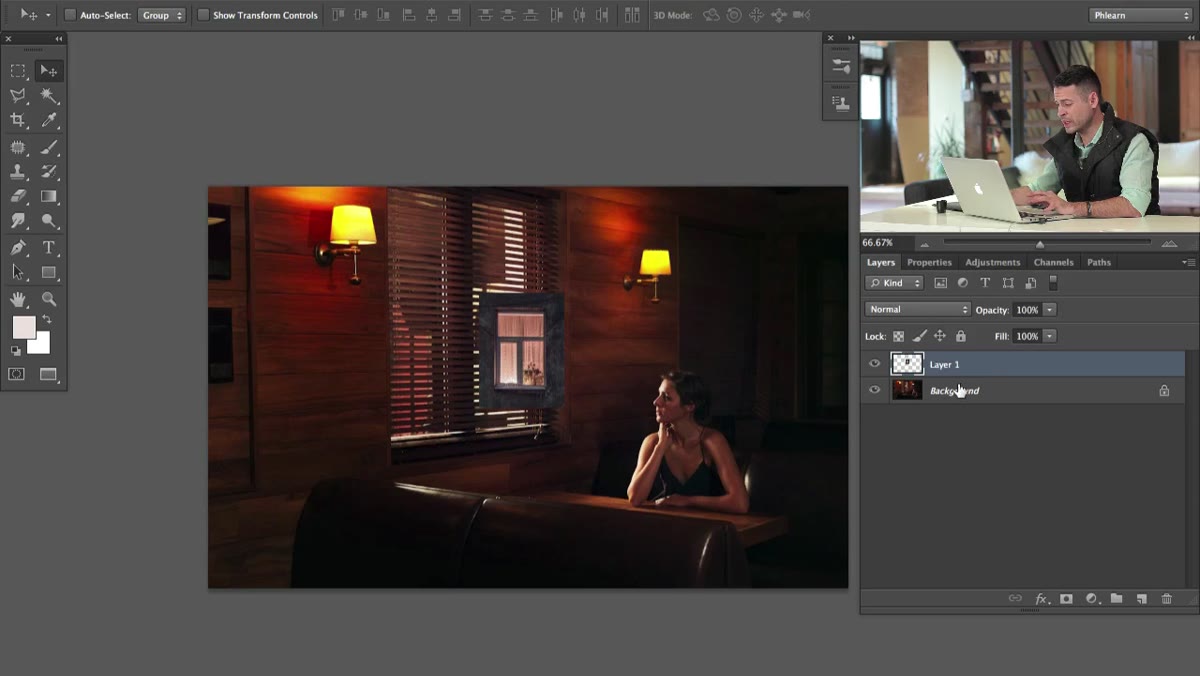 Replacement window layer shown much smaller than background image
Here’s where you have a choice to make. You can scale the replacement window up to match the background, or you can scale the background down slightly to close the gap. Scaling up a layer introduces image degradation – the more you upscale a raster image, the softer it gets. If the size difference is significant, scaling the background down a notch is often the cleaner option since it preserves the sharpness of your replacement element.
Replacement window layer shown much smaller than background image
Here’s where you have a choice to make. You can scale the replacement window up to match the background, or you can scale the background down slightly to close the gap. Scaling up a layer introduces image degradation – the more you upscale a raster image, the softer it gets. If the size difference is significant, scaling the background down a notch is often the cleaner option since it preserves the sharpness of your replacement element.
In the tutorial, Aaron opts to downscale the background slightly. To do that he first needs to unlock it, because a Background layer in Photoshop is locked by default. Hold Alt (Windows) or Option (Mac) and double-click the Background layer in the Layers panel. This converts it to a regular unlocked layer without any dialog boxes. Then use Free Transform (Ctrl+T / Cmd+T) to scale it down just enough that the replacement window fits naturally into the space.
Step 5: Position and Align the New Window
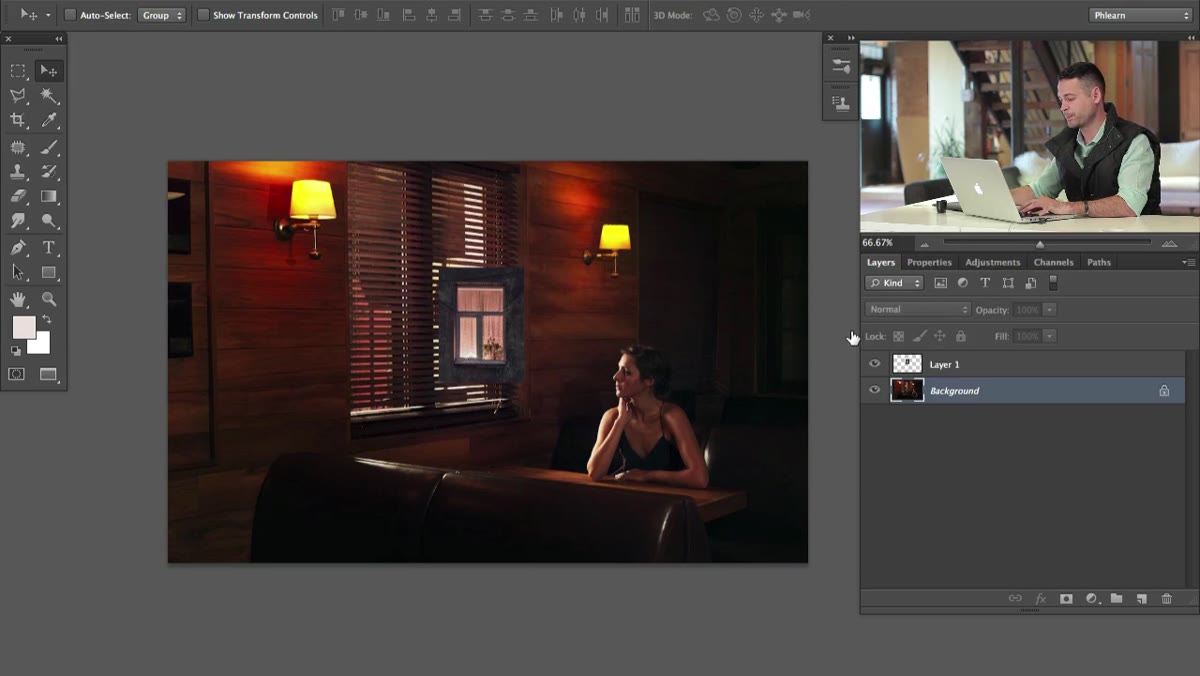 Replacement window being repositioned over original window area
With your scale issues handled, now you actually place the new window over the old one. Use the Move Tool to drag the replacement window layer into roughly the right position. Zoom in and use your arrow keys for fine-tuning – one pixel at a time is the right level of precision here. You’re trying to align the edges of the window frame with the surrounding architecture, so perspective and geometry matter.
Replacement window being repositioned over original window area
With your scale issues handled, now you actually place the new window over the old one. Use the Move Tool to drag the replacement window layer into roughly the right position. Zoom in and use your arrow keys for fine-tuning – one pixel at a time is the right level of precision here. You’re trying to align the edges of the window frame with the surrounding architecture, so perspective and geometry matter.
If the original photo has strong horizontal or vertical lines near the window (walls, baseboards, trim), use those as your guides. Turn on Photoshop’s grid or drag out some guides from the rulers (Ctrl+R / Cmd+R to toggle rulers) to help you get things straight. A slightly misaligned window will immediately read as a composite, so take your time here.
My Take: This Technique Earns Its Keep on Real Client Work
I spent three days once trying to fix a reflection in a glass door for a real estate client – cloning, patching, frequency separation, the works. A friend watched me explain it over coffee and basically said “why didn’t you just shoot it again or find a stock photo of a glass door?” I wanted to be annoyed, but she was completely right.
The lesson Aaron demonstrates here isn’t really about windows. It’s about recognizing that sometimes the most efficient path through a problem involves going around it, not through it. Compositing a replacement element from a second photo sounds like more work until you do the actual time math. One hour to find or shoot a cleaner element plus thirty minutes to composite it will often beat three hours of detail retouching that still doesn’t look quite right.
One thing I’d add that the tutorial doesn’t cover deeply: if you’re doing this on a real project, convert your layers to Smart Objects before you start scaling. That way if you need to revisit the size or position later, you’re not working with a degraded, already-resampled layer. I learned that the hard way after accidentally flattening a composite mid-project and losing all my flexibility. Smart Objects are cheap insurance.
The core takeaway here is deceptively simple: don’t default to fixing something just because fixing feels like the “correct” photoshop response. Sometimes replacement is cleaner, faster, and produces a better final result. That’s a mindset shift worth keeping.
Watch the full tutorial on YouTube to see Aaron walk through the complete composite from start to finish, including the blending steps that make the new window actually feel like it belongs in the scene.
Comments (2)
I've watched a dozen tutorials on this and yours is the clearest by far.
Clear and practical. No fluff. Appreciate that.
Leave a Comment