Compositing is where Photoshop either saves your project or humiliates you. I’ve been on both ends of that. There was a period where I spent three full days on a composite, painstakingly painting out a background pixel by pixel, only to have a friend glance at it, ask why I wasn’t using a smarter selection workflow, and then rebuild the whole thing in about twenty minutes while I sat there questioning my life choices. The culprit wasn’t my eye for light or my blending skills. It was that I never properly learned the selection step, which is the foundation everything else sits on.
In this Aaron Nace (PHLEARN) tutorial, Watch the full tutorial on YouTube, the focus is on cutting a studio-photographed subject out of their background and dropping them into a composite scene. It sounds basic. It is not basic. The technique centers on the Magic Wand tool, which I know, I know, feels like the thing Photoshop beginners click once and then abandon. But Aaron pulls out a setting that most people scroll past and never think about again, and it genuinely changes how the tool behaves. Here’s the full breakdown.
Step 1: Set Up Your Two Images Side by Side
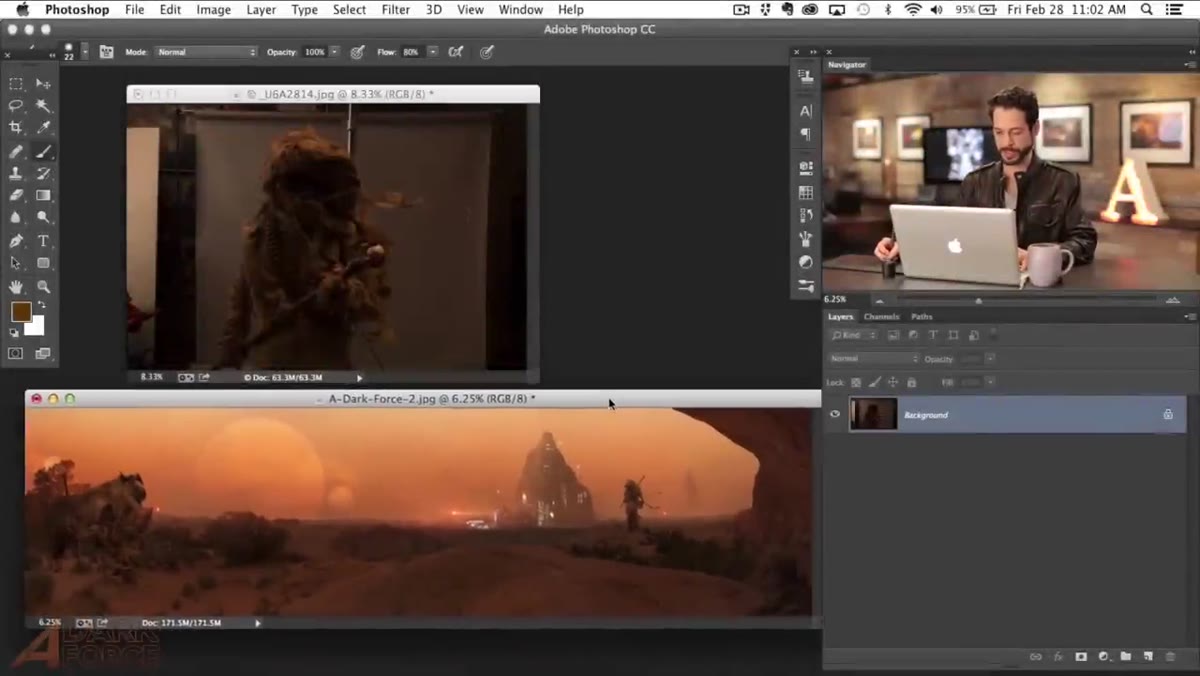 Background composite image and studio subject open side by side
Before any selection work happens, you need both your subject image and your background image open in Photoshop. Aaron works with a studio-lit subject shot against a gray backdrop, which is the ideal scenario for this technique because the background color is consistent and distinct from the subject. Once both files are open, grab the Move tool, hold Shift, and drag the subject layer directly onto the background image. Holding Shift centers it automatically. From there, hit F for full-screen mode and zoom in so you can actually see what you’re doing.
Background composite image and studio subject open side by side
Before any selection work happens, you need both your subject image and your background image open in Photoshop. Aaron works with a studio-lit subject shot against a gray backdrop, which is the ideal scenario for this technique because the background color is consistent and distinct from the subject. Once both files are open, grab the Move tool, hold Shift, and drag the subject layer directly onto the background image. Holding Shift centers it automatically. From there, hit F for full-screen mode and zoom in so you can actually see what you’re doing.
The gray backdrop detail matters here. A clean, even background color is what makes the Magic Wand behave predictably. If your subject was shot against a chaotic background, this specific workflow gets harder, but the selection logic still applies.
Step 2: Select the Magic Wand Tool and Lower the Tolerance
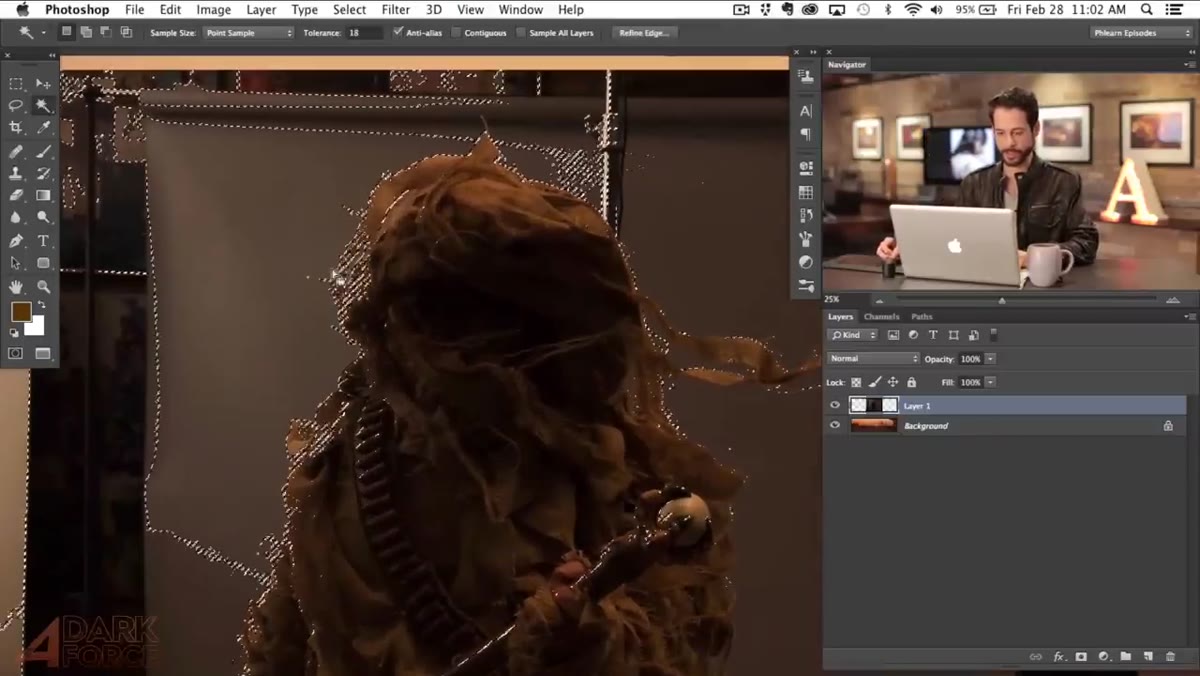 Magic Wand tool selected, Tolerance field highlighted in options bar
Grab the Magic Wand tool from the toolbar. The first thing to look at is the Tolerance setting in the options bar at the top. By default this sits at 32, which is way too broad for clean selections. A high tolerance means the tool grabs a wide range of similar colors, and you end up selecting chunks of your subject along with the background you actually want to remove.
Magic Wand tool selected, Tolerance field highlighted in options bar
Grab the Magic Wand tool from the toolbar. The first thing to look at is the Tolerance setting in the options bar at the top. By default this sits at 32, which is way too broad for clean selections. A high tolerance means the tool grabs a wide range of similar colors, and you end up selecting chunks of your subject along with the background you actually want to remove.
Aaron brings the tolerance down significantly, landing around 8. At that level, the tool only picks up colors that are very close to the exact pixel you click on. Click on the gray backdrop and you’ll get a tight, controlled selection of just the background tones, without pulling in edge pixels from your subject’s clothing or hair.
Step 3: Understand What “Contiguous” Actually Does
 Contiguous checkbox in options bar, checked by default
Here’s where most people’s Magic Wand education stops. By default, the Contiguous checkbox is enabled. With Contiguous on, the tool only selects pixels that are physically connected to the area you clicked. Click a patch of gray background and it selects that patch, but if there’s a sliver of subject color in between, it stops there. It won’t jump across the image to grab similar-colored areas elsewhere.
Contiguous checkbox in options bar, checked by default
Here’s where most people’s Magic Wand education stops. By default, the Contiguous checkbox is enabled. With Contiguous on, the tool only selects pixels that are physically connected to the area you clicked. Click a patch of gray background and it selects that patch, but if there’s a sliver of subject color in between, it stops there. It won’t jump across the image to grab similar-colored areas elsewhere.
This sounds like a reasonable behavior, and sometimes it is. But for a subject shot on a consistent backdrop, it means you end up shift-clicking dozens of tiny disconnected pockets of background color, especially around fine details like hair or fabric edges. It works, but it’s slow and annoying.
Step 4: Uncheck Contiguous and Let the Tool Work Globally
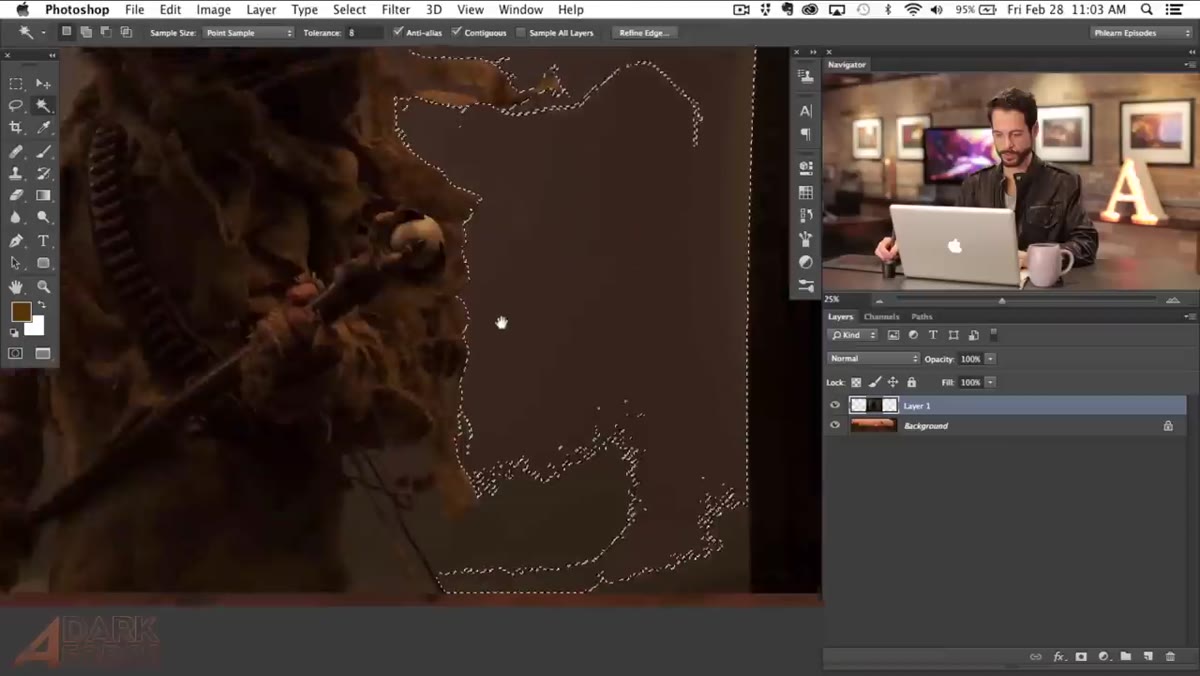
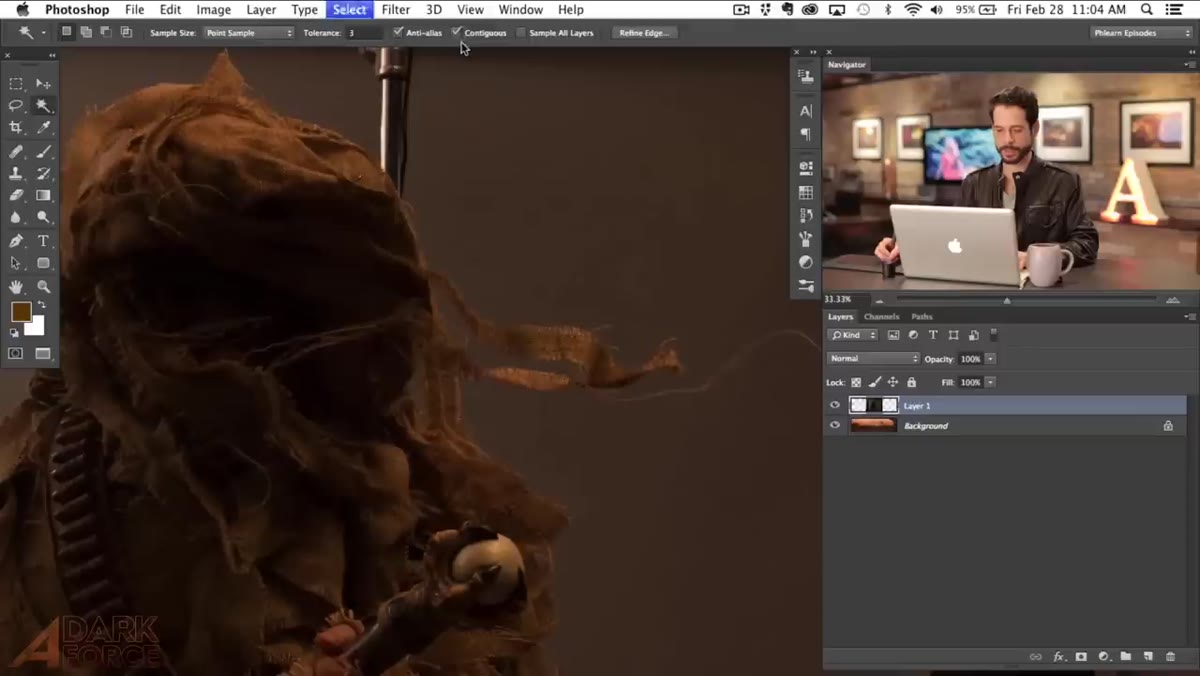 Contiguous unchecked, Magic Wand selecting across entire image non-contiguously
This is the move. Uncheck Contiguous. Now when you click a pixel, the Magic Wand doesn’t care about adjacency. It searches the entire layer for any pixel that falls within your tolerance range of the color you clicked, and selects all of them at once.
Contiguous unchecked, Magic Wand selecting across entire image non-contiguously
This is the move. Uncheck Contiguous. Now when you click a pixel, the Magic Wand doesn’t care about adjacency. It searches the entire layer for any pixel that falls within your tolerance range of the color you clicked, and selects all of them at once.
For a gray backdrop, this is transformative. One click on the background now pulls in the gray tones everywhere simultaneously, including all those tiny gaps in hair strands and those little pockets between fingers or jacket zippers that would take forever to catch manually. Because the tolerance is already set low (around 3 to 8), you’re not accidentally grabbing similar-toned areas of your subject. The selection stays sharp and targeted.
Step 5: Shift-Click to Add Missed Areas
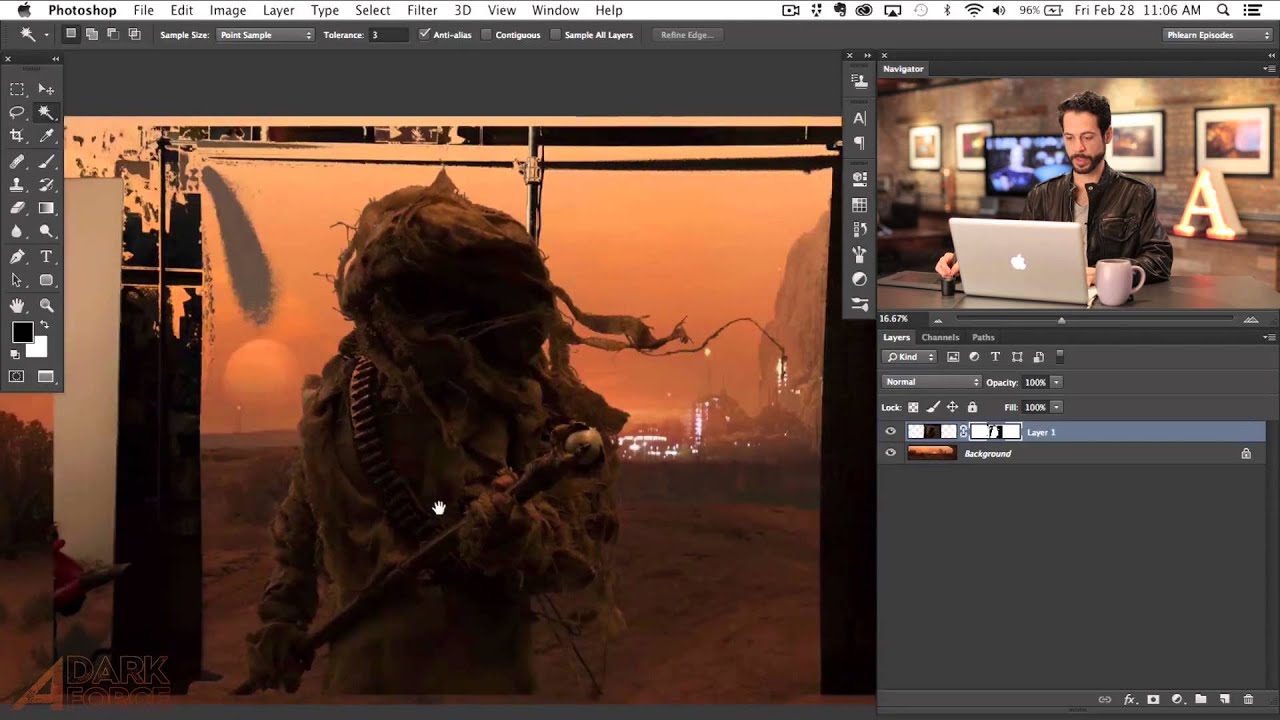
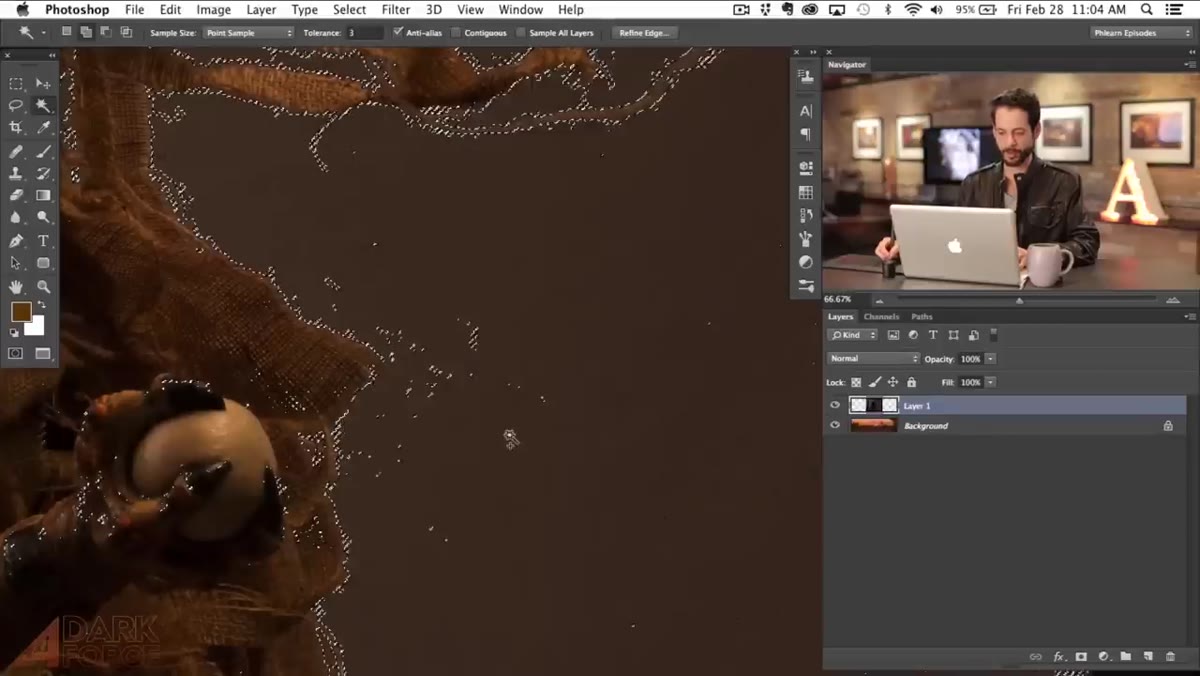 Shift-clicking additional areas to expand the active selection
One pass rarely catches everything. After your initial click, hold Shift and continue clicking any background areas the first selection missed. With Contiguous unchecked, each shift-click still searches globally, so you’re building up a comprehensive selection of the background without touching the subject.
Shift-clicking additional areas to expand the active selection
One pass rarely catches everything. After your initial click, hold Shift and continue clicking any background areas the first selection missed. With Contiguous unchecked, each shift-click still searches globally, so you’re building up a comprehensive selection of the background without touching the subject.
What you’re working toward is a selection that covers the entire backdrop. Once you have it, you’ll invert the selection (Select, then Inverse, or Shift+Ctrl+I on Windows, Shift+Cmd+I on Mac) so that your subject becomes the selected area. From there you can add a layer mask and the background drops out.
Step 6: Refine the Mask for Clean Edges
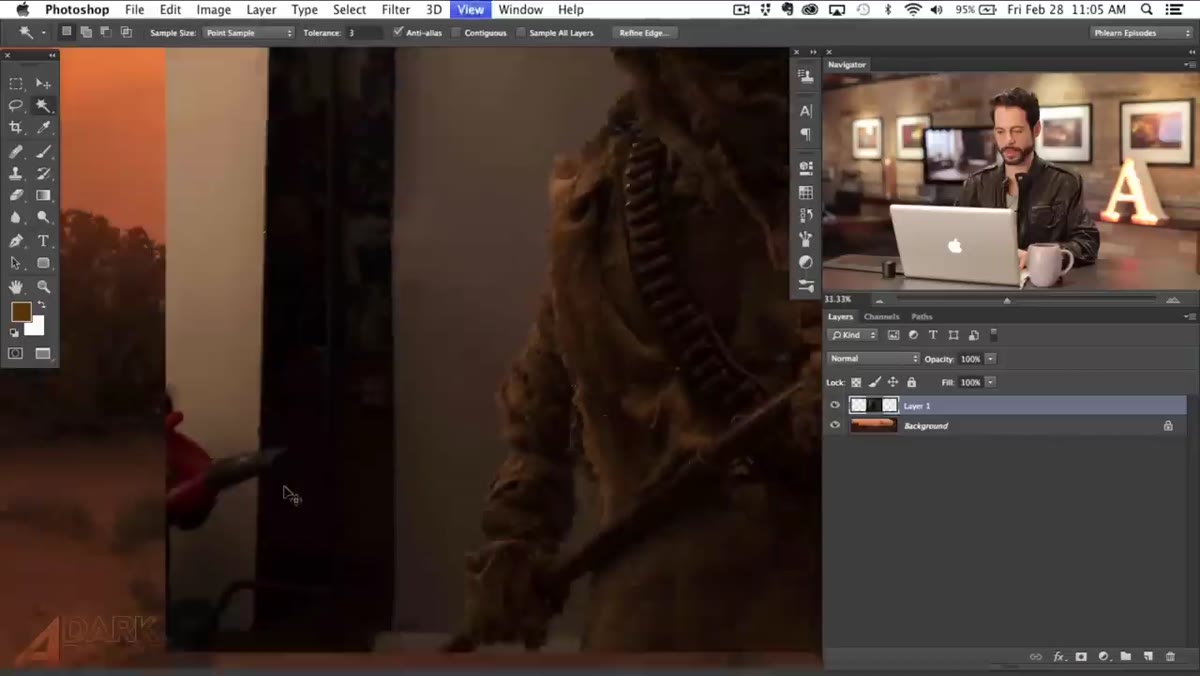 Reviewing the selection along the subject’s edges for cleanup
No automated selection is perfect on the first pass, and this one isn’t trying to be. Once you’ve masked out the background, zoom into the edges of your subject and look for fringing, where remnants of the gray backdrop cling to the outline, or for areas where the mask ate into the subject slightly. The Refine Edge or Select and Mask workspace handles the fine-tuning from here. Pay extra attention to hair and any area with texture or loose fibers.
Reviewing the selection along the subject’s edges for cleanup
No automated selection is perfect on the first pass, and this one isn’t trying to be. Once you’ve masked out the background, zoom into the edges of your subject and look for fringing, where remnants of the gray backdrop cling to the outline, or for areas where the mask ate into the subject slightly. The Refine Edge or Select and Mask workspace handles the fine-tuning from here. Pay extra attention to hair and any area with texture or loose fibers.
The low tolerance setting helps here. Because you were selective about what the Magic Wand grabbed, your starting mask is already pretty clean, which means less cleanup work on the back end.
What I’d Add From My Own Experience
The non-contiguous Magic Wand approach works beautifully when you control the shooting conditions. Gray backdrop, even lighting, clean separation. In client work, you don’t always get that. I’ve received assets shot against white walls with a window blowing out one side, and the Magic Wand becomes a liability fast in those situations.
My personal rule is this: use the non-contiguous approach as your first pass even on messy backgrounds, but switch to the Pen tool or Select and Mask’s edge detection for any section of the outline that’s giving you trouble. Don’t commit to one tool for the whole job. The Magic Wand earns its place in the workflow when it’s deployed strategically, not when you’re trying to force it to do precision work it wasn’t built for.
The single most useful takeaway from Aaron’s tutorial is deceptively simple: unchecking Contiguous turns the Magic Wand from a local selector into a global one, and pairing that with a low tolerance gives you a controlled way to pull clean background selections out of consistent-backdrop images in seconds rather than minutes. That one checkbox is the difference between the tool being useful and being the thing everyone makes fun of.
Watch the full tutorial on YouTube to see Aaron work through the composite matching and lighting steps that follow the cutout. The selection work is just the start.
Comments
Leave a Comment