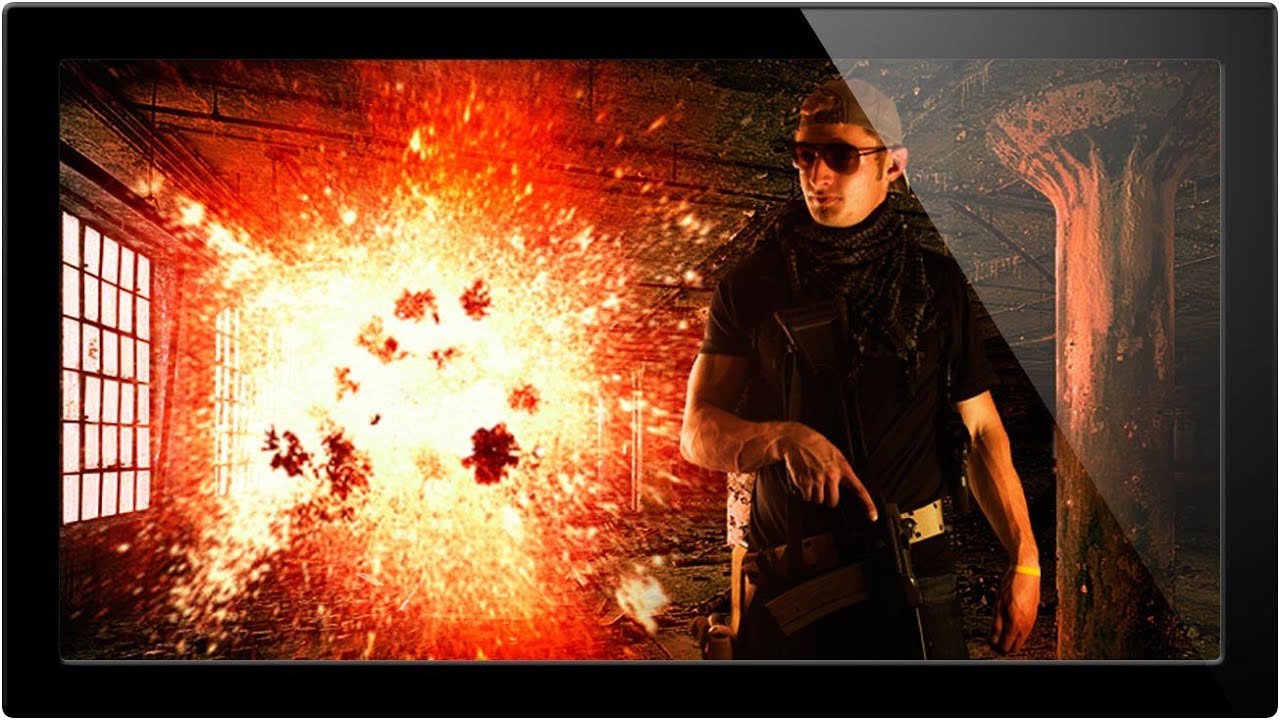
A few years back, I spent three full days on a composite. Three days of careful pen tool paths, obsessive masking, color matching that made my eyes water. A friend looked at it, nodded, then sat down and knocked out something that looked equally convincing in about twenty minutes using a workflow I’d never even considered. I wanted to flip my desk. Instead, I went home, opened YouTube, and started paying closer attention to how people who actually move fast think about this stuff.
That’s exactly the energy in this Watch the full tutorial on YouTube from Aaron Nace over at PHLEARN. He calls it “quick and dirty” compositing, and he means it. The goal isn’t a finished print piece. It’s a fast, usable draft that tells you whether a composite idea is even worth pursuing before you sink hours into it. That alone reframes how you should think about early-stage work.
The workflow uses a photo of a person (John, who, Aaron notes, appears to own a lot of guns), a dramatic building background, and an explosion. Standard cinematic fare. But the principles here transfer to anything. Let’s walk through it.
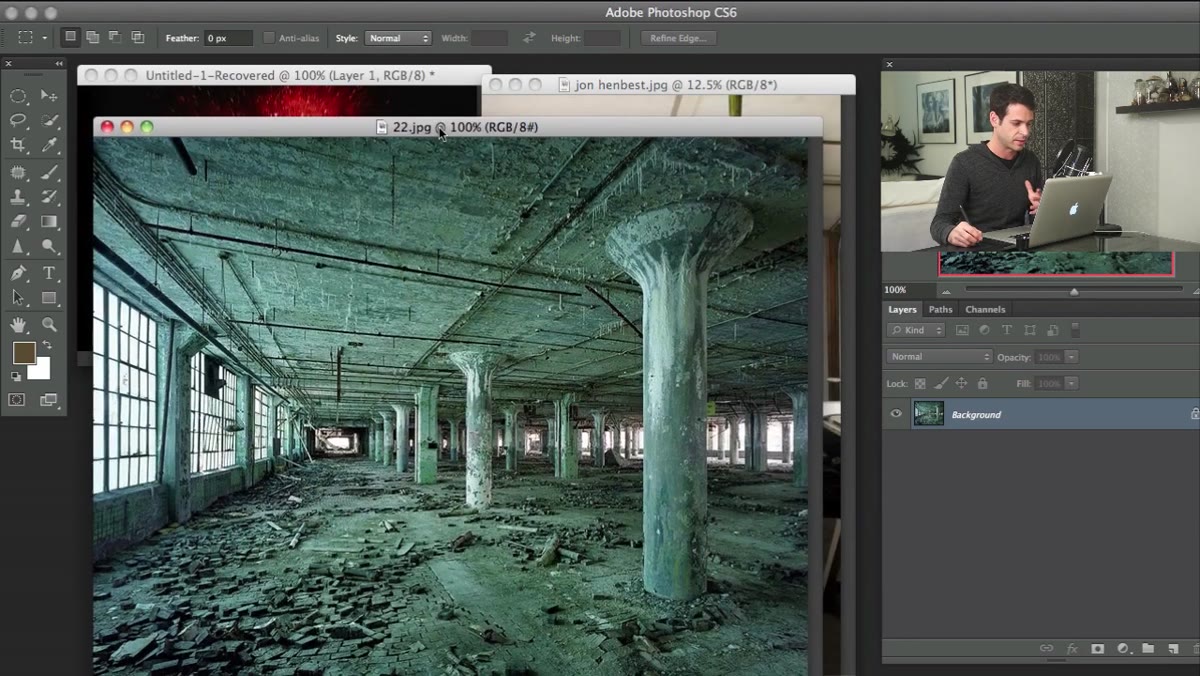
Step 1: Pull All Your Images Into One Document
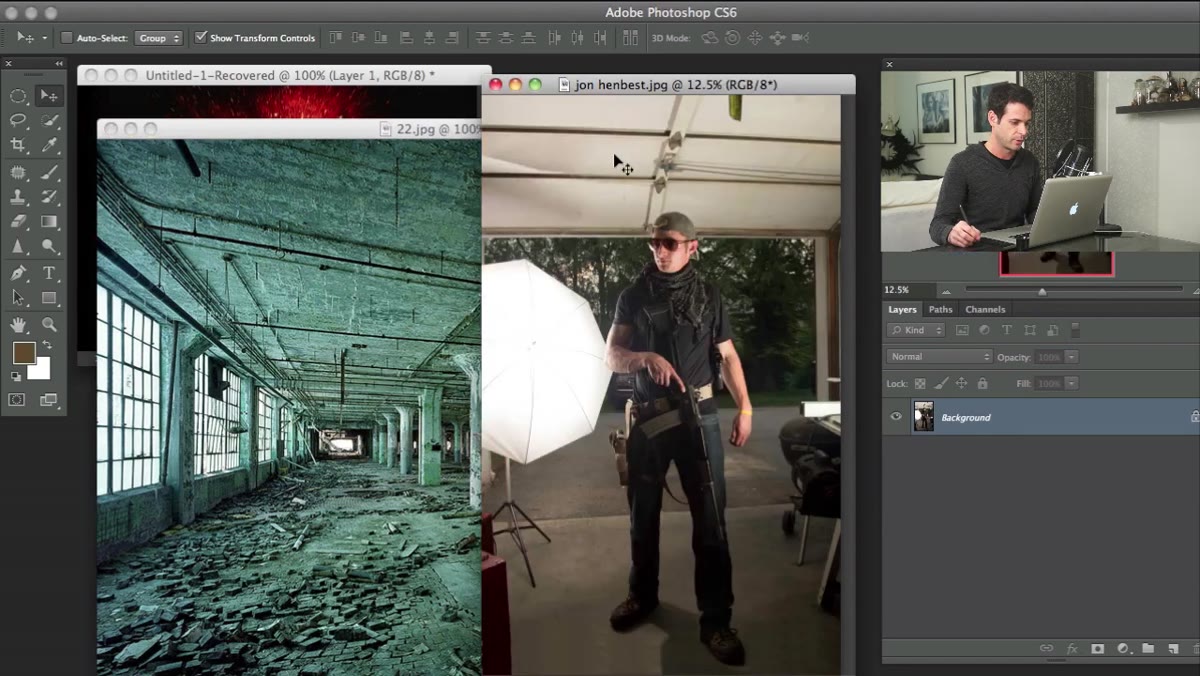 Three separate source images open side by side in Photoshop
Start with all your source images open simultaneously in Photoshop. Use the Move tool (V) to shift-click and drag each layer from its own window into your main document. Aaron’s shortcut here is just grabbing each image and dropping it over. No complex Place Embedded workflow, no smart objects at this stage. Quick and dirty means exactly that.
Three separate source images open side by side in Photoshop
Start with all your source images open simultaneously in Photoshop. Use the Move tool (V) to shift-click and drag each layer from its own window into your main document. Aaron’s shortcut here is just grabbing each image and dropping it over. No complex Place Embedded workflow, no smart objects at this stage. Quick and dirty means exactly that.
Once everything lands in a single file, hit F to toggle Full Screen mode so you can actually see what you’re dealing with. You’ll probably notice immediately what Aaron notices: the images are wildly different sizes. That’s your next problem to solve.
Step 2: Rescale Your Subjects to Match the Scene
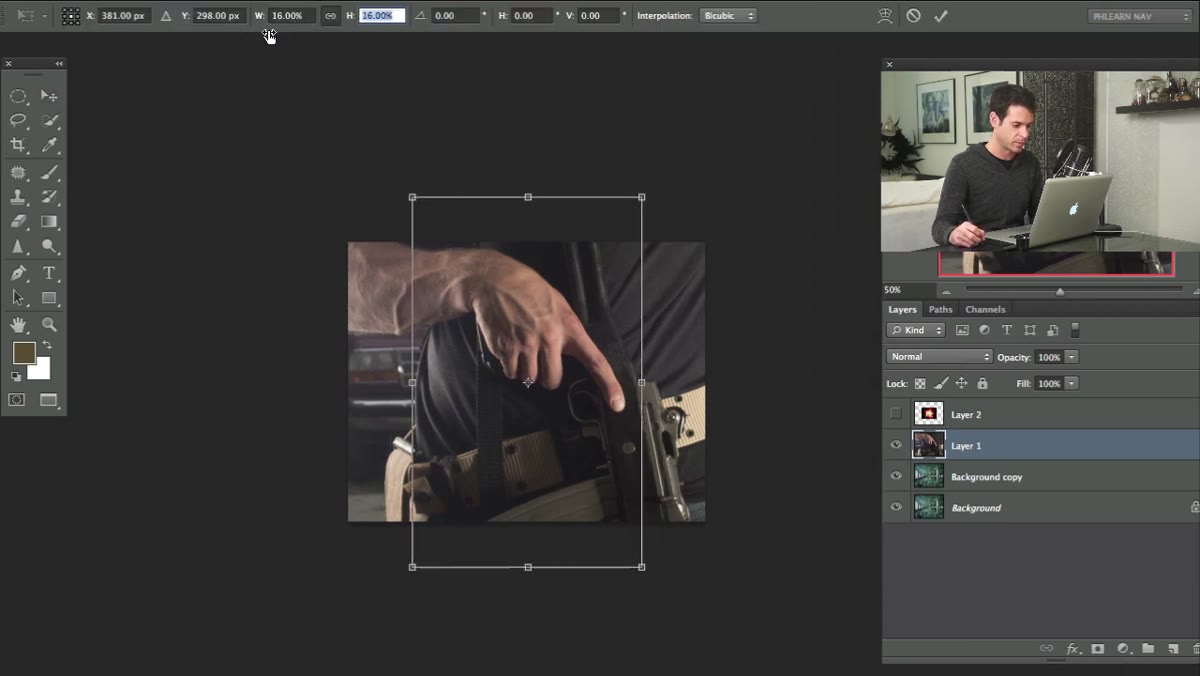 John’s layer being scaled down with Free Transform handles visible
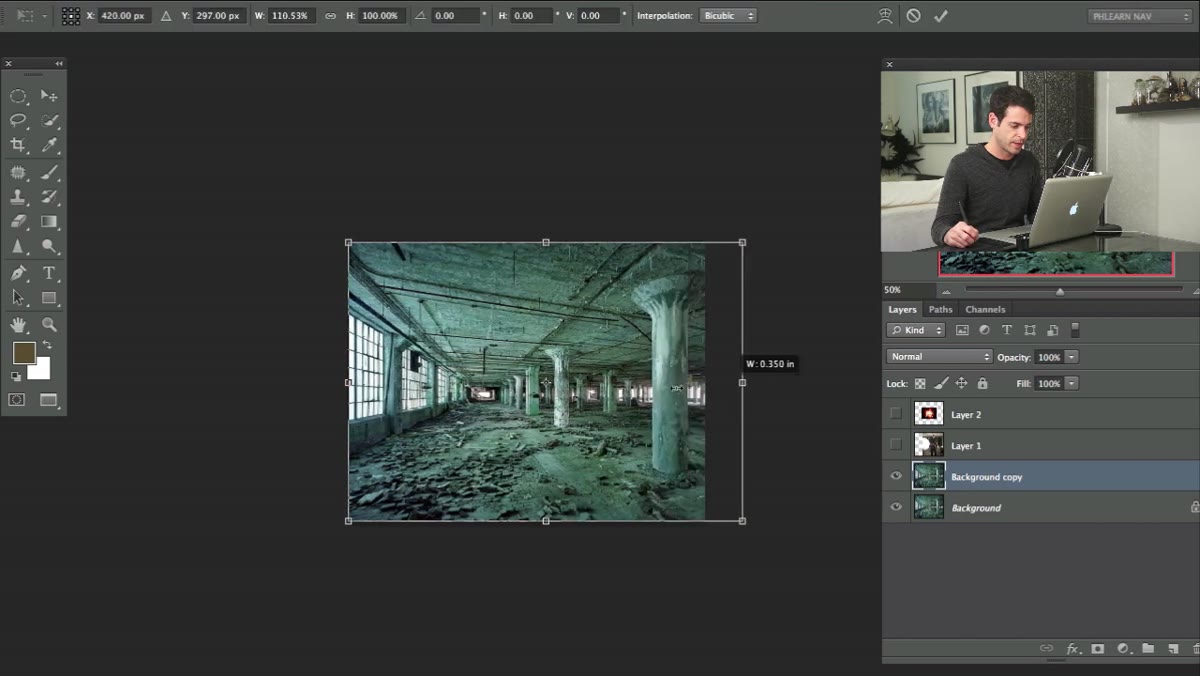
Use Free Transform (Ctrl+T / Cmd+T) to get your subject to a size that makes sense within the background. In this case, John was shot at a relatively normal focal length, while the building was captured with a wide-angle lens, so they feel visually mismatched. Aaron’s fix is counterintuitive but smart: instead of just shrinking John, he also stretches the background horizontally.
John’s layer being scaled down with Free Transform handles visible
Use Free Transform (Ctrl+T / Cmd+T) to get your subject to a size that makes sense within the background. In this case, John was shot at a relatively normal focal length, while the building was captured with a wide-angle lens, so they feel visually mismatched. Aaron’s fix is counterintuitive but smart: instead of just shrinking John, he also stretches the background horizontally.
Stretching a wide-angle background image slightly makes it read more like a normal focal length, which helps it sit better alongside a subject who wasn’t shot wide. It’s a subtle optical trick, but it closes the gap between two images that weren’t shot together. After scaling, go to Image and select “Reveal All” to expand the canvas so nothing gets cropped off.
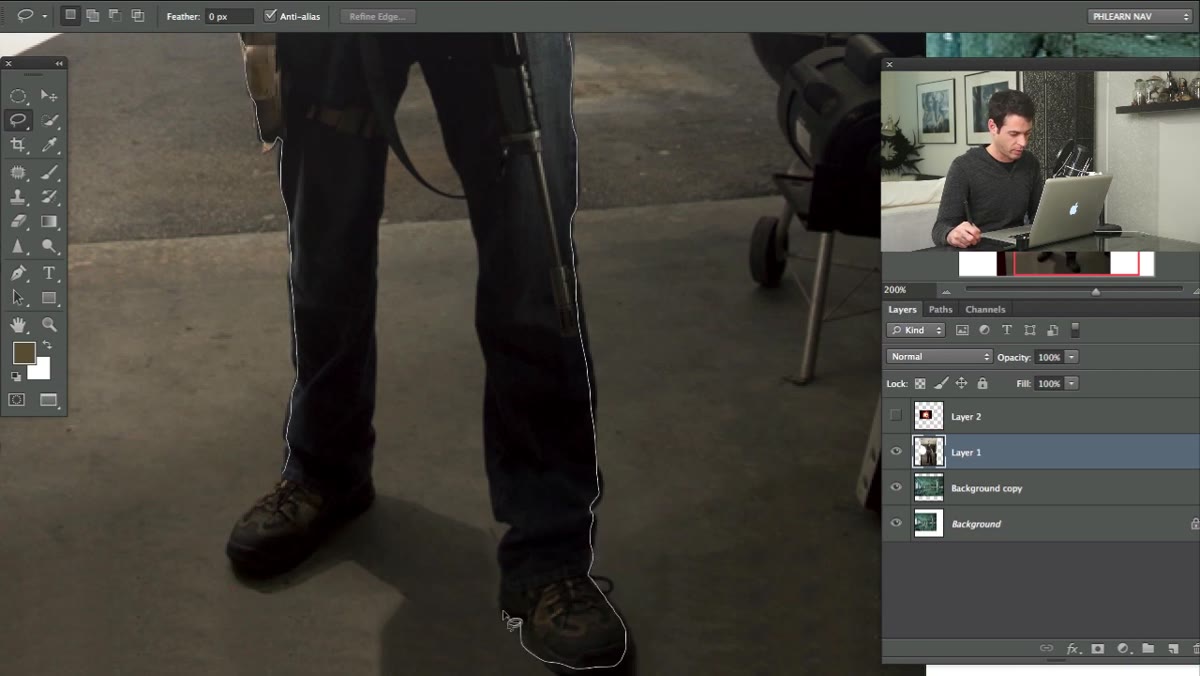
Step 3: Cut Out Your Subject (Fast and Imperfect)
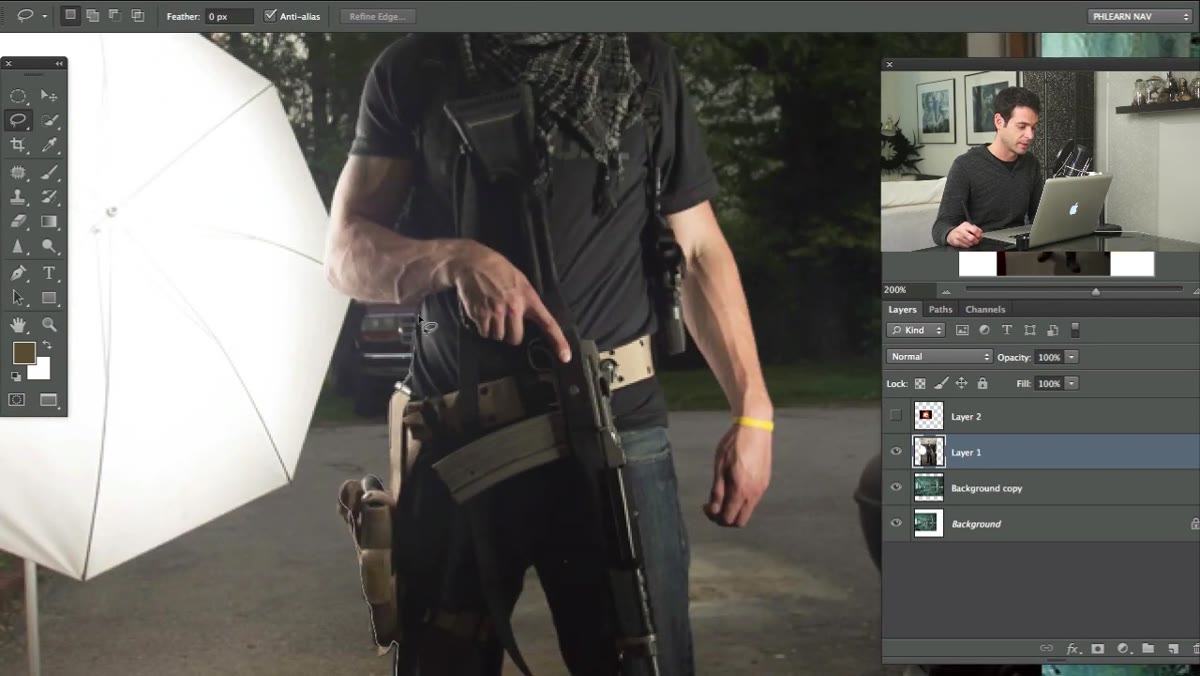 Lasso tool active, being drawn around the subject’s outline
Here’s where Aaron earns the “dirty” in quick and dirty. He grabs the Lasso tool (L) and traces around the subject by hand. No pen tool, no Select Subject, no Refine Edge at this stage. Just a loose freehand selection that gets close enough to work.
Lasso tool active, being drawn around the subject’s outline
Here’s where Aaron earns the “dirty” in quick and dirty. He grabs the Lasso tool (L) and traces around the subject by hand. No pen tool, no Select Subject, no Refine Edge at this stage. Just a loose freehand selection that gets close enough to work.
Is this the right call for a final deliverable? Absolutely not. But for a draft composite where you’re just testing whether the idea holds up visually, spending forty-five minutes on a perfect mask is a waste. The Lasso gets you 80% of the way there in about two minutes. Aaron also flags a genuinely useful compositional tip here: if you’re shooting subjects for composites, frame them from the waist up rather than full body. Cutting out feet and legs, especially where they meet the ground, is where quick masks fall apart completely.
Step 4: Add the Mask and Drop Your Subject Into the Scene
 Layer mask applied to subject layer, background now visible
Once you’ve got your rough selection, add a Layer Mask (click the mask icon at the bottom of the Layers panel). The background disappears, leaving your subject floating over the scene. At this point it’ll look a little rough around the edges, obviously, but you’re not fixing that yet. Position the layer so the subject is sitting in the foreground of the scene in a way that reads naturally.
Layer mask applied to subject layer, background now visible
Once you’ve got your rough selection, add a Layer Mask (click the mask icon at the bottom of the Layers panel). The background disappears, leaving your subject floating over the scene. At this point it’ll look a little rough around the edges, obviously, but you’re not fixing that yet. Position the layer so the subject is sitting in the foreground of the scene in a way that reads naturally.
The compositing logic here is about visual hierarchy, not pixel perfection. Is the scale believable? Does the subject feel like they’re in the scene or pasted on top of it? If the answer to the first two questions is yes, the rough edges are a secondary concern you can address in a real pass later.
Step 5: Place the Explosion and Blend It In
 Explosion image as a separate layer above the background
With the background and subject in place, it’s time to add the drama. Drag the explosion layer into position above the background but below the subject, so it feels like it’s happening in the environment rather than in front of everything. Scale it using Free Transform until it fills the space in a way that feels proportional.
Explosion image as a separate layer above the background
With the background and subject in place, it’s time to add the drama. Drag the explosion layer into position above the background but below the subject, so it feels like it’s happening in the environment rather than in front of everything. Scale it using Free Transform until it fills the space in a way that feels proportional.
The blend mode is where this gets fun. Aaron’s approach is to experiment with layer blend modes, particularly Screen or Lighten, which strip out the darker pixels in the explosion and let only the bright fire and smoke show through. This is the fastest way to integrate a pyrotechnic element without masking it out manually, and it works surprisingly well when the explosion image has a dark or black background.
Step 6: Adjust Color to Tie the Whole Thing Together
 Canvas expanded after Reveal All, all three layers visible
The last mile of any composite is color. Right now your three images probably have three different color temperatures, three different contrast levels, and zero visual cohesion. A quick Hue/Saturation or Color Balance adjustment layer clipped to each element can help pull them toward a common palette.
Canvas expanded after Reveal All, all three layers visible
The last mile of any composite is color. Right now your three images probably have three different color temperatures, three different contrast levels, and zero visual cohesion. A quick Hue/Saturation or Color Balance adjustment layer clipped to each element can help pull them toward a common palette.
For a fast draft, Aaron’s philosophy is to get everything reading as one image visually. Add a single overall adjustment layer at the top of your stack, something like a Photo Filter or Curves layer, and push everything toward a unified tone. Even a slight warm orange grade over the whole scene helps an explosion composite feel intentional rather than assembled from stock.
What I’d Add From My Own Workflow
One thing the tutorial doesn’t get into but I’d strongly recommend even for rough drafts: duplicate your background layer before you start scaling or transforming anything. Work on the copy. This takes about two seconds and saves you the particular misery of transforming your only copy of a layer and realizing you need to start over. I’ve learned this lesson more than once. My record is three times on the same project.
I’d also suggest saving a version of your rough composite before you go back to refine it. Sometimes the quick version has a looseness and energy that the careful version loses. It’s worth having it as a reference.
The single most important thing Aaron demonstrates here isn’t any specific tool. It’s the mindset. Rough composites exist to test ideas, not to ship. Give yourself permission to make something fast and imperfect, and you’ll end up making a lot more finished work in the long run because you’ll stop letting fear of the process block you at the start.
Watch the full tutorial on YouTube to see Aaron’s full process in real time, including how he handles the blend modes on the explosion.
Comments (2)
The before and after really sells it. Incredible difference.
Really solid breakdown. This pairs perfectly with the workflows work I've been writing about.
Leave a Comment