
There’s a specific kind of client pain that every retoucher knows. The shoot went great, everyone’s happy, and then someone in the approval chain asks why the subject’s arms look “a little stiff” or why the legs don’t quite read as dynamic. You stare at the photo. They’re not wrong. But going back for a reshoot isn’t happening, and liquify feels like the wrong tool for anything beyond a gentle nudge. This is exactly where Puppet Warp earns its keep, and it took me watching Aaron Nace over at PHLEARN actually walk through it before I stopped treating the feature like a novelty buried somewhere in the Edit menu.
Watch the full tutorial on YouTube
In this Aaron Nace (PHLEARN) tutorial, the subject is a levitation composite where the legs hang a little too naturally. They look like someone lying on a table, not floating through the air. The fix is Puppet Warp, and the process is cleaner than you’d expect. Here’s how to do it.
Step 1: Isolate the Part You Want to Move
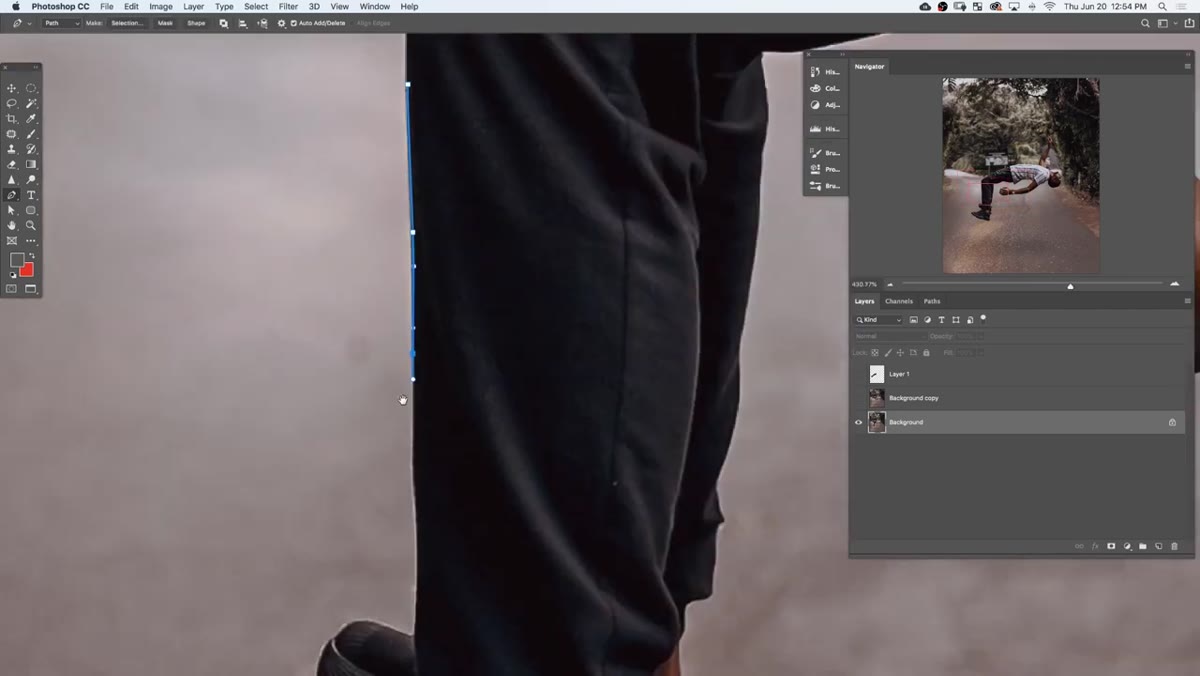 Pen tool tracing around the subject’s legs
The single most important thing to understand about Puppet Warp is that it works on a layer, not on a selection inside a layer. That means before you touch the tool, you need to cut out whatever you want to reposition and put it on its own layer. In the tutorial, Aaron only isolates the legs because that’s the only thing moving. There’s no point in cutting out the whole subject if you’re just adjusting one region.
Pen tool tracing around the subject’s legs
The single most important thing to understand about Puppet Warp is that it works on a layer, not on a selection inside a layer. That means before you touch the tool, you need to cut out whatever you want to reposition and put it on its own layer. In the tutorial, Aaron only isolates the legs because that’s the only thing moving. There’s no point in cutting out the whole subject if you’re just adjusting one region.
Use the pen tool to trace the area you want to warp. If you’re new to the pen tool, spend an hour with it before you try this workflow. A rough, jagged selection is going to create warping artifacts that no amount of tweaking will fix. Once your path is closed, right-click and choose “Make Selection.” A feather radius of around 1.5 pixels gives you a slightly soft edge that blends more naturally after the warp.
Step 2: Copy the Selection to a New Layer
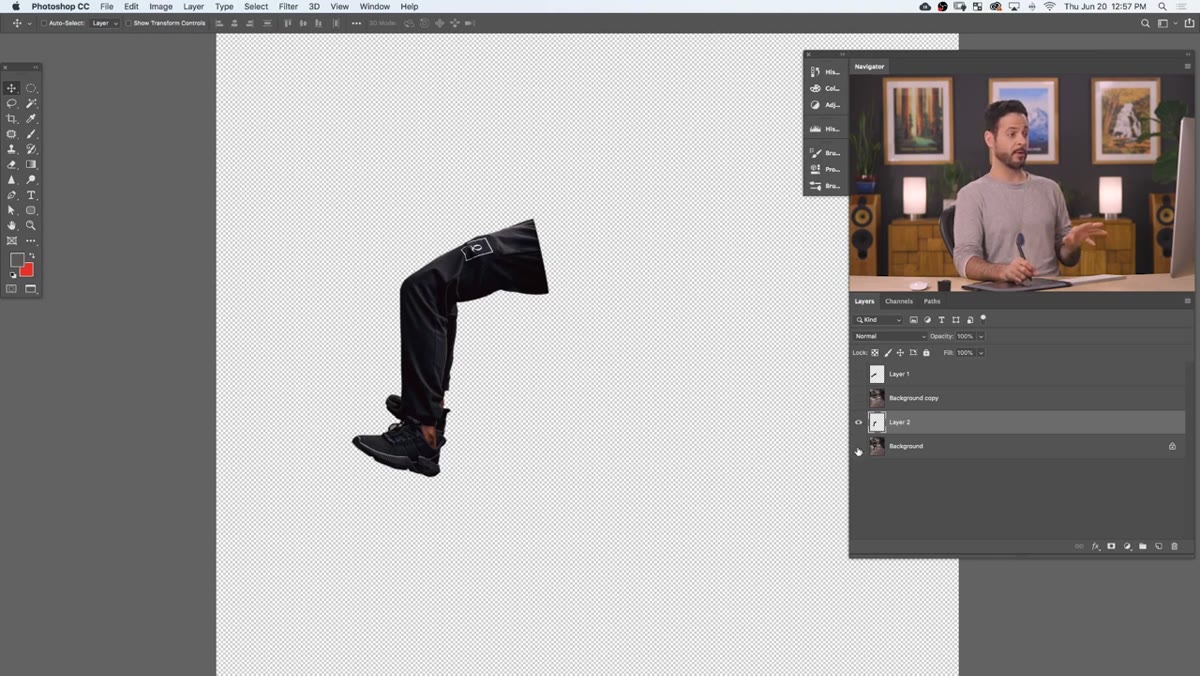
 Layers panel showing the duplicated legs on a new layer
With your selection active, make sure your background layer is highlighted in the Layers panel. Hit Ctrl+J (or Cmd+J on Mac) to copy just that selection up to a new layer. This is the layer Puppet Warp is going to operate on, so it’s worth double-checking by moving it temporarily with the Move tool. You should see only the isolated element: legs, arm, head, whatever you’re working with.
Layers panel showing the duplicated legs on a new layer
With your selection active, make sure your background layer is highlighted in the Layers panel. Hit Ctrl+J (or Cmd+J on Mac) to copy just that selection up to a new layer. This is the layer Puppet Warp is going to operate on, so it’s worth double-checking by moving it temporarily with the Move tool. You should see only the isolated element: legs, arm, head, whatever you’re working with.
Leave the original background layer untouched underneath. You’ll need what’s beneath your subject’s original position to fill back in once you move things around, either by painting it in, using Content-Aware Fill, or blending from the background. Plan for that step now, before you’re halfway through a warp and wondering why there’s a gaping hole where a knee used to be.
Step 3: Open Puppet Warp
 Edit menu open with Puppet Warp highlighted
Go to Edit, then Puppet Warp. The mesh overlay appears immediately over your layer, and the options bar at the top gives you a few dials worth knowing about. “Show Mesh” is toggled on by default, and I’d leave it on, especially while you’re learning. Watching the mesh deform as you drag pins is the clearest visual feedback you’ll get on how aggressively the warp is behaving.
Edit menu open with Puppet Warp highlighted
Go to Edit, then Puppet Warp. The mesh overlay appears immediately over your layer, and the options bar at the top gives you a few dials worth knowing about. “Show Mesh” is toggled on by default, and I’d leave it on, especially while you’re learning. Watching the mesh deform as you drag pins is the clearest visual feedback you’ll get on how aggressively the warp is behaving.
Density controls how fine the mesh grid is. Normal works for most subjects. If you’re warping something with lots of fine detail, like fingers or hair, bump it up to More Points so the mesh can handle the resolution. Fewer Points is useful for large, simple shapes where precision matters less than speed.
Step 4: Place Your Anchor Pins First
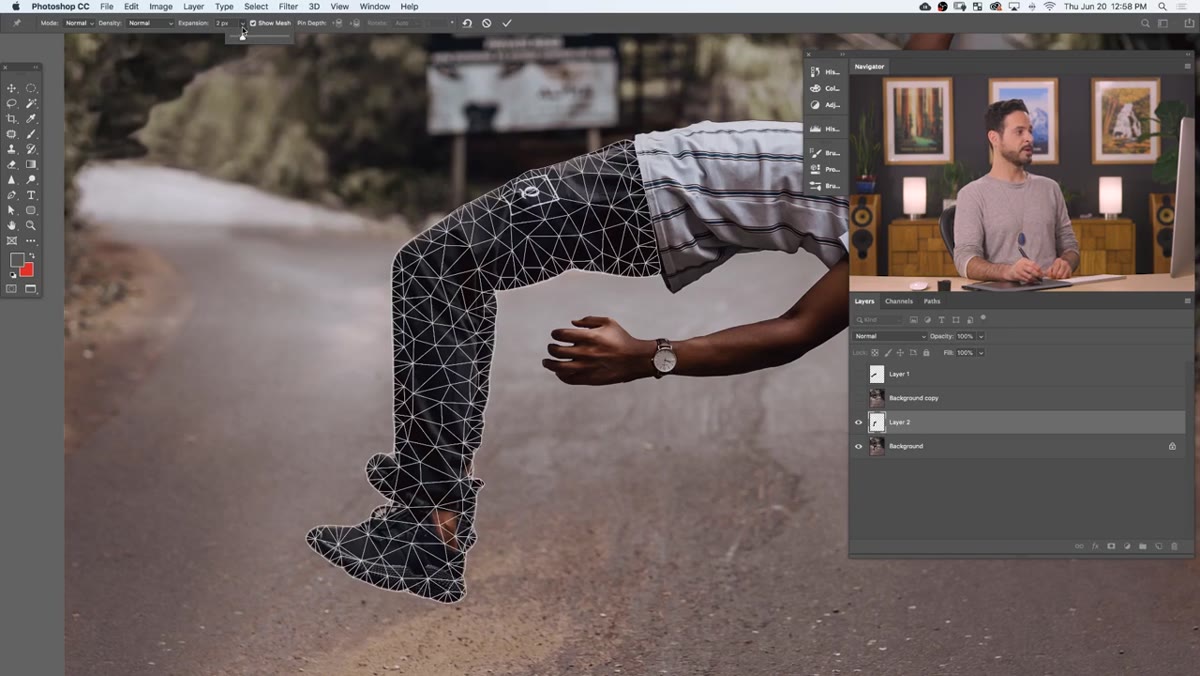 First pins being placed on the mesh to anchor the hips
Click anywhere on the mesh to drop a pin, and this is where technique separates a convincing result from a mangled mess. Your first pins should be anchors, placed at the parts of the subject you do NOT want to move. In the legs example, you’d pin the hips or the top of the thighs before you do anything else. Think of it like holding a rubber band: you pin the parts that stay still so the warp has something to push against.
First pins being placed on the mesh to anchor the hips
Click anywhere on the mesh to drop a pin, and this is where technique separates a convincing result from a mangled mess. Your first pins should be anchors, placed at the parts of the subject you do NOT want to move. In the legs example, you’d pin the hips or the top of the thighs before you do anything else. Think of it like holding a rubber band: you pin the parts that stay still so the warp has something to push against.
Drop at least two or three anchor pins before placing any transform pins. If you skip this step, the whole layer will shift and stretch in wild directions when you start dragging, and you’ll spend twenty minutes trying to undo the chaos instead of making the actual adjustment.
Step 5: Drag Your Transform Pins Into Position
 A pin being dragged at the ankle to extend the leg outward
Now place a pin at the point you want to actually move, and drag it. The mesh deforms around it while your anchor pins hold their positions. For the levitation image, Aaron drags the feet and lower legs outward so they extend more horizontally, giving the pose that genuine floating quality instead of the “lying on a glass table” look it had before.
A pin being dragged at the ankle to extend the leg outward
Now place a pin at the point you want to actually move, and drag it. The mesh deforms around it while your anchor pins hold their positions. For the levitation image, Aaron drags the feet and lower legs outward so they extend more horizontally, giving the pose that genuine floating quality instead of the “lying on a glass table” look it had before.
Work in small increments. Huge drags look unnatural, and the mesh can only do so much before the geometry starts to pinch or stretch in ways that read as fake. If something looks wrong, Ctrl+Z and try a lighter touch. You can also hold Alt (or Option on Mac) and hover near a pin to rotate it, which gives you rotational control instead of just a straight positional drag.
Step 6: Commit and Clean Up the Background
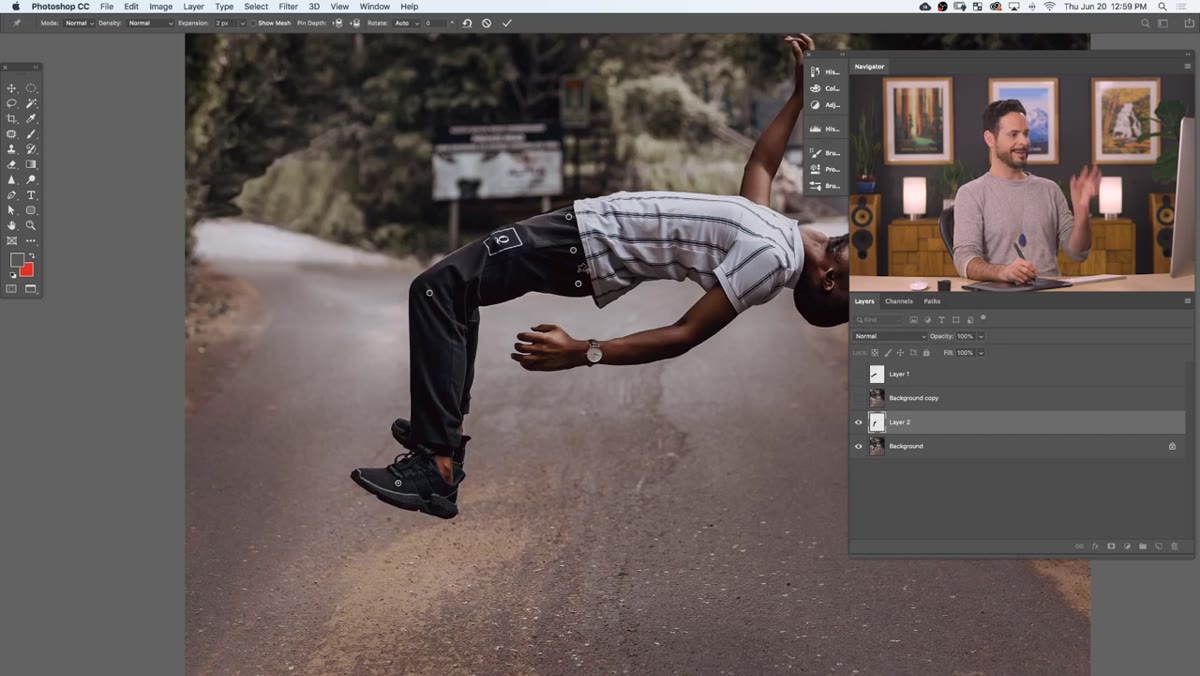 The warped legs repositioned over the original background
When you’re happy with the warp, press Enter to commit it. The mesh disappears and you’re left with your repositioned element. Now comes the part that the tutorial doesn’t dwell on but that matters just as much: the hole you’ve left in the original background layer where the subject used to be.
The warped legs repositioned over the original background
When you’re happy with the warp, press Enter to commit it. The mesh disappears and you’re left with your repositioned element. Now comes the part that the tutorial doesn’t dwell on but that matters just as much: the hole you’ve left in the original background layer where the subject used to be.
Use Content-Aware Fill, clone stamping, or patch tool work to fill in that gap. If you’re working on a composite with a simple background like a sky or a gradient, this is easy. If the background is complex, budget some time for it. A perfect warp with a sloppy fill looks worse than a slightly imperfect warp with clean background repair.
A Note From Experience: Convert to Smart Object First
I learned this the mildly painful way: once you commit a Puppet Warp, going back to adjust it is not a clean process. If you convert your isolated layer to a Smart Object before opening Puppet Warp, the warp becomes a Smart Filter, which you can double-click to re-open and tweak as many times as you want. For anything a client is going to review, that non-destructive flexibility is worth the two extra seconds it takes to right-click the layer and choose “Convert to Smart Object.”
The real takeaway here is deceptively simple. Puppet Warp isn’t a magic body-reshaping tool you throw at a full-resolution subject layer and hope for the best. It’s a precision instrument that rewards preparation: clean isolation, thoughtful pin placement, and a plan for what happens to the background. Get the setup right, and the warp itself is almost easy.
Watch the full tutorial on YouTube and see Aaron walk through the whole thing live. Watching the mesh move in real time makes the pin placement logic click in a way that’s hard to get from reading alone.
Comments
Leave a Comment