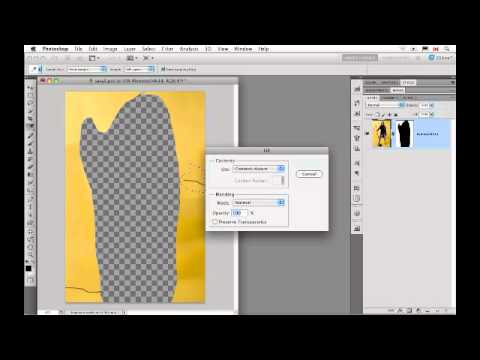
I’ll be honest with you. When I first heard about Puppet Warp, I did what a lot of people did: I watched someone use it to contort a cartoon character, thought “that’s a gimmick,” and went back to my liquify-everything workflow. It sat in my menu like a piece of gym equipment I kept promising myself I’d use. Then I watched a segment from a KelbyOne tutorial, specifically episode 282 of Photoshop User TV hosted by Scott Kelby and his crew, and one throwaway comment stopped me cold. The most useful thing Puppet Warp does isn’t the dramatic stuff. It’s the small, surgical stuff. Slight movements. Subtle repositioning. The kind of retouching that’s supposed to be invisible.
That reframing matters because I used to reach for Liquify for everything, which is fine, but Liquify smears pixels. Puppet Warp moves them with structure. For portrait work, for posing adjustments, for fixing that one arm that’s doing something weird, it’s a more precise instrument. Watch the full tutorial on YouTube and you’ll see the hosts demo several techniques across the episode, but the Puppet Warp retouching segment is the one that rewired how I think about this tool.
Here’s the walkthrough, broken down so you can follow along without pausing the video every thirty seconds.
Step 1: Open Your Image and Duplicate the Layer
 Host opening image and setting up layer panel
Before you touch Puppet Warp, duplicate your background layer. Command+J on Mac, Ctrl+J on Windows. This is non-negotiable. Puppet Warp is a destructive operation by default, meaning if you warp directly on your original pixels and decide later that it looks wrong, you’re in trouble. Work on the duplicate, keep the original underneath, and you’ve got a safety net. Name the duplicate something useful, not “Layer 1 copy.” Call it “warp” or “arm adjustment” or whatever tells you what you were trying to fix.
Host opening image and setting up layer panel
Before you touch Puppet Warp, duplicate your background layer. Command+J on Mac, Ctrl+J on Windows. This is non-negotiable. Puppet Warp is a destructive operation by default, meaning if you warp directly on your original pixels and decide later that it looks wrong, you’re in trouble. Work on the duplicate, keep the original underneath, and you’ve got a safety net. Name the duplicate something useful, not “Layer 1 copy.” Call it “warp” or “arm adjustment” or whatever tells you what you were trying to fix.
Step 2: Select the Area You Want to Move
 Making a selection around a specific body part or element
You don’t always need a selection, but for retouching purposes, isolating the area you want to move is cleaner and gives you more control. Use the Lasso tool with a feathered edge, somewhere between 10 and 20 pixels depending on your image resolution, to draw loosely around the area you’re adjusting. An arm, a shoulder, a strand of hair. The feathering keeps the edges from looking like they were cut with scissors. If you skip this step and apply Puppet Warp to the whole layer, you’ll find that moving one part of the image drags other parts with it in unpredictable ways.
Making a selection around a specific body part or element
You don’t always need a selection, but for retouching purposes, isolating the area you want to move is cleaner and gives you more control. Use the Lasso tool with a feathered edge, somewhere between 10 and 20 pixels depending on your image resolution, to draw loosely around the area you’re adjusting. An arm, a shoulder, a strand of hair. The feathering keeps the edges from looking like they were cut with scissors. If you skip this step and apply Puppet Warp to the whole layer, you’ll find that moving one part of the image drags other parts with it in unpredictable ways.
Step 3: Apply Puppet Warp
 Puppet Warp mesh appearing over the selected area
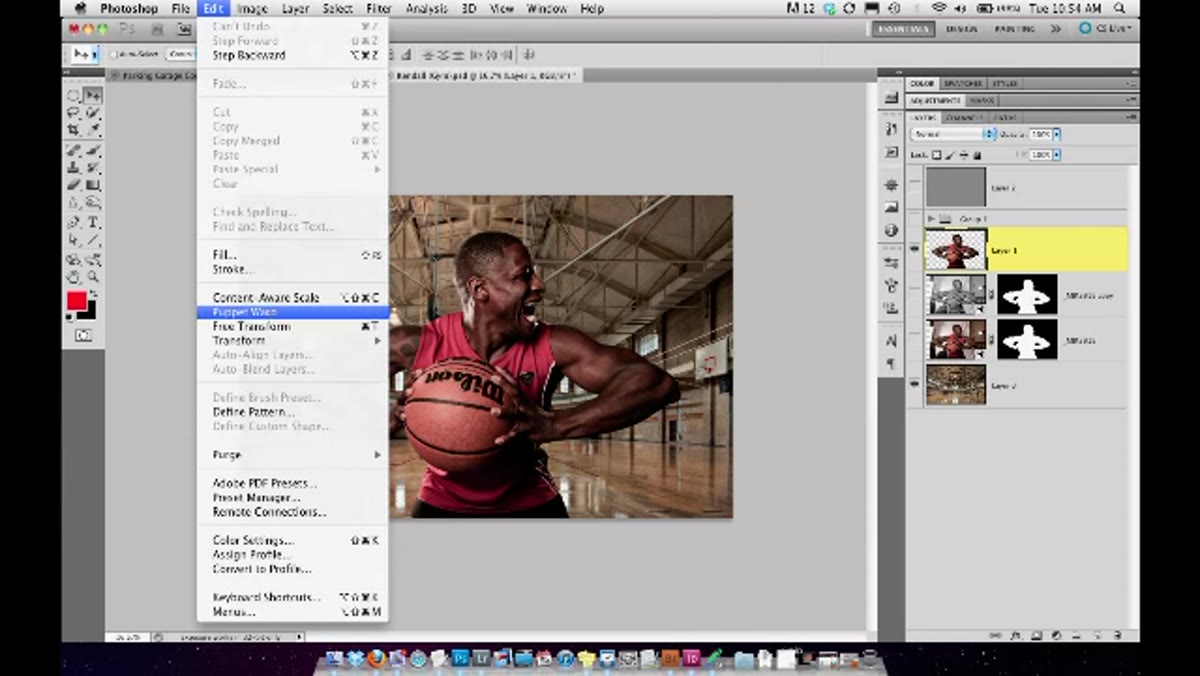
Go to Edit, then Puppet Warp. The moment you click it, a triangular mesh overlays your image or selection. This mesh is how Photoshop calculates the warp. You can change the mesh density in the options bar at the top: Fewer Points gives you broader, smoother movements while More Points gives you tighter, more localized control. For subtle retouching work, I usually leave it at Normal. You can also turn the mesh visibility off in the options bar if it’s visually cluttering your view, which it often is when you’re working on detail areas.
Puppet Warp mesh appearing over the selected area
Go to Edit, then Puppet Warp. The moment you click it, a triangular mesh overlays your image or selection. This mesh is how Photoshop calculates the warp. You can change the mesh density in the options bar at the top: Fewer Points gives you broader, smoother movements while More Points gives you tighter, more localized control. For subtle retouching work, I usually leave it at Normal. You can also turn the mesh visibility off in the options bar if it’s visually cluttering your view, which it often is when you’re working on detail areas.
Step 4: Pin the Parts That Should NOT Move
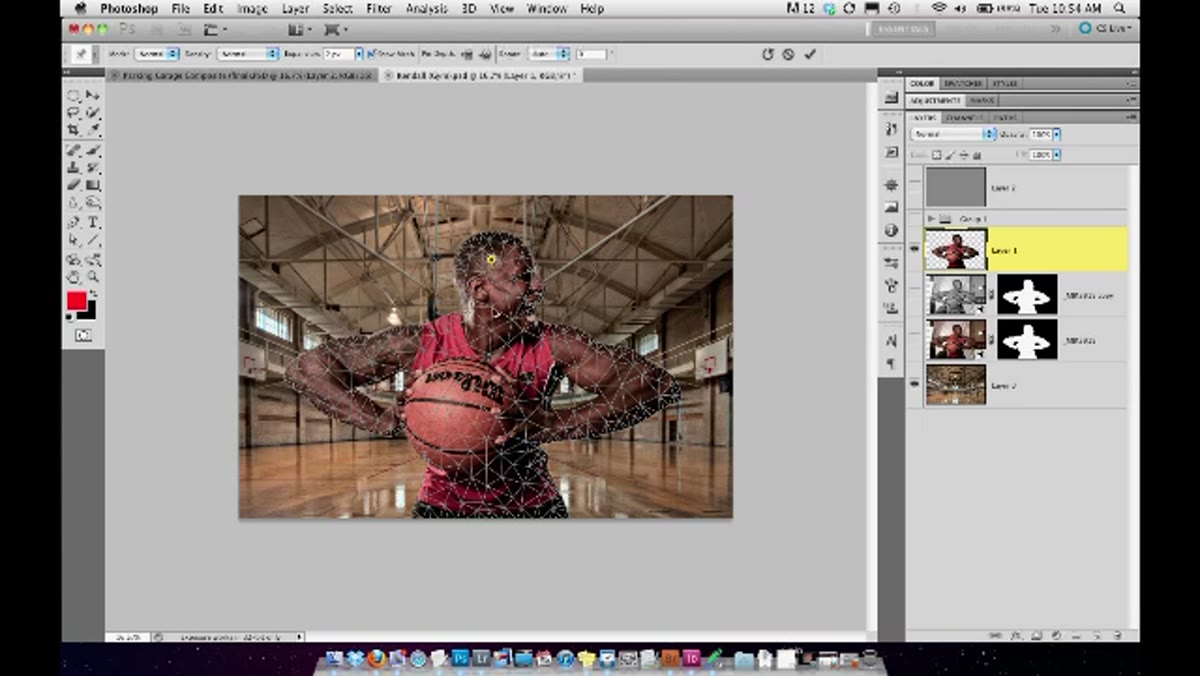 Clicking to place anchor pins around stable areas of the image
This is the step most people skip and then wonder why Puppet Warp is doing strange things to their image. Click to place pins on the parts of the image that you want to stay completely still. Think of these as anchors. If you’re adjusting someone’s arm, pin the shoulder, pin the torso, pin anything near the area of adjustment that needs to stay put. The pins are what give Puppet Warp its precision. Without them, when you move one point, everything nearby moves with it in ways you didn’t ask for. Place at least two or three anchor pins before you touch the area you actually want to move.
Clicking to place anchor pins around stable areas of the image
This is the step most people skip and then wonder why Puppet Warp is doing strange things to their image. Click to place pins on the parts of the image that you want to stay completely still. Think of these as anchors. If you’re adjusting someone’s arm, pin the shoulder, pin the torso, pin anything near the area of adjustment that needs to stay put. The pins are what give Puppet Warp its precision. Without them, when you move one point, everything nearby moves with it in ways you didn’t ask for. Place at least two or three anchor pins before you touch the area you actually want to move.
Step 5: Place Your Warp Pin and Move It
 Dragging a single pin to reposition an arm or pose element
Now click to place a pin on the spot you actually want to move, and drag it. With the anchor pins in place, the movement stays local. You’re nudging, not shoving. For retouching, this is usually a matter of pixels or a few millimeters on screen, not a dramatic swing across the canvas. The key thing Scott’s team emphasizes is restraint. Puppet Warp can do extreme bends, but for portrait retouching you’re looking for the adjustment that makes someone think “wow, great photo” not “wow, great Photoshop.” Small movements that fix a posture, tighten an arm against the body, or correct a slightly awkward lean are where this tool earns its place in your workflow.
Dragging a single pin to reposition an arm or pose element
Now click to place a pin on the spot you actually want to move, and drag it. With the anchor pins in place, the movement stays local. You’re nudging, not shoving. For retouching, this is usually a matter of pixels or a few millimeters on screen, not a dramatic swing across the canvas. The key thing Scott’s team emphasizes is restraint. Puppet Warp can do extreme bends, but for portrait retouching you’re looking for the adjustment that makes someone think “wow, great photo” not “wow, great Photoshop.” Small movements that fix a posture, tighten an arm against the body, or correct a slightly awkward lean are where this tool earns its place in your workflow.
Step 6: Commit and Check Your Edges
 Pressing Enter to commit warp and reviewing result at full size
When you’re happy with the position, press Enter or Return to commit the warp. Then zoom in to 100% and check your edges. Even with feathering on your selection, there can be slight artifacts where the warped area meets the background. A soft clone stamp or healing brush at a low opacity, around 20 to 30%, will clean those up quickly. Toggle the layer on and off to compare against the original and make sure you haven’t over-cooked it.
Pressing Enter to commit warp and reviewing result at full size
When you’re happy with the position, press Enter or Return to commit the warp. Then zoom in to 100% and check your edges. Even with feathering on your selection, there can be slight artifacts where the warped area meets the background. A soft clone stamp or healing brush at a low opacity, around 20 to 30%, will clean those up quickly. Toggle the layer on and off to compare against the original and make sure you haven’t over-cooked it.
What I’d Add From My Own Experience
The tutorial doesn’t mention this, but Puppet Warp plays very nicely with Smart Objects if you want to stay non-destructive the whole way through. Convert your layer to a Smart Object before applying Puppet Warp, and the warp gets saved as a Smart Filter you can go back and edit later. I learned this the expensive way on a client job where I’d committed a warp, delivered the file, and then needed to revise it two days later. Learned about Smart Objects very quickly after that. It adds one extra step up front and saves you a lot of pain on anything that might need revision.
The other thing worth knowing: Puppet Warp gets sluggish on very large files. If your file is above 50 megapixels, you might want to do your warp work on a scaled-down version and bring the adjustment back in, or just expect a short wait when you first apply the mesh.
Puppet Warp is one of those tools that looks like a parlor trick until you understand that restraint is the whole point. Used with light pins, feathered selections, and small intentional movements, it’s one of the most precise retouching instruments Photoshop has. The KelbyOne crew put it plainly in this episode and it stuck with me: the dramatic demos are how you learn the tool exists. The subtle adjustments are how you actually use it.
Watch the full tutorial on YouTube to see the Puppet Warp segment plus the rest of the episode, which also covers Filter Gallery techniques and a smart approach to Content-Aware Fill that’s worth your time.
Comments
Leave a Comment