There’s a specific kind of frustration that comes from spending an hour manually distorting a layer to match the perspective of a wall, only for it to still look slightly off. I’ve been there more times than I’d like to admit. You nudge a corner handle, zoom out, squint, nudge it again, and eventually you just convince yourself it looks “good enough” and move on. The problem is, good enough in compositing is usually pretty obvious to anyone looking at it. Turns out, Photoshop has had a filter designed to solve exactly this problem for years, and I was out here doing it the hard way like an absolute rookie.
In this Aaron Nace (PHLEARN) tutorial, Watch the full tutorial on YouTube, Aaron walks through the Vanishing Point filter from start to finish using a real-world example: placing an abstract landscape painting onto the wall above a fireplace in a living room photo. The use case is dead practical. Want to see how that print you’re eyeing on Etsy would actually look in your apartment? This is how you mock it up. The technique is clean, the results are convincing, and the filter itself is easier to use than you’d expect.
What makes this tutorial worth your time is that Aaron doesn’t just show you the buttons to click. He takes a few minutes to actually explain perspective before touching the filter, which turns out to be exactly the context you need to understand why the tool works the way it does.
Step 1: Set Up Your Two Images
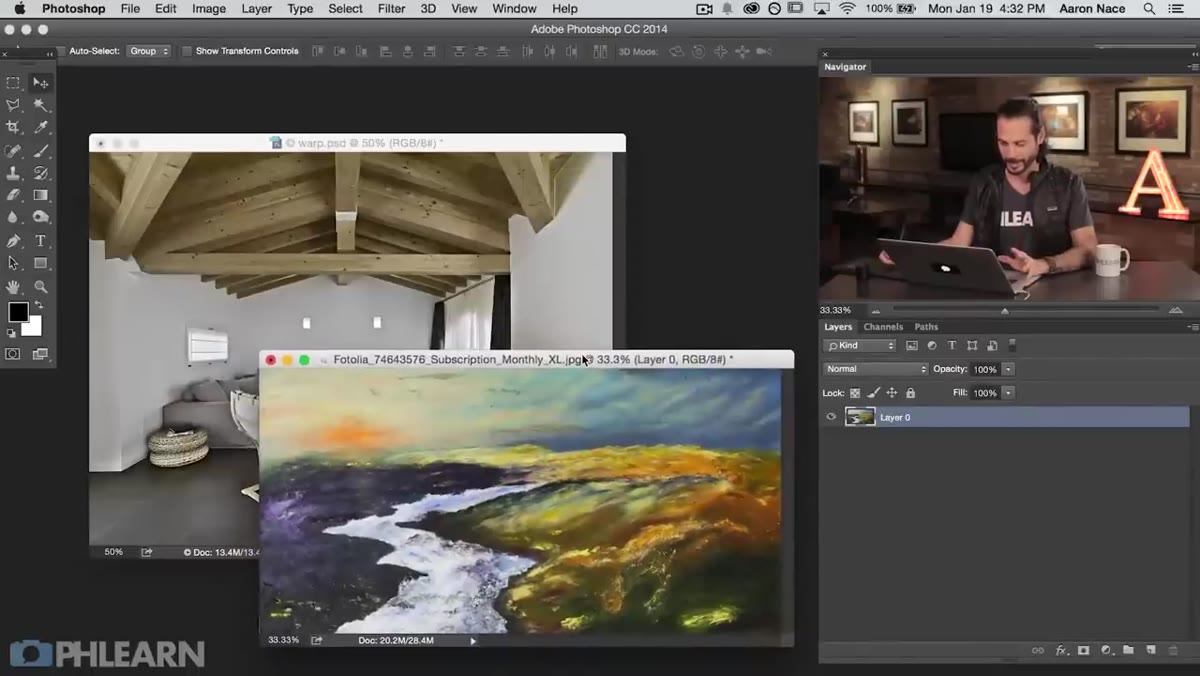 Two source images open side by side in Photoshop
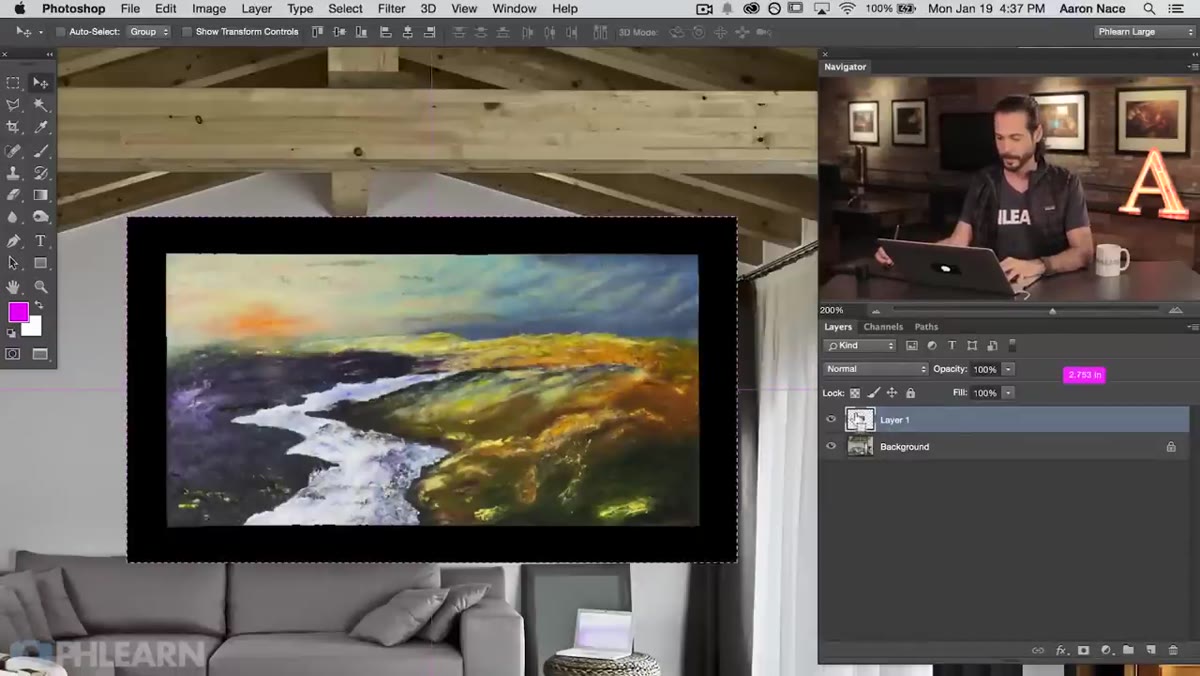
Start with both images open in Photoshop: the image you want to place (the artwork or photo), and the destination image (the room, building, or surface). Using the Move tool (V), hold Shift and drag the artwork from its own document onto the destination image. Holding Shift drops it centered on the canvas, which makes it easier to manage.
Once it lands, it’ll almost certainly be way too large. Hit Command/Ctrl+T to open Free Transform, lock the aspect ratio, and scale it down to roughly the size you want it to appear in the final image. You don’t need to be pixel-perfect here. Getting it in the ballpark is enough for now.
Step 2: Understand the Perspective Before You Start
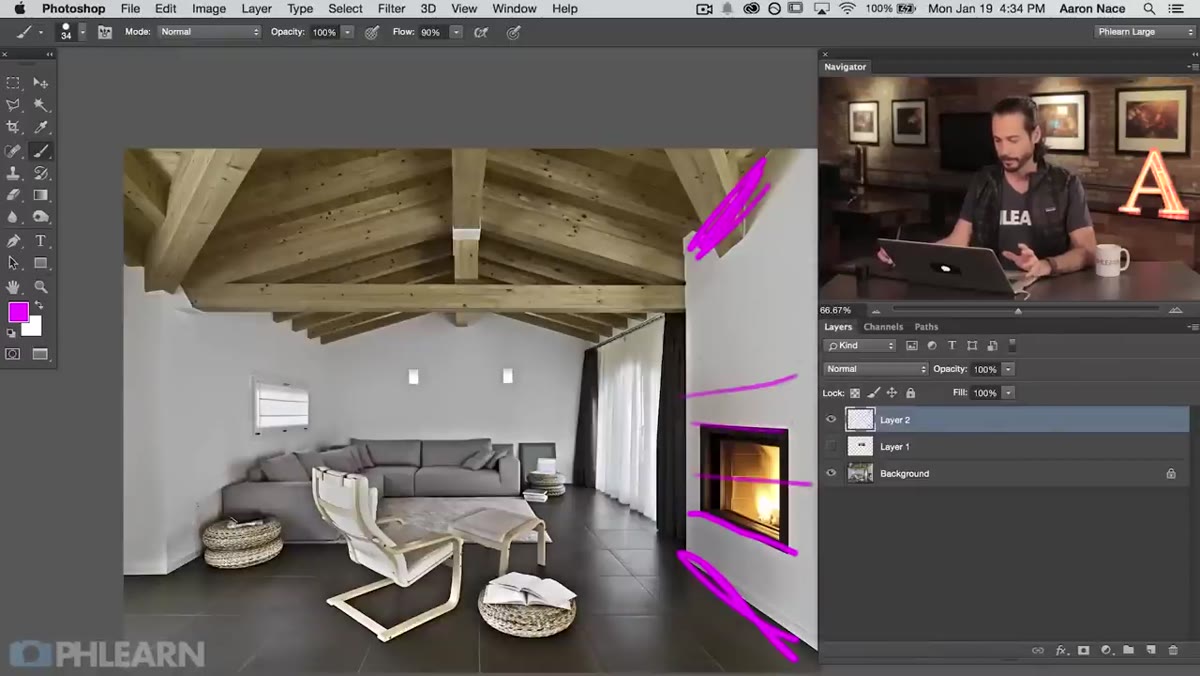
 Guide lines drawn over the room photo showing converging perspective
This is the step most tutorials skip, and skipping it is why a lot of composites look wrong even when the technique is applied correctly. Aaron draws a few guide lines over the room photo to show how the ceiling, floor, and wall edges all converge toward a vanishing point on the horizon. Lines that are physically parallel in real life appear to angle toward each other in a photograph. That’s perspective.
Why does this matter before using the filter? Because the Vanishing Point filter is going to ask you to define those planes manually. If you don’t have an intuitive sense of which lines are converging and in what direction, you’ll define the plane wrong and your placed image will look like it’s floating or tilted. Take thirty seconds to look at your destination image and trace the angles with your eyes before you start clicking.
Step 3: Prep the Artwork for the Clipboard
 Magic Wand tool selected with Sample All Layers unchecked in the toolbar
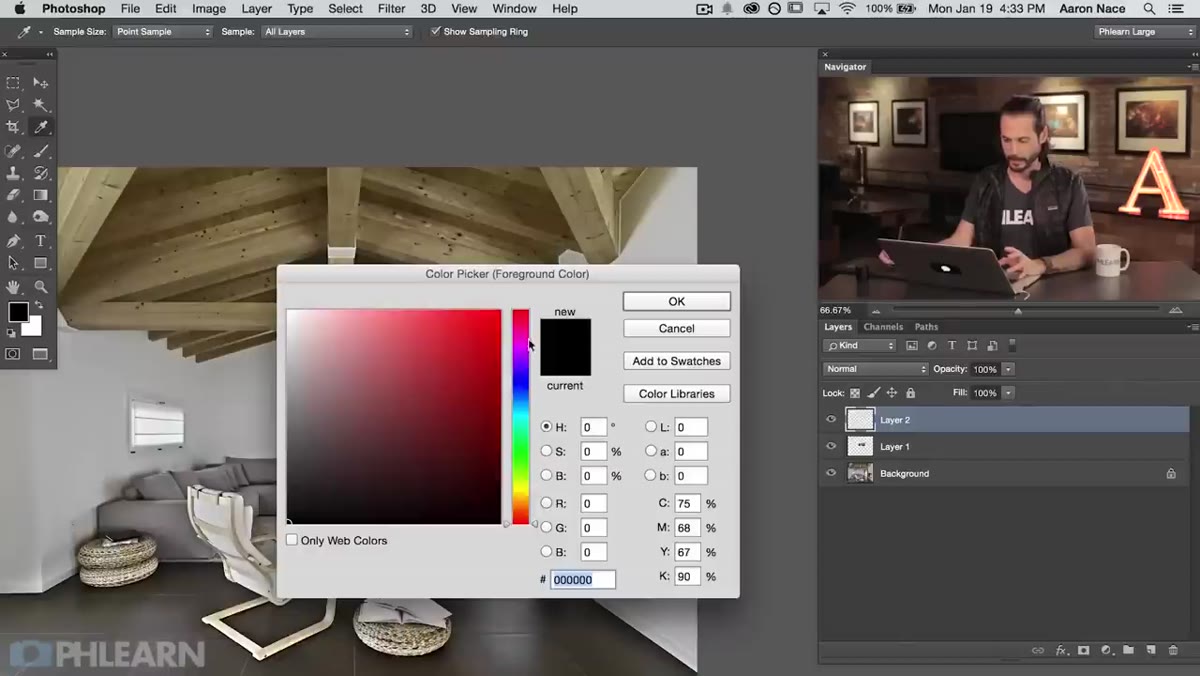
Before you open the Vanishing Point filter, the artwork needs to be copied to your clipboard. First, though, there’s a small but important detail: if your artwork has a border you want to keep, make sure its color works with the destination. In the tutorial, the painting has a white border, but the fireplace wall is dark, so Aaron changes it to black using the Magic Wand tool (W) to select the border area.
Make sure “Sample All Layers” is unchecked in the tool options so you’re only selecting from the artwork layer itself. Click on the border to select it, adjust the fill color to match your destination surface, and deselect. Then select the entire artwork layer (Command/Ctrl+A to select all, or use your preferred selection method), and copy it to the clipboard with Command/Ctrl+C. That clipboard content is what the Vanishing Point filter is going to work with.
Step 4: Open the Vanishing Point Filter on the Right Layer
 Filter menu open with Vanishing Point option visible
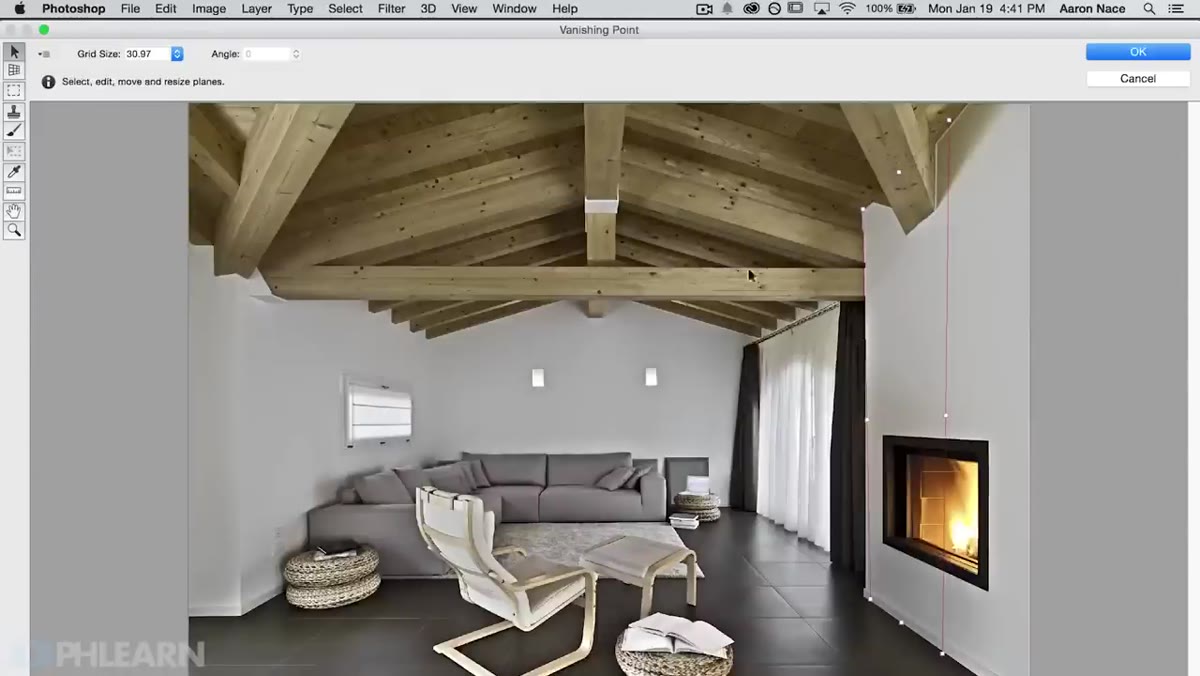
This is where people get tripped up. You do not want to open Vanishing Point while you’re on your artwork layer. You want to be on the destination image layer, because that’s the surface you’re going to be mapping onto. Select your background/room layer in the Layers panel, then go to Filter > Vanishing Point. The filter opens in its own full-screen dialog with its own set of tools along the left side.
A quick pro tip before you dive in: if you want to stay non-destructive, create a new blank layer above everything before opening the filter. Open Vanishing Point with that blank layer selected. The filter will apply its output to that layer rather than permanently altering your background, which means you can adjust things later without redoing the whole process.
Step 5: Define the Perspective Plane
 Vanishing Point filter interface with plane grid being drawn on the wall
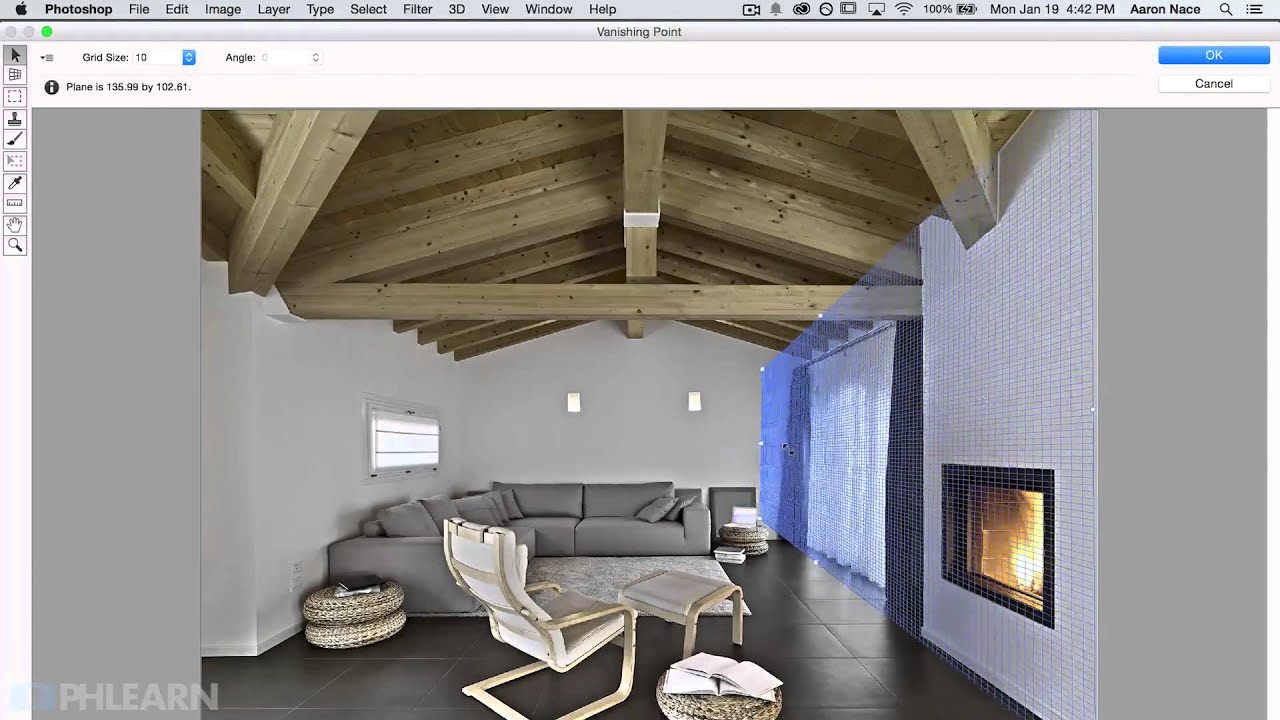
Inside the Vanishing Point dialog, the Create Plane tool is selected by default. Click four points to define the flat surface you want to map onto. For a wall above a fireplace, you’d click the four corners of that wall section. The filter draws a grid over the area, and that grid is your visual feedback. If the grid turns red, the plane geometry is off and you need to adjust your corner points. If it turns yellow, it’s workable but not ideal. Blue means you’re good.
You can adjust individual corner handles after placing them. Take your time here. A well-defined plane is the difference between a composite that looks like it belongs in the scene and one that looks pasted on. Once the grid looks solid and blue, you’re ready for the next step.
Step 6: Paste and Position the Artwork
 Pasted artwork appearing inside the Vanishing Point filter on the defined plane
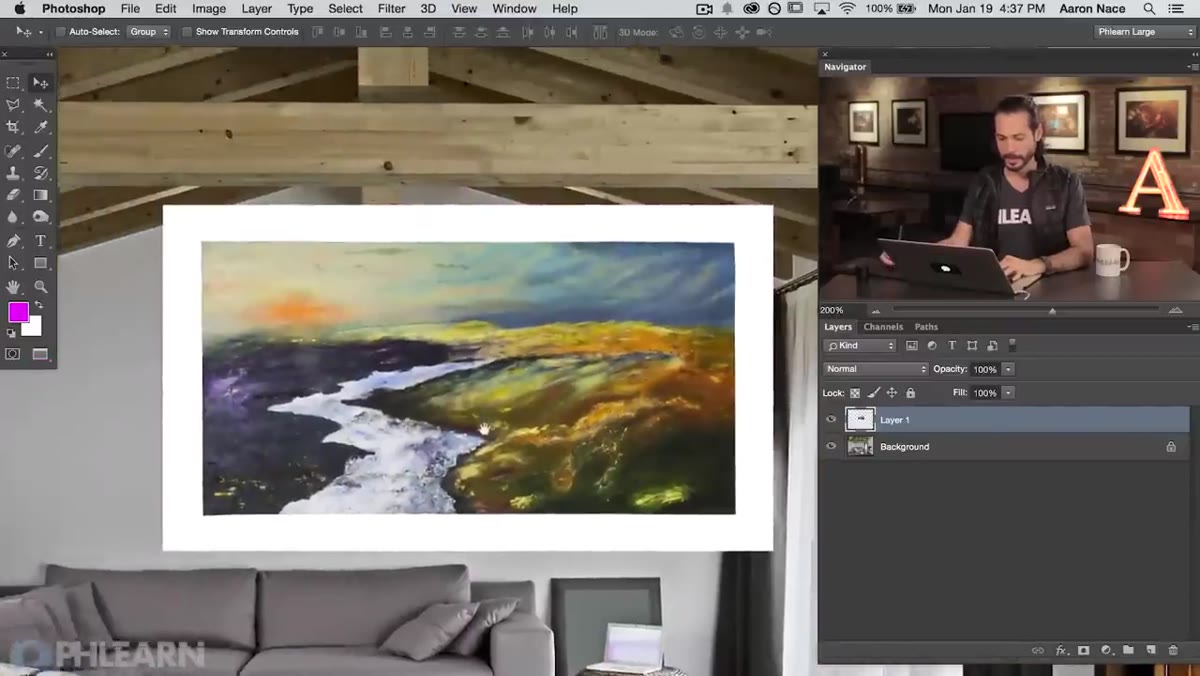
With your plane defined, hit Command/Ctrl+V inside the Vanishing Point dialog to paste the artwork you copied earlier. It’ll appear as a floating element. Use the Move tool within the filter to drag it toward your plane. The moment it touches the grid, the magic happens: the image snaps into the perspective of the plane automatically, warping to match the angles you defined.
Drag it into position, scale it within the plane if needed, and check that the edges align naturally with the surrounding environment. When it looks right, click OK. The filter closes and your result lands back in Photoshop on whatever layer you had selected.
A Note From My Own Workflow
I’d add one thing Aaron doesn’t get to in this particular video: blend modes. After the Vanishing Point filter applies your artwork, the placed layer is sitting at 100% Normal by default. If the destination surface has any texture, like plaster, brick, or canvas, switching that layer to Multiply or Overlay at a reduced opacity can make the placed image read as part of the surface rather than sitting on top of it. It’s a small adjustment that adds a lot of believability, especially for older or textured walls. Five seconds of work, big difference in result.
The Vanishing Point filter is one of those tools that sounds like it would be complicated and then turns out to be one of the more intuitive things Photoshop offers. The key is letting it do the geometric math instead of fighting with Free Transform handles yourself. Define the plane correctly, paste your artwork into it, and Photoshop handles the rest. That’s a trade I’ll take every time.
Watch the full tutorial on YouTube to see Aaron walk through the whole process with his source files. Worth the watch.
Comments (2)
Tried this technique this morning. Game changer for real.
Couldn't agree more. I've seen this make a huge difference in retouching work specifically.
Leave a Comment