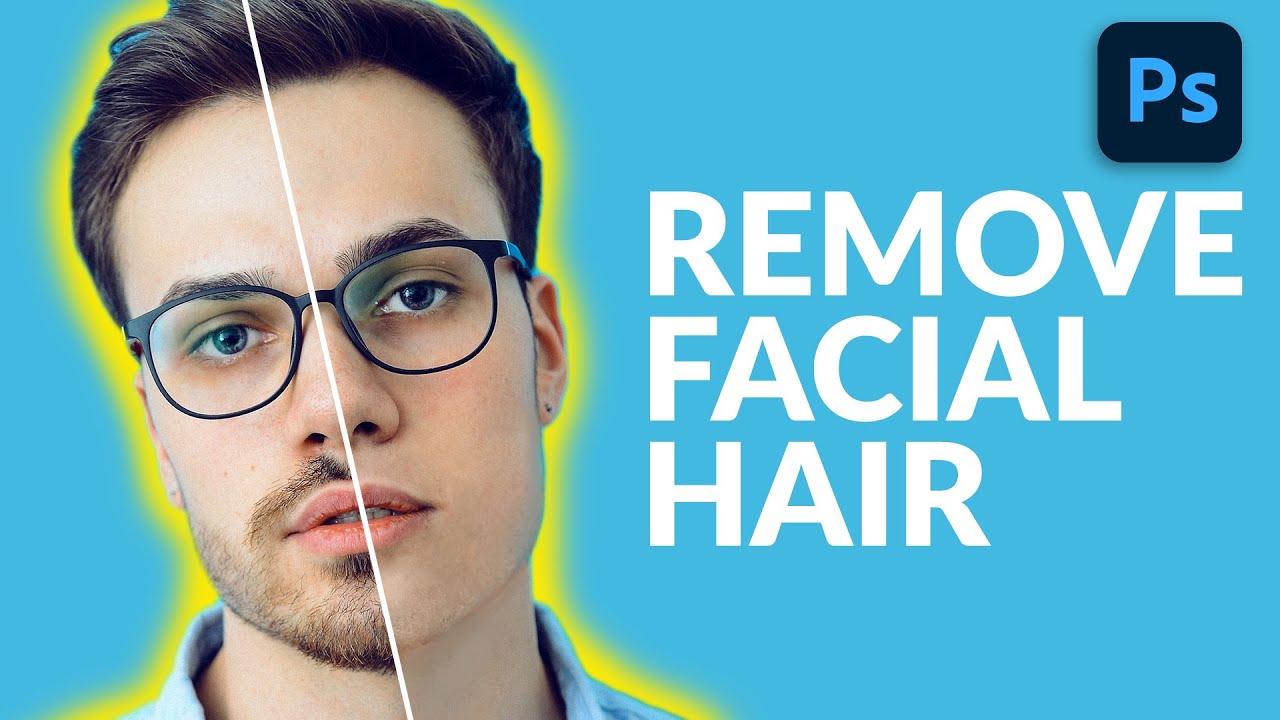
Retouching facial hair is one of those jobs that sounds simple until you’re forty-five minutes deep and your subject looks like they lost a fight with a rubber eraser. I’ve had clients send me portraits where the brief is something like “can you just clean him up a bit” - and that phrase, “clean him up,” almost always means removing a beard, a patch of stubble, or some combination of both. The automatic tools in Photoshop are genuinely great at a lot of things. This is not one of those things.
In this Aaron Nace (PHLEARN) tutorial, he walks through a multi-stage process for removing facial hair that relies on manual brush painting followed by a texture overlay pass to keep everything looking like actual skin. Watch the full tutorial on YouTube - but if you want the breakdown before you dive in, here’s how the whole thing works and why each piece matters.
The core insight of the technique is this: automatic healing and cloning tools fail on large surface areas because they can’t invent skin that was never there. The brush tool, on the other hand, lets you lay down exactly what you want - color, tone, softness - and then a separate texture pass makes it believable. Two stages, one solid result.
Step 1: Understand Why the Spot Healing Brush Fails Here
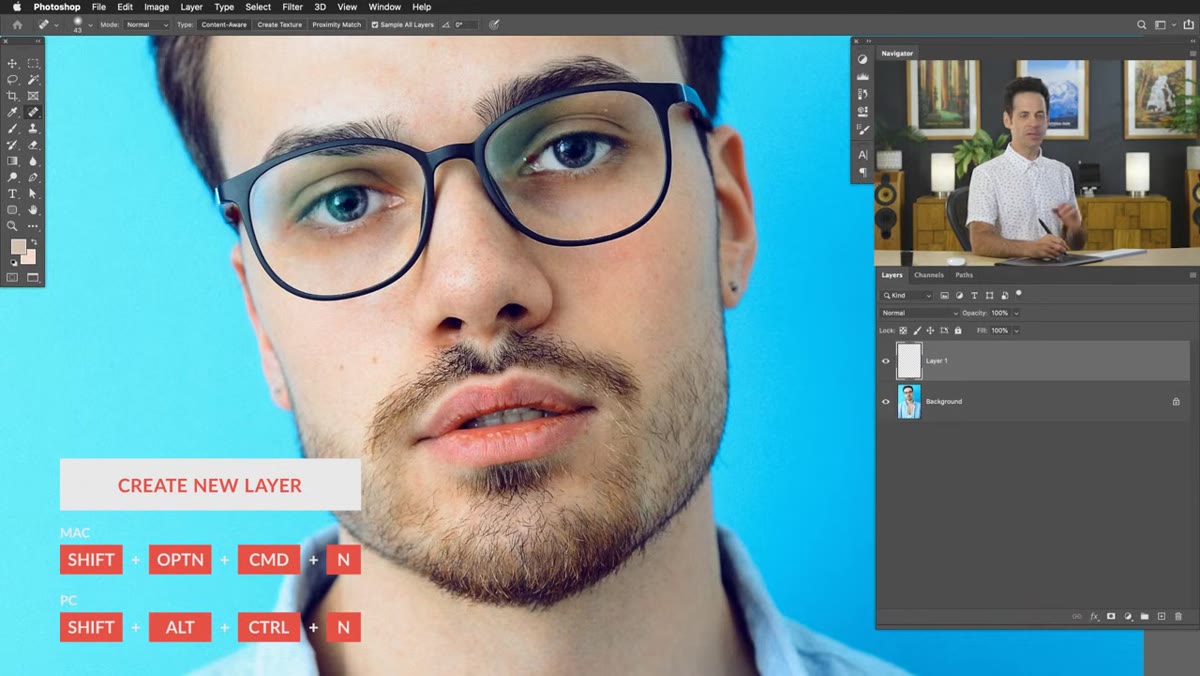 Spot healing brush producing messy, confused results on stubble area
Before jumping into the actual fix, Nace takes a moment to show why the obvious approach doesn’t work. The Spot Healing Brush is excellent for removing isolated blemishes or a single stray hair. Paint over one small thing and it’s gone. But when you ask it to cover a large, complex region like a full beard or a patch of stubble across the jaw and chin, it doesn’t have enough reference information to know what should replace it. The result is a muddy, blotchy mess that looks worse than the original. Content-Aware Fill runs into the same wall. If you’ve ever watched a client’s eyebrow slowly turn into abstract art, you know what I’m talking about. The lesson here is not that automatic tools are bad - it’s that they need a plausible replacement to pull from, and a full beard doesn’t give them one.
Spot healing brush producing messy, confused results on stubble area
Before jumping into the actual fix, Nace takes a moment to show why the obvious approach doesn’t work. The Spot Healing Brush is excellent for removing isolated blemishes or a single stray hair. Paint over one small thing and it’s gone. But when you ask it to cover a large, complex region like a full beard or a patch of stubble across the jaw and chin, it doesn’t have enough reference information to know what should replace it. The result is a muddy, blotchy mess that looks worse than the original. Content-Aware Fill runs into the same wall. If you’ve ever watched a client’s eyebrow slowly turn into abstract art, you know what I’m talking about. The lesson here is not that automatic tools are bad - it’s that they need a plausible replacement to pull from, and a full beard doesn’t give them one.
Step 2: Create a New Layer and Set Up Your Brush
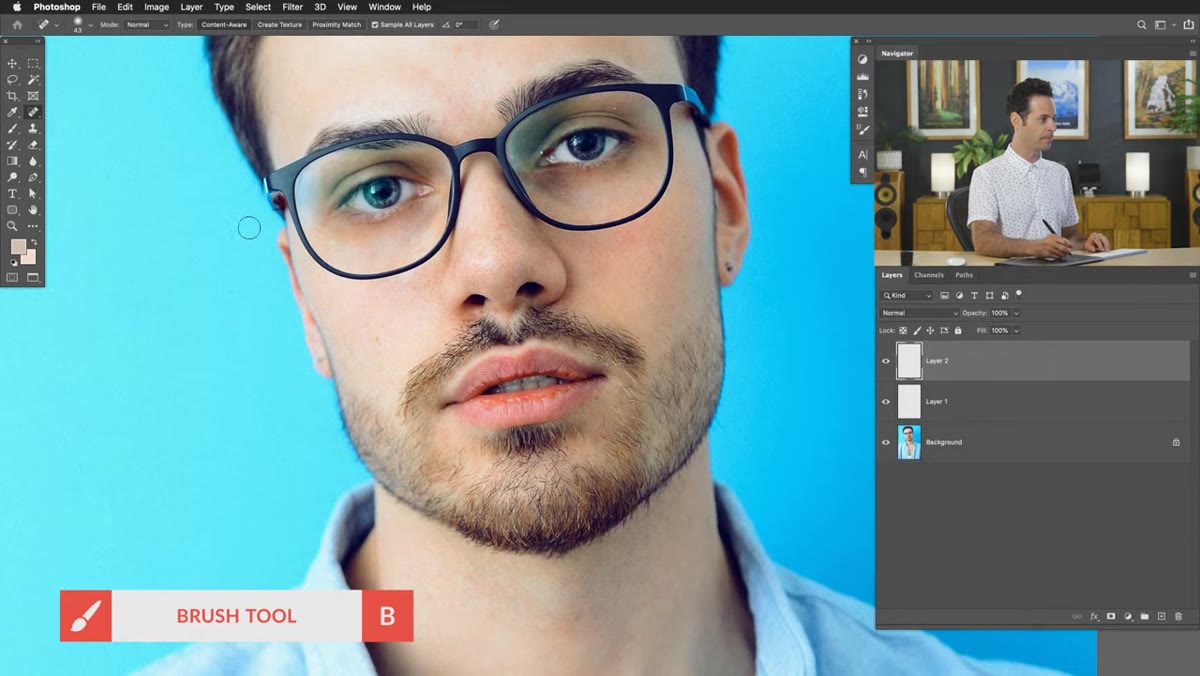 Brush tool selected, hardness at zero, flow set to 20 percent
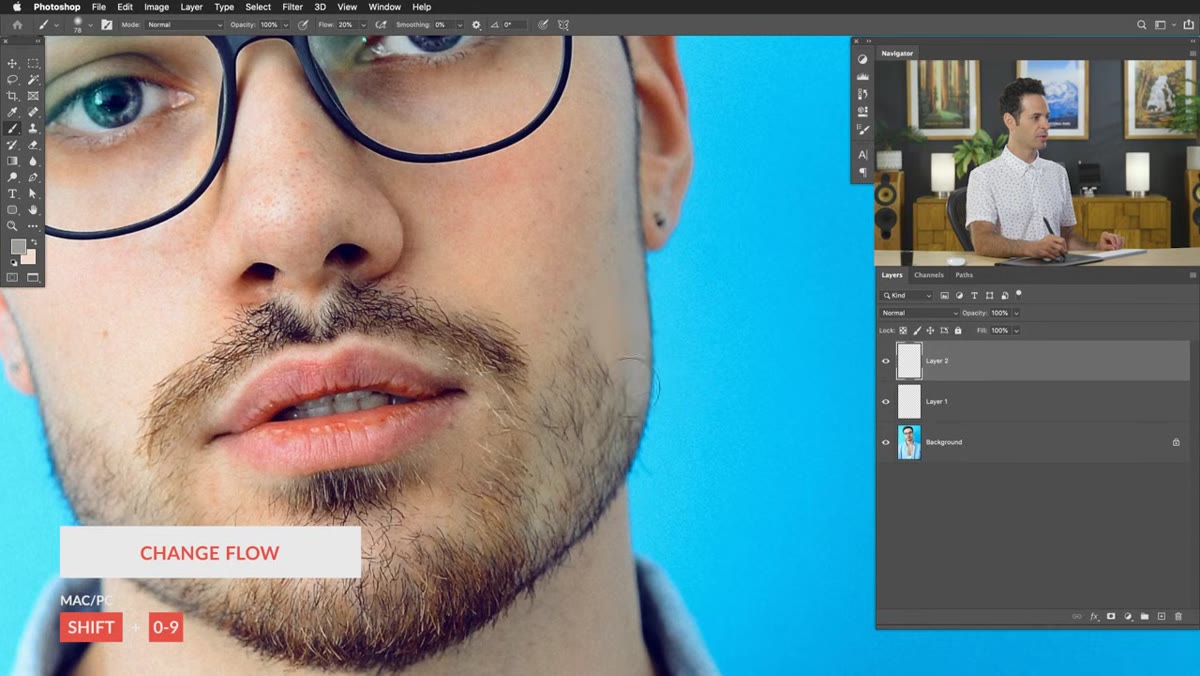
Start by creating a new empty layer above your background image. This keeps your painting non-destructive and lets you dial it back or erase specific areas without touching the original. With the Brush tool selected (keyboard shortcut: B), right-click to open the brush options and drag the Hardness slider all the way down to zero. A fully soft brush is essential here - hard edges will create visible lines that immediately read as painted. For flow, hit Shift+2 to set it to 20%. Flow, not opacity. Flow controls how much paint builds up with each pass, so you can gradually layer color without dumping it all in one stroke. This gives you far more control over how smoothly the new skin tones blend across the face.
Brush tool selected, hardness at zero, flow set to 20 percent
Start by creating a new empty layer above your background image. This keeps your painting non-destructive and lets you dial it back or erase specific areas without touching the original. With the Brush tool selected (keyboard shortcut: B), right-click to open the brush options and drag the Hardness slider all the way down to zero. A fully soft brush is essential here - hard edges will create visible lines that immediately read as painted. For flow, hit Shift+2 to set it to 20%. Flow, not opacity. Flow controls how much paint builds up with each pass, so you can gradually layer color without dumping it all in one stroke. This gives you far more control over how smoothly the new skin tones blend across the face.
Step 3: Continuously Sample Skin Colors as You Paint
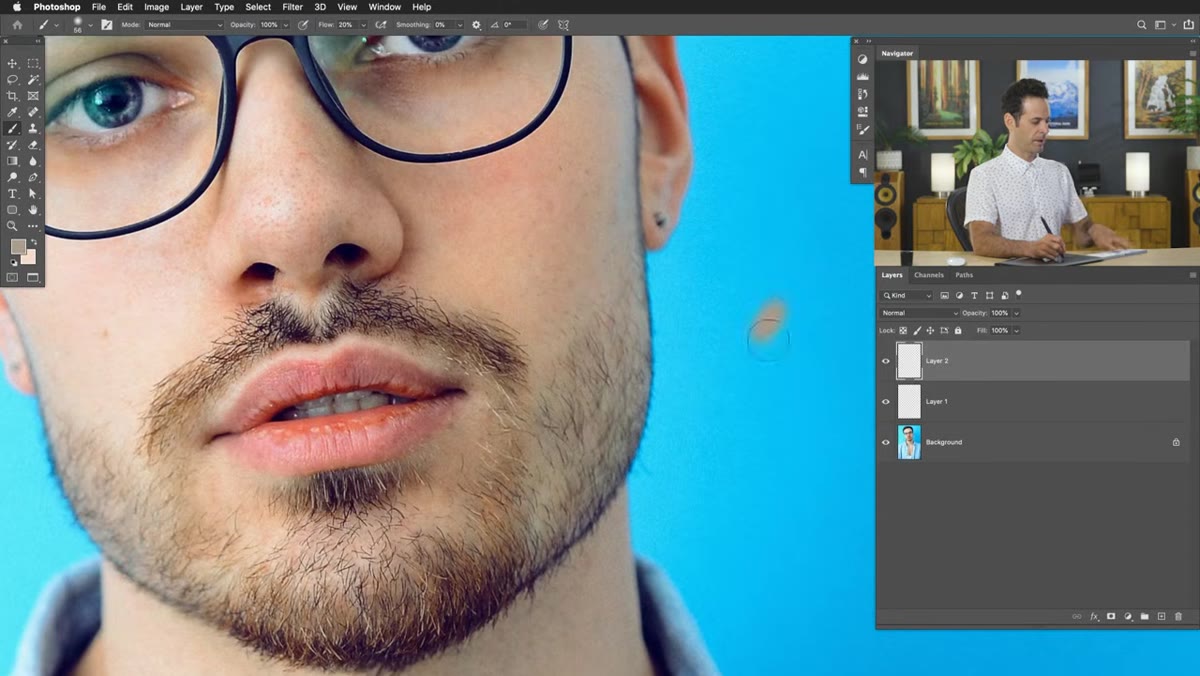 Color swatches showing range of skin tones sampled from across the face
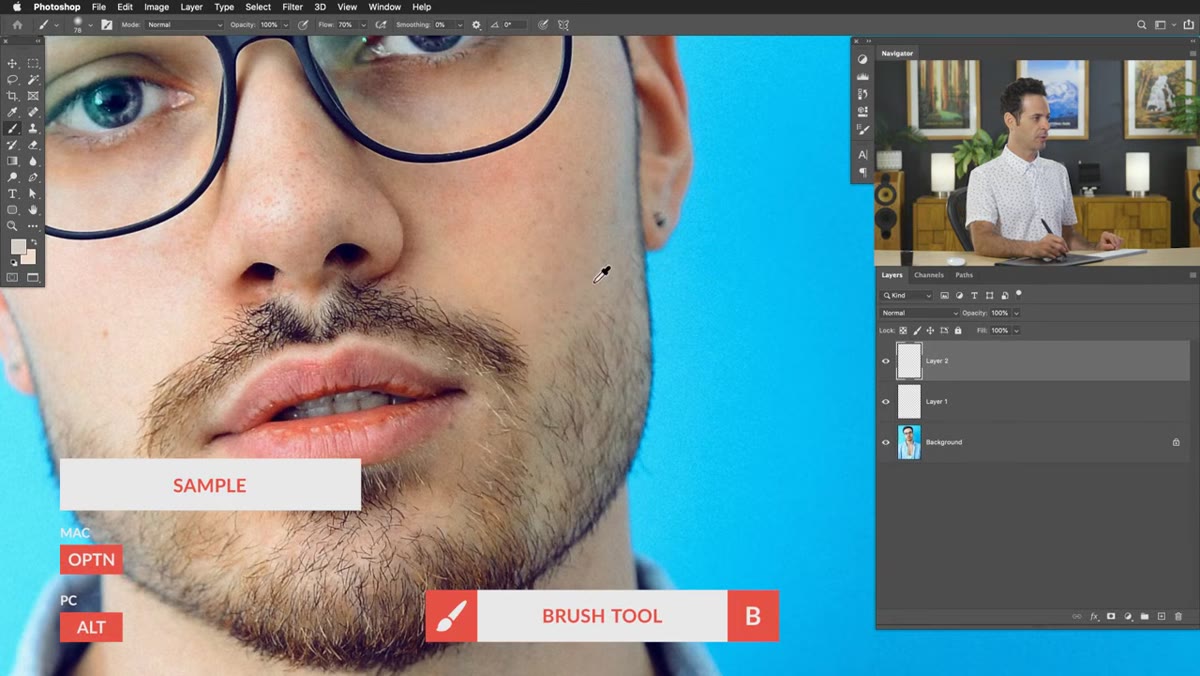
This is the step most people skip and it’s the reason their results look flat. Hold Alt (Option on Mac) to temporarily switch to the eyedropper and sample a color directly from your subject’s face before each painting pass. Nace demonstrates this clearly by sampling several points across the face and painting them as swatches - and the range is surprising. Highlights, shadows, areas catching reflected color from the background - they’re all technically “skin tone” but they vary quite a bit. If you just sample once and paint the whole beard area with a single color, you’ll end up with a flat, mask-like patch that reads as wrong even if viewers can’t immediately say why. Keep sampling as you move across different zones of the face.
Color swatches showing range of skin tones sampled from across the face
This is the step most people skip and it’s the reason their results look flat. Hold Alt (Option on Mac) to temporarily switch to the eyedropper and sample a color directly from your subject’s face before each painting pass. Nace demonstrates this clearly by sampling several points across the face and painting them as swatches - and the range is surprising. Highlights, shadows, areas catching reflected color from the background - they’re all technically “skin tone” but they vary quite a bit. If you just sample once and paint the whole beard area with a single color, you’ll end up with a flat, mask-like patch that reads as wrong even if viewers can’t immediately say why. Keep sampling as you move across different zones of the face.
Step 4: Paint Over the Facial Hair With a Low-Flow Brush
 Soft brush painting over beard area with sampled skin tones
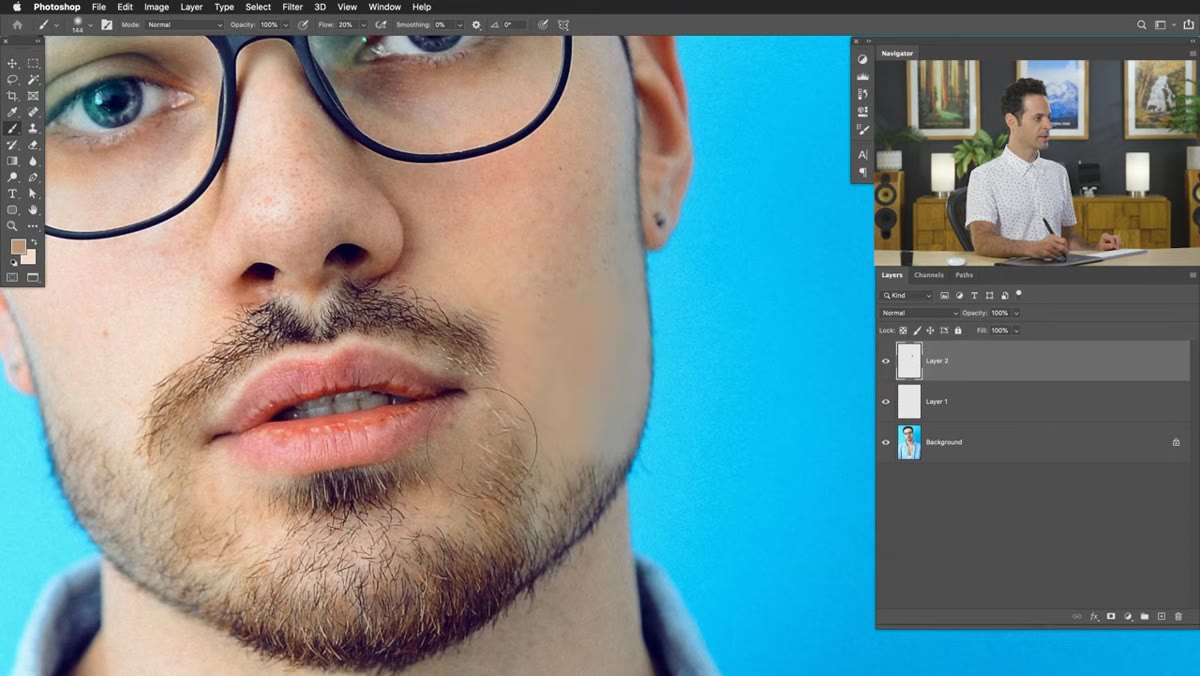
With your brush sized appropriately for the area you’re working on (use Ctrl+Alt+drag on PC or Cmd+Option+drag on Mac to resize on the fly), start painting over the facial hair using the skin tones you’ve sampled. Work in passes rather than trying to cover everything in one go. The 20% flow means you’re building up coverage gradually, which lets you blend between tones naturally as you move from the chin up toward the cheek or across the upper lip. Paint in the general direction of the face’s contours. Don’t worry about perfection yet - you’re building the color and tone foundation. The texture pass in the next stage is what makes it convincing, so a smooth, slightly imperfect paint layer underneath is fine and actually preferable to something too clean.
Soft brush painting over beard area with sampled skin tones
With your brush sized appropriately for the area you’re working on (use Ctrl+Alt+drag on PC or Cmd+Option+drag on Mac to resize on the fly), start painting over the facial hair using the skin tones you’ve sampled. Work in passes rather than trying to cover everything in one go. The 20% flow means you’re building up coverage gradually, which lets you blend between tones naturally as you move from the chin up toward the cheek or across the upper lip. Paint in the general direction of the face’s contours. Don’t worry about perfection yet - you’re building the color and tone foundation. The texture pass in the next stage is what makes it convincing, so a smooth, slightly imperfect paint layer underneath is fine and actually preferable to something too clean.
Step 5: Bring In a Reference Photo for Skin Texture
 Second reference image of clean skin placed over the painted layer
Once the painted layer looks tonally correct - meaning the color and light roughly match the surrounding skin - it’s time to add texture back in. Nace brings in a separate reference photo of clean skin to use as a texture source. This is the step that separates a convincing result from an obvious retouch. The painted layer on its own has no pores, no subtle surface variation, nothing that reads as real skin. Placing a skin texture layer over it and blending it in using a blend mode like Soft Light or Overlay, then adjusting opacity to taste, reintroduces that surface quality without blowing out the color work underneath. Match the texture’s scale and direction to the subject’s natural skin as closely as possible.
Second reference image of clean skin placed over the painted layer
Once the painted layer looks tonally correct - meaning the color and light roughly match the surrounding skin - it’s time to add texture back in. Nace brings in a separate reference photo of clean skin to use as a texture source. This is the step that separates a convincing result from an obvious retouch. The painted layer on its own has no pores, no subtle surface variation, nothing that reads as real skin. Placing a skin texture layer over it and blending it in using a blend mode like Soft Light or Overlay, then adjusting opacity to taste, reintroduces that surface quality without blowing out the color work underneath. Match the texture’s scale and direction to the subject’s natural skin as closely as possible.
Step 6: Blend and Finish With Masking
 Layer mask being applied to blend texture layer into painted area
The final pass is about integration. Add a layer mask to your texture layer and use a soft black brush to fade the texture away from the edges of the painted area so it doesn’t create a harsh boundary against the untouched skin. This is also the stage to step back, zoom out, and look at the overall face. Adjust the painted layer’s opacity if the color feels too heavy. Flatten the texture layer if the skin grain looks too prominent. Small nudges here make a big difference in whether the final image reads as natural or retouched.
Layer mask being applied to blend texture layer into painted area
The final pass is about integration. Add a layer mask to your texture layer and use a soft black brush to fade the texture away from the edges of the painted area so it doesn’t create a harsh boundary against the untouched skin. This is also the stage to step back, zoom out, and look at the overall face. Adjust the painted layer’s opacity if the color feels too heavy. Flatten the texture layer if the skin grain looks too prominent. Small nudges here make a big difference in whether the final image reads as natural or retouched.
One Thing I’d Add From My Own Experience
The technique works brilliantly, but skin color temperature varies more than you’d expect between portraits taken in different lighting conditions. When I’ve had to use a reference photo from a separate source rather than the same shoot, I’ll run a quick Hue/Saturation or Curves adjustment on the texture layer, clipped to that layer only, to get the warmth closer to the original before blending. Saves a lot of back-and-forth at the end.
The single biggest takeaway from this tutorial is that painting over a problem and adding texture back are two separate jobs - and treating them as one is why quick fixes usually fall apart. Nail the color first, then worry about making it look like skin.
Watch the full tutorial on YouTube and follow along with PHLEARN’s sample images to see exactly how Aaron Nace pulls this off from start to finish.
Comments (2)
I've watched a dozen tutorials on this and yours is the clearest by far.
Clear and practical. No fluff. Appreciate that.
Leave a Comment