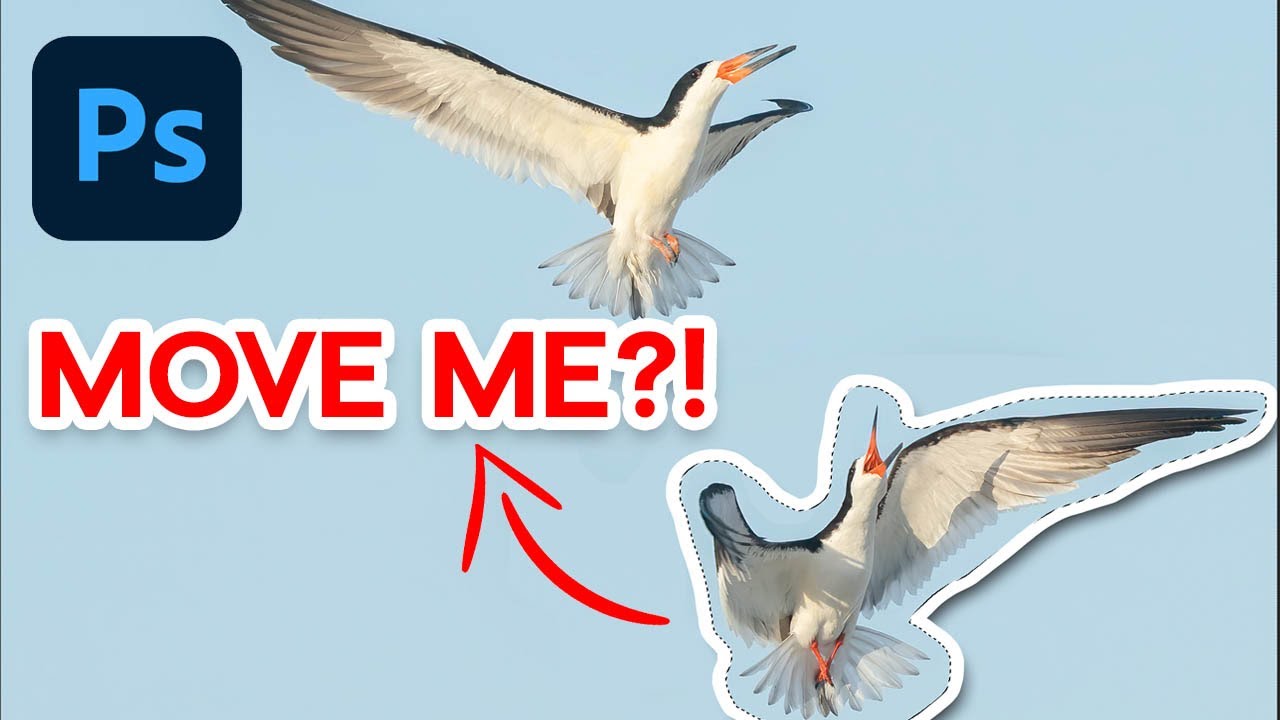
Here’s a confession: for years I treated Content Aware Move like that gym membership I kept paying for but never used. I knew it existed. I’d seen it in the flyout menu tucked under the Spot Healing Brush. I just assumed it was one of those tools that sounds magical in a demo and falls apart the second you try it on a real photo. So I kept defaulting to my trusty Rectangular Marquee and Move Tool combo, patching up the seams afterward with varying degrees of success.
Then I watched Matt Kloskowski work through a wildlife photo, specifically a shot of black skimmers, those shorebirds that skim along the water with their beaks dipped in, and he demonstrated exactly why this tool earns its place in a real editing workflow. Watch the full tutorial on YouTube – it’s short, practical, and changed how I think about moving subjects around in a frame.
The goal in the tutorial is simple: two birds in mid-air confrontation, but too far apart for the photo to feel tense. Move them closer, and suddenly there’s a story. Matt walks through two methods. The first is the Marquee approach most of us already know. The second, using Content Aware Move, is the one worth slowing down for. Here’s how to do it yourself.
Step 1: Understand the Problem the Old Way Creates
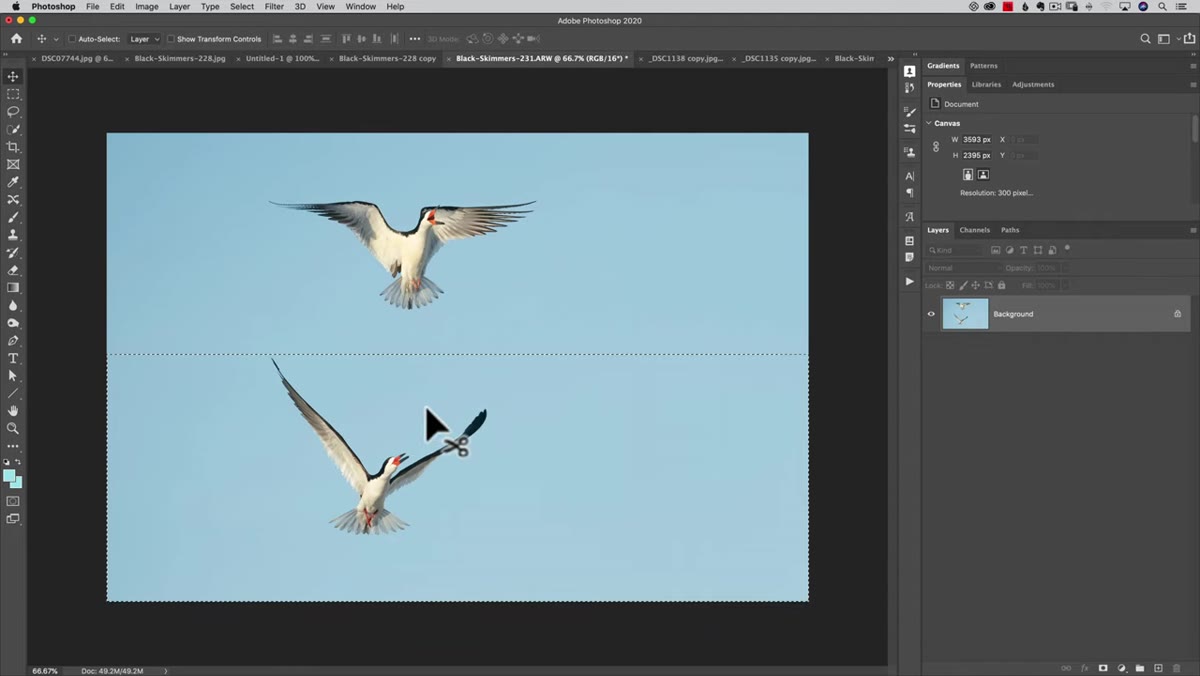 Seam visible after moving bird with Rectangular Marquee
Before diving into Content Aware Move, it helps to understand why the basic method falls short. With the Rectangular Marquee Tool selected, you draw a selection around your subject, then grab the Move Tool and drag. If the background is clean and consistent, like an open sky, it works reasonably well. But you’ll almost always end up with a faint seam where the pixels from the original location get smeared or mismatched along the selection edge. On a busy background, that seam becomes a patching job. On a clean sky, it’s subtle but noticeable to anyone who’s looking. It’s the editing equivalent of almost getting away with something.
Seam visible after moving bird with Rectangular Marquee
Before diving into Content Aware Move, it helps to understand why the basic method falls short. With the Rectangular Marquee Tool selected, you draw a selection around your subject, then grab the Move Tool and drag. If the background is clean and consistent, like an open sky, it works reasonably well. But you’ll almost always end up with a faint seam where the pixels from the original location get smeared or mismatched along the selection edge. On a busy background, that seam becomes a patching job. On a clean sky, it’s subtle but noticeable to anyone who’s looking. It’s the editing equivalent of almost getting away with something.
Step 2: Find the Content Aware Move Tool
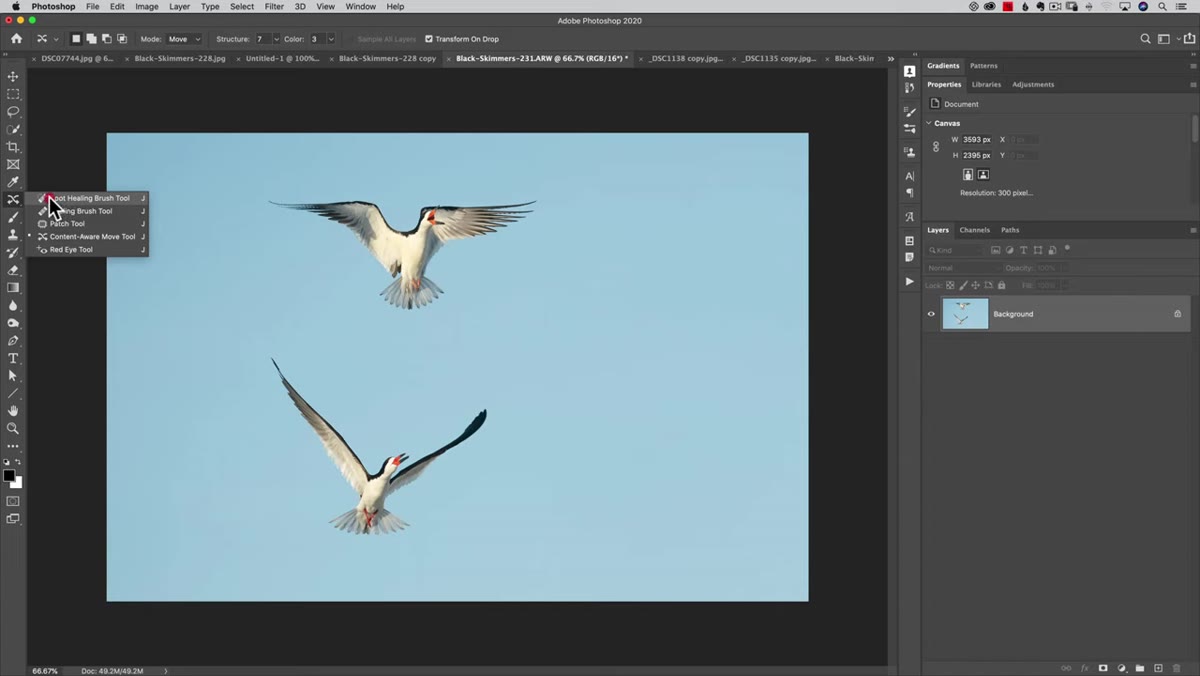 Content Aware Move tool selected in Spot Healing Brush flyout
The Content Aware Move Tool lives in the same group as the Spot Healing Brush. In the toolbar, click and hold on the Spot Healing Brush (or press J and then hold the tool icon) to open the flyout menu. It’s usually near the bottom of that group. You’ll see the icon looks like a cursor with a two-headed arrow. Select it, and check your options bar at the top of the screen. The Mode dropdown should be set to “Move,” not “Extend.” Move is what you want when you’re relocating a subject entirely. Extend is for stretching or duplicating.
Content Aware Move tool selected in Spot Healing Brush flyout
The Content Aware Move Tool lives in the same group as the Spot Healing Brush. In the toolbar, click and hold on the Spot Healing Brush (or press J and then hold the tool icon) to open the flyout menu. It’s usually near the bottom of that group. You’ll see the icon looks like a cursor with a two-headed arrow. Select it, and check your options bar at the top of the screen. The Mode dropdown should be set to “Move,” not “Extend.” Move is what you want when you’re relocating a subject entirely. Extend is for stretching or duplicating.
Step 3: Draw a Loose Lasso Around Your Subject
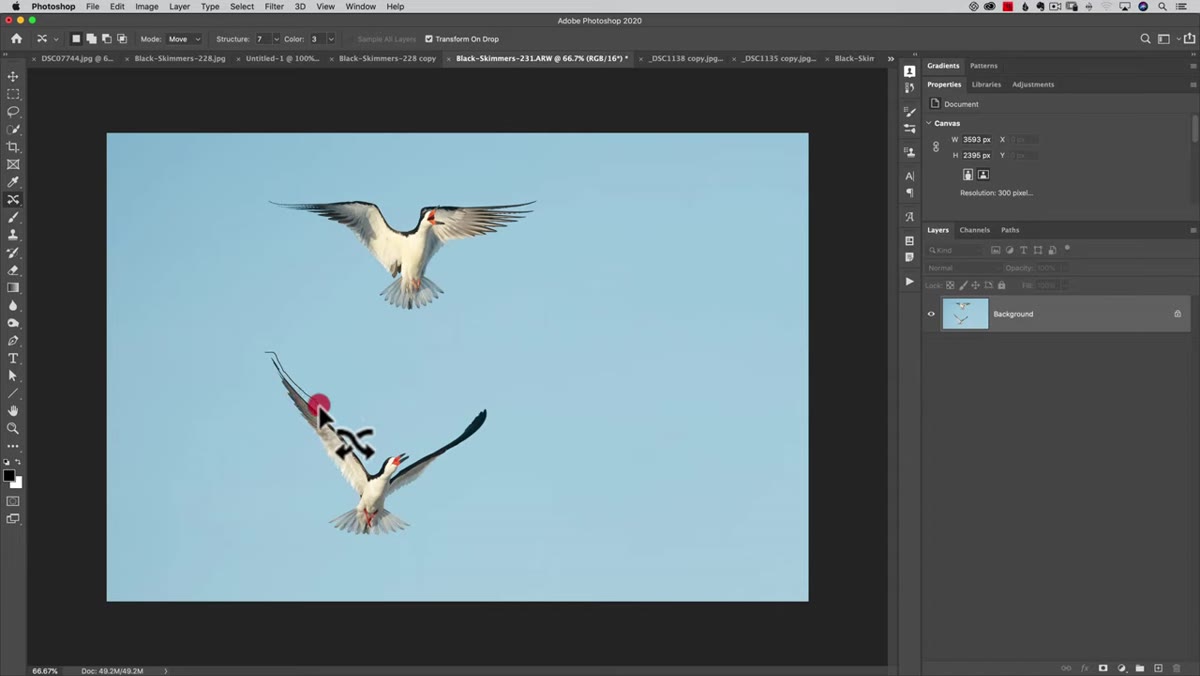 Lasso selection drawn around the upper bird
This tool doesn’t use a box selection. It uses a freehand lasso, and honestly that’s one of the things that makes it better suited to organic shapes like birds, people, or animals. Click and drag to draw a rough outline around the subject you want to move. You don’t need to be precise. In fact, leaving a little breathing room around the edges actually helps the algorithm blend things out. For the tighter side of the subject, where it’s closer to another element you care about, try to keep the selection reasonably snug. On the side that’s just open background, you can be as casual as you like.
Lasso selection drawn around the upper bird
This tool doesn’t use a box selection. It uses a freehand lasso, and honestly that’s one of the things that makes it better suited to organic shapes like birds, people, or animals. Click and drag to draw a rough outline around the subject you want to move. You don’t need to be precise. In fact, leaving a little breathing room around the edges actually helps the algorithm blend things out. For the tighter side of the subject, where it’s closer to another element you care about, try to keep the selection reasonably snug. On the side that’s just open background, you can be as casual as you like.
Step 4: Position Your Cursor and Drag
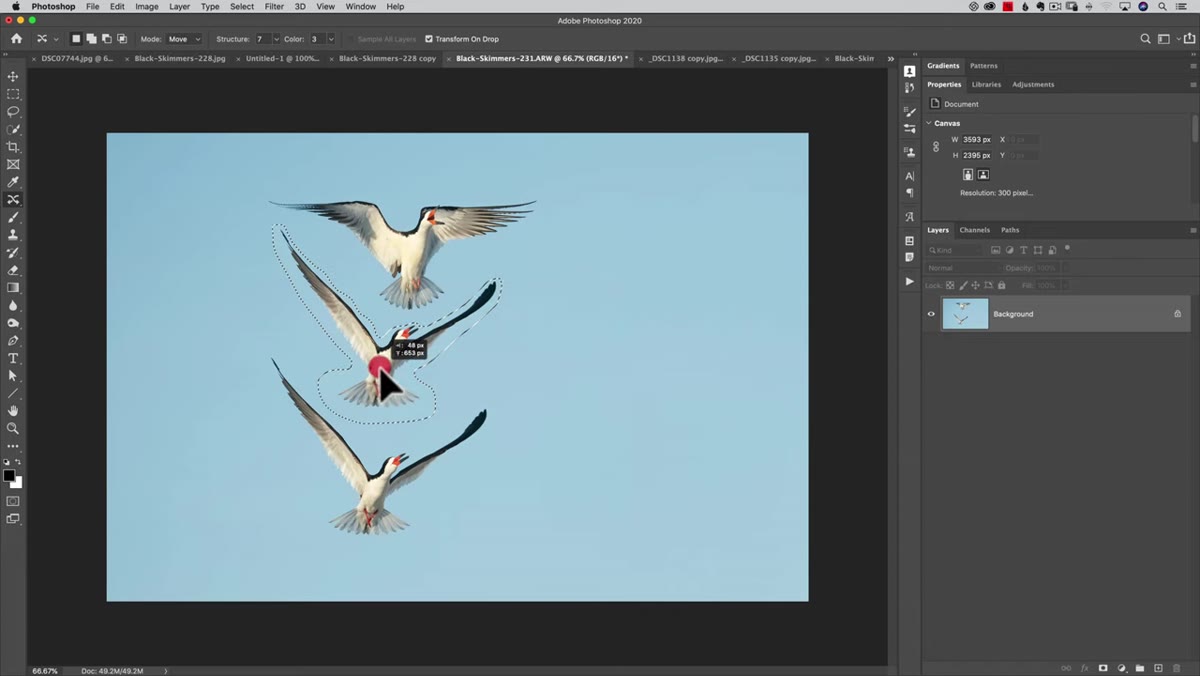 Cursor placed inside selection, bird being dragged closer
Once your selection is drawn, place your cursor inside the selected area. You’ll see it changes to indicate you can move the content. Click and drag to reposition the subject wherever you want it in the frame. In the tutorial, Matt pulls the upper bird closer to the lower one so it looks like a genuine mid-air dispute rather than two birds happening to be in the same zip code. Take your time here. You can nudge the position incrementally before committing, so try a few placements until the composition feels right.
Cursor placed inside selection, bird being dragged closer
Once your selection is drawn, place your cursor inside the selected area. You’ll see it changes to indicate you can move the content. Click and drag to reposition the subject wherever you want it in the frame. In the tutorial, Matt pulls the upper bird closer to the lower one so it looks like a genuine mid-air dispute rather than two birds happening to be in the same zip code. Take your time here. You can nudge the position incrementally before committing, so try a few placements until the composition feels right.
Step 5: Commit the Move with the Checkmark
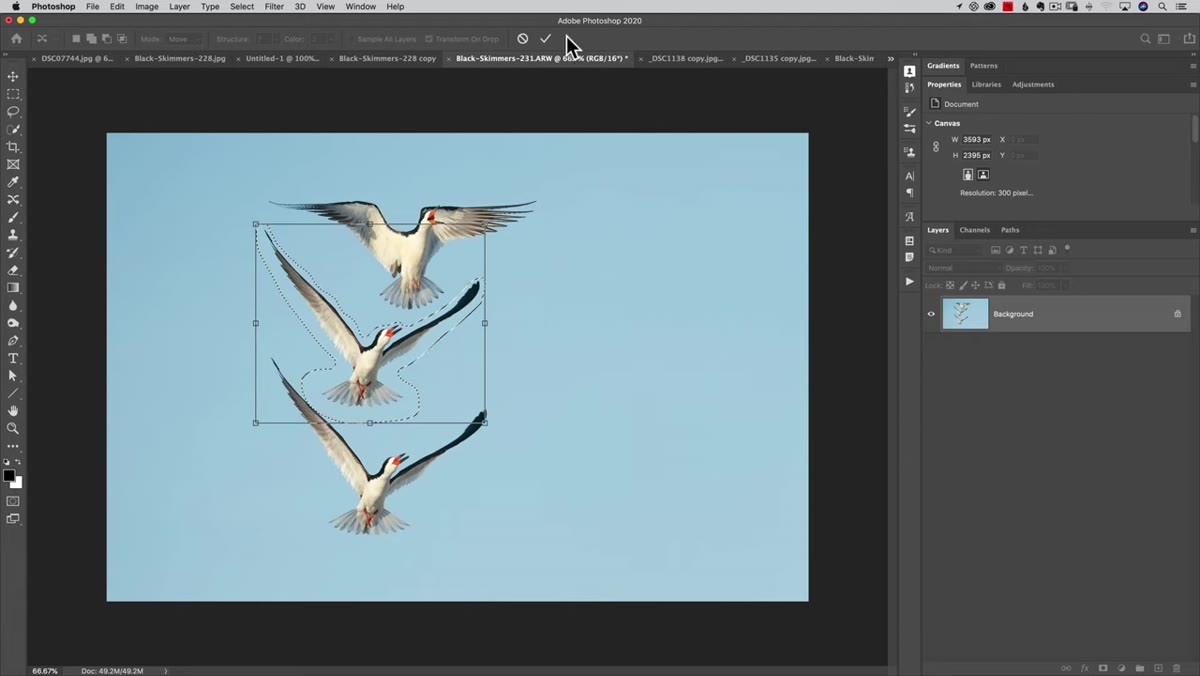 Checkmark in options bar being used to commit the transformation
When you’re happy with the placement, don’t just click somewhere else to deselect. Hit the checkmark in the top options bar, the same one you’d use to confirm a Free Transform. This is what actually triggers the content-aware fill to do its job. Photoshop fills in the area where the subject used to be and blends the moved subject into its new location. Depending on the complexity of your background, this can take a second or two to process. On a clean gradient sky, it’s usually clean enough to use with minimal cleanup.
Checkmark in options bar being used to commit the transformation
When you’re happy with the placement, don’t just click somewhere else to deselect. Hit the checkmark in the top options bar, the same one you’d use to confirm a Free Transform. This is what actually triggers the content-aware fill to do its job. Photoshop fills in the area where the subject used to be and blends the moved subject into its new location. Depending on the complexity of your background, this can take a second or two to process. On a clean gradient sky, it’s usually clean enough to use with minimal cleanup.
Step 6: Clean Up Any Remaining Artifacts
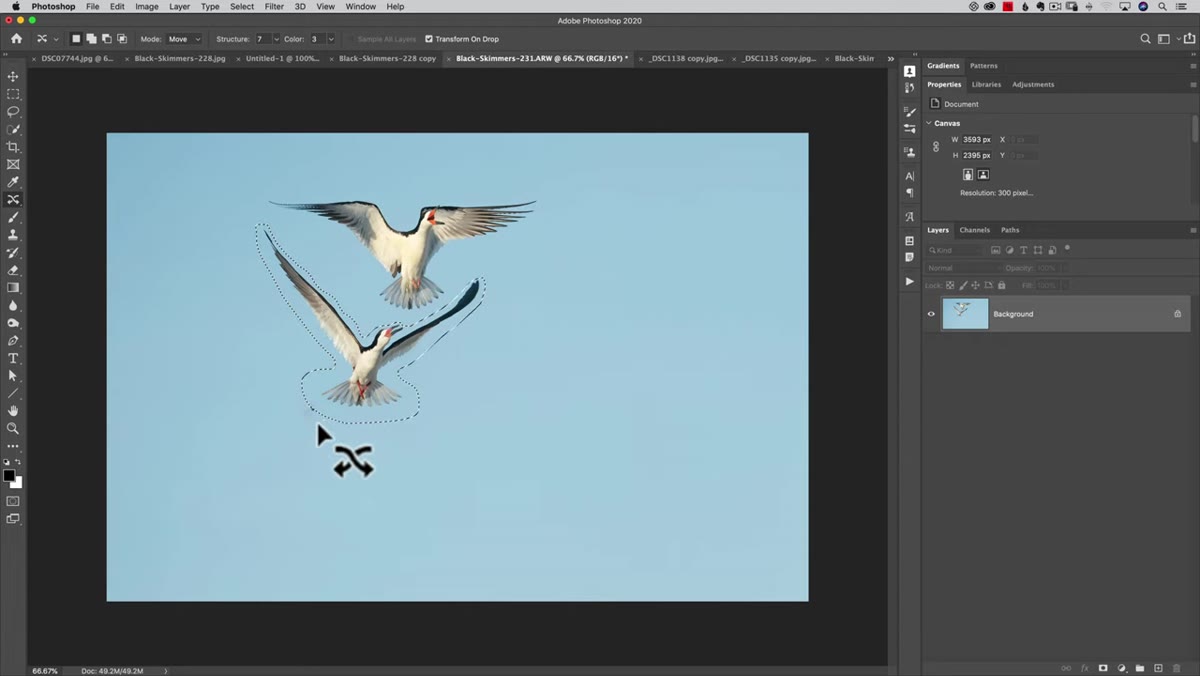 Slight color splotch left behind after content aware move completes
Even with a great background, you might end up with a small color cast or soft splotch where the subject originated. This is normal and not a reason to panic. A quick pass with the Spot Healing Brush usually handles it. Select a brush size slightly larger than the problem area, click once or twice, and Photoshop fills it using surrounding pixel information. For slightly larger issues, the Patch Tool works well too. Draw a selection around the bad area, then drag it to a clean part of the background to sample from. Crop out any dead space at the edges if the move left blank canvas.
Slight color splotch left behind after content aware move completes
Even with a great background, you might end up with a small color cast or soft splotch where the subject originated. This is normal and not a reason to panic. A quick pass with the Spot Healing Brush usually handles it. Select a brush size slightly larger than the problem area, click once or twice, and Photoshop fills it using surrounding pixel information. For slightly larger issues, the Patch Tool works well too. Draw a selection around the bad area, then drag it to a clean part of the background to sample from. Crop out any dead space at the edges if the move left blank canvas.
Where I’d Take This Further
One thing the tutorial doesn’t cover, but that I’ve found useful: duplicate your background layer before running any Content Aware Move operation. The tool edits destructively by default on a flattened layer, and if the result isn’t what you hoped, you want an easy undo path. More than once I’ve run a content-aware operation, thought it looked fine, kept working, and then realized 20 minutes later there was a weird artifact hiding near an edge. Having that original layer sitting below is cheap insurance.
Also worth knowing: Content Aware Move handles solid, even backgrounds much better than complex ones. Open sky, clean water, simple gradients, those are where it shines. If you’re trying to move a subject across a busy textured background, you’ll spend more time cleaning up than the tool saves you. Know when to reach for it and when to go back to basics.
The single most important thing I took from this tutorial is that Content Aware Move isn’t a tool for every photo. It’s a tool for the right photo, and recognizing which photos qualify is half the skill. Clean backgrounds, strong separation between subject and surroundings, and a clear destination for the subject to land – check those three boxes and this tool will save you serious time.
Watch the full tutorial on YouTube to see Matt walk through the full before and after, including the comparison between the Marquee method and the Content Aware approach side by side.
Comments
Leave a Comment