There’s a very specific kind of frustration that comes from watching Photoshop confidently replace a distracting branch with a smear of abstract garbage. You ran the tool. You did the thing. The thing looked terrible. And now you’re sitting in a coffee shop wondering if you should just clone stamp it by hand like it’s 2009. I’ve been there more times than I’d like to admit.
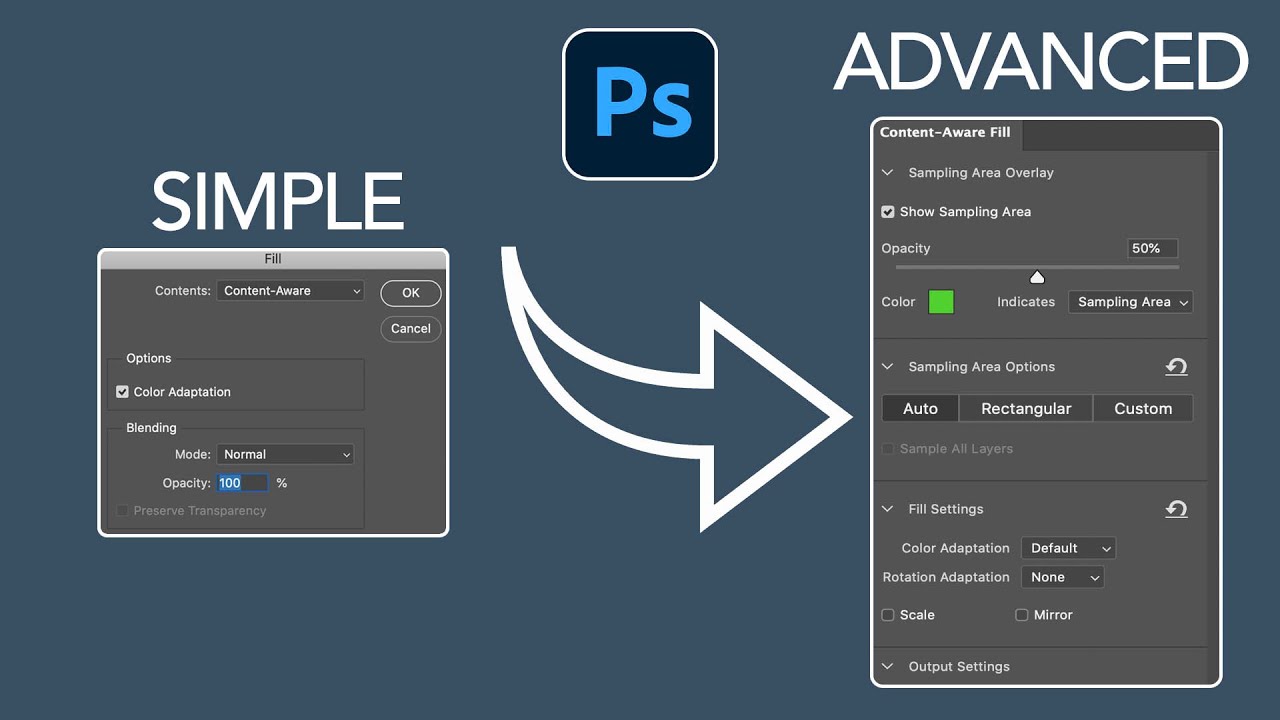
What I didn’t realize for a long time is that Content Aware Fill isn’t one tool with one behavior. It’s two different workflows, with meaningfully different levels of control. Matt Kloskowski lays this out cleanly in his tutorial, and once I understood the split, my whole approach to cleanup retouching changed. Watch the full tutorial on YouTube if you want to see his examples side by side, but here’s the full walkthrough.
The short version: the quick method is fast and surprisingly powerful when conditions are right. The advanced method hands you the controls when they aren’t. Knowing which to reach for, and when to switch, is the actual skill.
Step 1: Make a Loose Selection with the Lasso Tool
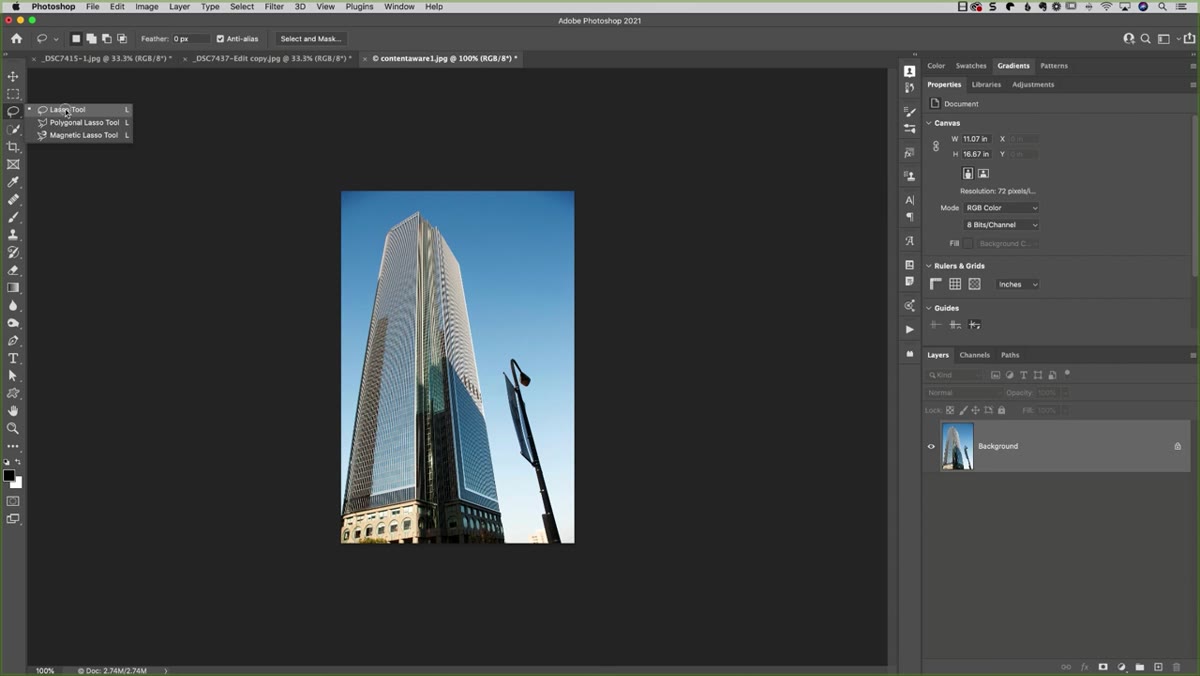 Lasso tool active, loose selection drawn around distraction
Grab the Lasso tool (keyboard shortcut: L) and draw a rough selection around whatever you want to remove. Deliberately loose is the right call here. You’re not tracing the object, you’re just flagging the general area. Tight, precise selections tend to leave seams. Give the tool some breathing room.
Lasso tool active, loose selection drawn around distraction
Grab the Lasso tool (keyboard shortcut: L) and draw a rough selection around whatever you want to remove. Deliberately loose is the right call here. You’re not tracing the object, you’re just flagging the general area. Tight, precise selections tend to leave seams. Give the tool some breathing room.
This applies to both methods, so get comfortable with it. The selection is the thing you’re always doing first, no matter where you go after that.
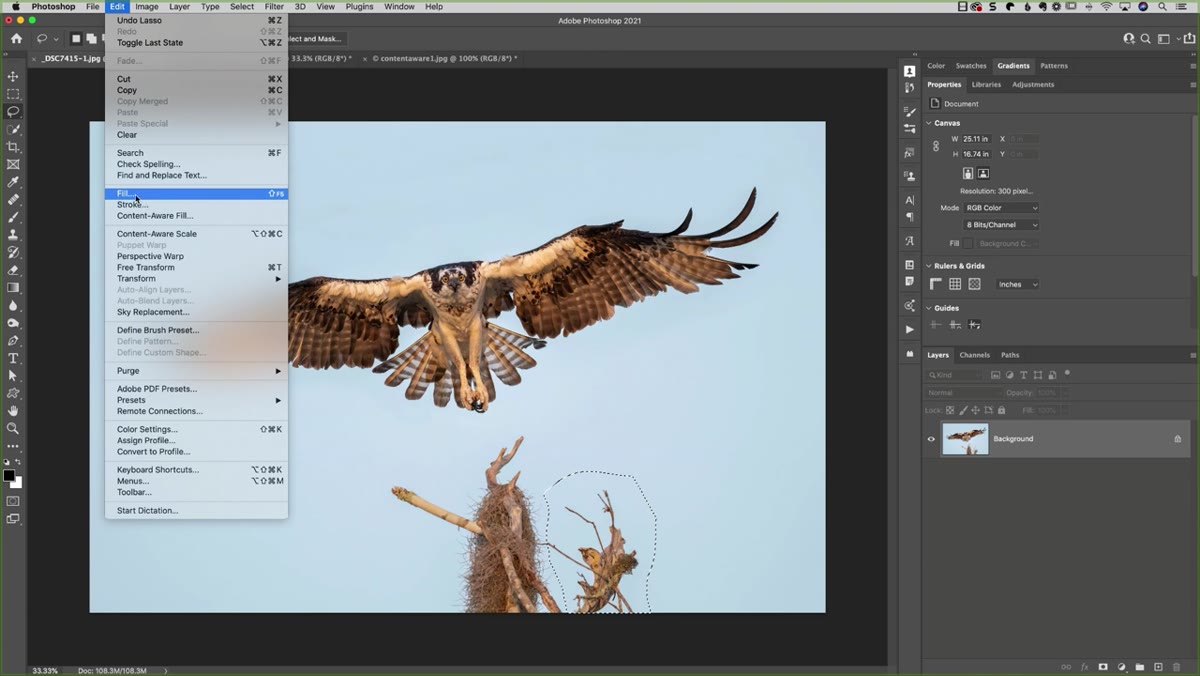
Step 2: Run the Quick Fill via the Edit Menu (or Better, the Keyboard Shortcut)
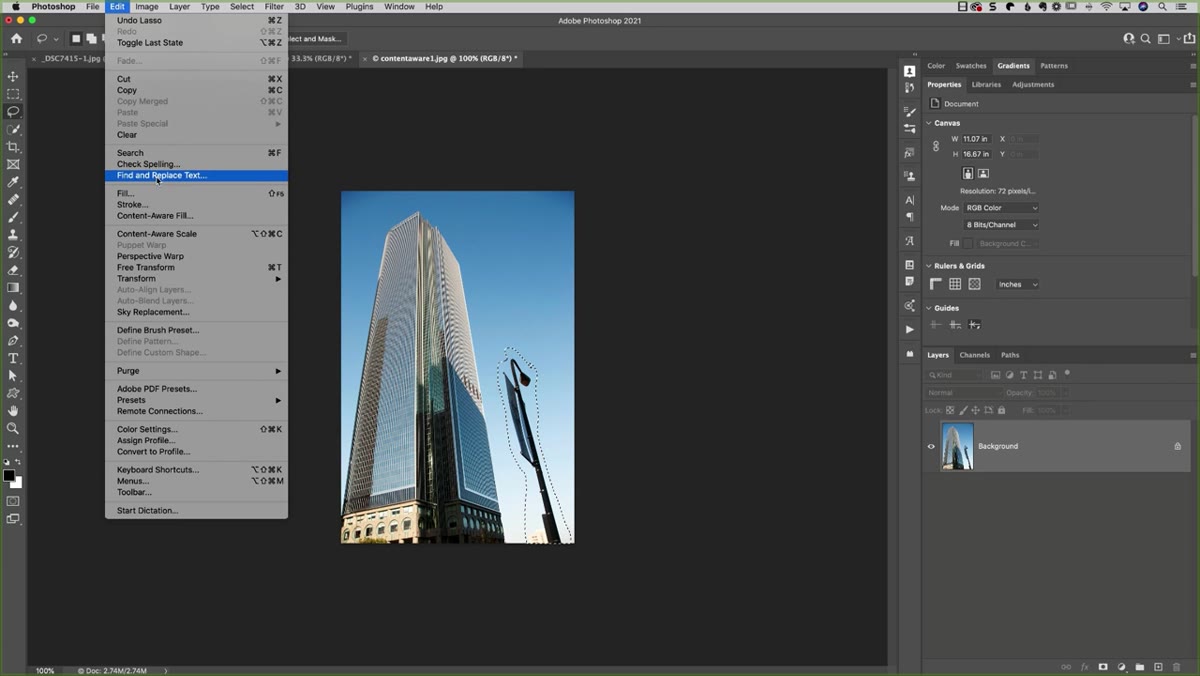 Edit menu open, Fill option highlighted
Once your selection is active, go to Edit, then Fill. In the Fill dialog, change the Contents dropdown to Content-Aware and hit OK. Photoshop analyzes the surrounding pixels and replaces your selection with its best reconstruction. Then go to Select, Deselect, and see what you’ve got.
Edit menu open, Fill option highlighted
Once your selection is active, go to Edit, then Fill. In the Fill dialog, change the Contents dropdown to Content-Aware and hit OK. Photoshop analyzes the surrounding pixels and replaces your selection with its best reconstruction. Then go to Select, Deselect, and see what you’ve got.
That’s the long way. The fast way is to skip the menu entirely. After you draw your selection, hit Shift+Delete on Mac or Shift+Backspace on PC, choose Content-Aware in the dialog, and hit Enter. It takes about three seconds total. For clean, simple backgrounds with consistent tones, this is genuinely impressive. The tool earns its reputation here.
Step 3: Recognize When the Quick Method Is Working (and When It Isn’t)
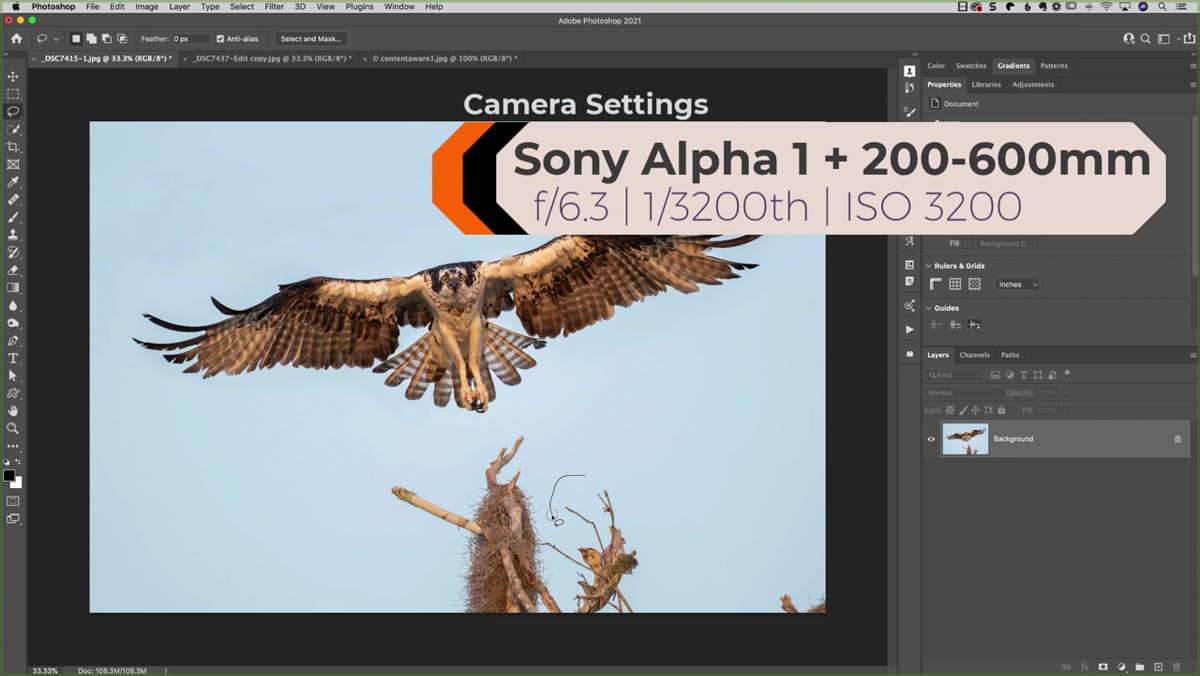 Content Aware Fill result showing unwanted pixels pulled in from elsewhere
This is the step most tutorials skip, and it’s the one that actually saves you time. The quick method works beautifully when there’s a lot of similar, continuous texture around your subject. A bird against open sky, a person standing in front of a plain wall, a rock on a sandy beach. Photoshop can sample confidently because there’s not much variation nearby.
Content Aware Fill result showing unwanted pixels pulled in from elsewhere
This is the step most tutorials skip, and it’s the one that actually saves you time. The quick method works beautifully when there’s a lot of similar, continuous texture around your subject. A bird against open sky, a person standing in front of a plain wall, a rock on a sandy beach. Photoshop can sample confidently because there’s not much variation nearby.
It starts falling apart when there are competing elements close to your selection. If there’s a tree branch near the edge, or a shoreline, or any hard boundary, Photoshop is basically guessing with incomplete information and it will sometimes pull in completely wrong material. When you see that happen, don’t keep trying to wrestle the quick method into working. That’s when you switch.
Step 4: Open the Content Aware Fill Workspace
 Content Aware Fill workspace panel open on screen
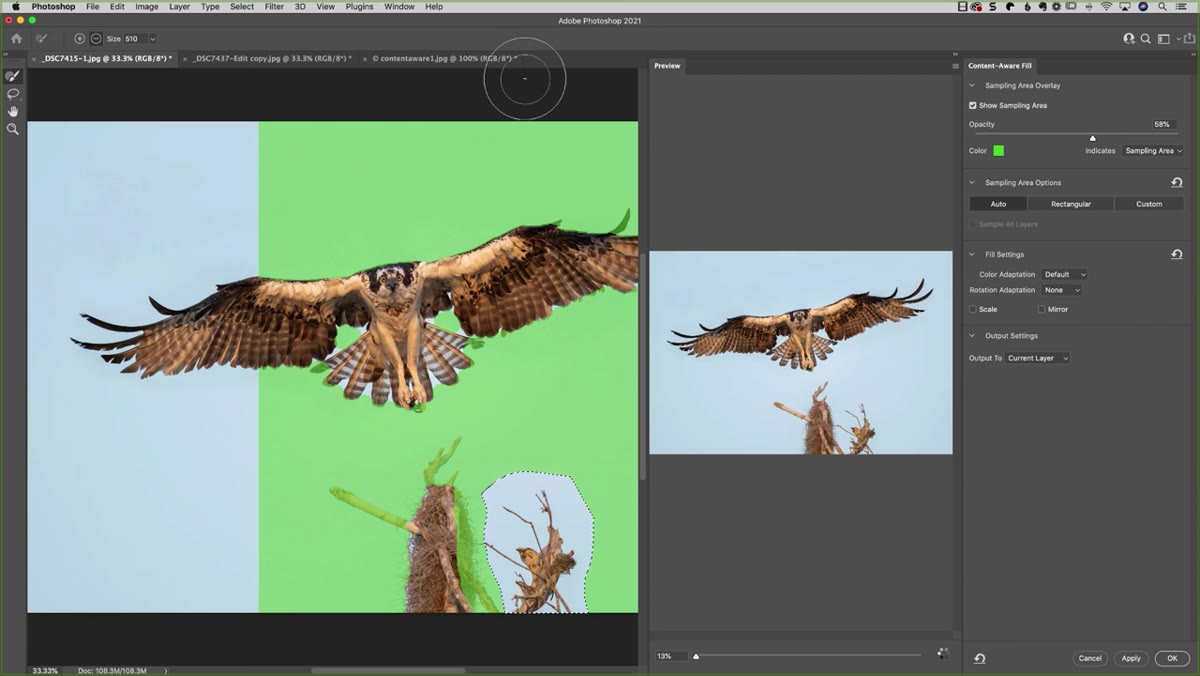
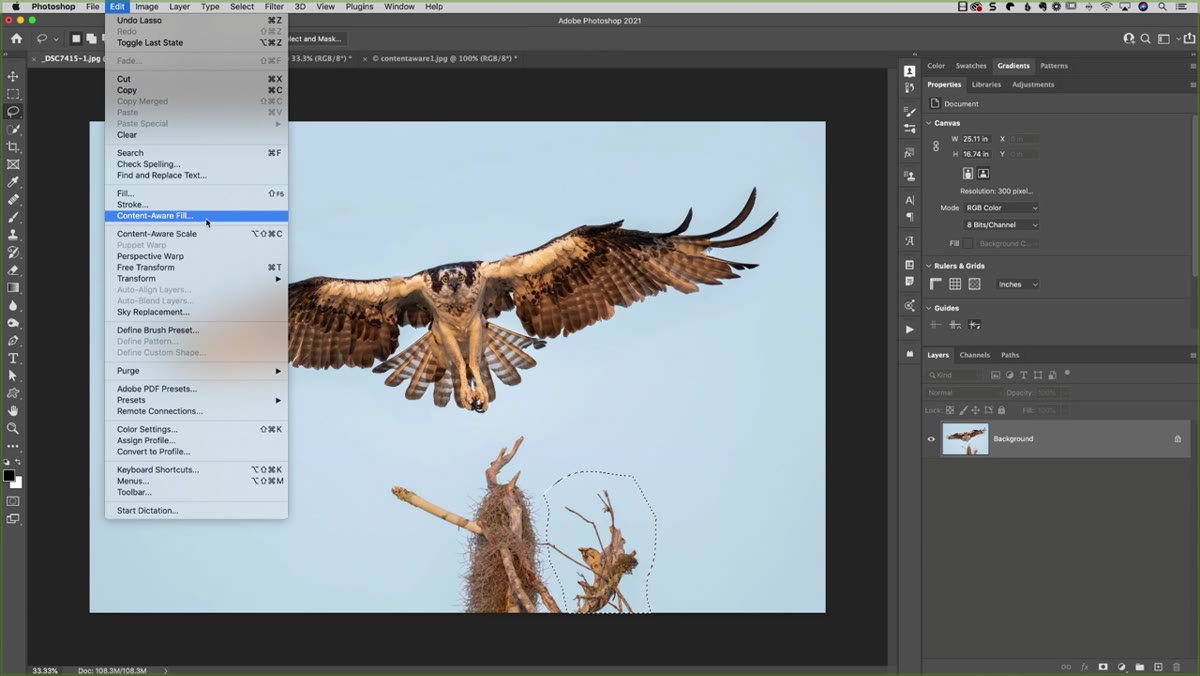
When the quick method makes a mess, go to Edit and look just below Fill. You’ll see a separate option labeled Content-Aware Fill. This opens a dedicated full-panel workspace, which is a different experience entirely from the dialog box.
Content Aware Fill workspace panel open on screen
When the quick method makes a mess, go to Edit and look just below Fill. You’ll see a separate option labeled Content-Aware Fill. This opens a dedicated full-panel workspace, which is a different experience entirely from the dialog box.
The workspace gives you a green overlay on your canvas that shows Photoshop which parts of the image it’s allowed to sample from when filling your selection. That’s the key difference. Instead of the tool grabbing whatever it thinks is relevant, you get to tell it where to look. This is the thing that changes everything on complex images.
Step 5: Paint Out the Sampling Area to Guide Photoshop
 Green overlay on image with sampling brush being used to exclude areas
On the left side of the workspace, you’ll have a sampling brush. By default, the green overlay covers almost the entire image. If there are elements near your subject that you don’t want Photoshop pulling from, paint over them with the brush in subtract mode to remove them from the sampling area.
Green overlay on image with sampling brush being used to exclude areas
On the left side of the workspace, you’ll have a sampling brush. By default, the green overlay covers almost the entire image. If there are elements near your subject that you don’t want Photoshop pulling from, paint over them with the brush in subtract mode to remove them from the sampling area.
This is precise, intentional control. If you’re removing a stump from under a bird and there’s water to the left that keeps bleeding in, you paint out the water from the sample zone. Now Photoshop is only reconstructing from the pixels you’re actually pointing it toward. The results jump dramatically in quality as soon as you start doing this.
Step 6: Check the Preview and Apply
 Live preview pane showing the filled result in the workspace
The Content-Aware Fill workspace has a live preview panel on the right. As you adjust your sampling area, the preview updates in real time. You can see exactly what Photoshop intends to do before you commit. This alone makes the advanced method worth using over the quick method on anything remotely tricky.
Live preview pane showing the filled result in the workspace
The Content-Aware Fill workspace has a live preview panel on the right. As you adjust your sampling area, the preview updates in real time. You can see exactly what Photoshop intends to do before you commit. This alone makes the advanced method worth using over the quick method on anything remotely tricky.
When the preview looks right, click Apply. The fill gets rendered to your image and you can close the workspace. Deselect your selection and you’re done. Clean, controlled, and you can see what you’re getting before it happens.
What I’d Add From My Own Experience
The quick method has one more thing going for it that the tutorial touches on but is worth spelling out: speed on layered, nondestructive files. If you’re working smart (new layers, nothing baked in permanently), you can burn through five or six quick fills in a row and undo any that don’t land. It becomes an exploratory tool, not a commitment.
Where I’ve learned to be disciplined is stopping myself from running the quick method twice on the same spot when it didn’t work the first time. More attempts with the same limited information doesn’t produce better information. When I catch myself doing that, it’s a sign to open the workspace and actually look at what Photoshop is sampling from. Nine times out of ten, there’s something just outside my selection that the tool keeps reaching for, and painting it out takes ten seconds.
Strong opinions about keyboard shortcuts are just part of how I work at this point, and Shift+Delete is one I actually use every single session. But knowing when to put the shortcut away and open the proper tool is the more valuable habit.
The real lesson here is that “Content Aware Fill didn’t work” usually means you used the wrong version of it for the situation. The quick method and the workspace method are genuinely different tools, and matching them to the right job makes you faster than trying to muscle one of them into doing the other’s work.
Watch the full tutorial on YouTube to see Matt walk through both methods with real photos. His examples make the difference between the two immediately obvious in a way that’s hard to describe in text.
Comments
Leave a Comment