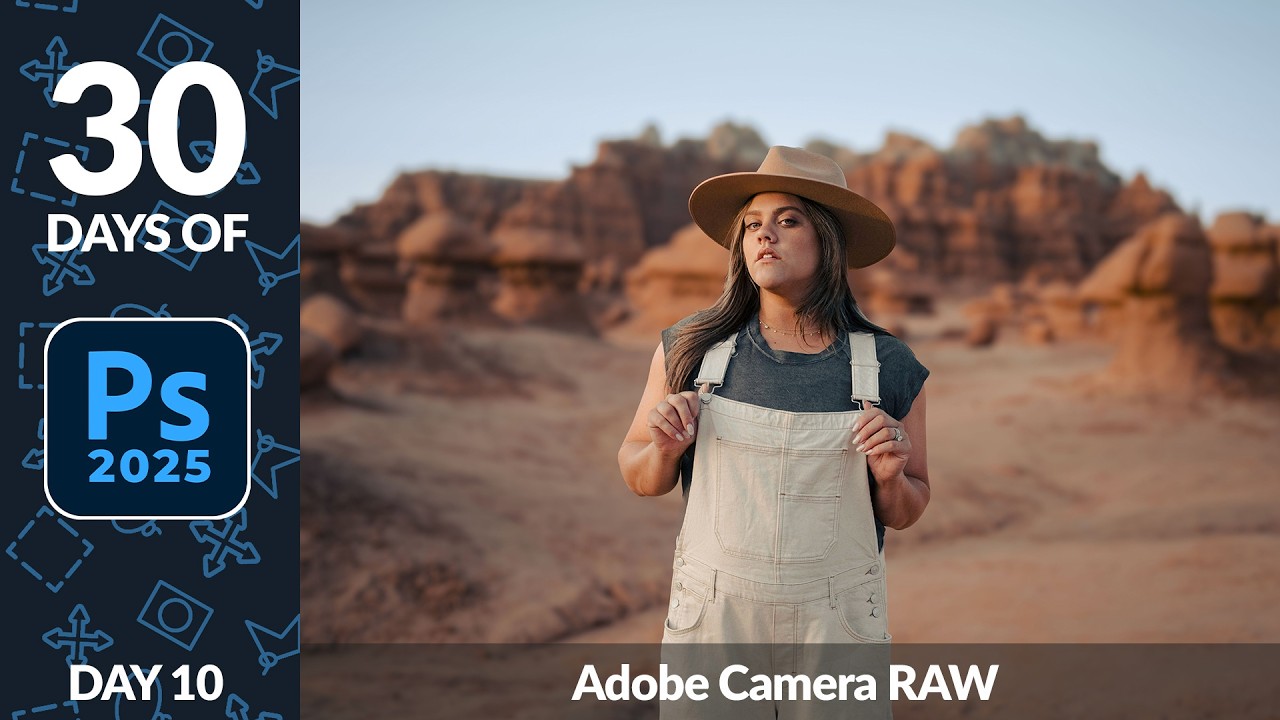
I spent the better part of three years doing things the hard way in Photoshop. Manually painting masks for background blur. Dragging Hue/Saturation sliders trying to isolate a sky without torching the rest of the image. Stacking adjustment layers like I was building a skyscraper out of toothpicks. It worked, mostly, but it was slow and fragile. One wrong move and the whole thing collapsed. That’s actually how I learned about smart objects, after accidentally flattening a client’s project file and spending the next two hours trying to reconstruct it from a JPEG export. Not my finest Tuesday.
So when I came across this Aaron Nace tutorial from PHLEARN’s 30 Days of Photoshop series, I almost scrolled past it. Camera Raw? I thought that was just for Lightroom people. Turns out I was completely wrong, and Adobe Camera Raw inside Photoshop is genuinely one of the most capable editing environments I’ve ignored for years. Watch the full tutorial on YouTube and you’ll see what I mean in about ten minutes flat.
The workflow Aaron walks through hits three common editing challenges: background separation, sky color, and subject lighting. None of it requires a single selection brush or blend mode argument with yourself at 1am. Here’s how it works.
Step 1: Convert Your Layer to a Smart Object First
 Converting background layer to Smart Object via Filter menu
Before you touch Camera Raw, convert your background layer to a Smart Object. Go to Filter, then choose “Convert for Smart Filters.” This single step is what separates a flexible, revisable edit from one you’re committed to forever. Once it’s a Smart Object, the Camera Raw filter you’re about to apply gets attached as an editable layer, not baked in. You can double-click it any time and tweak your settings. If you’ve ever wished you could go back and adjust an edit from three steps ago, this is how.
Converting background layer to Smart Object via Filter menu
Before you touch Camera Raw, convert your background layer to a Smart Object. Go to Filter, then choose “Convert for Smart Filters.” This single step is what separates a flexible, revisable edit from one you’re committed to forever. Once it’s a Smart Object, the Camera Raw filter you’re about to apply gets attached as an editable layer, not baked in. You can double-click it any time and tweak your settings. If you’ve ever wished you could go back and adjust an edit from three steps ago, this is how.
Step 2: Open the Camera Raw Filter
 Camera Raw filter dialog opening from Filter menu
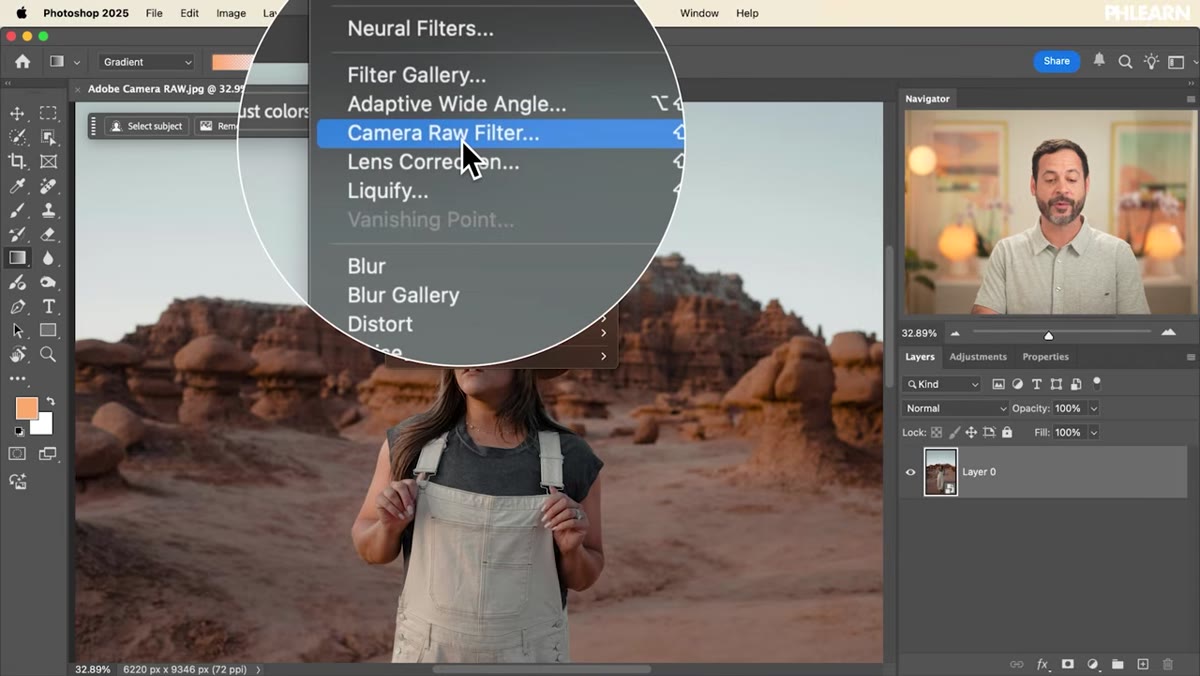
With your Smart Object selected, go back to Filter and this time choose “Camera Raw Filter.” The Camera Raw workspace opens up, and if you’ve spent any time in Lightroom, it’s going to feel immediately familiar. If you haven’t, think of it as a dedicated photo editing panel that lives inside Photoshop. All the heavy-hitting sliders, exposure, highlights, shadows, color temperature, are here, plus some tools that go well beyond what you’d find in a basic adjustment layer.
Camera Raw filter dialog opening from Filter menu
With your Smart Object selected, go back to Filter and this time choose “Camera Raw Filter.” The Camera Raw workspace opens up, and if you’ve spent any time in Lightroom, it’s going to feel immediately familiar. If you haven’t, think of it as a dedicated photo editing panel that lives inside Photoshop. All the heavy-hitting sliders, exposure, highlights, shadows, color temperature, are here, plus some tools that go well beyond what you’d find in a basic adjustment layer.
Step 3: Apply Lens Blur for Background Separation
 Lens blur panel showing automatic subject detection applied
In the right-hand panel, find the “Lens Blur” section. Click “Apply” and Camera Raw automatically detects your subject and blurs the background around them. The first time I saw this I genuinely laughed. I have spent hours with the Pen tool doing this manually. The AI subject detection is solid, but Aaron’s tip here is a good one: use the focal point icon and click and drag it directly over your subject’s face to help the detection refine its edges. From there, you’ve got a blur amount slider to control how aggressive the effect is. There’s also a bokeh shape selector if you want the out-of-focus highlights to have a specific character, round, hexagonal, and so on. Keep it subtle. A background blur that announces itself is worse than no blur at all.
Lens blur panel showing automatic subject detection applied
In the right-hand panel, find the “Lens Blur” section. Click “Apply” and Camera Raw automatically detects your subject and blurs the background around them. The first time I saw this I genuinely laughed. I have spent hours with the Pen tool doing this manually. The AI subject detection is solid, but Aaron’s tip here is a good one: use the focal point icon and click and drag it directly over your subject’s face to help the detection refine its edges. From there, you’ve got a blur amount slider to control how aggressive the effect is. There’s also a bokeh shape selector if you want the out-of-focus highlights to have a specific character, round, hexagonal, and so on. Keep it subtle. A background blur that announces itself is worse than no blur at all.
Step 4: Mask the Sky and Shift Its Color
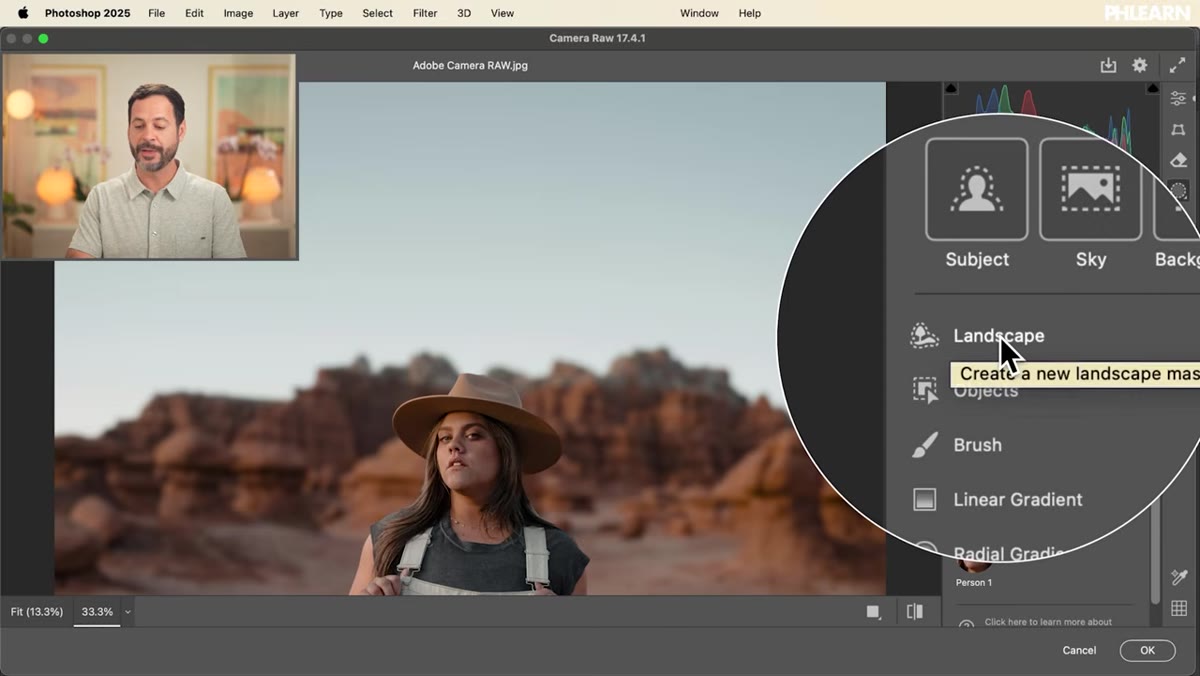 Sky mask created via landscape masking tool in Camera Raw
Close the Lens Blur panel and navigate to the Masking tools (the icon looks like a dotted circle with a person). Select “Landscape Masking,” which is one of Camera Raw’s newer additions. You’ll get options to isolate the sky, mountains, or ground automatically. Choose Sky, hit Create, and Camera Raw builds a precise mask of just the sky in seconds. Now you can adjust only that region without touching anything else. Aaron pulls the highlights down to darken the sky slightly, then moves the color temperature slider toward blue. The combination gives you a richer, more saturated sky that feels natural rather than painted. The before and after is legitimately impressive for about ten seconds of work.
Sky mask created via landscape masking tool in Camera Raw
Close the Lens Blur panel and navigate to the Masking tools (the icon looks like a dotted circle with a person). Select “Landscape Masking,” which is one of Camera Raw’s newer additions. You’ll get options to isolate the sky, mountains, or ground automatically. Choose Sky, hit Create, and Camera Raw builds a precise mask of just the sky in seconds. Now you can adjust only that region without touching anything else. Aaron pulls the highlights down to darken the sky slightly, then moves the color temperature slider toward blue. The combination gives you a richer, more saturated sky that feels natural rather than painted. The before and after is legitimately impressive for about ten seconds of work.
Step 5: Add a Radial Gradient to Draw Attention to Your Subject
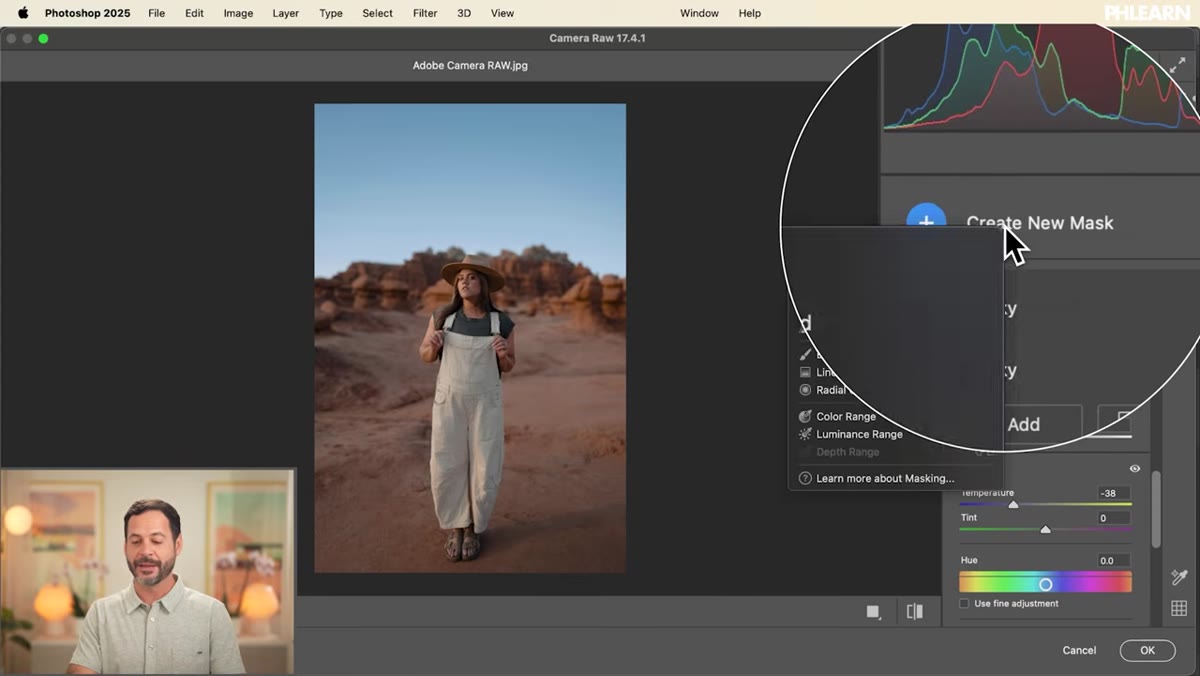 Radial gradient mask dragged over subject with exposure raised
Go back to the masking panel and choose “Create New Mask,” then select “Radial Gradient.” Click and drag from the center of your subject outward to define the gradient’s reach. Once it’s placed, bring up the Exposure slider. What you’re doing is creating a subtle bright spot centered on your subject, the kind of directional light that makes a portrait feel intentional rather than flat. It doesn’t need to be dramatic. A small bump in exposure is enough to give the viewer’s eye somewhere to land. Think of it as the photographic equivalent of a spotlight on a very small dimmer setting.
Radial gradient mask dragged over subject with exposure raised
Go back to the masking panel and choose “Create New Mask,” then select “Radial Gradient.” Click and drag from the center of your subject outward to define the gradient’s reach. Once it’s placed, bring up the Exposure slider. What you’re doing is creating a subtle bright spot centered on your subject, the kind of directional light that makes a portrait feel intentional rather than flat. It doesn’t need to be dramatic. A small bump in exposure is enough to give the viewer’s eye somewhere to land. Think of it as the photographic equivalent of a spotlight on a very small dimmer setting.
One Thing I’d Add: Stack Your Camera Raw Edits with a Duplicate Smart Object
Here’s where my own workflow has evolved since going through this tutorial. Because Camera Raw is applied as a Smart Filter on a Smart Object, all your edits are bundled together in one filter instance. That works great, but it also means your lens blur, sky mask, and radial gradient are all tied to the same layer. If you want more granular control, for example, to mask or fade just the blur independently from the color grade, duplicate the Smart Object layer first and apply different Camera Raw edits to each copy. You can then use layer masks or blending modes to composite them together. It’s a bit more setup, but on commercial work where a client might ask you to pull back just the blur without touching the color, you’ll thank yourself later.
The single biggest takeaway from this tutorial is that Adobe Camera Raw isn’t a tool you use before Photoshop. It’s a tool you use inside Photoshop, as a Smart Filter, which means it fits neatly into a non-destructive layer-based workflow you’re probably already using. The masking tools, especially landscape masking and radial gradients, are fast enough that they’ve replaced a lot of what I used to do with manual selections. It won’t replace precision work on complex composites, but for portrait retouching and photo enhancement, it’s the most efficient path I’ve found.
Watch the full tutorial on YouTube and see Aaron walk through the whole thing live. It’s part of PHLEARN’s 30 Days of Photoshop series, and if this is Day 10, the rest of the series is worth your time too.
Comments
Leave a Comment