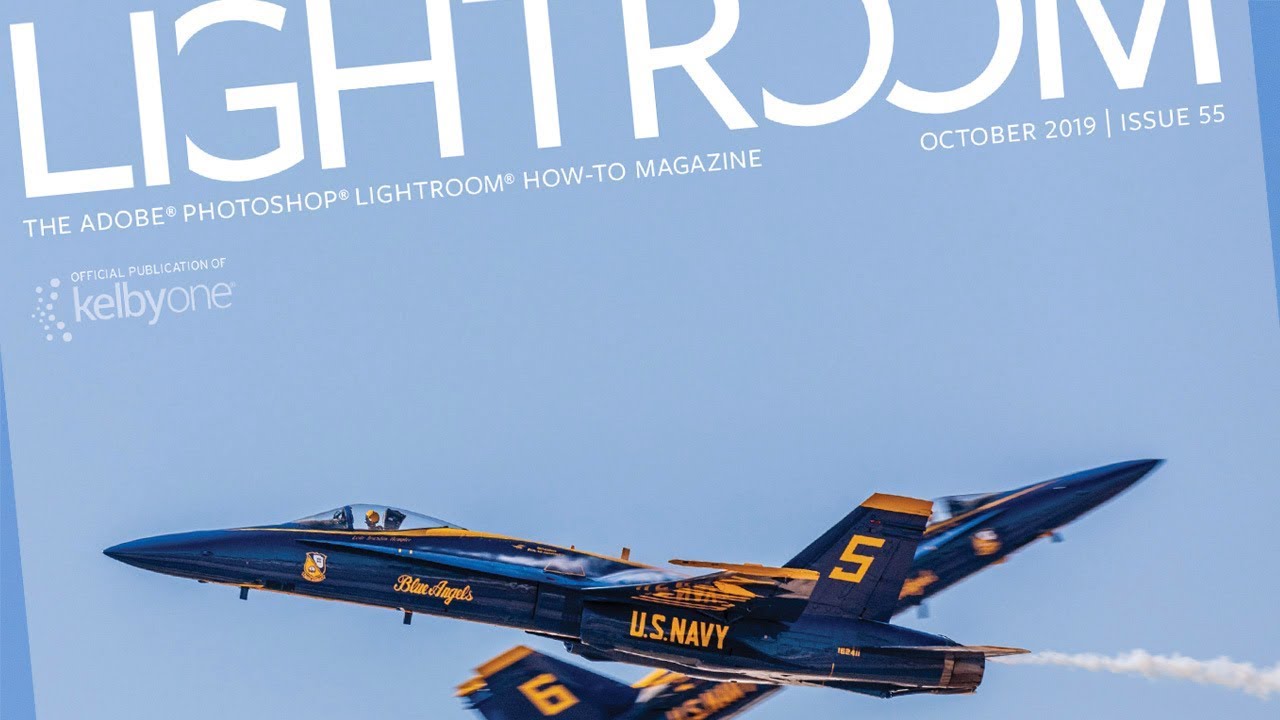
There’s a specific kind of dread that hits when a client asks for a vertical crop of a photo you shot horizontal. It doesn’t matter how good the image is. If the canvas is taller than the frame, you’ve got dead space, and dead space on a magazine cover is a career-limiting move. I’ve been there more times than I’d like to admit, usually sitting in a coffee shop frantically masking gradients into skies that don’t quite match, hoping the client doesn’t zoom in.
So when I came across this Scott Kelby tutorial covering an old-school background extension technique, I stopped what I was doing and watched it twice. Kelby is working on an actual cover of Lightroom Magazine, using a Blue Angels photo he shot wide when the layout needed tall. The problem is real. The solution is embarrassingly simple. And the fact that I didn’t already know this trick is the kind of thing I’m choosing not to think too hard about.
The core idea is flipping a duplicate of your image vertically so the sky meets itself, creating a seamless color blend with zero gradient work. Then you use the Spot Healing Brush and Patch Tool to clean up anything that doesn’t belong. That’s the whole trick. Here’s how to actually do it. Watch the full tutorial on YouTube
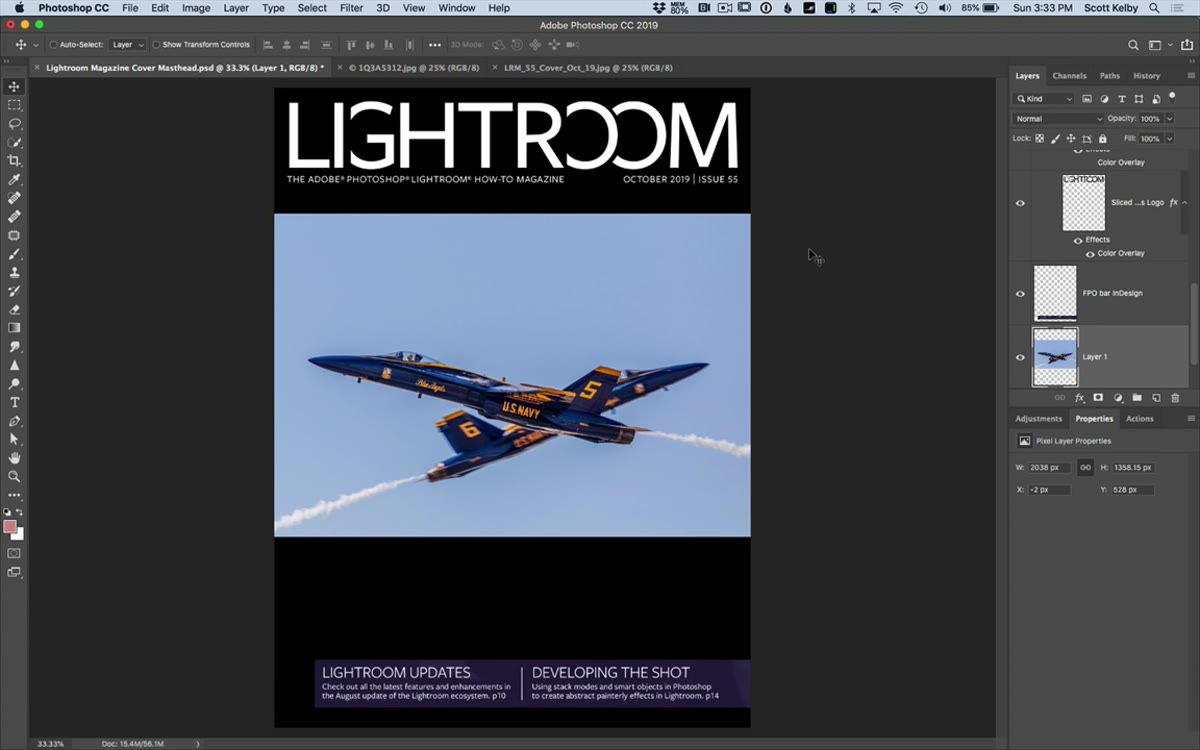
Step 1: Get Your Image into the Layout
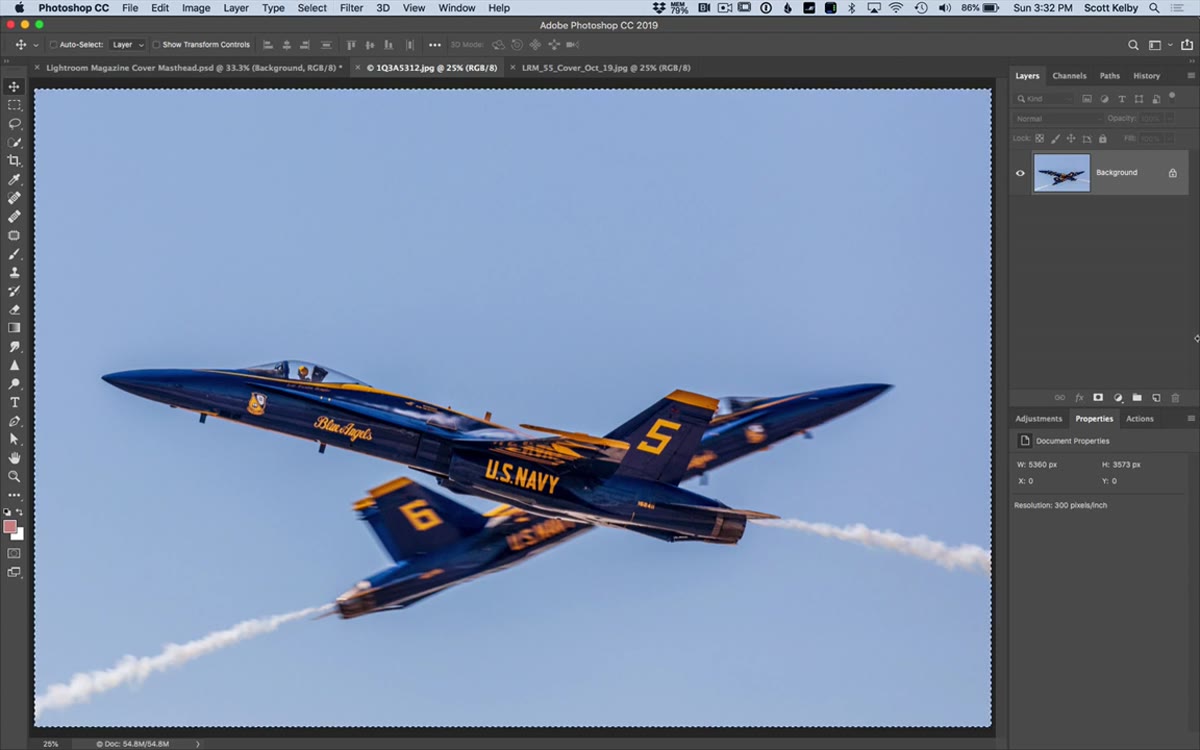 Wide photo pasted into a tall cover layout in Photoshop
Copy your photo and paste it into your cover or layout document. It’s going to look wrong immediately. That’s fine. Use Free Transform (Cmd+T on Mac, Ctrl+T on Windows) to scale it down so it fits the width of your canvas. Don’t worry about height yet. You just need it positioned so you can see where the gaps are at the top and bottom. Nudge it into place with the arrow keys.
Wide photo pasted into a tall cover layout in Photoshop
Copy your photo and paste it into your cover or layout document. It’s going to look wrong immediately. That’s fine. Use Free Transform (Cmd+T on Mac, Ctrl+T on Windows) to scale it down so it fits the width of your canvas. Don’t worry about height yet. You just need it positioned so you can see where the gaps are at the top and bottom. Nudge it into place with the arrow keys.
At this stage you’re just establishing your baseline layer. Everything else gets built on top of it.
Step 2: Duplicate the Layer and Flip It Vertically to Extend the Top
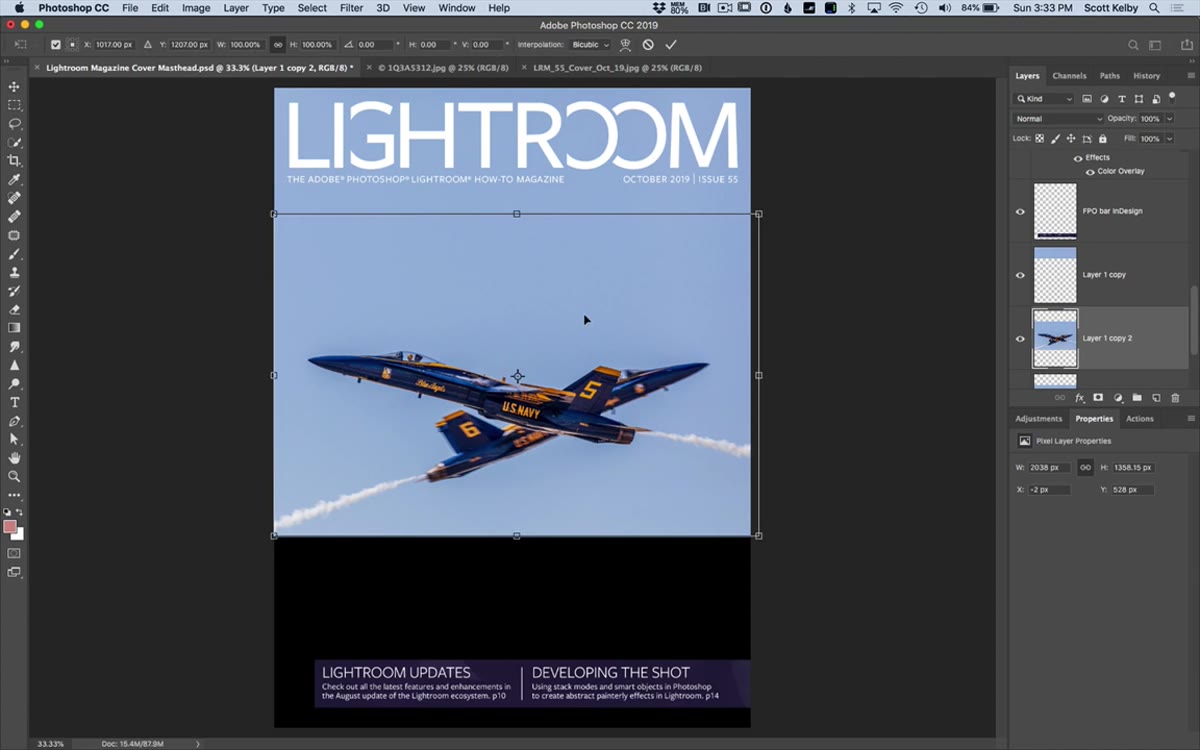
 Duplicated layer selected in Layers panel before flip
Here’s where the trick starts. Duplicate the layer with Cmd+J (Mac) or Ctrl+J (Windows). Then open Free Transform again (Cmd+T / Ctrl+T), right-click inside the transform box, and choose Flip Vertical from the context menu. You now have an upside-down copy of your image sitting on top of the original.
Duplicated layer selected in Layers panel before flip
Here’s where the trick starts. Duplicate the layer with Cmd+J (Mac) or Ctrl+J (Windows). Then open Free Transform again (Cmd+T / Ctrl+T), right-click inside the transform box, and choose Flip Vertical from the context menu. You now have an upside-down copy of your image sitting on top of the original.
The key insight is that the edge of the sky on both layers is identical, because they came from the same image. Move the flipped layer upward until the sky edges meet. When they touch, the colors blend perfectly because they’re literally the same pixel row, mirrored. No gradient. No color matching. Just move it until it locks in.
Step 3: Duplicate Again to Extend the Bottom
 Second flipped layer being dragged downward to extend bottom of image
Go back to your middle layer (the original), duplicate it again with Cmd+J or Ctrl+J, and repeat the vertical flip. This time, drag the flipped copy downward until the bottom edges of the two layers meet up. Same principle: matching edges, seamless blend.
Second flipped layer being dragged downward to extend bottom of image
Go back to your middle layer (the original), duplicate it again with Cmd+J or Ctrl+J, and repeat the vertical flip. This time, drag the flipped copy downward until the bottom edges of the two layers meet up. Same principle: matching edges, seamless blend.
Kelby points out that the bottom is trickier than the top when there are planes or other subjects near the lower edge. You’ll likely end up with mirrored elements that don’t belong in the final image. That’s expected. The next steps handle the cleanup.
Step 4: Merge Visible Layers into a New Stamp Layer
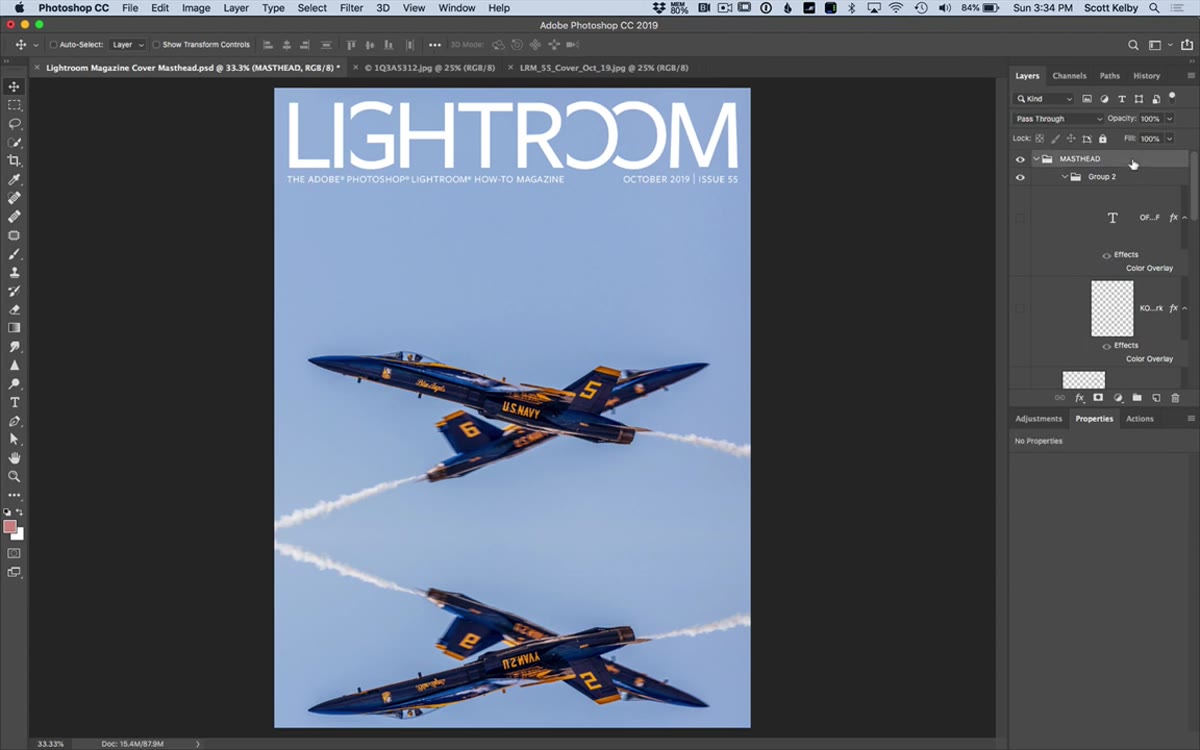 Keyboard shortcut used to create merged stamp layer above stack
Before you start any cleanup work, you want to preserve your layer stack while giving yourself a flat surface to paint on. The shortcut for this is Shift+Option+Cmd+E on Mac or Shift+Alt+Ctrl+E on Windows. This creates a new layer at the top of the stack that looks like a flattened version of everything below it, but your original layers stay intact underneath.
Keyboard shortcut used to create merged stamp layer above stack
Before you start any cleanup work, you want to preserve your layer stack while giving yourself a flat surface to paint on. The shortcut for this is Shift+Option+Cmd+E on Mac or Shift+Alt+Ctrl+E on Windows. This creates a new layer at the top of the stack that looks like a flattened version of everything below it, but your original layers stay intact underneath.
Do all your healing and patching on this stamp layer. If you make a mess, you can delete it and stamp again without losing the work underneath.
Step 5: Remove Small Artifacts with the Spot Healing Brush
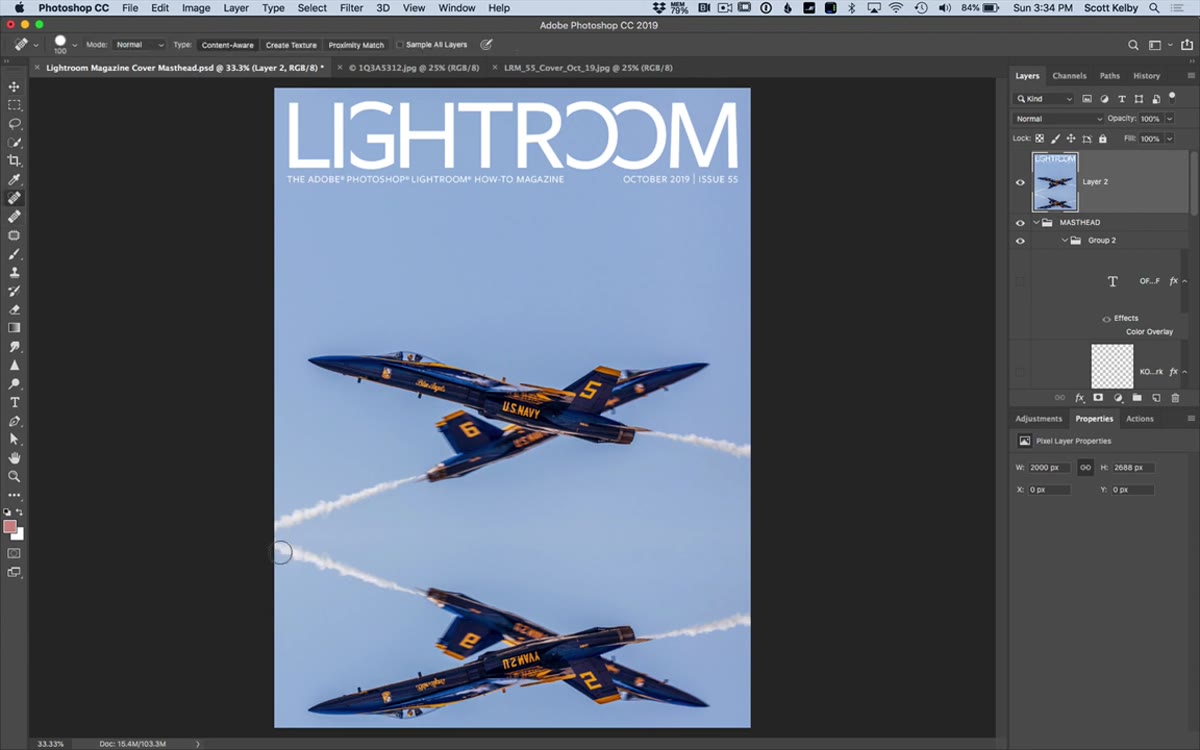 Spot Healing Brush removing vapor trails in extended sky area
Any small duplicated elements, vapor trails, stray contrails, weird repeated textures, get dealt with using the Spot Healing Brush (J). Make sure Content-Aware is selected in the options bar. Just paint over the problem area and let Photoshop sample the surrounding sky to fill it in.
Spot Healing Brush removing vapor trails in extended sky area
Any small duplicated elements, vapor trails, stray contrails, weird repeated textures, get dealt with using the Spot Healing Brush (J). Make sure Content-Aware is selected in the options bar. Just paint over the problem area and let Photoshop sample the surrounding sky to fill it in.
Keep your brush size close to the size of the artifact you’re removing. The Spot Healing Brush works best on relatively isolated elements against a consistent background. If the area is large or complex, don’t fight it. Move on to the Patch Tool.
Step 6: Use the Patch Tool for Larger Problem Areas
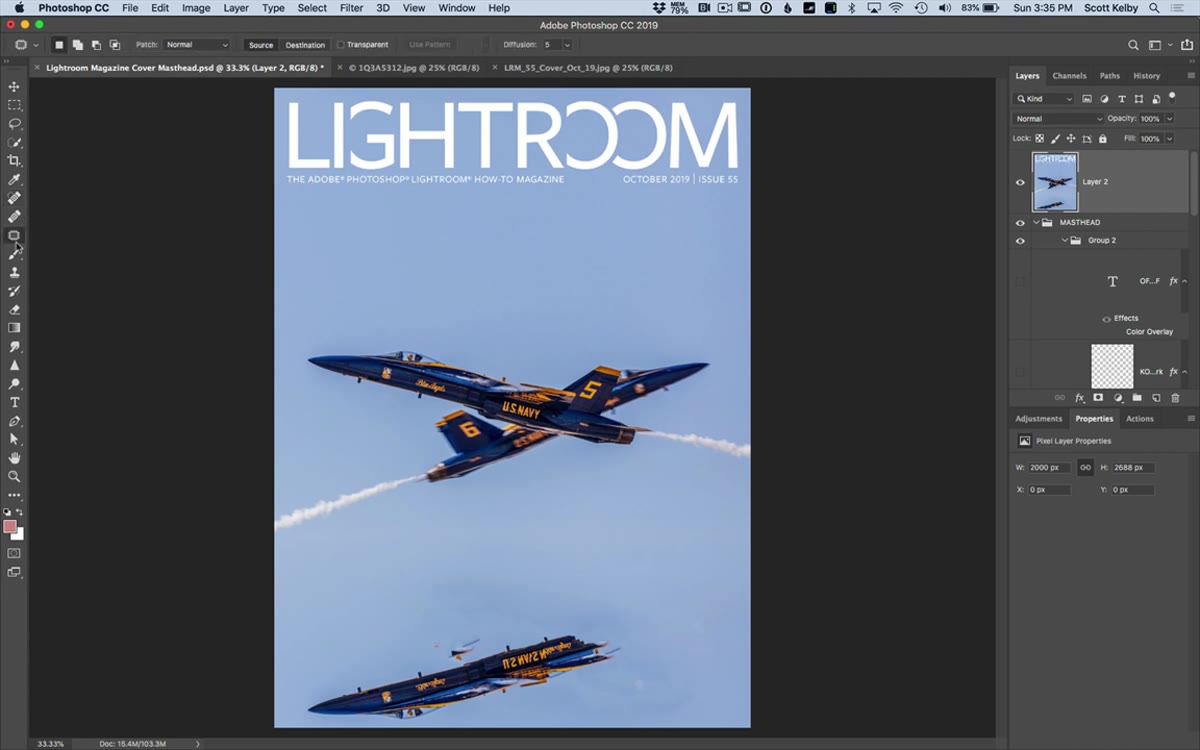 Patch Tool lassoing large area of duplicated planes in extended sky
The Patch Tool (also nested under J, or find it in the toolbar) is the right call when you’ve got a big chunk of the image that needs replacing. Think of it as the Spot Healing Brush’s cousin for heavy lifting. In the options bar, make sure it’s set to Content-Aware.
Patch Tool lassoing large area of duplicated planes in extended sky
The Patch Tool (also nested under J, or find it in the toolbar) is the right call when you’ve got a big chunk of the image that needs replacing. Think of it as the Spot Healing Brush’s cousin for heavy lifting. In the options bar, make sure it’s set to Content-Aware.
Draw a loose selection around the problem area like you’re using the Lasso Tool, then drag that selection to a clean part of the sky nearby and release. Photoshop blends the clean area into the selected zone. For the bottom extension on a sky image, you might need to run this two or three times on different problem spots. Each pass takes a few seconds and the result is cleaner than anything you’d get trying to clone-stamp your way through it.
Step 7: Restore Any Design Elements to the Top of the Stack
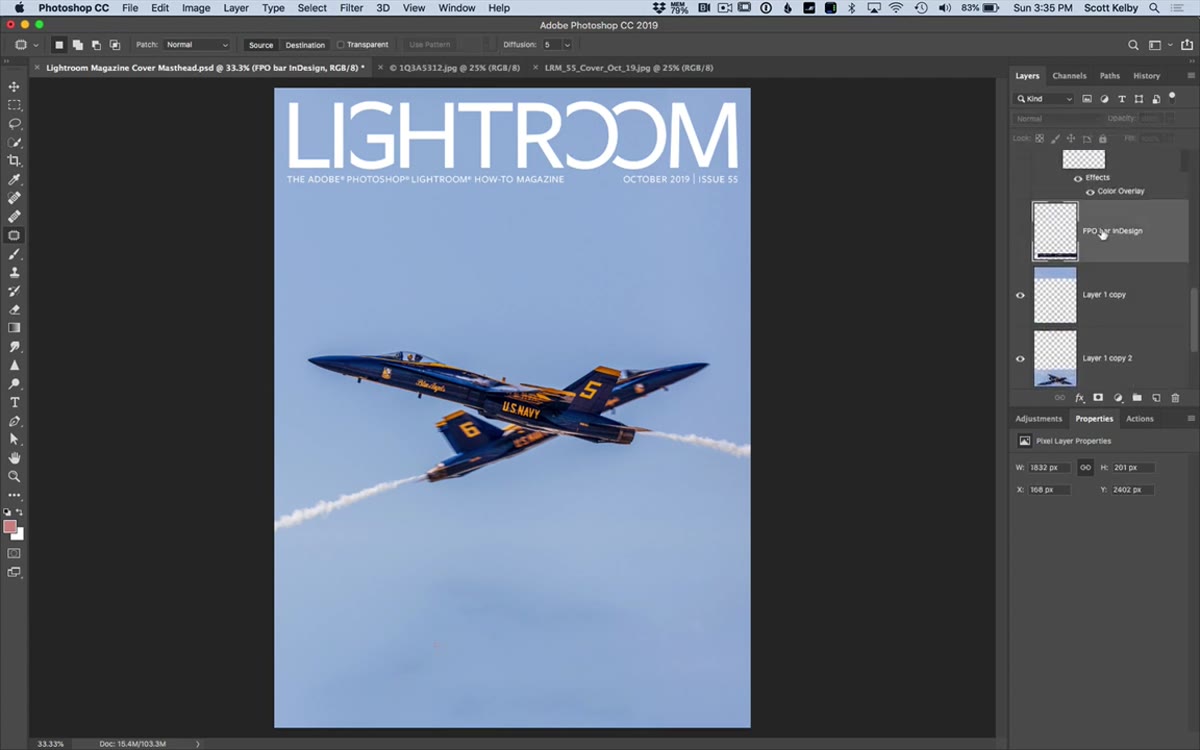 Magazine info bar layer moved to top of layer stack with shortcut
If your layout has text, logos, or graphic elements on separate layers (like a magazine nameplate or info bar), they may have gotten buried when you created your stamp layer. Bring them back to the top with Shift+Cmd+Right Bracket on Mac (Shift+Ctrl+Right Bracket on Windows). That shortcut moves the selected layer to the very top of the stack instantly. Left Bracket sends it to the bottom.
Magazine info bar layer moved to top of layer stack with shortcut
If your layout has text, logos, or graphic elements on separate layers (like a magazine nameplate or info bar), they may have gotten buried when you created your stamp layer. Bring them back to the top with Shift+Cmd+Right Bracket on Mac (Shift+Ctrl+Right Bracket on Windows). That shortcut moves the selected layer to the very top of the stack instantly. Left Bracket sends it to the bottom.
This is the kind of shortcut that sounds trivial until you’re doing it twenty times during a deadline crunch.
Where This Technique Has Limits (and What to Do About It)
This trick is genuinely brilliant for skies, water, open landscapes, anything where the background is relatively uniform and doesn’t have strong directional elements. Where it breaks down is with images that have a defined horizon line or a strong light source. A sunset with the sun near one edge will look obviously mirrored when you flip it. In those cases, the flip gets you most of the way there, but you’ll need to blend the transition zone with a layer mask and a soft brush to sell the illusion.
I’ve also found that shooting with this technique in mind changes how I frame things. If I know a shot might need to be extended later, I leave a little more neutral sky or background at the edges. That gives the flip-and-match trick more to work with and less cleanup to do afterward.
The single most valuable thing here isn’t any specific tool. It’s the mindset: use what’s already in the image before reaching for something external. The sky you need is already there. You just have to flip it.
Watch the full tutorial on YouTube to see Kelby work through the actual cover in real time. Watching the Patch Tool cleanup in motion makes the technique click in a way that screenshots can’t quite replicate.
Comments (1)
Never thought of approaching it this way. Really creative.
Leave a Comment