
There’s a specific kind of freelance misery that hits when you’re cleaning up a photo with six distracting elements in the background and you have to run the full Content-Aware Fill dialog separately for each one. Select, fill, click OK, exit, re-select, repeat. By object three you’re questioning your career choices. By object five you’re Googling “how to become a park ranger.”
This is exactly the problem that a recent Matt Kloskowski tutorial on Photoshop 2020 addresses, and I’ll be honest, I watched it mostly out of habit and ended up genuinely relieved. Watch the full tutorial on YouTube if you want to see Matt walk through it himself. The update he covers is a mid-cycle release from February 2020, not one of Adobe’s big fall drops, so it flew under a lot of people’s radar. But the Content-Aware Fill enhancement alone makes it worth paying attention to. Here’s how to use it.
Step 1: Identify Your Problem Areas and Make Your First Selection
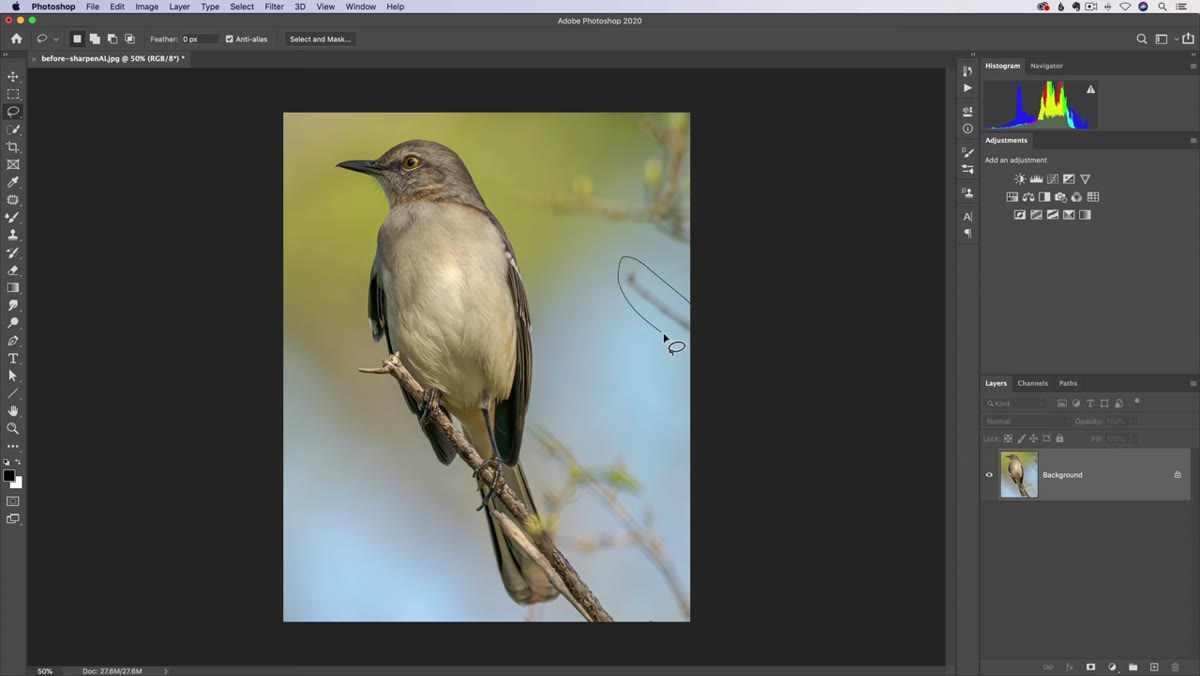 Lasso tool active, first object selected on photo
Grab the Lasso tool (L on your keyboard, and yes, I will always mention keyboard shortcuts because life is short). Draw a loose selection around the first object you want to remove. You don’t need to be surgical here. Content-Aware Fill works better when it has a little breathing room around the edges of whatever you’re trying to erase. Think of it like giving Photoshop space to figure out what the surrounding area looks like before it fills in the gap.
Lasso tool active, first object selected on photo
Grab the Lasso tool (L on your keyboard, and yes, I will always mention keyboard shortcuts because life is short). Draw a loose selection around the first object you want to remove. You don’t need to be surgical here. Content-Aware Fill works better when it has a little breathing room around the edges of whatever you’re trying to erase. Think of it like giving Photoshop space to figure out what the surrounding area looks like before it fills in the gap.
If you’ve got multiple distracting elements, pick one and start there. The old workflow would have you dreading the next five selections already. The new workflow makes that dread largely irrelevant, but we’ll get there.
Step 2: Open Content-Aware Fill
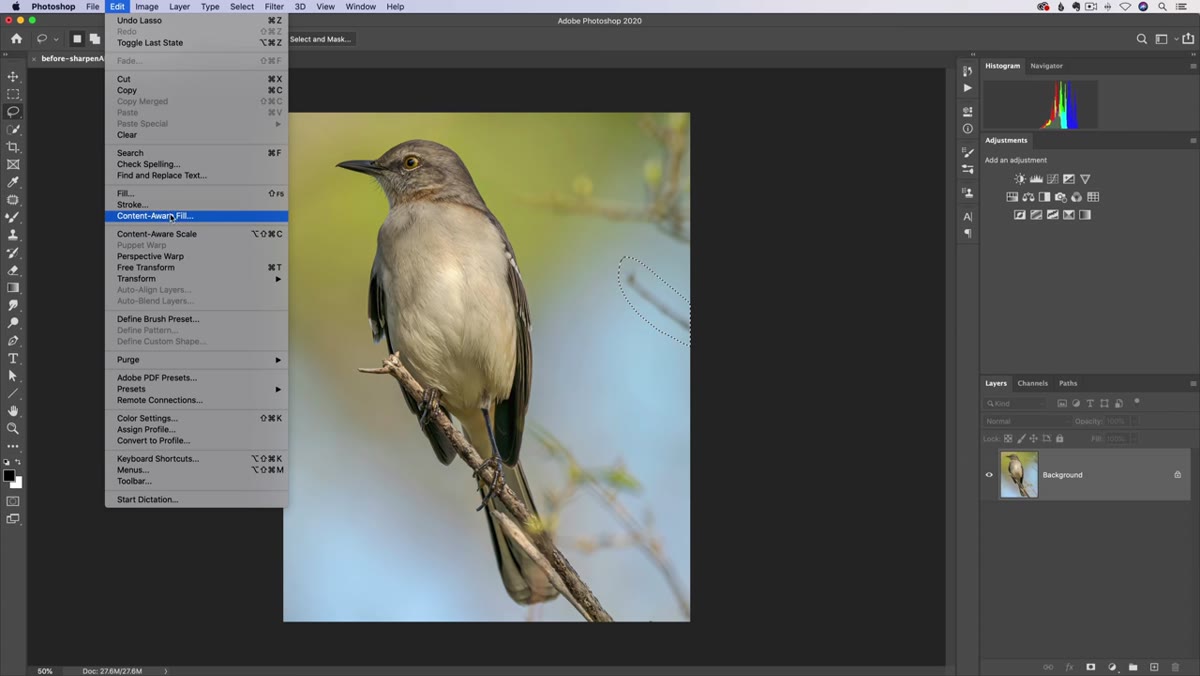 Edit menu open with Content-Aware Fill option highlighted
With your selection active, go to Edit and choose Content-Aware Fill. This opens the dedicated workspace that Adobe added back in Photoshop CC 2019. The interface shows you a green overlay across the areas Photoshop is sampling to generate its fill. The preview panel on the right gives you a live look at what the result will look like before you commit to anything.
Edit menu open with Content-Aware Fill option highlighted
With your selection active, go to Edit and choose Content-Aware Fill. This opens the dedicated workspace that Adobe added back in Photoshop CC 2019. The interface shows you a green overlay across the areas Photoshop is sampling to generate its fill. The preview panel on the right gives you a live look at what the result will look like before you commit to anything.
If you’ve never used this workspace before, don’t panic. It’s more intuitive than it looks. The green stuff is good. Green means Photoshop is pulling color and texture information from those areas to patch your selection.
Step 3: Adjust the Sampling Area with the Sampling Brush
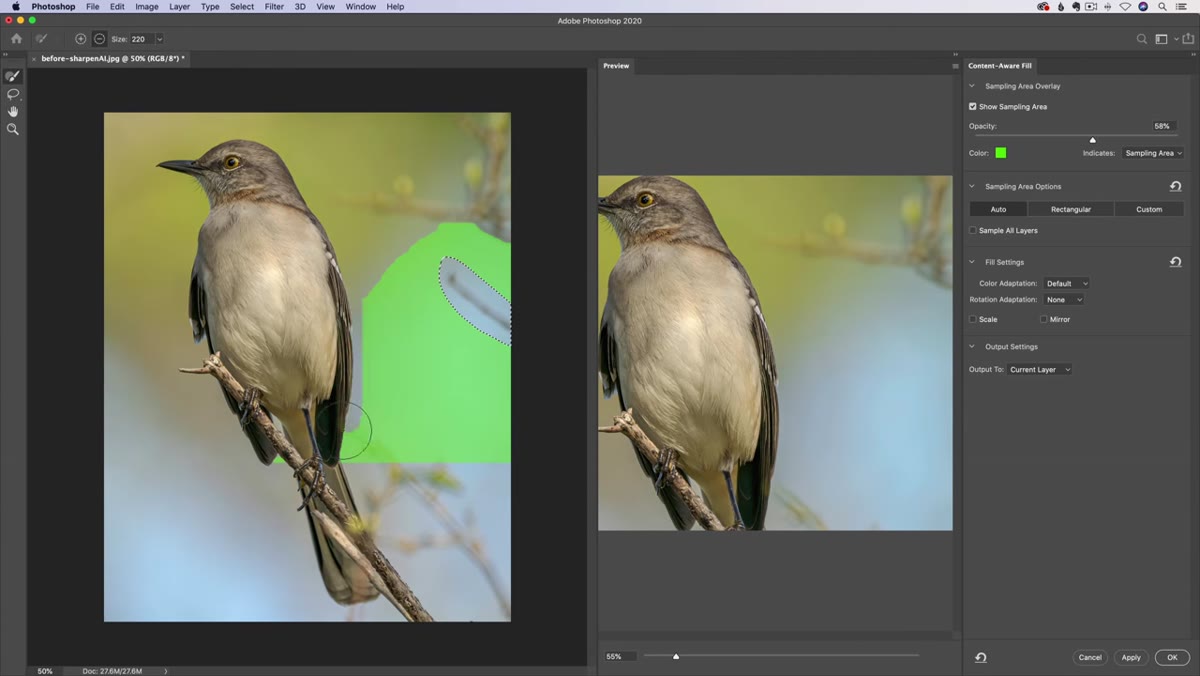 Green sampling overlay visible with sampling brush tool active
The Sampling Brush Tool is the main instrument in this workspace. By default, Photoshop makes its best guess about which parts of the image are useful reference material for the fill. Sometimes that guess is excellent. Sometimes it grabs something weird from the edge of the frame and your fill looks like abstract art.
Green sampling overlay visible with sampling brush tool active
The Sampling Brush Tool is the main instrument in this workspace. By default, Photoshop makes its best guess about which parts of the image are useful reference material for the fill. Sometimes that guess is excellent. Sometimes it grabs something weird from the edge of the frame and your fill looks like abstract art.
Paint over areas in green to tell Photoshop to include them in its sampling pool. Hold Alt (Option on Mac) to subtract areas from the green overlay if Photoshop is pulling from somewhere it shouldn’t be. Hold Shift to add more areas quickly. Watching the preview panel update in real time as you paint is actually one of those small Photoshop moments that never gets old.
Step 4: Modify Your Selection Without Leaving the Dialog
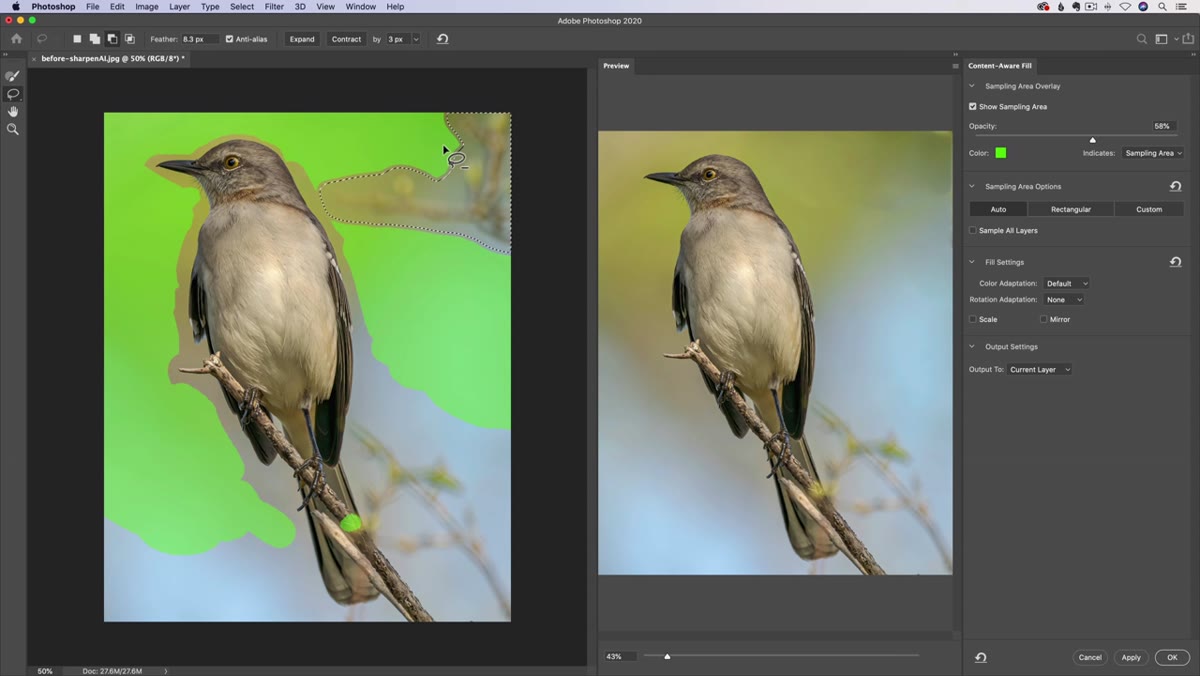 Lasso tool selected inside Content-Aware Fill workspace
Here’s something that trips people up. You can switch back to the Lasso tool while you’re still inside the Content-Aware Fill workspace. This lets you refine your active selection if you realize it’s too tight or too loose, without bailing out of the dialog entirely. Hold Shift to add to the selection or Alt/Option to subtract from it.
Lasso tool selected inside Content-Aware Fill workspace
Here’s something that trips people up. You can switch back to the Lasso tool while you’re still inside the Content-Aware Fill workspace. This lets you refine your active selection if you realize it’s too tight or too loose, without bailing out of the dialog entirely. Hold Shift to add to the selection or Alt/Option to subtract from it.
This isn’t new to the 2020 update, but it’s worth knowing because a lot of people don’t realize the workspace lets you do this. Being able to tweak your selection, adjust your sampling, and watch the preview all update simultaneously is a huge part of what makes this workflow efficient.
Step 5: Click Apply Instead of OK
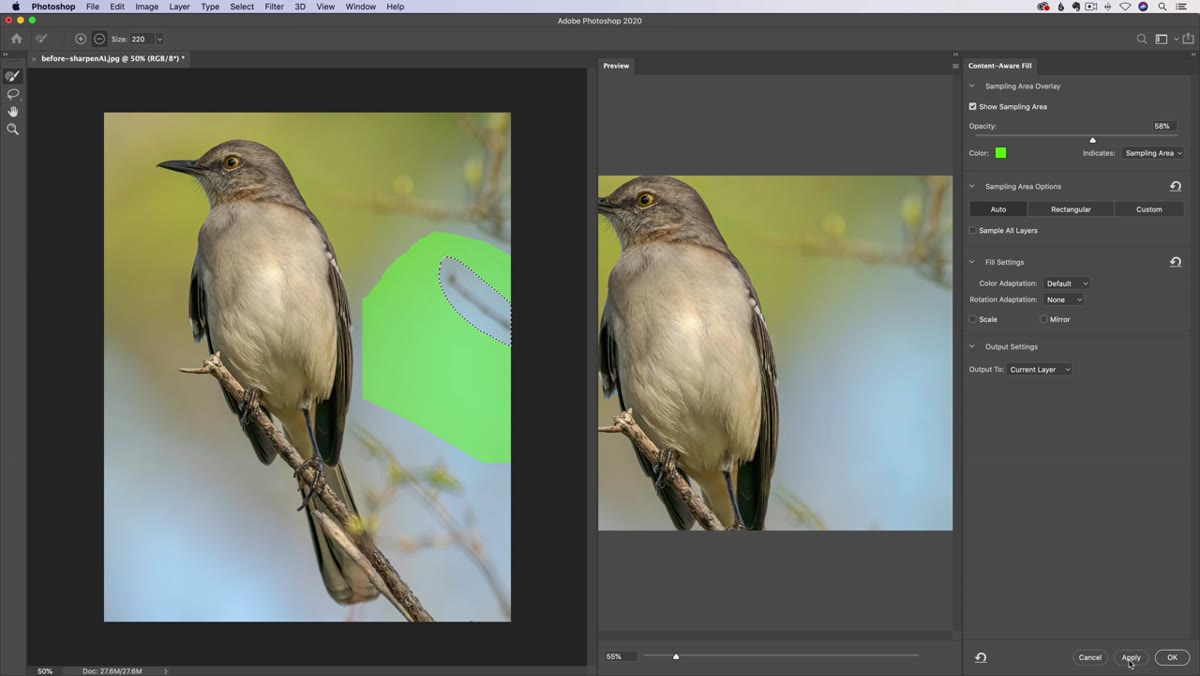 Apply button visible in bottom right of Content-Aware Fill panel
This is the actual new feature, and it’s smaller than you’d expect from something this useful. In the bottom right of the Content-Aware Fill workspace, there are now two buttons: Apply and OK. Previously there was only OK, which would commit your fill, close the dialog, and dump you back into the regular canvas with nothing but your next selection to look forward to.
Apply button visible in bottom right of Content-Aware Fill panel
This is the actual new feature, and it’s smaller than you’d expect from something this useful. In the bottom right of the Content-Aware Fill workspace, there are now two buttons: Apply and OK. Previously there was only OK, which would commit your fill, close the dialog, and dump you back into the regular canvas with nothing but your next selection to look forward to.
Apply commits the fill to the image but keeps you inside the workspace. The object disappears, Photoshop patches the area, and the dialog stays open. No exiting, no re-entering, no ritual suffering.
Step 6: Select the Next Object and Repeat
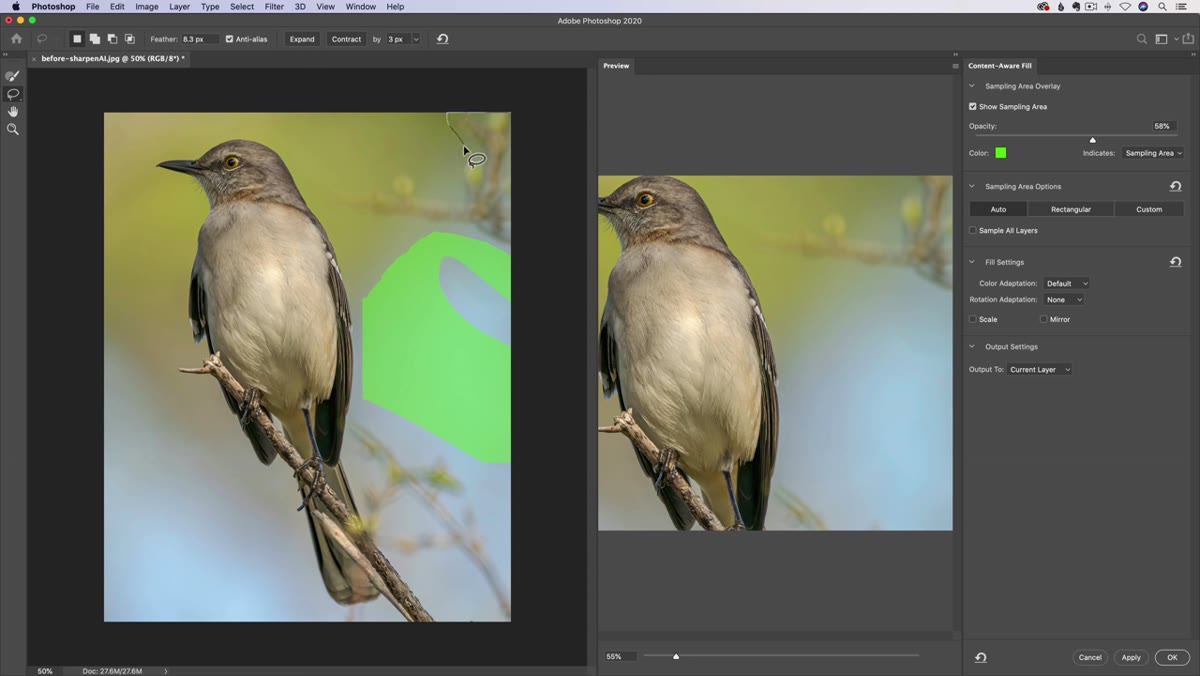 Lasso tool making new selection after first fill was applied
After clicking Apply, switch back to the Lasso tool within the workspace and draw your next selection around the next element you want to remove. The workspace treats this as a fresh operation. Adjust your sampling brush if needed, check the preview, and hit Apply again.
Lasso tool making new selection after first fill was applied
After clicking Apply, switch back to the Lasso tool within the workspace and draw your next selection around the next element you want to remove. The workspace treats this as a fresh operation. Adjust your sampling brush if needed, check the preview, and hit Apply again.
You can chain as many fills as you need this way. Matt uses two objects in his example, but the real payoff is when you’re cleaning up a scene with a dozen minor distractions. What used to be a repetitive back-and-forth becomes a single continuous session. When you’re fully done, click OK to close the dialog and finalize everything.
One Thing I’d Add From Personal Experience
Matt keeps this tutorial tight and focused on the new functionality, which is exactly right for an update video. But one thing worth layering on top of his walkthrough: do this work on a duplicate layer.
I learned this particular lesson the expensive way early in my freelance career. Content-Aware Fill is non-destructive in the sense that you can refine it, but once you flatten or merge things down, your options narrow fast. Duplicate your background layer before you even open the Lasso tool, and do all your Content-Aware Fill work on the copy. If the fill on object four looks slightly wrong after you’ve already applied objects one through three, you can go back without torching the whole job. It’s a simple habit that costs you one keyboard shortcut and saves you from a very specific kind of 11pm panic.
The bottom line here is that the Apply button sounds like a minor UI change and functions like a genuine workflow upgrade. Content-Aware Fill is already one of the most impressive tools in Photoshop, and removing the friction from multi-object cleanup makes it significantly more practical for real retouching work. One session instead of ten. That’s it. That’s the win.
Watch the full tutorial on YouTube to see Matt demonstrate this in real time. He also touches on a Lens Blur update later in the video that’s worth catching.
Comments
Leave a Comment