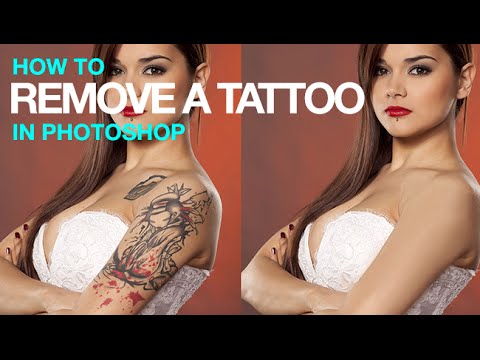
I do a fair amount of portrait retouching for clients — headshots, lifestyle stuff, the occasional album cover for a band that takes itself way too seriously. And every so often someone slides into my inbox asking if I can “just remove” a tattoo from a photo. Sometimes it’s for a corporate headshot. Sometimes it’s for a family portrait where grandma is going to lose her mind if she sees it. Whatever the reason, tattoo removal in Photoshop is one of those skills that sounds intimidating until you actually break it down. Watch the full tutorial on YouTube
In this Aaron Nace (PHLEARN) tutorial, the process gets broken into three distinct phases: a rough removal pass with the Spot Healing Brush, a manual sampling and painting phase to smooth everything out, and finally a texture restoration step so the skin doesn’t look like it was ironed flat. That three-phase structure is what makes this technique worth knowing. A lot of people stop after phase one, wonder why it looks blotchy, and call it a day. Nace pushes through to the finish line, and that’s where the real result lives.
What I like about this approach is that it treats the Spot Healing Brush as a starting point, not a solution. It’s a rough draft tool. You’re not asking it to do precision work, you’re asking it to do the heavy lifting fast so you can spend your energy on the parts that actually matter. That framing alone will change how you use half the tools in Photoshop.
Step 1: Set Up a New Layer Before You Touch Anything
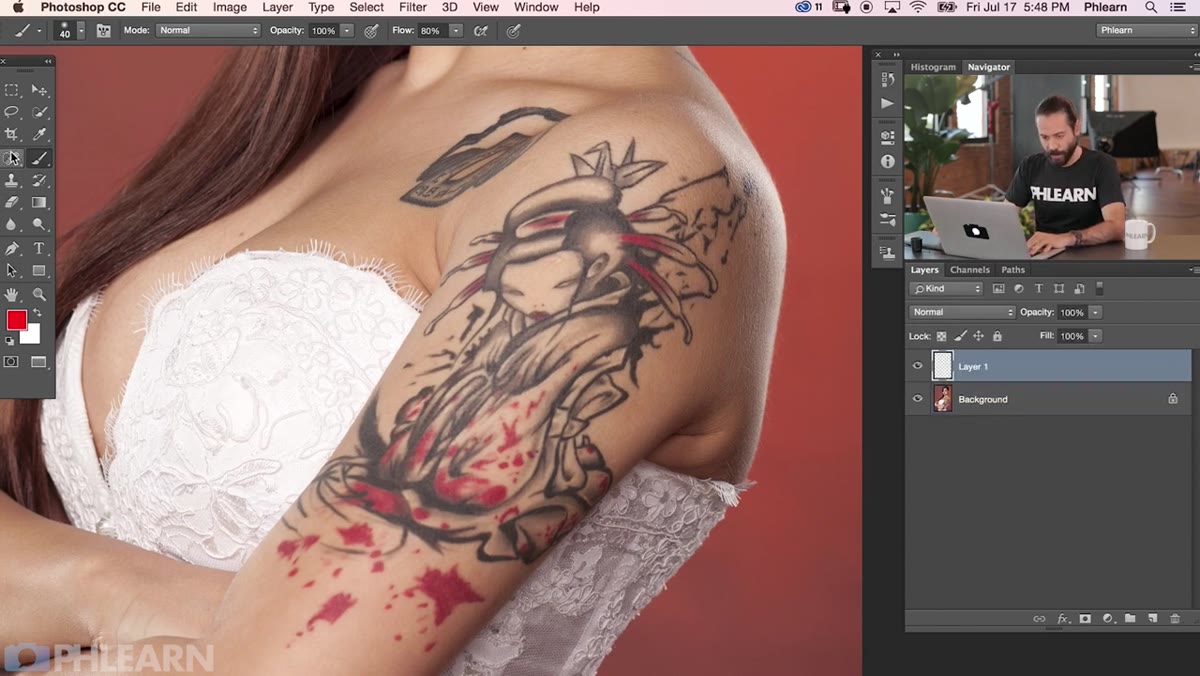 New layer created above background in Layers panel
Before picking up any tool, create a new empty layer above your background image. This keeps your original pixel data completely untouched, which matters a lot when you’re doing removal work and need to compare before and after, or course-correct partway through. Working destructively on a portrait is a habit worth breaking early. Trust me on that one.
New layer created above background in Layers panel
Before picking up any tool, create a new empty layer above your background image. This keeps your original pixel data completely untouched, which matters a lot when you’re doing removal work and need to compare before and after, or course-correct partway through. Working destructively on a portrait is a habit worth breaking early. Trust me on that one.
Step 2: Configure the Spot Healing Brush for Content-Aware Work
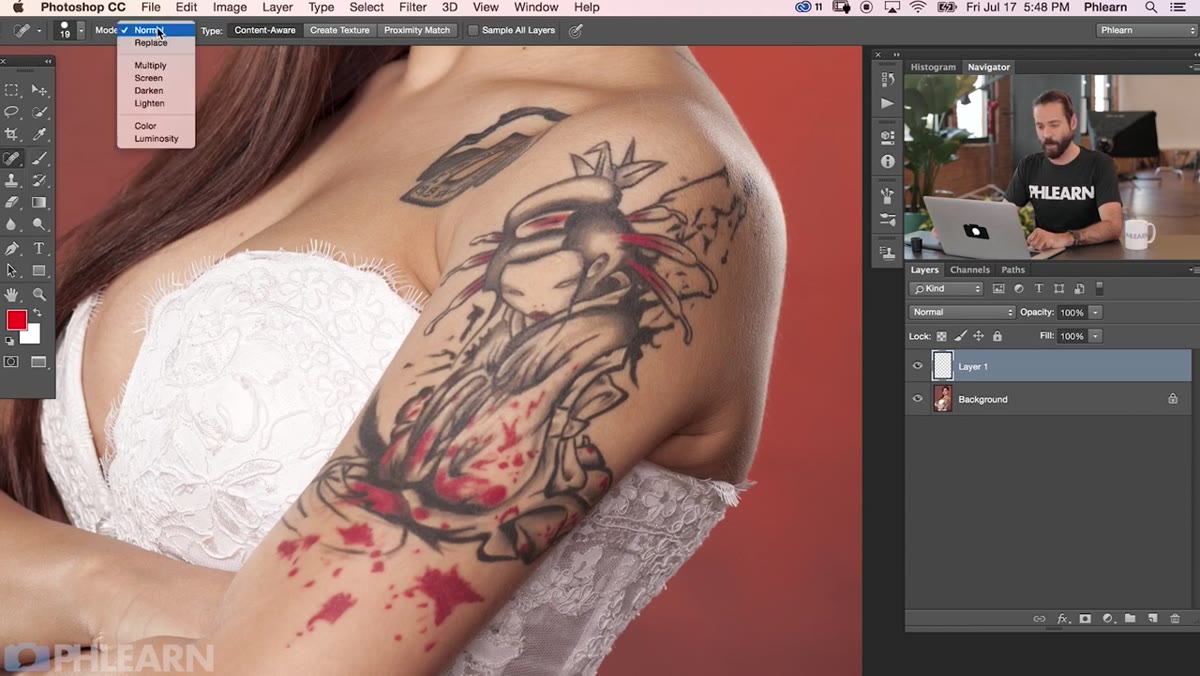 Spot Healing Brush options bar showing Content-Aware and Sample All Layers checked
Grab the Spot Healing Brush from the toolbar. In the options bar at the top, you need two specific settings: set the Type to “Content Aware” and check “Sample All Layers.” Content Aware is what tells Photoshop to analyze the surrounding pixels and make an intelligent fill rather than a random smear. Sample All Layers is what allows the tool to read the original photo on the layer below even though you’re painting on the new empty layer above. Skip either of those and you’ll wonder why nothing is working.
Spot Healing Brush options bar showing Content-Aware and Sample All Layers checked
Grab the Spot Healing Brush from the toolbar. In the options bar at the top, you need two specific settings: set the Type to “Content Aware” and check “Sample All Layers.” Content Aware is what tells Photoshop to analyze the surrounding pixels and make an intelligent fill rather than a random smear. Sample All Layers is what allows the tool to read the original photo on the layer below even though you’re painting on the new empty layer above. Skip either of those and you’ll wonder why nothing is working.
Step 3: Paint Over the Tattoo in Sections, Not All at Once
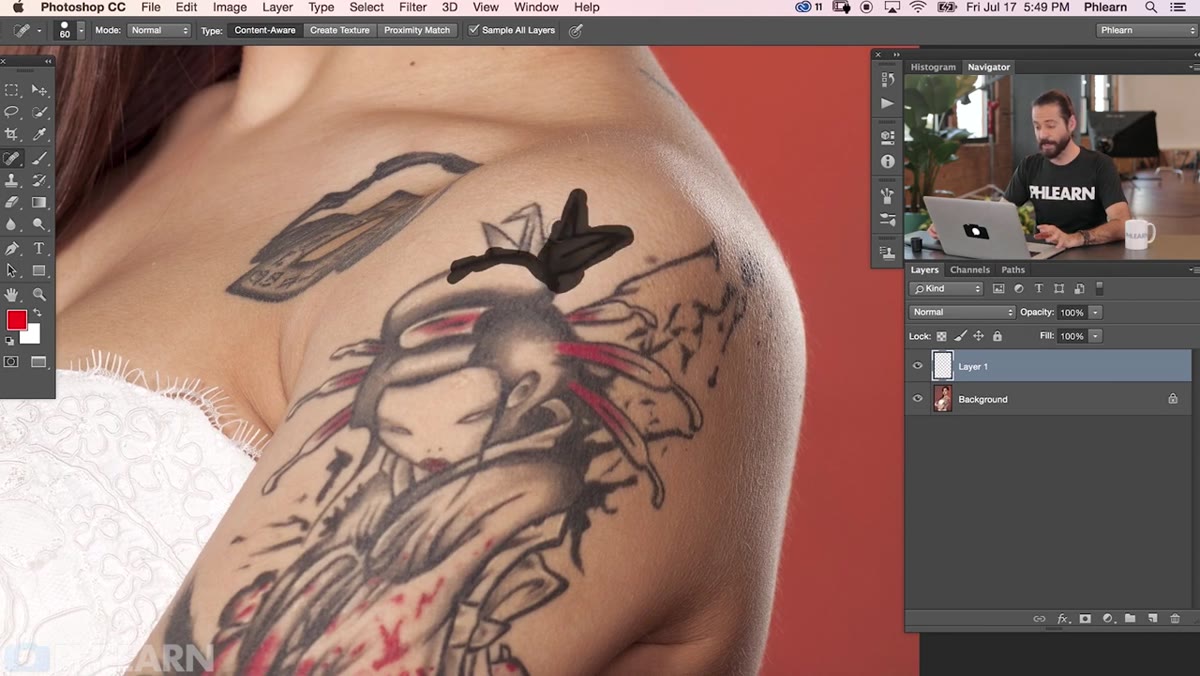 Spot Healing Brush being painted over tattoo area in small strokes
This is where people get impatient and mess it up. Don’t try to paint over the entire tattoo in one giant stroke. Work in smaller sections, lift your mouse or stylus between passes, and let Photoshop process each one. The algorithm needs skin data surrounding the tattoo to understand what it should be replacing the ink with. So make sure your brush stroke always overlaps into clean skin area, not just the tattoo itself. If a section looks wrong on the first pass, just paint over it again. The tool is iterative by design.
Spot Healing Brush being painted over tattoo area in small strokes
This is where people get impatient and mess it up. Don’t try to paint over the entire tattoo in one giant stroke. Work in smaller sections, lift your mouse or stylus between passes, and let Photoshop process each one. The algorithm needs skin data surrounding the tattoo to understand what it should be replacing the ink with. So make sure your brush stroke always overlaps into clean skin area, not just the tattoo itself. If a section looks wrong on the first pass, just paint over it again. The tool is iterative by design.
One practical tip here: if the tool starts pulling color or texture from the wrong area (like a nearby piece of clothing), try approaching that section from a different direction. Starting a stroke from the edge of clean skin and moving inward gives the algorithm a better reference to work from. It’s not magic, it’s just giving the tool the context it needs.
Step 4: Accept That the First Pass Will Look Rough
 Skin showing blotchy, uneven texture after initial healing brush pass
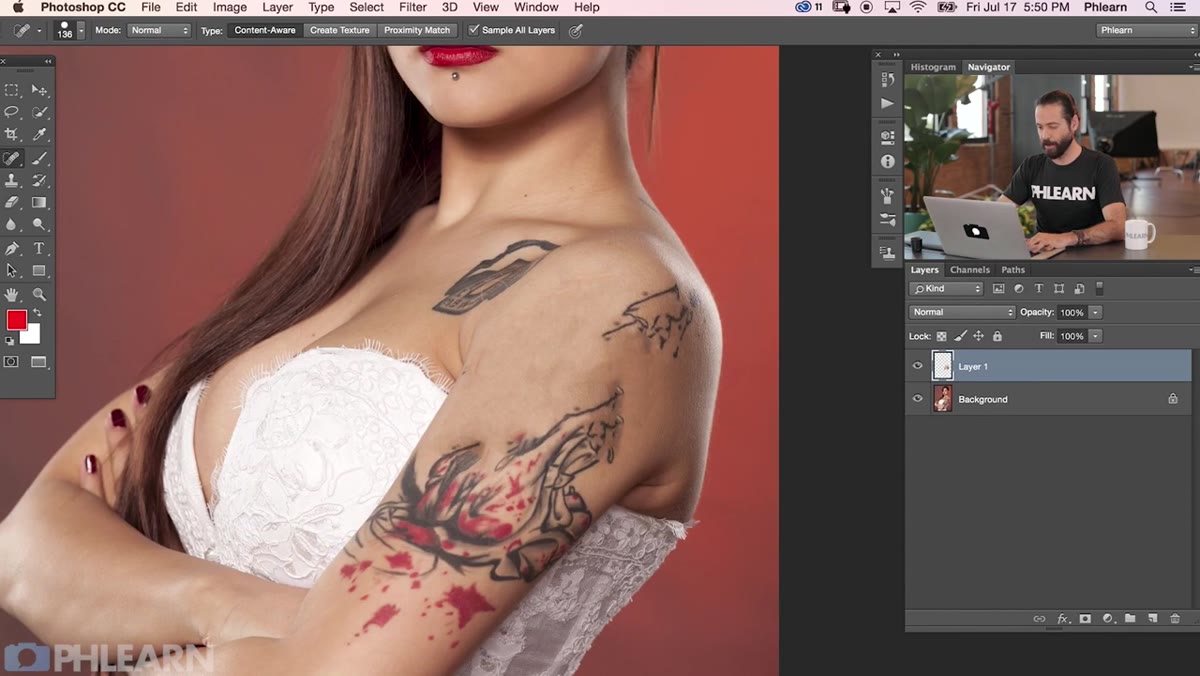
After your first full pass with the Spot Healing Brush, the tattoo will be gone but the skin is going to look blotchy and uneven. Nace describes it as looking like someone spent time in a toaster oven, which is accurate and also hilarious. The point is: this is expected. You’re not done. This pass is just phase one, the rough draft. It removes the main ink but leaves you with inconsistent tone and texture that needs to be addressed in the next step.
Skin showing blotchy, uneven texture after initial healing brush pass
After your first full pass with the Spot Healing Brush, the tattoo will be gone but the skin is going to look blotchy and uneven. Nace describes it as looking like someone spent time in a toaster oven, which is accurate and also hilarious. The point is: this is expected. You’re not done. This pass is just phase one, the rough draft. It removes the main ink but leaves you with inconsistent tone and texture that needs to be addressed in the next step.
Don’t go back and try to fix everything with more Spot Healing at this stage. You’ll just be chasing your tail. Move forward.
Step 5: Sample and Paint to Even Out Skin Tone
 Brush tool sampling skin tone adjacent to healed area
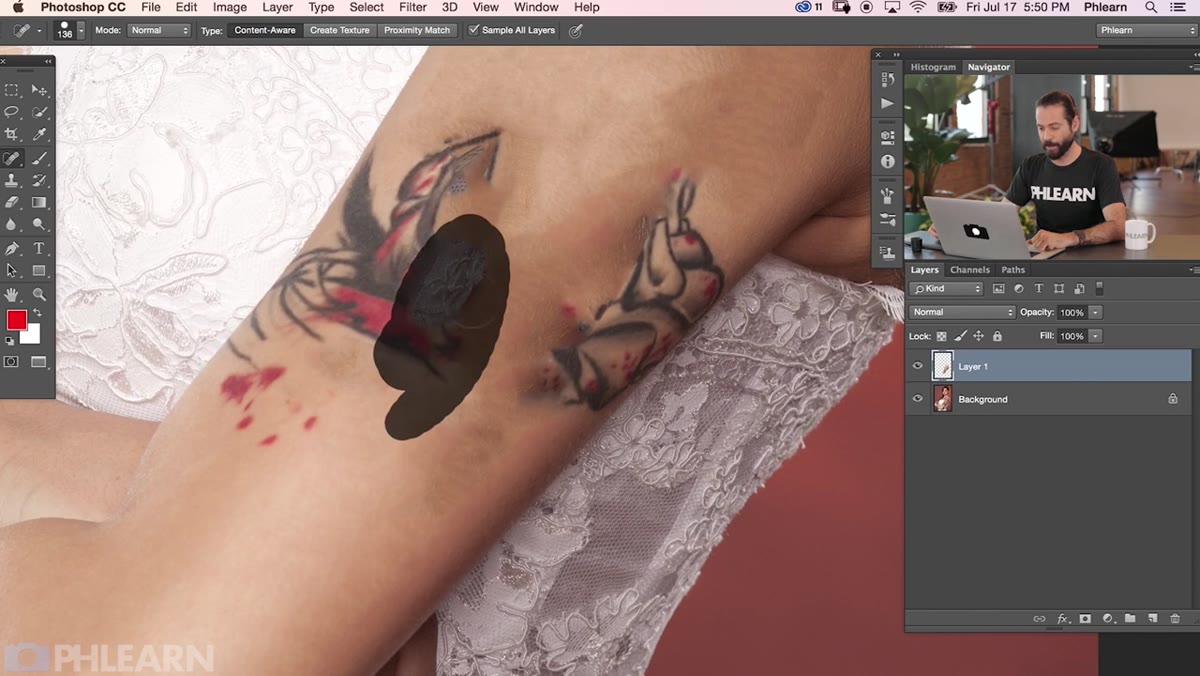
Switch to the regular Brush tool. Set it to a low opacity, somewhere in the 10-20% range, with a soft edge. Hold Alt (Option on Mac) to sample a skin tone from a nearby area that looks clean and consistent, then paint gently over the blotchy regions. You’re not trying to paint skin from scratch, you’re redistributing what’s already there. Short, overlapping strokes work better than long sweeping ones.
Brush tool sampling skin tone adjacent to healed area
Switch to the regular Brush tool. Set it to a low opacity, somewhere in the 10-20% range, with a soft edge. Hold Alt (Option on Mac) to sample a skin tone from a nearby area that looks clean and consistent, then paint gently over the blotchy regions. You’re not trying to paint skin from scratch, you’re redistributing what’s already there. Short, overlapping strokes work better than long sweeping ones.
This phase takes patience but it’s also where the photo starts to look believable. You’re essentially hand-blending the patches left behind by the Spot Healing Brush, using real skin tone from the same subject. Keep sampling from multiple spots so you’re not flattening everything to one single tone.
Step 6: Restore Skin Texture So It Doesn’t Look Plastic
 Smooth, flat skin area that needs texture added back
Once the tone looks consistent, there’s one more problem: the skin looks too smooth. Retouched skin that has no pores, no micro-texture, no natural variation looks fake in a way that’s hard to pinpoint but immediately noticeable. Nace addresses this with a texture restoration step, applying a subtle overlay of skin texture so the healed area matches the surrounding skin in feel, not just color.
Smooth, flat skin area that needs texture added back
Once the tone looks consistent, there’s one more problem: the skin looks too smooth. Retouched skin that has no pores, no micro-texture, no natural variation looks fake in a way that’s hard to pinpoint but immediately noticeable. Nace addresses this with a texture restoration step, applying a subtle overlay of skin texture so the healed area matches the surrounding skin in feel, not just color.
A common method for this is to find a clean patch of skin elsewhere in the image, copy it to a new layer, desaturate it, set the blend mode to Overlay or Soft Light, and then mask it down over the healed area. Adjust opacity until the texture level matches the rest of the skin. It should blend in, not draw attention.
What I’d Add From My Own Experience
The big thing Nace doesn’t get into, probably because the tutorial is already covering a lot of ground, is how much harder this gets near edges. Tattoos that run up to clothing lines, jawlines, or hairlines are a genuinely different problem because you lose the clean skin reference the Spot Healing Brush needs. In those situations I usually clone from further away and use the Patch Tool instead, which lets me define the source area manually. If you’re working on a large tattoo that bleeds into a hard edge, budget extra time for those boundary zones.
The single most important idea from this whole workflow is that the Spot Healing Brush is a first pass, not a final answer. If you’ve been frustrated by healing tools leaving blotchy results and walking away from them, it’s because you stopped one step too early. The manual sampling and texture restoration phases are what convert a rough fix into something that actually looks like skin.
Watch the full tutorial on YouTube to see Nace walk through each phase live, with a large, complex tattoo that’s a solid real-world test case for the technique.
Comments (2)
This is exactly what I needed today. Been struggling with this for weeks.
Great article! I actually covered something related on my site — the workflows angle is really complementary to this.
Leave a Comment