
Fringe is the enemy. That gross little halo of color that clings to your subject after you’ve cut them out - the ghost of the background they came from - has killed more composites than any other single thing in my workflow. I’ve been there a dozen times: I spend an hour on a careful selection, drop the subject onto a new background, zoom out to admire my work, and there it is. A pale rim of color wrapping the whole subject like a neon sign that reads “THIS WAS PASTED HERE.” Not great.
In this Matt Kloskowski tutorial - Watch the full tutorial on YouTube - Matt walks through the problem with a real subject on a messy, imperfect background, which I appreciated. A lot of defringe tutorials use a perfectly lit subject on a seamless white backdrop and then act surprised when the technique works. This one deals with the messiness of actual compositing work, which is the only kind most of us do.
The big insight here isn’t just a single fix - it’s that there’s no one-size-fits-all solution. Matt shows three different approaches, because different images need different medicine. Here’s how he does it.
Step 1: Start by Placing the Subject on the Actual Background
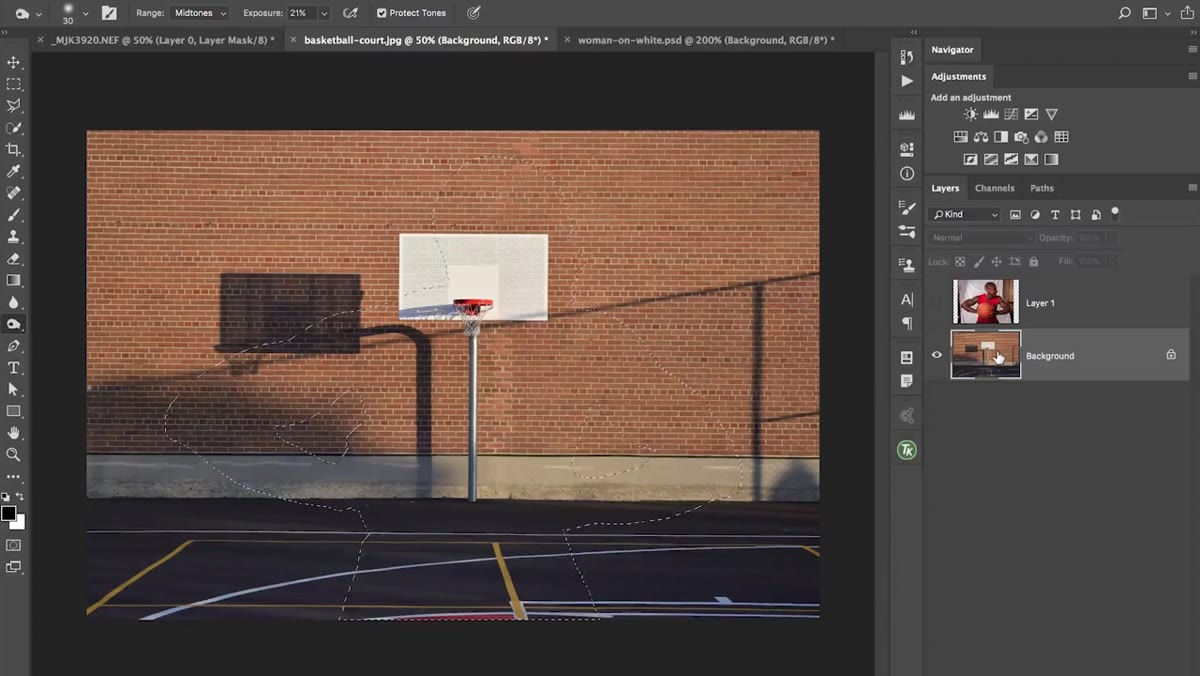 Subject layer placed on top of background layer in Layers panel
Before you even open Select and Mask, Matt places the subject layer on top of the intended background. This sounds obvious but it’s easy to skip, and skipping it costs you time. The reason is visibility. When you go into Select and Mask, you want to use the “On Layers” view mode, which shows your subject exactly as it will look in the final comp - sitting on that background. If you built your selection in isolation against white or black, you might over-correct or under-correct for fringe that either isn’t a real problem or is worse than you thought.
Subject layer placed on top of background layer in Layers panel
Before you even open Select and Mask, Matt places the subject layer on top of the intended background. This sounds obvious but it’s easy to skip, and skipping it costs you time. The reason is visibility. When you go into Select and Mask, you want to use the “On Layers” view mode, which shows your subject exactly as it will look in the final comp - sitting on that background. If you built your selection in isolation against white or black, you might over-correct or under-correct for fringe that either isn’t a real problem or is worse than you thought.
Dropping the subject onto the background first means you’re reacting to reality, not guessing. If the background is light and your subject looks clean, you might not need to defringe at all. That’s time saved.
Step 2: Make Your Initial Selection with the Quick Selection Tool
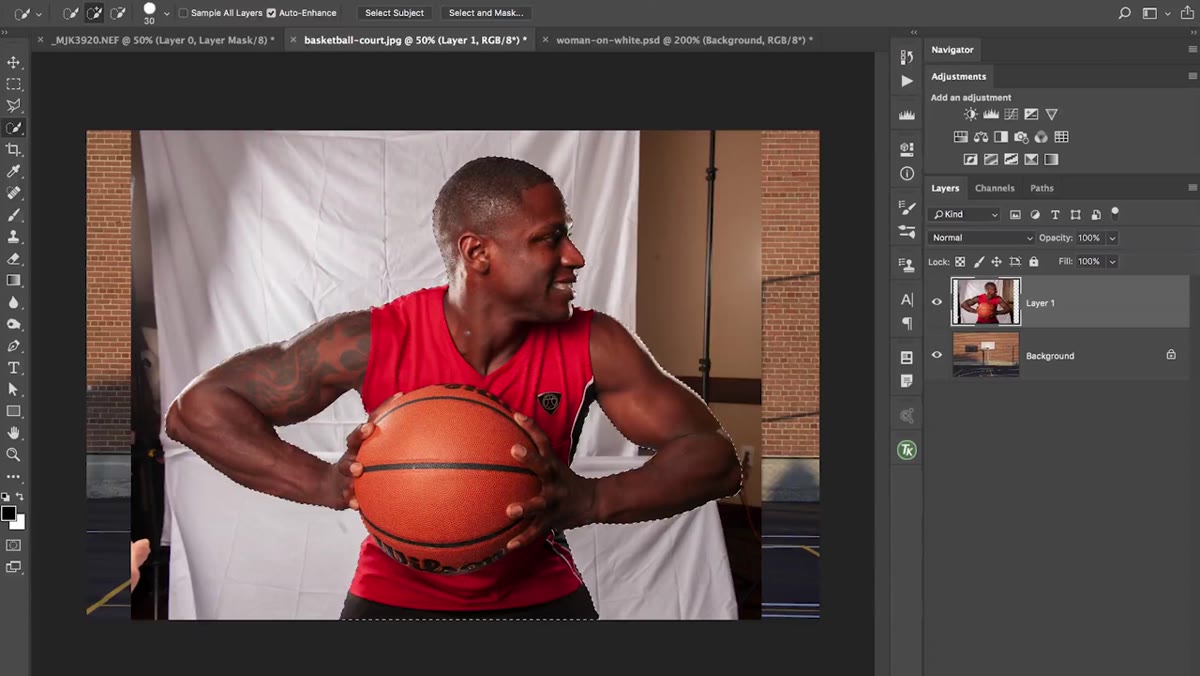 Quick Selection Tool painting over subject with larger brush size
Matt uses the Quick Selection Tool to lay down a rough first pass. He starts with a larger brush (tap the right bracket key to size up) and paints broadly across the subject to get the general shape selected. Then he zooms in tight with Cmd/Ctrl+Plus, switches to a smaller brush with the left bracket key, and works around the edges to catch anything the first pass missed.
Quick Selection Tool painting over subject with larger brush size
Matt uses the Quick Selection Tool to lay down a rough first pass. He starts with a larger brush (tap the right bracket key to size up) and paints broadly across the subject to get the general shape selected. Then he zooms in tight with Cmd/Ctrl+Plus, switches to a smaller brush with the left bracket key, and works around the edges to catch anything the first pass missed.
The spacebar is your friend here - hold it to temporarily grab the Hand Tool and reposition the canvas without dropping your selection tool. This step doesn’t have to be perfect. You’re just trying to get close enough that Select and Mask can take over. Hair and fine edges can wait - that gets handled in the next step.
Step 3: Open Select and Mask and Set Your View to “On Layers”
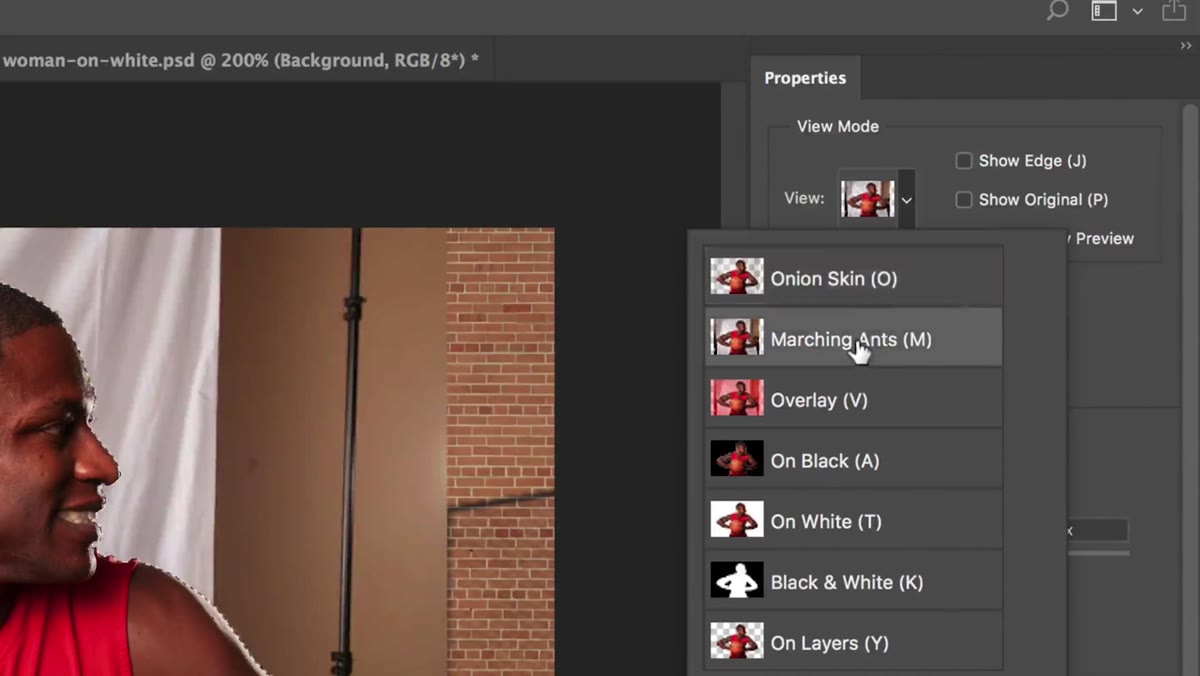 Select and Mask dialog open with On Layers view mode selected
With your selection active, head up to Select > Select and Mask. Once you’re inside the dialog, the first thing to do is change the View mode in the Properties panel to “On Layers.” This is the key move Matt keeps coming back to. Onion Skin and Marching Ants won’t show you what the fringe actually looks like in context. Black or white backgrounds might look fine or terrible depending on your actual background, so neither is reliable.
Select and Mask dialog open with On Layers view mode selected
With your selection active, head up to Select > Select and Mask. Once you’re inside the dialog, the first thing to do is change the View mode in the Properties panel to “On Layers.” This is the key move Matt keeps coming back to. Onion Skin and Marching Ants won’t show you what the fringe actually looks like in context. Black or white backgrounds might look fine or terrible depending on your actual background, so neither is reliable.
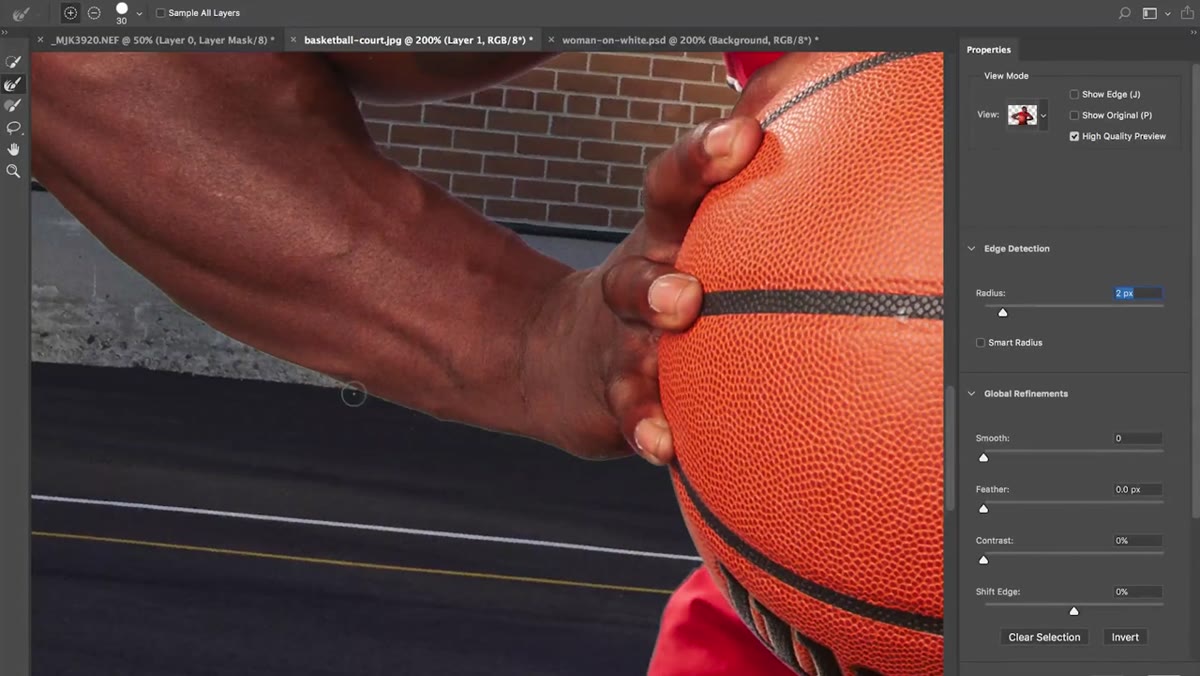
On Layers is reliable. It shows you the truth. Set your Radius to somewhere around 1-2 pixels. This isn’t a dramatic setting - it just softens and smooths the edge of your selection a little before you do anything else. Think of it as cleaning up your pencil lines before you ink.
Step 4: Use the Refine Edge Brush on Any Hair or Wispy Areas
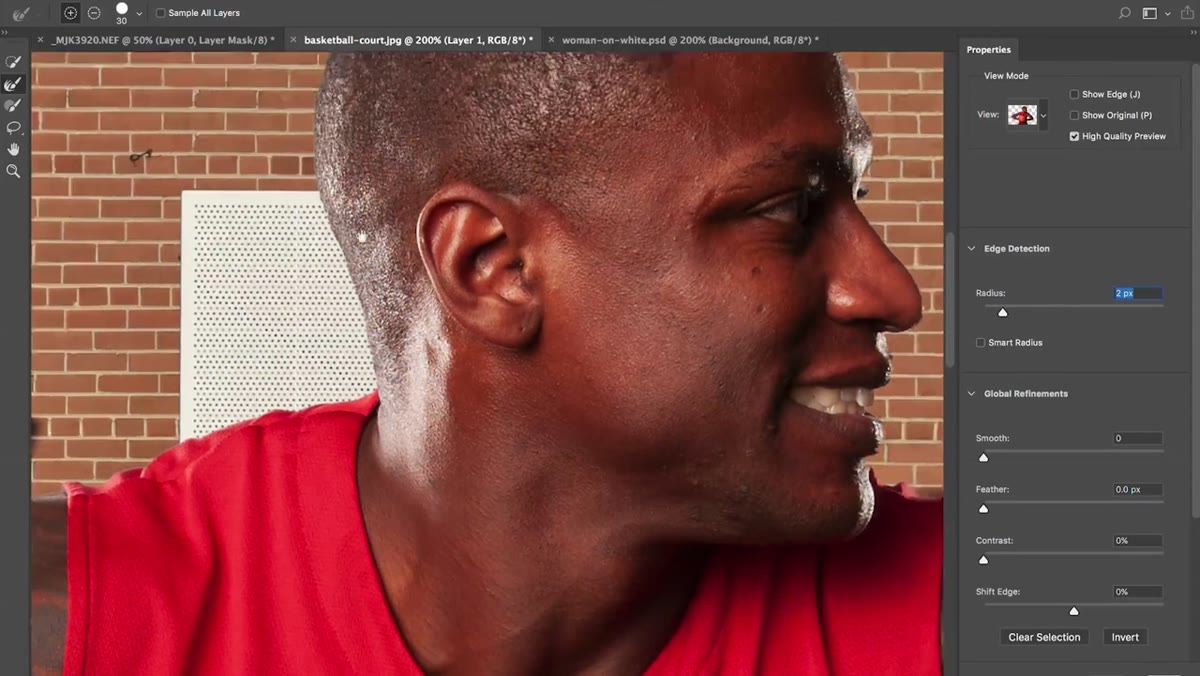 Refine Edge Brush being painted along hair edges in Select and Mask
If your subject has hair, fur, or anything with fine flyaway edges, grab the Refine Edge Brush Tool from the toolbar on the left side of the Select and Mask dialog. Paint along those tricky edges and watch Photoshop analyze and pull in the fine detail. You’ll see strands appear that weren’t part of your original selection.
Refine Edge Brush being painted along hair edges in Select and Mask
If your subject has hair, fur, or anything with fine flyaway edges, grab the Refine Edge Brush Tool from the toolbar on the left side of the Select and Mask dialog. Paint along those tricky edges and watch Photoshop analyze and pull in the fine detail. You’ll see strands appear that weren’t part of your original selection.
Matt is clear that this step is specifically for hair and fine edges - it’s not the fringe fix itself. Consider this the pre-work. You’re getting the selection as accurate as possible before you attack the color contamination problem. Get the edges right first, then deal with what’s left.
Step 5: Use Decontaminate Colors to Kill the Fringe at the Source
 Decontaminate Colors checkbox enabled in Select and Mask Output settings
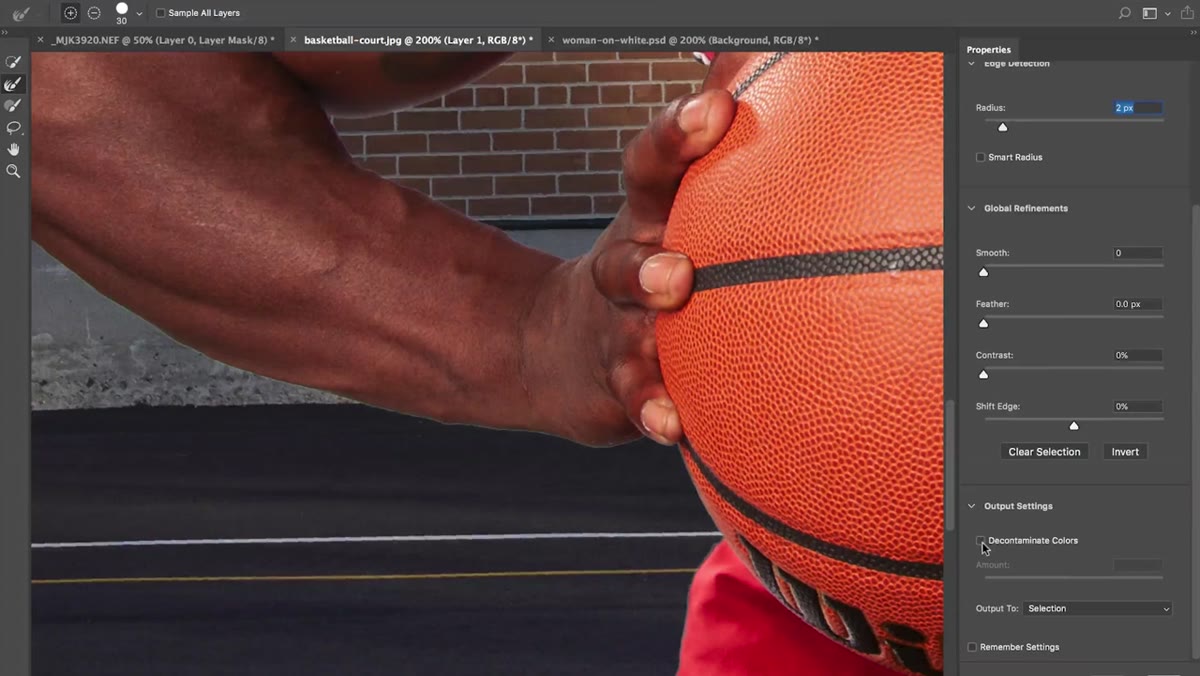
Scroll down to the Output Settings section at the bottom of the Select and Mask panel. You’ll find a checkbox labeled “Decontaminate Colors.” This is the first of the three defringe techniques Matt covers, and it’s often the most effective one. Check the box and bring the Amount slider up - start around 50% and push it higher if the fringe is stubborn.
Decontaminate Colors checkbox enabled in Select and Mask Output settings
Scroll down to the Output Settings section at the bottom of the Select and Mask panel. You’ll find a checkbox labeled “Decontaminate Colors.” This is the first of the three defringe techniques Matt covers, and it’s often the most effective one. Check the box and bring the Amount slider up - start around 50% and push it higher if the fringe is stubborn.
What this does is physically replace the edge pixels’ color data with color sampled from the interior of the subject. It’s not just masking the fringe - it’s repainting it. Because it has to create new pixel data, Photoshop will force you to output to a New Layer with Layer Mask. That’s fine. Accept it. You’ll get a clean copy of your subject with the edge contamination pushed out.
Step 6: If Fringe Survives, Use Minimum Filter or Matting Options
 Layer menu open showing Matting submenu options
When Decontaminate Colors doesn’t finish the job on its own, Matt goes to two backup options. The first is Layer > Matting > Defringe, which lets you specify a pixel width to strip from the edge of your layer. Start at 1 pixel. That’s usually enough. The second option is using the Minimum filter (Filter > Other > Minimum) on the mask itself - click the layer mask thumbnail, apply Minimum with a radius of 1 pixel, and it will chew back the mask edge just enough to eat the fringe without visibly shrinking your subject.
Layer menu open showing Matting submenu options
When Decontaminate Colors doesn’t finish the job on its own, Matt goes to two backup options. The first is Layer > Matting > Defringe, which lets you specify a pixel width to strip from the edge of your layer. Start at 1 pixel. That’s usually enough. The second option is using the Minimum filter (Filter > Other > Minimum) on the mask itself - click the layer mask thumbnail, apply Minimum with a radius of 1 pixel, and it will chew back the mask edge just enough to eat the fringe without visibly shrinking your subject.
These are surgical tools for situations where the fringe is narrow and specific. They’re not fixes for a bad selection - they’re the final polish on a good one.
What I’d Add from My Own Experience
I spent three days once on a composite that a friend rebuilt in about 20 minutes after pointing out I’d been trying to fix selection edges that were actually a lighting mismatch. The subject was lit from one direction and the background from another, and no amount of defringing was going to fix a problem that was actually a lighting problem. So before you go deep on these techniques, make sure the fringe you’re seeing is actually a selection edge issue and not something else wearing the same costume. Zoom in close. If the edge pixels have the wrong color, that’s fringe. If the whole subject looks like it’s glowing or too bright against the background, that’s a different conversation involving blend modes and color grading.
The single most important thing to take from Matt’s approach is this: check your selection against the real background before you do anything else. Everything that follows is easier and more accurate when you’re working in context. Most fringe problems look dramatically worse or better depending on what’s behind the subject, and treating the wrong problem is the easiest way to waste an afternoon.
Watch the full tutorial on YouTube to see Matt demonstrate all three techniques side by side - seeing the before and after on an actual image makes the differences between the methods much clearer than any description can.
Comments
Leave a Comment