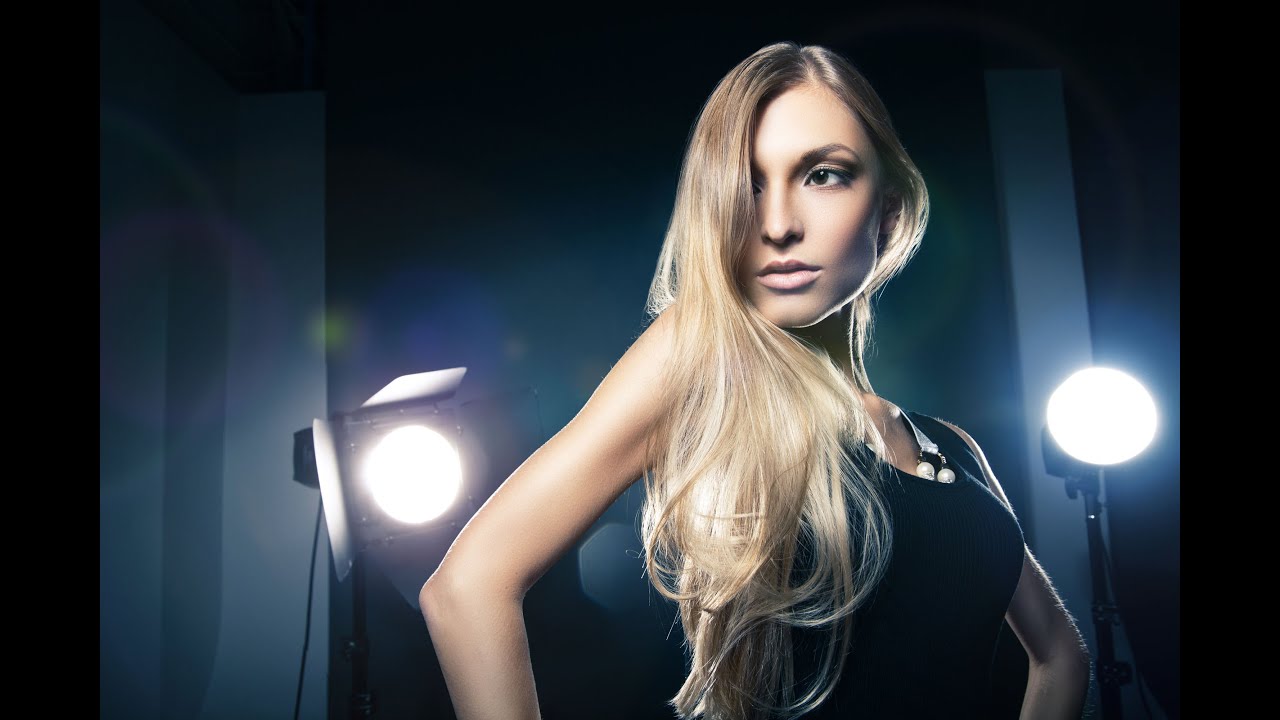
There’s a specific kind of embarrassment that comes from sending a client a composite, feeling pretty good about yourself, and then getting back a response that says “cool… but what’s that weird light blob?” I’ve been there. For a long time, lens flares were something I’d throw into a photo the way a 15-year-old throws hot sauce on everything - liberally and without much thought. It took me an embarrassingly long time to understand that a lens flare isn’t decoration. It’s a physical phenomenon, and if your photo’s lighting doesn’t support it, the flare is going to look exactly as wrong as it is.
That’s what makes this tutorial from Aaron Nace over at PHLEARN so useful. Watch the full tutorial on YouTube - it’s not just a walkthrough of Photoshop’s Lens Flare filter. Aaron spends real time on the conceptual side first: when does a flare belong in a photo, and when is it just noise? That framing alone is worth more than the technical steps, which are also solid. Let me break the whole thing down so you can follow along without pausing every 10 seconds.
Step 1: Figure Out If Your Photo Actually Earns a Lens Flare
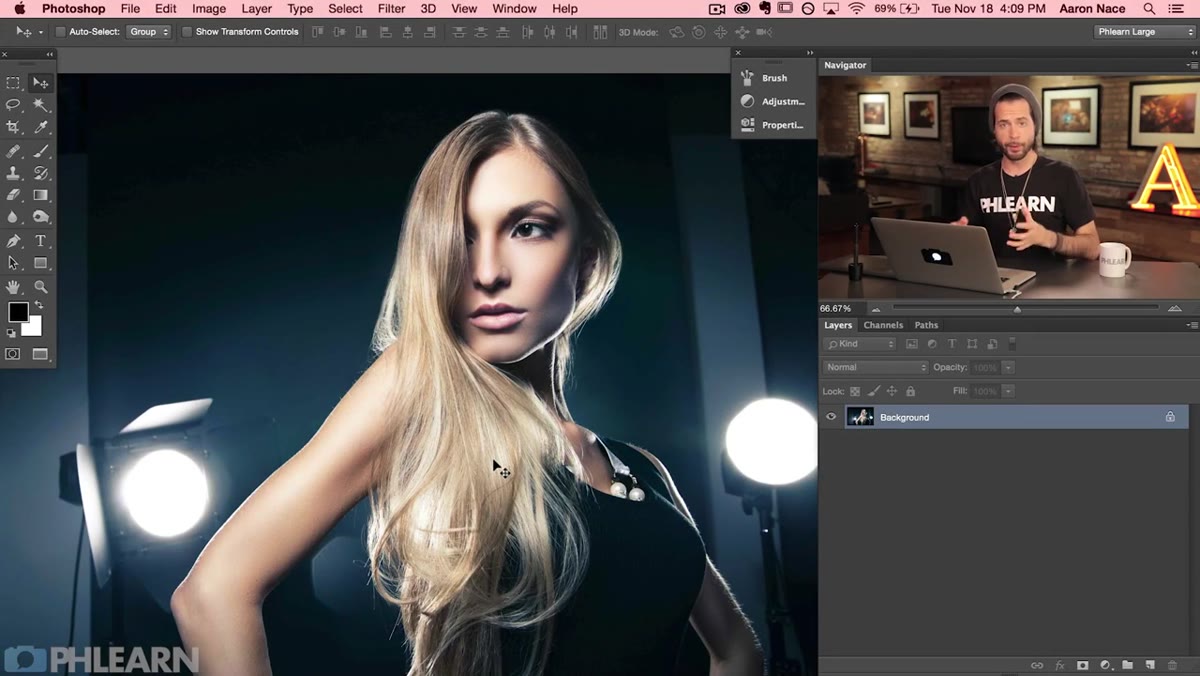 Backlit portrait with visible rim lighting on subject’s hair and arm
Before you touch a single filter, you need to audit your image’s lighting. Lens flares are caused by light entering a camera lens directly - they happen when the light source is behind or strongly to the side of the subject, pointing toward the camera. Aaron calls this a backlit setup. The clue in your photo is rim lighting: that thin line of light wrapping around your subject’s hair, shoulders, or edges. If you see that, you’ve got a legitimate backlit scenario and a flare can make sense.
Backlit portrait with visible rim lighting on subject’s hair and arm
Before you touch a single filter, you need to audit your image’s lighting. Lens flares are caused by light entering a camera lens directly - they happen when the light source is behind or strongly to the side of the subject, pointing toward the camera. Aaron calls this a backlit setup. The clue in your photo is rim lighting: that thin line of light wrapping around your subject’s hair, shoulders, or edges. If you see that, you’ve got a legitimate backlit scenario and a flare can make sense.
If the main light is coming from in front of the subject - meaning the camera and the light are roughly on the same side - no flare would occur in real life, and adding one will immediately read as fake to anyone paying attention. This is the step most people skip entirely, and it’s why so many flare edits look off even when the execution is technically fine.
Step 2: Identify the Specific Light Sources That Would Cause the Flare
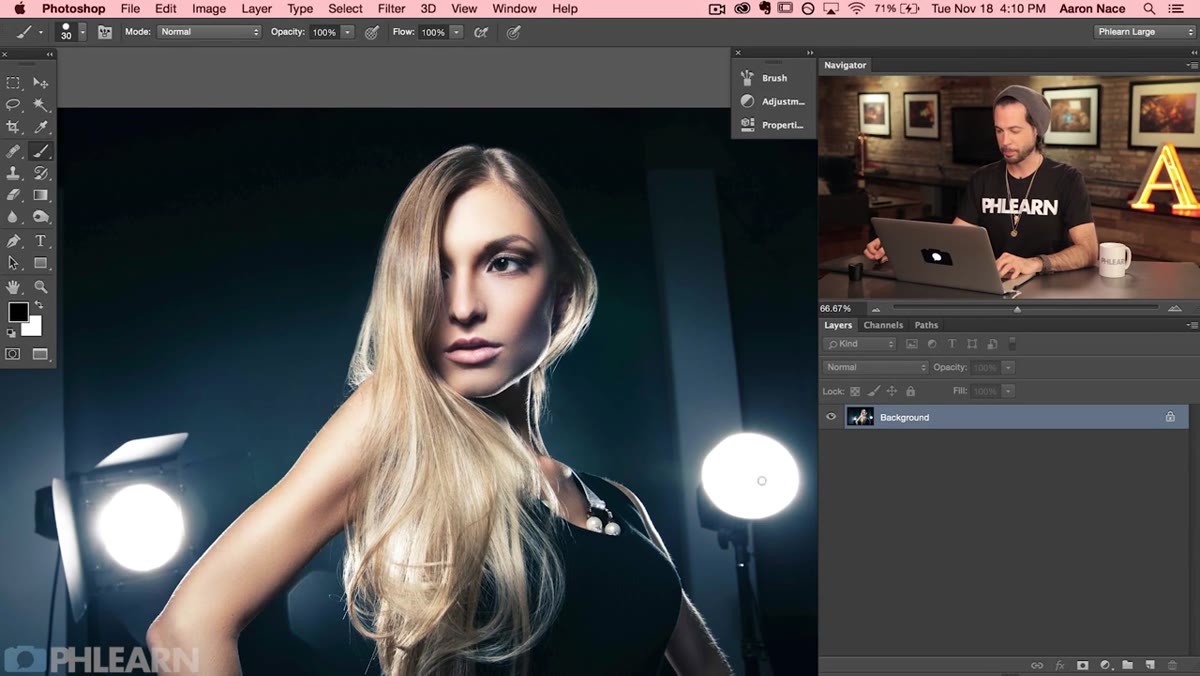 Tutorial footage showing background lights positioned behind the subject
Not every light in the frame is a candidate for a flare. You’re looking specifically at lights that are positioned behind your subject from the camera’s perspective. In Aaron’s example, there are lights behind the subject that create rim lighting along her arm and hair. Those are the flare sources. There’s also a light in front of her illuminating her face - but that one faces away from the lens, so no flare comes from it.
Tutorial footage showing background lights positioned behind the subject
Not every light in the frame is a candidate for a flare. You’re looking specifically at lights that are positioned behind your subject from the camera’s perspective. In Aaron’s example, there are lights behind the subject that create rim lighting along her arm and hair. Those are the flare sources. There’s also a light in front of her illuminating her face - but that one faces away from the lens, so no flare comes from it.
This matters when you get to placement later. The flare needs to sit on top of the actual light source that would realistically create it. If you put a flare somewhere random in the frame because it “looks cool,” you’ve already lost the plot.
Step 3: Create a Stamp Visible Layer
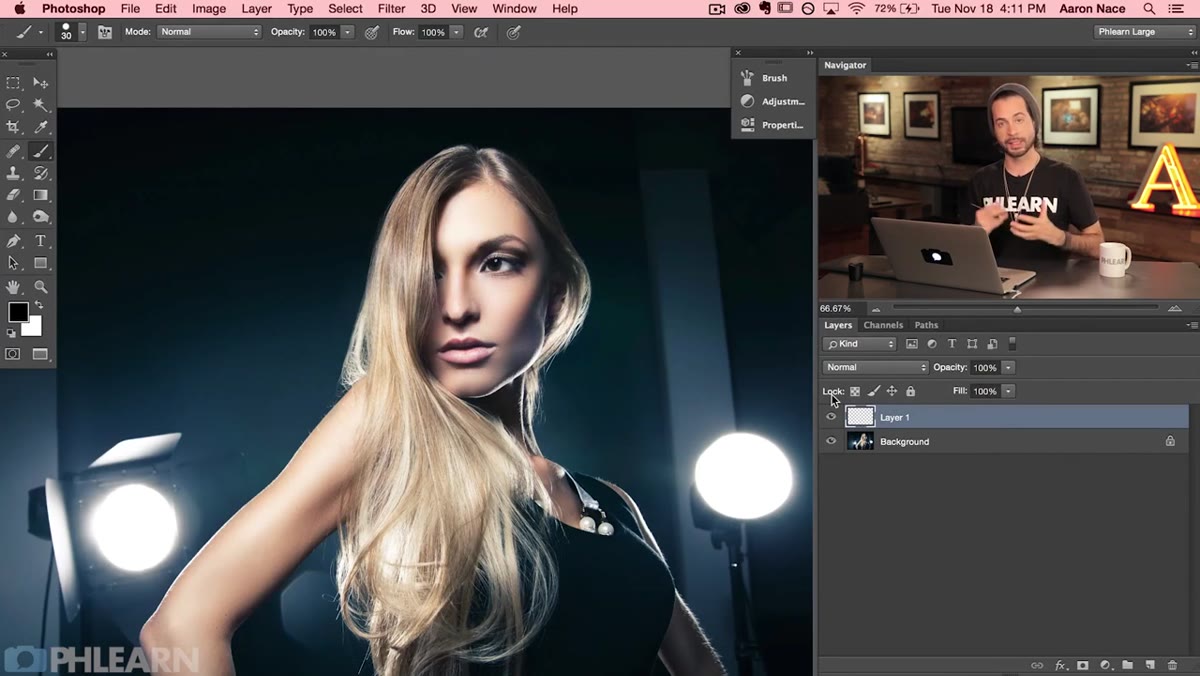 Photoshop layers panel showing stamp visible layer created above existing layers
Here’s where the Photoshop workflow gets specific. The Lens Flare filter under Filter > Render cannot be applied to a blank layer. Photoshop will throw an error if you try. The workaround is to create what’s called a Stamp Visible layer - a flattened snapshot of everything currently visible in your document, merged into a single new layer at the top of the stack.
Photoshop layers panel showing stamp visible layer created above existing layers
Here’s where the Photoshop workflow gets specific. The Lens Flare filter under Filter > Render cannot be applied to a blank layer. Photoshop will throw an error if you try. The workaround is to create what’s called a Stamp Visible layer - a flattened snapshot of everything currently visible in your document, merged into a single new layer at the top of the stack.
The keyboard shortcut is Shift + Option + Command + E on Mac (Shift + Alt + Ctrl + E on Windows). Hit that, and you’ll get a new layer that looks like a flat version of your whole composition. This is the layer you’ll apply the flare to. The advantage is that your original layers stay untouched underneath, so if you hate what the flare does, you can just delete the stamp layer and start over without wrecking anything.
Step 4: Apply the Lens Flare Filter
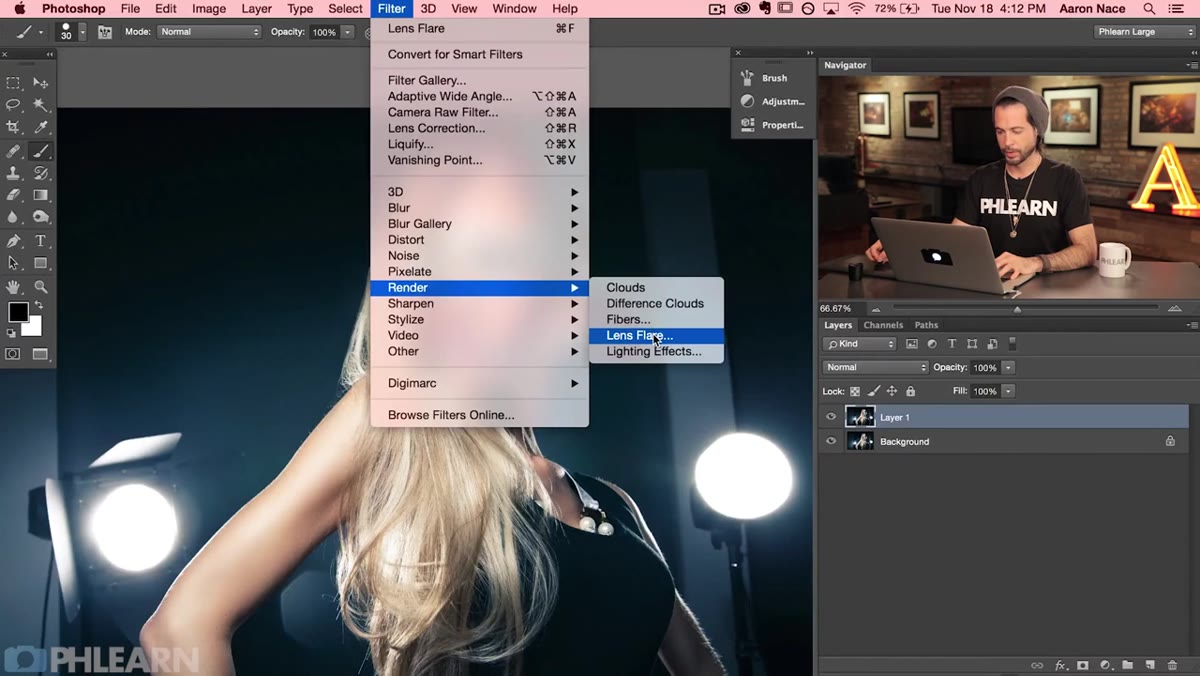 Lens Flare dialog box open with preview showing flare position over light source
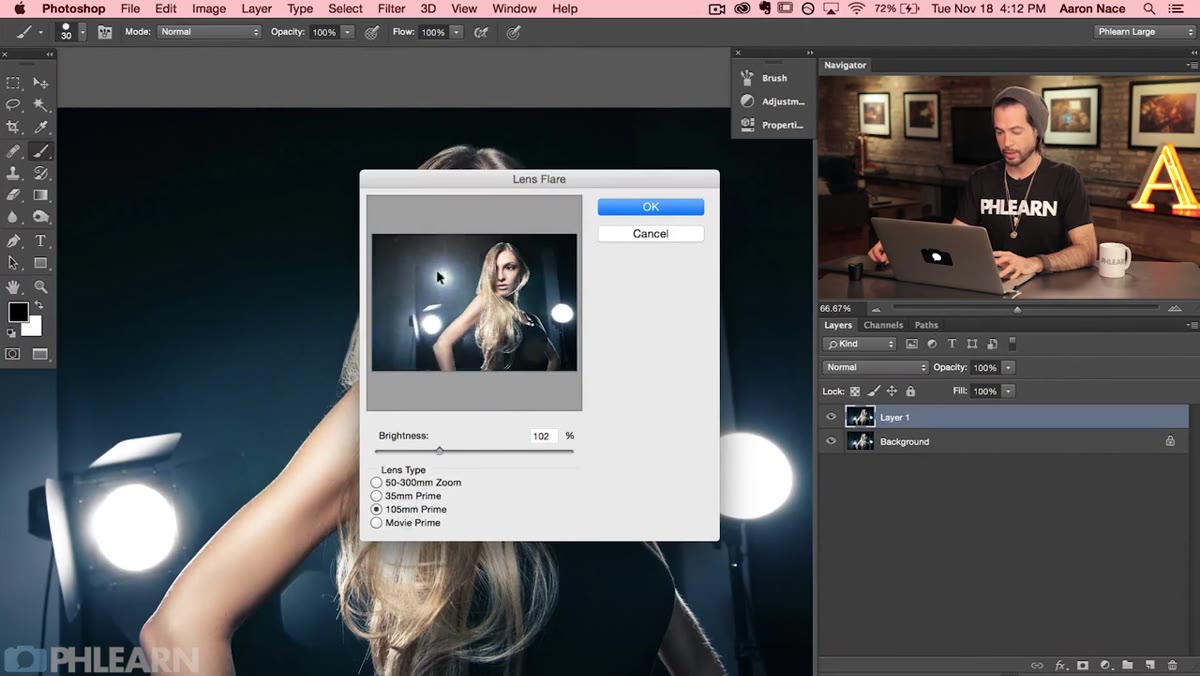
With your stamp visible layer selected, go to Filter > Render > Lens Flare. A dialog box opens with a small preview of your image. You can click directly on that preview to reposition the flare - drag it around until it’s sitting right on top of one of your backlit sources. This is not the place to be creative with placement. Put it on the light, full stop.
Lens Flare dialog box open with preview showing flare position over light source
With your stamp visible layer selected, go to Filter > Render > Lens Flare. A dialog box opens with a small preview of your image. You can click directly on that preview to reposition the flare - drag it around until it’s sitting right on top of one of your backlit sources. This is not the place to be creative with placement. Put it on the light, full stop.
From here you have two main controls. First is Lens Type, which changes the character of the flare. The 50-300mm Zoom option tends to produce a classic, cinematic look. The 105mm Prime is more subtle and organic. The 35mm Prime and Movie Prime options give you more stylized results. Try a couple and see which one matches the overall feel of your image. Second is Brightness, which controls intensity. Aaron’s advice here is to stay restrained - cranking the brightness too high moves the flare from “believable” to “Microsoft Office clipart,” and he’s not wrong.
Step 5: Evaluate Placement Against Your Light Source Logic
 Lens flare positioned incorrectly in center of frame as a what-not-to-do example
After you click OK, zoom out and look at the result critically. The flare should feel like it’s emanating from a real point of light that already exists in the frame. If you look at the image and the flare seems to float somewhere disconnected from any actual light source, it needs to move. You can undo, re-open the filter, and reposition.
Lens flare positioned incorrectly in center of frame as a what-not-to-do example
After you click OK, zoom out and look at the result critically. The flare should feel like it’s emanating from a real point of light that already exists in the frame. If you look at the image and the flare seems to float somewhere disconnected from any actual light source, it needs to move. You can undo, re-open the filter, and reposition.
This is also the moment to check whether the brightness you chose is reading naturally at full-image scale. What looks fine in a small dialog preview can feel blown out on the actual canvas. Dial it back before you commit if anything feels heavy.
One Thing the Tutorial Doesn’t Cover (That I Learned the Annoying Way)
The stamp visible approach works, but it bakes the flare directly into a merged pixel layer. If your client asks you to shift the flare three days later, you’re redoing it from scratch. My current workaround: after creating the stamp visible layer, I convert it to a Smart Object before applying the filter. That makes the Lens Flare a re-editable Smart Filter, so I can double-click it later and tweak the position or brightness without nuking the layer. It adds one extra step but it’s saved me more than once on revision-heavy jobs.
The other thing worth noting: a single flare is almost always enough. The temptation to stack multiple flares for a “more dramatic” effect usually results in something that looks like a 2009 sci-fi movie poster. Pick your strongest light source, place one flare, and resist.
The core lesson from Aaron’s tutorial is that lens flares are evidence of a physical event, not a style choice you apply in post because the photo felt a bit flat. Get the lighting logic right first, use the stamp visible layer to keep your workflow non-destructive, and treat brightness like hot sauce - a little goes a long way. Watch the full tutorial on YouTube for Aaron’s full walkthrough and to see how the finished image comes together.
Comments (1)
Wow, I had no idea you could do this. Mind blown.
Leave a Comment