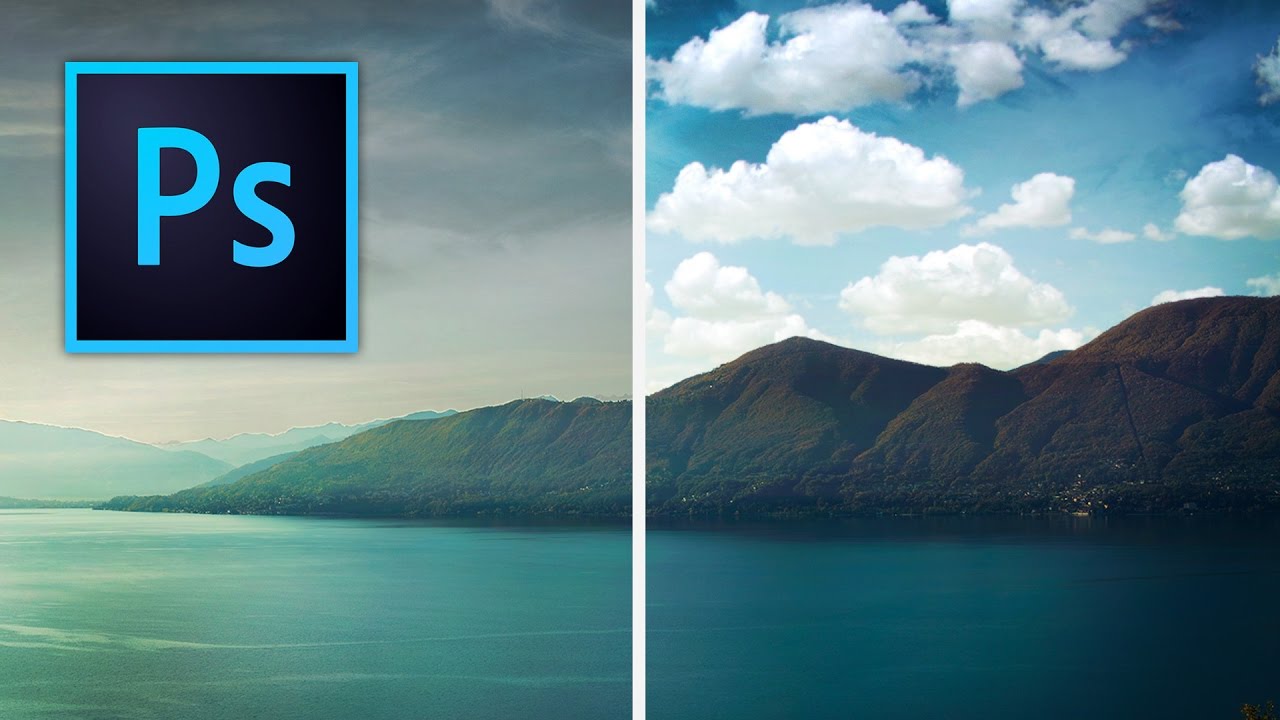
A few years back I spent the better part of a Tuesday stressing over a landscape composite for a client. The photo was solid — good light, interesting subject — but the sky was that flat, washed-out grey that makes everything look like it was shot in a Walmart parking lot. I knew the fix existed somewhere in Photoshop. I just didn’t know the clean way to do it without spending three hours masking individual clouds by hand like some kind of caffeinated monk.
That’s exactly the problem this technique solves. In this Kelvin Designs tutorial, Kelvin walks through a workflow that combines blend modes, a quick Curves adjustment, and a simple mask to swap out a sky in a way that actually holds up. It’s not the “Sky Replacement” auto button that Photoshop added later. It’s the manual method, and understanding it means you’re not dependent on an algorithm to make your compositional decisions for you.
Watch the full tutorial on YouTube
The whole process is cleaner than you’d expect, and the principles carry over to other compositing work well beyond sky swaps. Here’s how it breaks down.
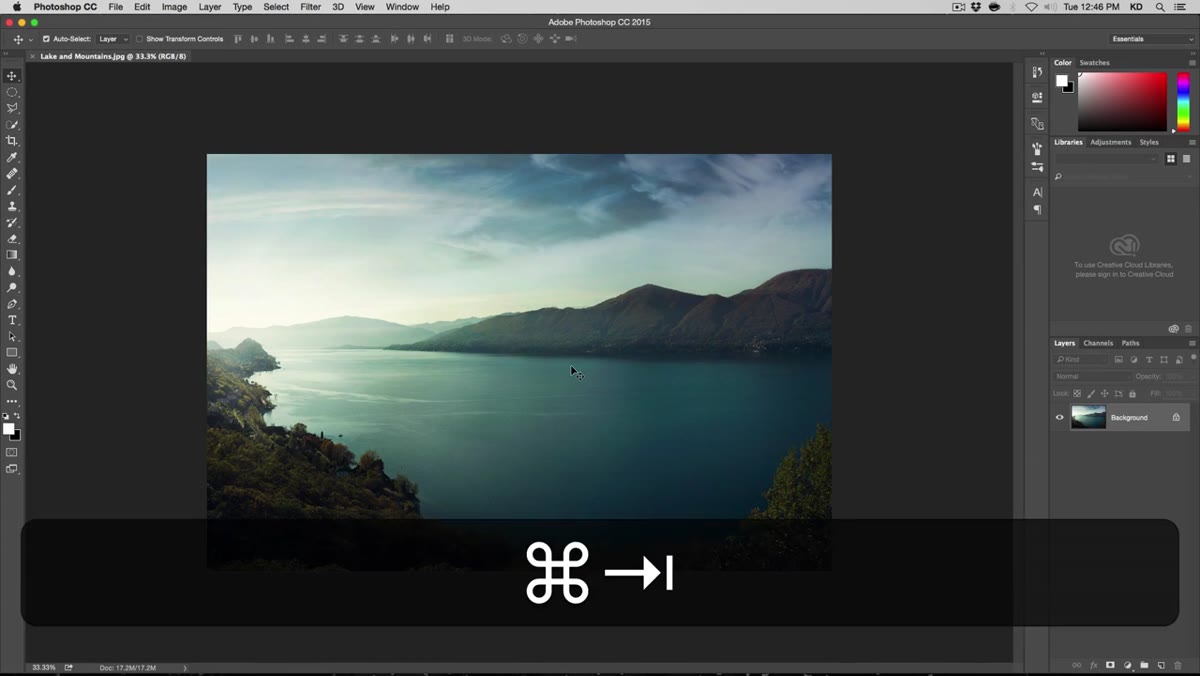
Step 1: Open Both Images and Place Your Sky
 Dragging cloud image onto landscape photo tab
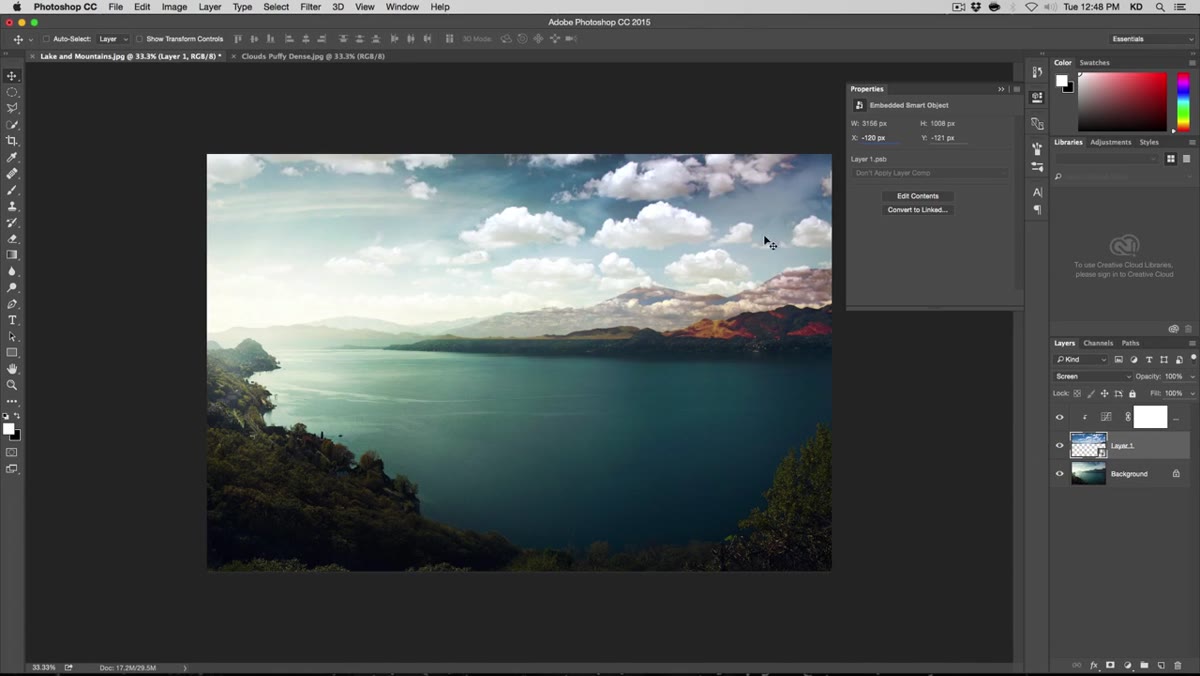
Open your base landscape photo first, then open your replacement sky image as a separate file. With the Move tool selected, drag the sky image over to the tab of your landscape and drop it in. This places it as a new layer on top of your base image. Immediately right-click that layer and choose “Convert to Smart Object.” This is non-negotiable. Smart Objects let you scale the layer back up later without degrading quality, and they protect you from doing something permanent to a layer you might want to revisit.
Dragging cloud image onto landscape photo tab
Open your base landscape photo first, then open your replacement sky image as a separate file. With the Move tool selected, drag the sky image over to the tab of your landscape and drop it in. This places it as a new layer on top of your base image. Immediately right-click that layer and choose “Convert to Smart Object.” This is non-negotiable. Smart Objects let you scale the layer back up later without degrading quality, and they protect you from doing something permanent to a layer you might want to revisit.
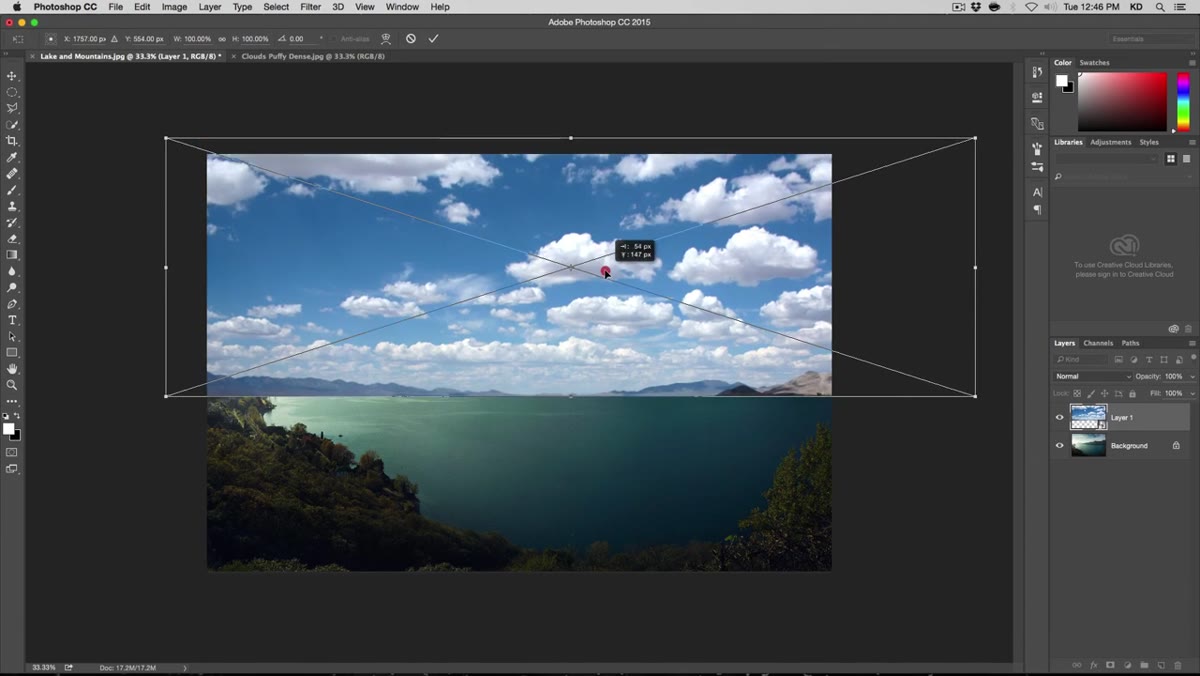
Step 2: Scale and Position the Sky Layer
 Transforming sky layer with Command+T over landscape
Hit Command+T (Ctrl+T on Windows) to bring up Free Transform. Resize the sky layer so it covers the upper portion of the frame, but pay attention to where your horizon line sits. In this case, Kelvin is working with mountains, and the goal is to make sure no mountain peaks are poking up into the sky layer. Use the arrow keys to nudge position precisely. Shift plus an arrow key moves in ten-pixel increments if you need bigger adjustments fast. When you’re happy with placement, press Return to commit.
Transforming sky layer with Command+T over landscape
Hit Command+T (Ctrl+T on Windows) to bring up Free Transform. Resize the sky layer so it covers the upper portion of the frame, but pay attention to where your horizon line sits. In this case, Kelvin is working with mountains, and the goal is to make sure no mountain peaks are poking up into the sky layer. Use the arrow keys to nudge position precisely. Shift plus an arrow key moves in ten-pixel increments if you need bigger adjustments fast. When you’re happy with placement, press Return to commit.
Drop the layer opacity to around 50% temporarily. This lets you see both layers at once and confirm your sky is sitting where you actually want it before you go any further.
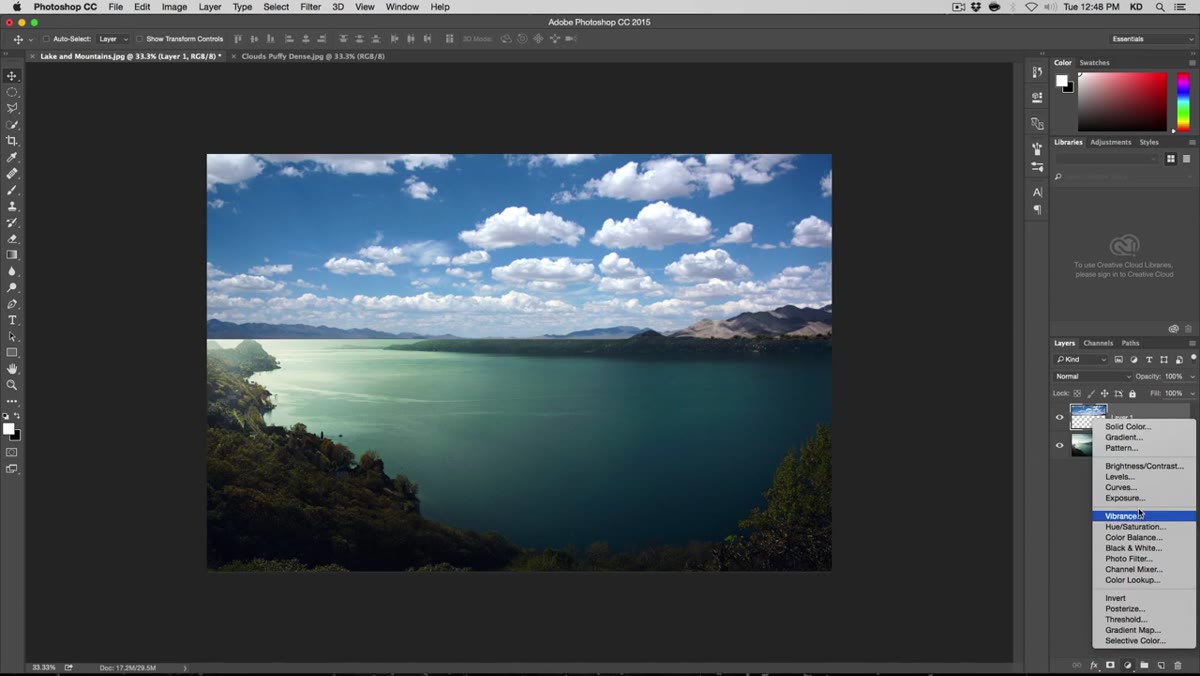
Step 3: Adjust the Black Point with a Curves Layer
 Curves adjustment panel with black point eyedropper active
Here’s where most people skip a step and then wonder why their blend mode looks muddy. Before switching blend modes, you need to increase the contrast within the sky layer itself. Add a Curves adjustment layer, and use the black point eyedropper (the darkest of the three eyedroppers in the Curves panel) to click on an area of blue sky in your cloud image. This tells Photoshop “this is my new black point,” which deepens the shadows in the sky layer and creates a much stronger separation between the clouds and the blue areas.
Curves adjustment panel with black point eyedropper active
Here’s where most people skip a step and then wonder why their blend mode looks muddy. Before switching blend modes, you need to increase the contrast within the sky layer itself. Add a Curves adjustment layer, and use the black point eyedropper (the darkest of the three eyedroppers in the Curves panel) to click on an area of blue sky in your cloud image. This tells Photoshop “this is my new black point,” which deepens the shadows in the sky layer and creates a much stronger separation between the clouds and the blue areas.
You can click around a few times to find the right spot. Kelvin adjusts until he gets strong contrast without blowing out the cloud detail. Then, critically, hold Alt (Option on Mac) and click the Curves layer icon to clip it to the sky layer only. This is the step people miss. Without clipping, the Curves adjustment will affect your entire image and wreck the landscape underneath.
Step 4: Switch the Sky Layer to Screen Blend Mode
 Blend mode dropdown set to Screen on sky layer
Set your sky layer’s opacity back to 100%, then change its blend mode from Normal to Screen. Screen mode works by revealing whites and hiding darks. The dark blue areas of the sky layer become transparent, letting your original landscape show through, while the bright white clouds stay visible. Because you deepened the black point in Step 3, that separation is now pronounced enough to actually work. Without that Curves step, the blue wasn’t dark enough to go transparent, and the result would look like a washed-out mess.
Blend mode dropdown set to Screen on sky layer
Set your sky layer’s opacity back to 100%, then change its blend mode from Normal to Screen. Screen mode works by revealing whites and hiding darks. The dark blue areas of the sky layer become transparent, letting your original landscape show through, while the bright white clouds stay visible. Because you deepened the black point in Step 3, that separation is now pronounced enough to actually work. Without that Curves step, the blue wasn’t dark enough to go transparent, and the result would look like a washed-out mess.
This is the kind of thing that makes blend modes suddenly make sense once you see it in context rather than just reading a definition.
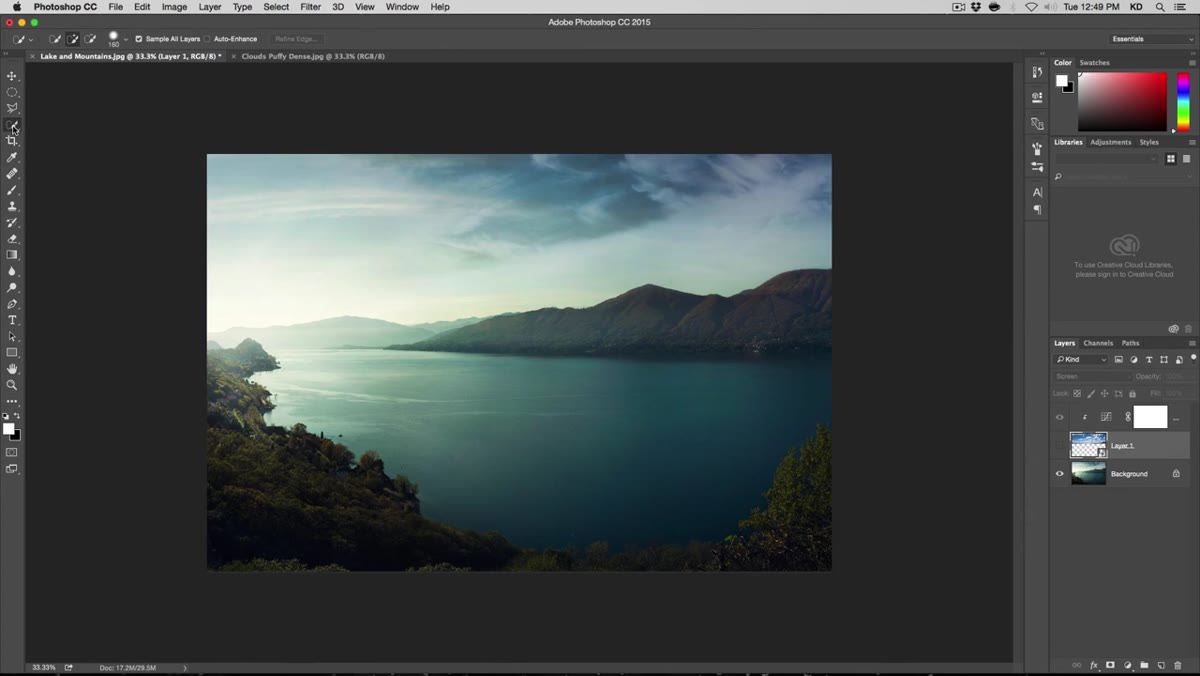
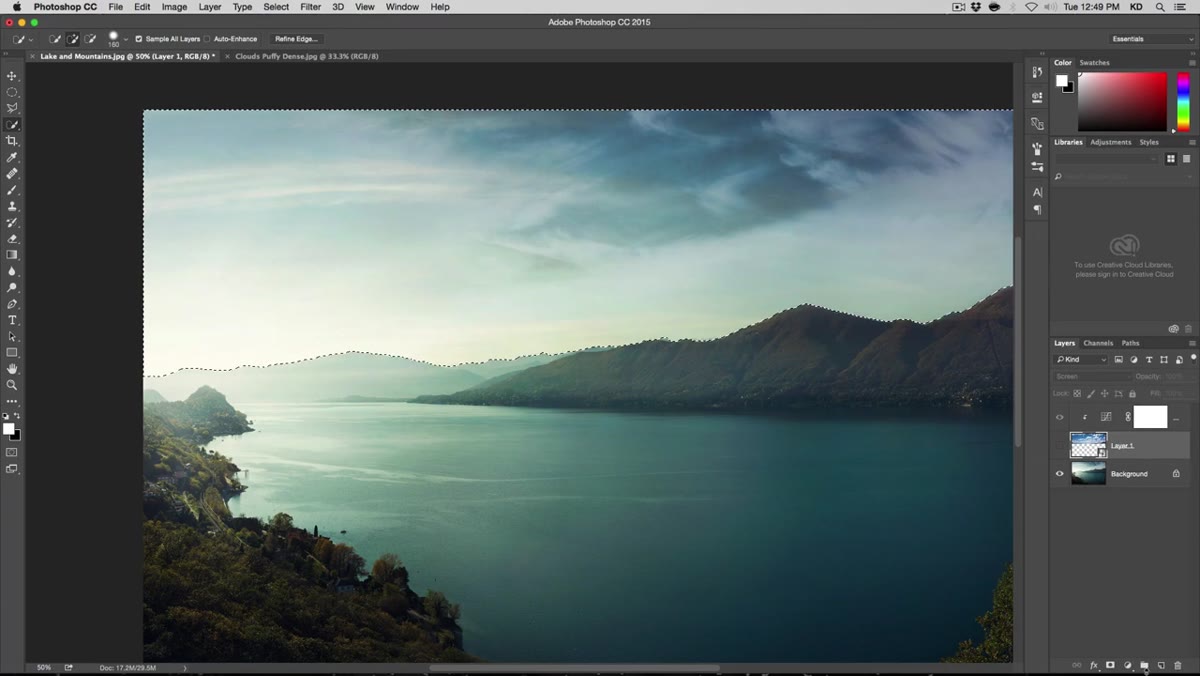
Step 5: Select the Sky Area with the Quick Selection Tool
 Quick Selection tool painting over sky area in base photo
Hide your sky layer for a moment so you can see the original landscape clearly. Grab the Quick Selection tool and paint over the sky portion of your base image. Photoshop is usually pretty good at finding the horizon edge on its own. Zoom in and hold Alt to subtract from your selection anywhere it spills into the landscape. You don’t need a perfect pixel-level selection here. Good enough is genuinely good enough for this step.
Quick Selection tool painting over sky area in base photo
Hide your sky layer for a moment so you can see the original landscape clearly. Grab the Quick Selection tool and paint over the sky portion of your base image. Photoshop is usually pretty good at finding the horizon edge on its own. Zoom in and hold Alt to subtract from your selection anywhere it spills into the landscape. You don’t need a perfect pixel-level selection here. Good enough is genuinely good enough for this step.
Once you have a workable selection, open Select and Mask (or Refine Edge, depending on your version). Add a small amount of Feather, a touch of Smoothing, and shift the Edge slider inward slightly so your selection contracts rather than expands. This prevents a halo of original sky from showing around the composite. Keep the values subtle. A little goes a long way here.
Step 6: Create a Group and Apply the Selection as a Mask
 Selection converted to mask on a layer group in Layers panel
With your selection still active, create a new layer group in the Layers panel. Then, with the group selected, click the Add Layer Mask button. Your selection becomes a mask on the group. Now drag your sky layer (and its clipped Curves adjustment) inside that group. The mask confines the entire sky composite to just the area where your original sky was, so nothing bleeds into the landscape below. It’s a tidy way to keep everything organized and editable without committing to anything destructive.
Selection converted to mask on a layer group in Layers panel
With your selection still active, create a new layer group in the Layers panel. Then, with the group selected, click the Add Layer Mask button. Your selection becomes a mask on the group. Now drag your sky layer (and its clipped Curves adjustment) inside that group. The mask confines the entire sky composite to just the area where your original sky was, so nothing bleeds into the landscape below. It’s a tidy way to keep everything organized and editable without committing to anything destructive.
One Thing I’d Add: Check Your Edge in Multiple Zoom Levels
The mask edge can look clean at 50% zoom and then show problems when you zoom to 100% or look at it on a larger monitor. Before calling any sky swap done, I zoom into the horizon line at full resolution and check for fringing, hard edges, or any spot where the clouds look like they’re sitting on top of the landscape rather than behind it. If the edge looks wrong, a quick Levels adjustment clipped to the mask (not the layer) can tighten it up without redoing your selection from scratch. It’s a small habit that’s saved me from some embarrassing client exports.
The single most transferable idea from this whole technique is using Curves to manipulate a layer’s tonal range specifically so a blend mode can do its job properly. Most people try the blend mode, see it doesn’t look right, and give up. The actual fix is almost always in the prep work, not the mode itself. Get the contrast right first, then let Screen do what it does.
Watch the full tutorial on YouTube and grab the free source files Kelvin offers through his newsletter so you can follow along with the exact images used in the lesson.
Comments
Leave a Comment