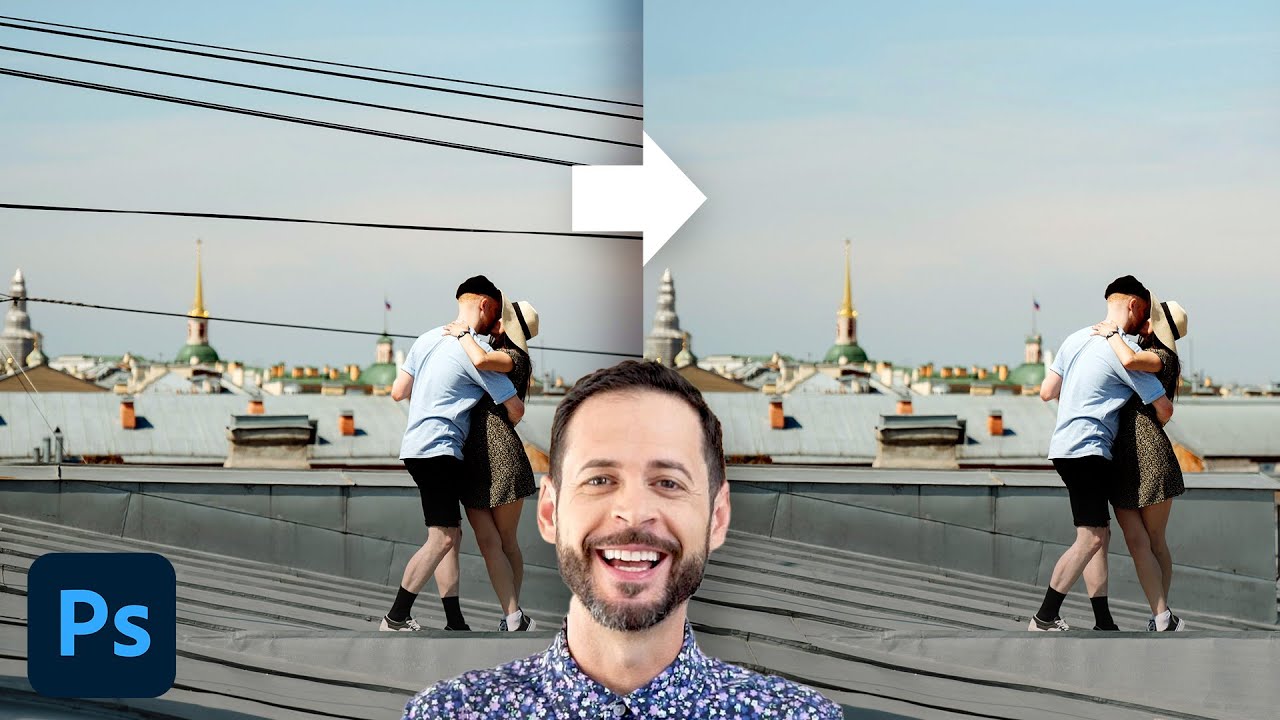
There’s a specific kind of disappointment that hits when you get home from a shoot, pull up your photos, and realize the best frame in the whole batch has a tangle of power lines draped across the sky like someone strung laundry across your composition. I’ve been there more times than I want to admit. For years I handled it the slow way, cloning and healing and patch-tooling my way through it pixel by pixel, sometimes spending 30 minutes on a single wire. That’s 30 minutes I could have spent drinking coffee and staring out a window, which is basically my second job.
That’s why this tutorial from Aaron Nace over at PHLEARN genuinely changed how I approach these edits. Watch the full tutorial on YouTube — but if you want a written walkthrough you can follow step by step without scrubbing back and forth, that’s exactly what I’ve put together here. The method leans on Content-Aware Fill, which has been in Photoshop for years but has gotten quietly impressive. When you use it right, it’s not a hack. It actually works.
The image Aaron uses is a solid real-world test case: a photo with multiple clusters of power lines crossing different types of background, some over open sky, some over more complex areas. By the end, every line is gone and the result looks natural. Here’s how he does it.
Step 1: Choose the Right Selection Tool
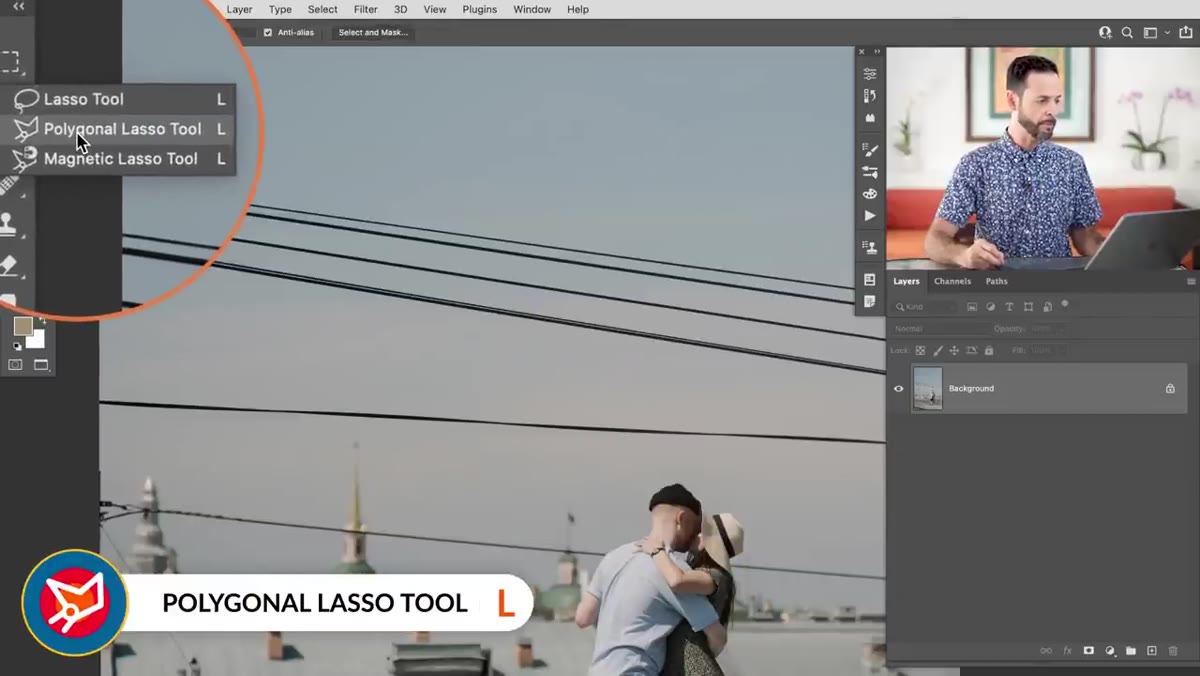 Polygonal Lasso Tool selected in the Photoshop toolbar
Start with the Polygonal Lasso Tool, not the regular Lasso. You’ll find it nested under the standard Lasso in the toolbar. The reason it’s the better pick here is straightforward: power lines are straight (or close enough), so a tool that lets you click from point to point and draw perfectly straight segments is going to trace around them much faster and more accurately than freehand drawing. Zoom in on your image first so you can see what you’re actually working with.
Step 2: Make a Selection That’s Slightly Larger Than the Line
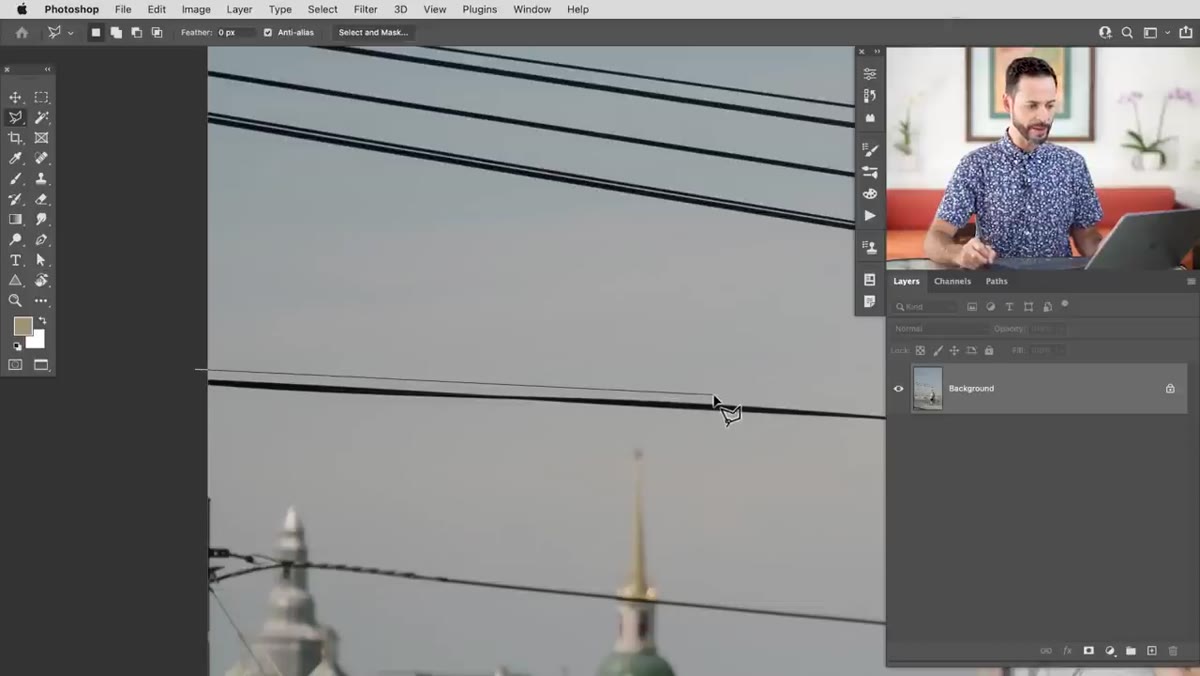 Polygonal Lasso drawing a selection around a power line cluster
Click to set your first anchor point just outside one end of the power line, then click around it, keeping your selection a little loose. You’re not trying to hug the line tightly. Give yourself maybe 10 to 20 pixels of buffer on each side. Too tight and Content-Aware Fill doesn’t have enough room to work. Too loose and you risk pulling in background elements you don’t want sampled. The goal is a slim rectangular-ish marquee that fully contains the wire.
One useful trick Aaron points out: if you’re zoomed way in and you need to scroll to follow the line across the frame, just hold the Spacebar while you’re mid-selection. This lets you pan around the canvas without dropping your selection. Click to continue adding points when you’re repositioned. When you’re done, either click back on your starting point or hit Enter to close the selection.
Step 3: Open Content-Aware Fill
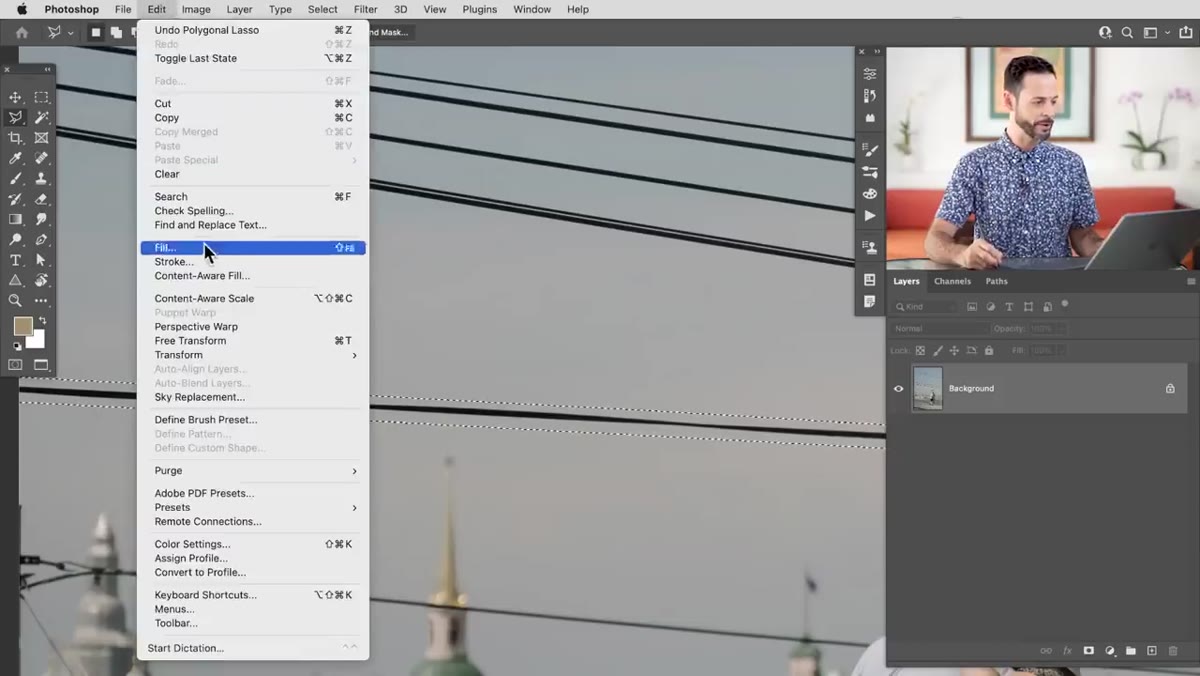 Edit menu open with Content-Aware Fill option highlighted
With your selection active, go to Edit, then scroll down to Content-Aware Fill. This opens a dedicated dialog panel rather than just running the fill instantly, which is what you want. The panel gives you actual control over what happens. You’ll see your image on the left with a green overlay showing Photoshop which areas it’s allowed to sample from to build the fill. That green zone is the key to getting good results.
Step 4: Check the Preview and Adjust the Sampling Area
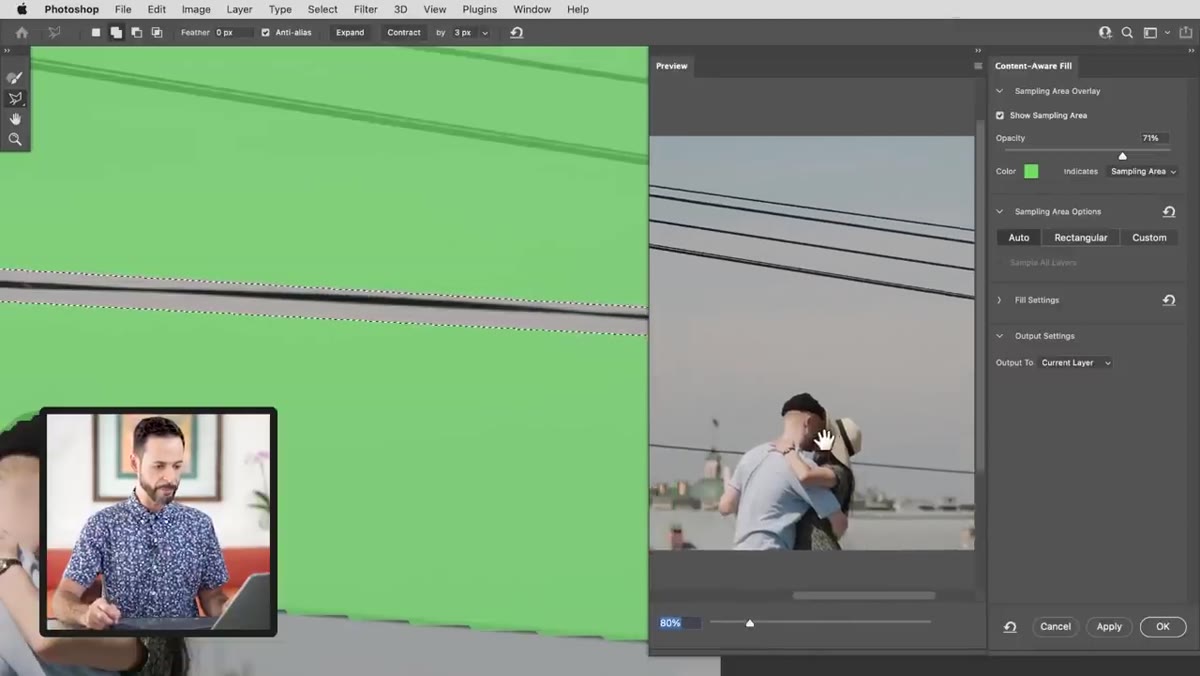 Content-Aware Fill dialog showing green sampling overlay and preview panel
On the right side of the dialog there’s a live preview. Take a second to actually look at it before clicking OK. If the fill looks wrong, it’s usually because Photoshop is sampling from a problem area, maybe a part of the image with a different color tone or texture. You can use the Sampling Brush (the green paint brush tool on the left side of the dialog) to add or remove areas from the green sampling zone. Paint over areas you want Photoshop to use, or hold Alt and paint over areas you want it to ignore. This one adjustment fixes most bad fills before they happen.
Step 5: Output to a New Layer
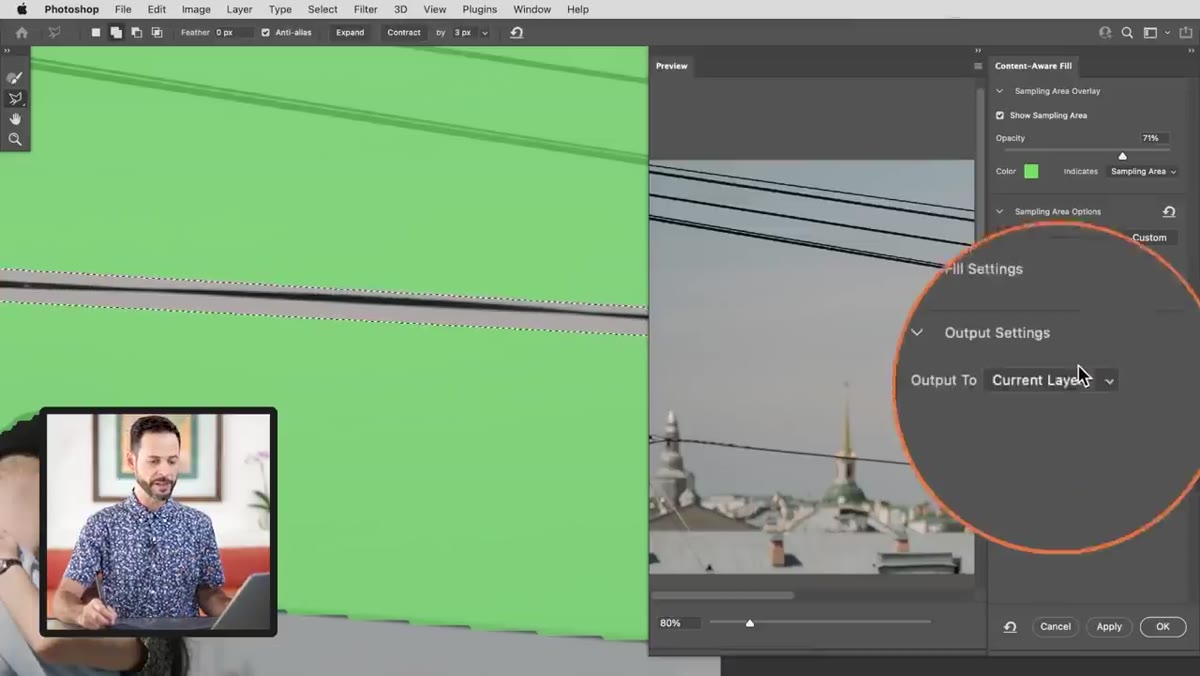 Output Settings dropdown in Content-Aware Fill set to New Layer
Before you hit OK, check the Output Settings section at the bottom right of the dialog. By default it may output directly to your current layer, overwriting pixels permanently. Change this to New Layer instead. This keeps your original image untouched and puts the filled result on a separate layer above it. If the fill looks slightly off when you zoom out, you can mask it, nudge it, or redo just that piece without touching anything else. This habit alone will save you from a lot of “wait, what did I just do” moments.
Step 6: Handle Multiple Lines With Shift-Click Selections
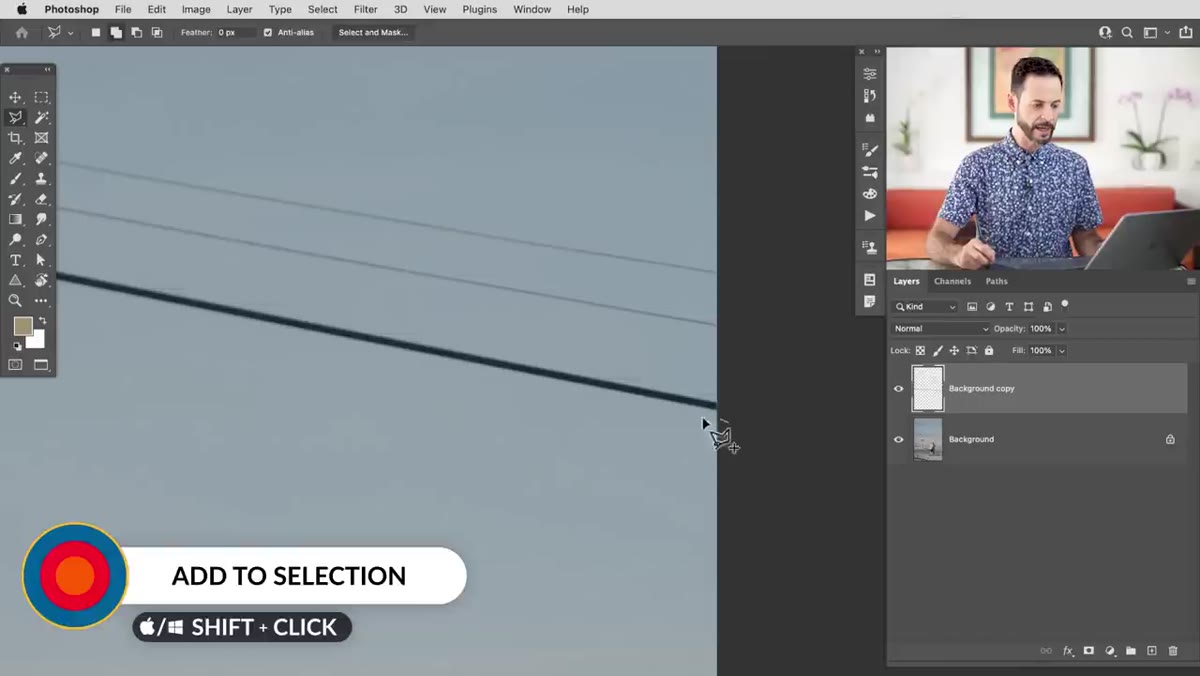 Two separate power line selections active simultaneously on the image
For images with more than one cluster of lines, you don’t have to run Content-Aware Fill separately for each one. After closing your first selection, hold Shift and use the Polygonal Lasso to draw around the next cluster. Holding Shift adds to the existing selection rather than replacing it. You can queue up two or three separate line clusters in a single selection pass, then run one Content-Aware Fill operation that handles all of them at once. This is a real time saver when you’ve got a photo that looks like someone knocked over a plate of spaghetti across the sky.
When you run Content-Aware Fill on these multi-part selections on a new layer (rather than the background), make sure to tick the Sample All Layers checkbox in the dialog. Since you’re working on a blank layer, Photoshop needs permission to look at the layers below it for sampling data. Without that box checked, you’ll get a gray fill and a small headache.
A Real-World Caveat: When the Line Crosses Something Detailed
Content-Aware Fill is impressively good at open sky and simple backgrounds. Where it starts to earn less of my trust is when a power line cuts directly through something with strong structure, like a tree canopy, a roofline, or a person’s shoulder. In those cases, running this exact process often gives you a fill that looks smeared or repeated in a way your eye catches immediately.
My workaround: I still use Content-Aware Fill as the first pass to knock out the obvious part of the line. Then I drop down to the Clone Stamp or Healing Brush to touch up the 10 or 15 percent that didn’t blend cleanly. Working on a separate layer makes this combination approach much less painful because nothing is permanent until you decide it is. Think of Content-Aware Fill as doing 85 percent of the heavy lifting, and manual tools cleaning up the edges.
The single most useful thing in this whole technique isn’t any one tool, it’s the habit of outputting to a new layer every time, keeping your edits non-destructive so you can fix mistakes without starting over. Everything else follows from that.
Watch the full tutorial on YouTube to see Aaron walk through the whole process on a real image, including some trickier line clusters that test the limits of what Content-Aware Fill can do on its own.
Comments
Leave a Comment