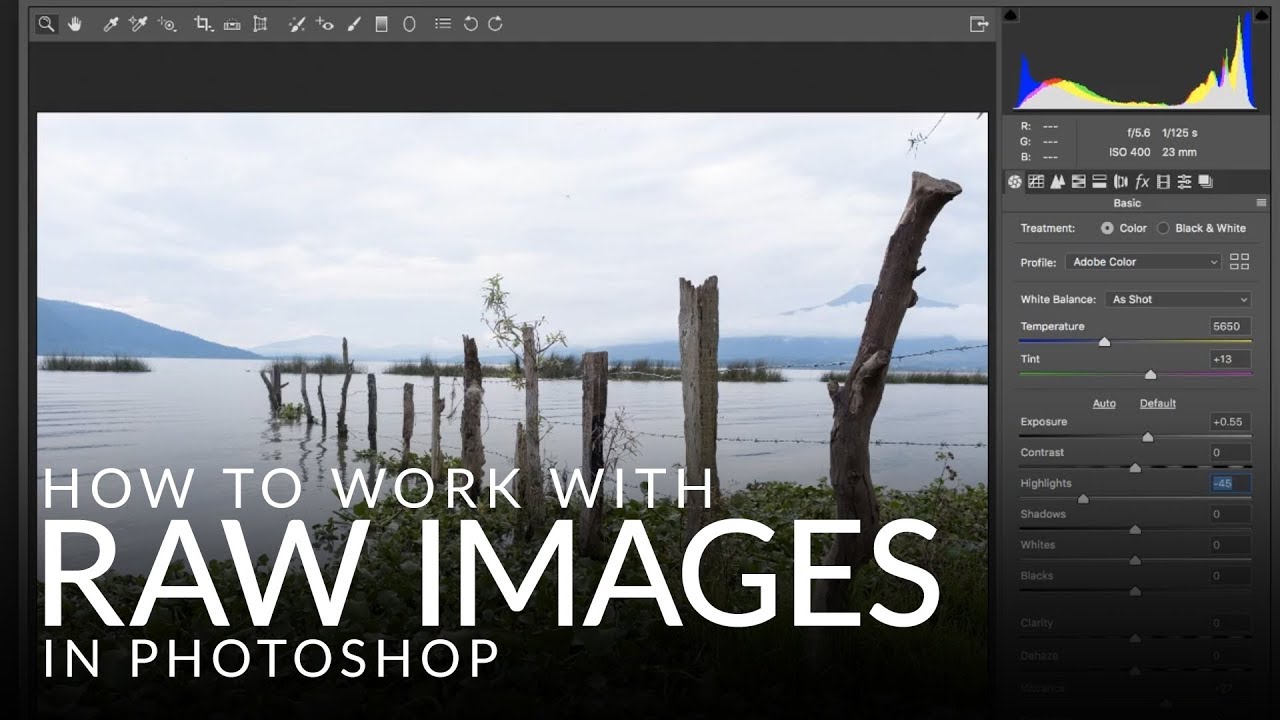
There’s a specific kind of pain that comes from finishing a Photoshop edit, sending it to a client, and then realizing you need to go back and change the exposure on the original RAW file. If you opened that file the wrong way, you’re basically starting over. I learned this the hard way early in my freelance career, and it cost me hours I didn’t have sitting in a coffee shop at 11pm with a deadline breathing down my neck. The good news is the fix is embarrassingly simple once someone shows you where to look.
In this Aaron Nace (PHLEARN) tutorial, Watch the full tutorial on YouTube, Aaron walks through how to bring a RAW image into Photoshop in a way that keeps the door open to your original RAW data at any point in your edit. The whole thing hinges on one checkbox that is, bafflingly, turned off by default. Let’s walk through it.
Step 1: Open Your RAW File Through Photoshop Directly
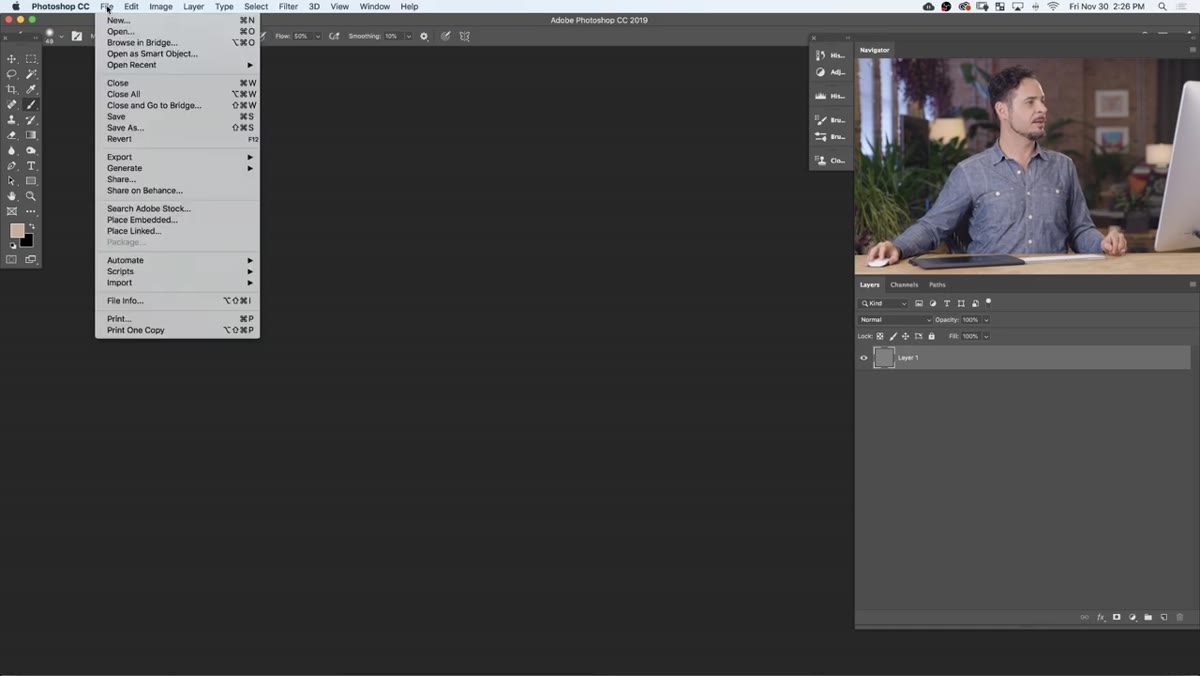 File menu open, navigating to a RAW image file
Go to File, then Open, and select your RAW file. Don’t route it through Lightroom first. Aaron makes a clear case for skipping that step: going directly into Photoshop via Adobe Camera Raw keeps your workflow cleaner and less destructive. When Lightroom is in the chain, you’re adding an extra conversion step before you even start editing. Photoshop will automatically detect the RAW format and open Adobe Camera Raw for you. No extra software to launch, no plugins to install. It’s already built in.
File menu open, navigating to a RAW image file
Go to File, then Open, and select your RAW file. Don’t route it through Lightroom first. Aaron makes a clear case for skipping that step: going directly into Photoshop via Adobe Camera Raw keeps your workflow cleaner and less destructive. When Lightroom is in the chain, you’re adding an extra conversion step before you even start editing. Photoshop will automatically detect the RAW format and open Adobe Camera Raw for you. No extra software to launch, no plugins to install. It’s already built in.
Step 2: Get Familiar with the Adobe Camera Raw Dialog
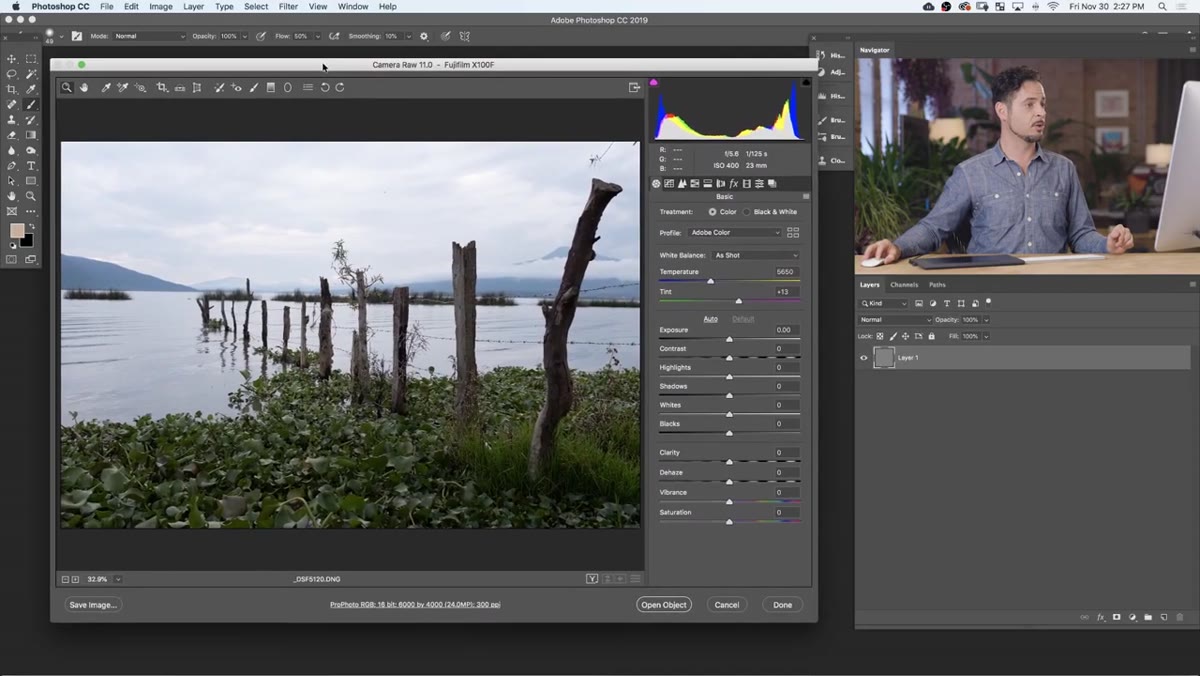 Adobe Camera Raw dialog open with photo loaded
Once your file loads, you’re inside Adobe Camera Raw, which Aaron identifies as the RAW processing engine behind both Photoshop and Lightroom. Think of it as the interpreter between your camera’s raw sensor data and something Photoshop can actually work with. At the top of the dialog you’ll see the version number and the camera model that shot the file. This is where you’ll make your initial tonal and color decisions before the image ever touches a Photoshop layer. It’s not just a gateway screen to click past. It matters.
Adobe Camera Raw dialog open with photo loaded
Once your file loads, you’re inside Adobe Camera Raw, which Aaron identifies as the RAW processing engine behind both Photoshop and Lightroom. Think of it as the interpreter between your camera’s raw sensor data and something Photoshop can actually work with. At the top of the dialog you’ll see the version number and the camera model that shot the file. This is where you’ll make your initial tonal and color decisions before the image ever touches a Photoshop layer. It’s not just a gateway screen to click past. It matters.
Step 3: Make Your Basic RAW Adjustments
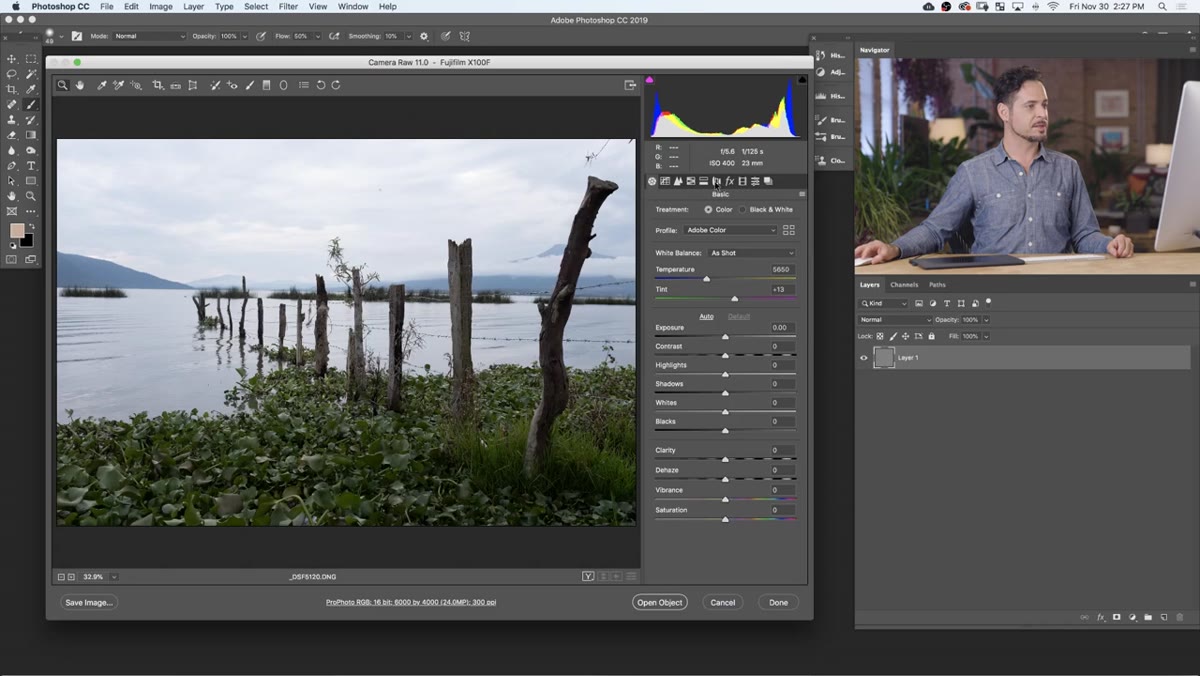 Lens Correction panel with profile corrections enabled
Aaron runs through a handful of quick but meaningful adjustments here. First, he heads to the Lens Correction panel and enables Profile Corrections. This automatically compensates for distortion and vignetting specific to the lens used, and it takes about one click. From there, he nudges the Vibrance slider up slightly to add some color richness without oversaturating skin tones the way the Saturation slider tends to do. He also bumps Exposure up to brighten the image, then pulls Highlights back down to recover detail that the exposure boost started to blow out. These aren’t arbitrary numbers. The idea is to do as much heavy lifting as possible while you still have access to the full RAW data, before any conversion happens.
Lens Correction panel with profile corrections enabled
Aaron runs through a handful of quick but meaningful adjustments here. First, he heads to the Lens Correction panel and enables Profile Corrections. This automatically compensates for distortion and vignetting specific to the lens used, and it takes about one click. From there, he nudges the Vibrance slider up slightly to add some color richness without oversaturating skin tones the way the Saturation slider tends to do. He also bumps Exposure up to brighten the image, then pulls Highlights back down to recover detail that the exposure boost started to blow out. These aren’t arbitrary numbers. The idea is to do as much heavy lifting as possible while you still have access to the full RAW data, before any conversion happens.
Step 4: Find the Workflow Options - The Most Important Click in This Whole Process
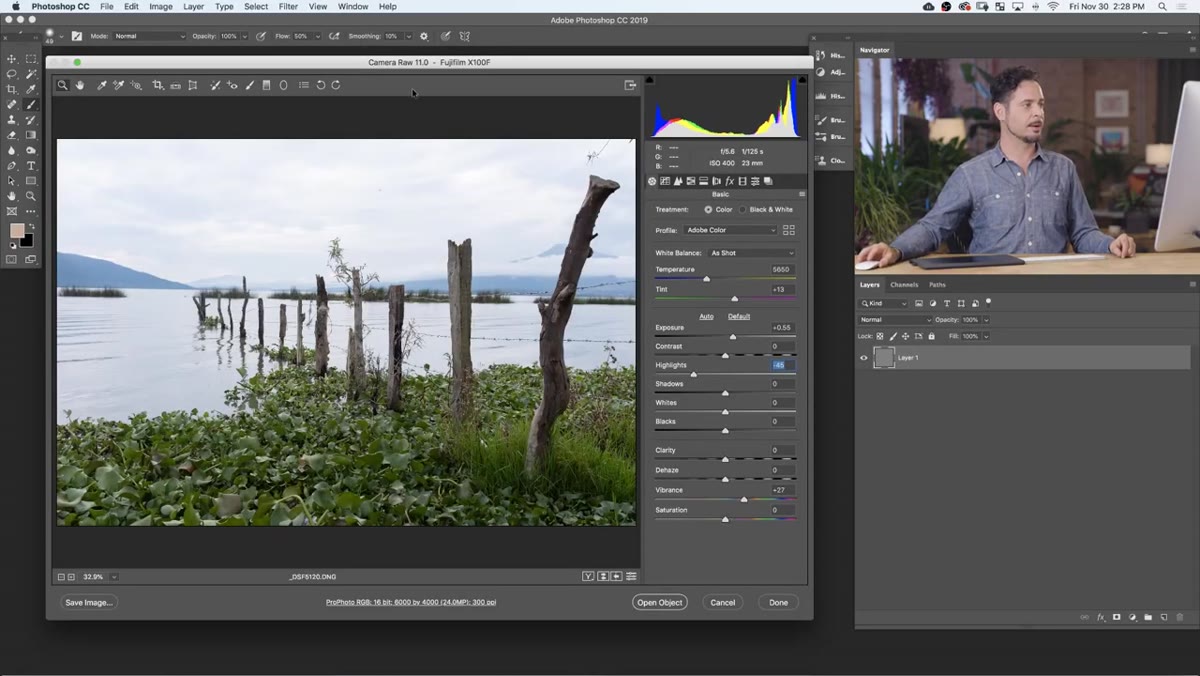 Bottom of Camera Raw dialog showing the workflow options text link
Here’s where most people zone out, and where the real value of this tutorial lives. At the very bottom of the Adobe Camera Raw dialog, there’s a small string of text showing things like color space, bit depth, and resolution. It looks more like a status bar than something interactive. It is extremely interactive. Click on it. Aaron calls this out as the single most important part of the entire dialog, and he’s not being dramatic. Clicking that text opens the Workflow Options panel, where you control exactly how your image gets handed off to Photoshop.
Bottom of Camera Raw dialog showing the workflow options text link
Here’s where most people zone out, and where the real value of this tutorial lives. At the very bottom of the Adobe Camera Raw dialog, there’s a small string of text showing things like color space, bit depth, and resolution. It looks more like a status bar than something interactive. It is extremely interactive. Click on it. Aaron calls this out as the single most important part of the entire dialog, and he’s not being dramatic. Clicking that text opens the Workflow Options panel, where you control exactly how your image gets handed off to Photoshop.
Step 5: Set Your Color Space and Bit Depth
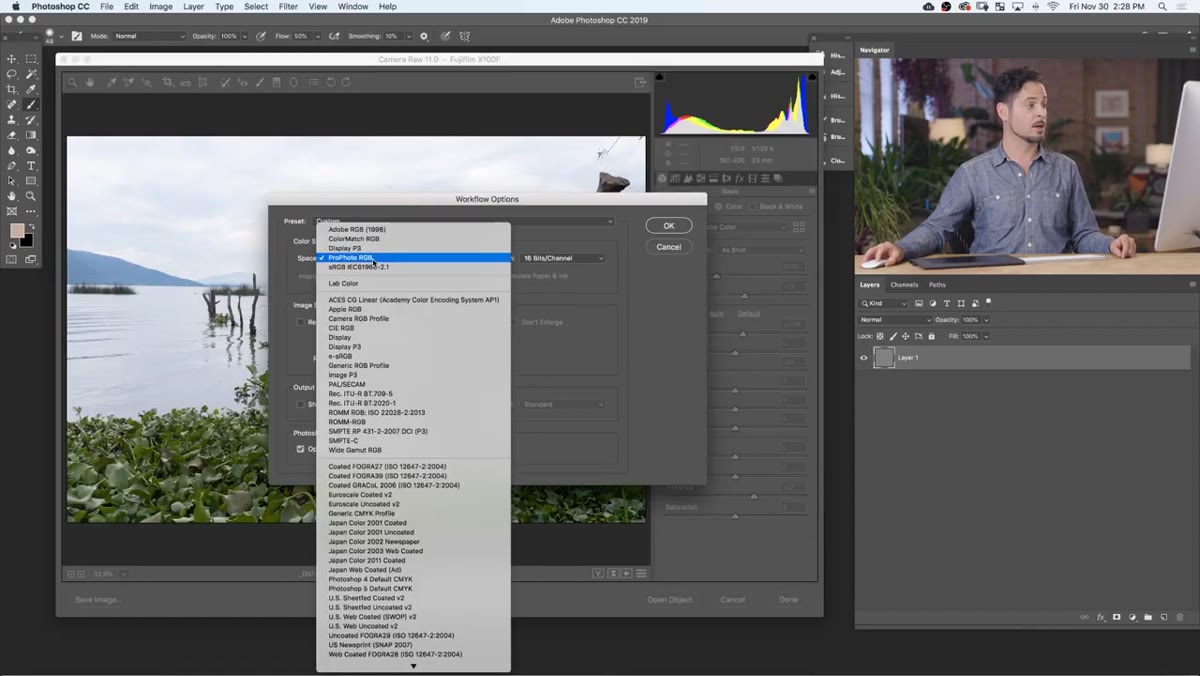 Workflow Options dialog open showing color space and bit depth settings
Inside Workflow Options, you’ve got two settings to dial in before the one everyone forgets. For Color Space, Aaron recommends ProPhoto RGB. It’s the largest available color space, which means you’re preserving the widest range of colors from your RAW file as it moves into Photoshop. Downsampling to a smaller space later is always an option, but you can’t recover information you threw away at the start. For Bit Depth, set it to 16 bits per channel for the same reason. More bits means smoother gradients, better shadow detail, and more room to push edits without banding or posterization. These two settings together give you the richest possible file to work with inside Photoshop.
Workflow Options dialog open showing color space and bit depth settings
Inside Workflow Options, you’ve got two settings to dial in before the one everyone forgets. For Color Space, Aaron recommends ProPhoto RGB. It’s the largest available color space, which means you’re preserving the widest range of colors from your RAW file as it moves into Photoshop. Downsampling to a smaller space later is always an option, but you can’t recover information you threw away at the start. For Bit Depth, set it to 16 bits per channel for the same reason. More bits means smoother gradients, better shadow detail, and more room to push edits without banding or posterization. These two settings together give you the richest possible file to work with inside Photoshop.
Step 6: Check “Open in Photoshop as Smart Objects” - Don’t Skip This
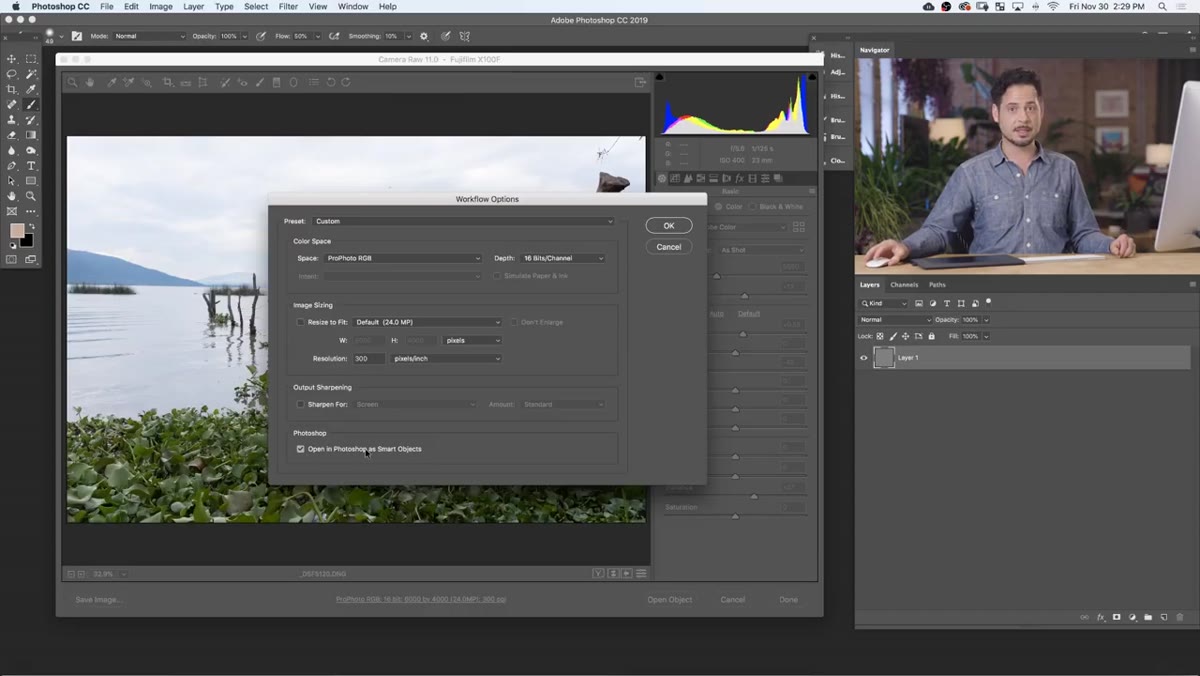 Workflow Options dialog with Smart Objects checkbox highlighted
Here it is. At the bottom of the Workflow Options dialog, there’s a checkbox that says “Open in Photoshop as Smart Objects.” It is unchecked by default. Check it. What this does is wrap your RAW file in a Smart Object layer when it lands in Photoshop, which means the original Adobe Camera Raw data is preserved and linked to that layer. Any time you want to go back and change your RAW adjustments, you just double-click the Smart Object thumbnail and Camera Raw opens right back up with all your previous settings intact. Without this checked, you get a flattened pixel layer with no way back. The button at the bottom of Camera Raw will also change from “Open Image” to “Open Object” once this setting is active, which is a handy confirmation that you’ve got it right.
Workflow Options dialog with Smart Objects checkbox highlighted
Here it is. At the bottom of the Workflow Options dialog, there’s a checkbox that says “Open in Photoshop as Smart Objects.” It is unchecked by default. Check it. What this does is wrap your RAW file in a Smart Object layer when it lands in Photoshop, which means the original Adobe Camera Raw data is preserved and linked to that layer. Any time you want to go back and change your RAW adjustments, you just double-click the Smart Object thumbnail and Camera Raw opens right back up with all your previous settings intact. Without this checked, you get a flattened pixel layer with no way back. The button at the bottom of Camera Raw will also change from “Open Image” to “Open Object” once this setting is active, which is a handy confirmation that you’ve got it right.
What I’d Add: Smart Objects Are Useful Way Beyond RAW Files
Once you get into the habit of opening RAW files as Smart Objects, you start to see how useful the Smart Object workflow is across everything in Photoshop. Any filter you apply to a Smart Object layer becomes a Smart Filter, which means it stays editable and can be toggled on and off without any destructive changes to the actual pixels. I now convert almost every layer I plan to apply filters to into a Smart Object before I touch it. You can do that by right-clicking the layer in the Layers panel and choosing “Convert to Smart Object.” It adds maybe five seconds to your setup and saves enormous headaches later. If you’ve ever had to redo an entire edit because a client wanted the blur “just a little less,” you understand exactly why this matters.
The single most important habit you can build from this tutorial is checking that Smart Objects box before you ever hit Open. Everything else in Adobe Camera Raw, the sliders, the lens corrections, the color settings, can be revisited. But if you open a RAW file as a flat image and then spend two hours editing it, that RAW data is gone from your working file. Make the checkbox check a reflex.
Watch the full tutorial on YouTube to see Aaron walk through the whole thing with a real RAW image and get a feel for the Camera Raw interface before you sit down with your own files.
Comments
Leave a Comment