Every working photographer or designer hits this wall eventually. You’ve got a great shot, you need it to fill an 11x14 print (or a photo book spread, or a square social tile), and the aspect ratio just doesn’t cooperate. Your options feel like a bad multiple-choice question: crop out the part of the image you actually care about, or live with white bars on the sides like you’re watching a DVD on a 2003 flatscreen.
I’ve been in that exact situation more times than I’d like to admit. Back when I was freelancing on tighter deadlines, I’d just crop and move on and quietly hate myself for it. Turns out there are smarter ways to handle this, and Watch the full tutorial on YouTube - Matt Kloskowski walks through a handful of techniques that can extend your image edges just enough to fill the frame without sacrificing anything you shot.
This is a Photoshop-only situation. You can’t pull this off inside Lightroom, so the workflow is: do your processing, open in Photoshop, and then use one of the approaches below depending on what kind of image you’re working with.
Step 1: Set Up Your Document at the Target Size
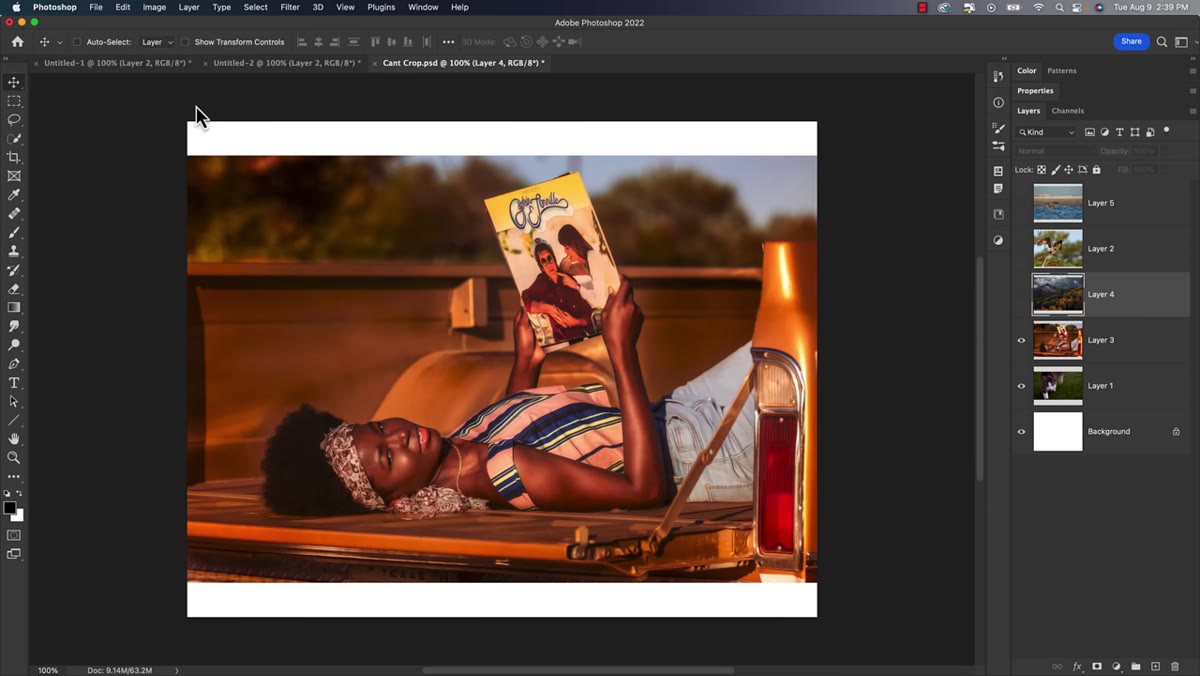 An 11x14 inch blank Photoshop document with pasted photo
Start by creating a new Photoshop document at the exact dimensions you’re printing or publishing to. If you’re targeting an 11x14 print, that’s your canvas. File > New, plug in 11 inches by 14 inches, set the resolution to 300 PPI for print, and hit Create. Then paste or place your photo into that document.
An 11x14 inch blank Photoshop document with pasted photo
Start by creating a new Photoshop document at the exact dimensions you’re printing or publishing to. If you’re targeting an 11x14 print, that’s your canvas. File > New, plug in 11 inches by 14 inches, set the resolution to 300 PPI for print, and hit Create. Then paste or place your photo into that document.
You’ll immediately see the problem laid bare: the photo sits inside the frame with empty space on one or more sides. That white space is your canvas. The goal is to fill it with something that looks like it was always there.
Step 2: Select the Empty Area With the Rectangular Marquee Tool
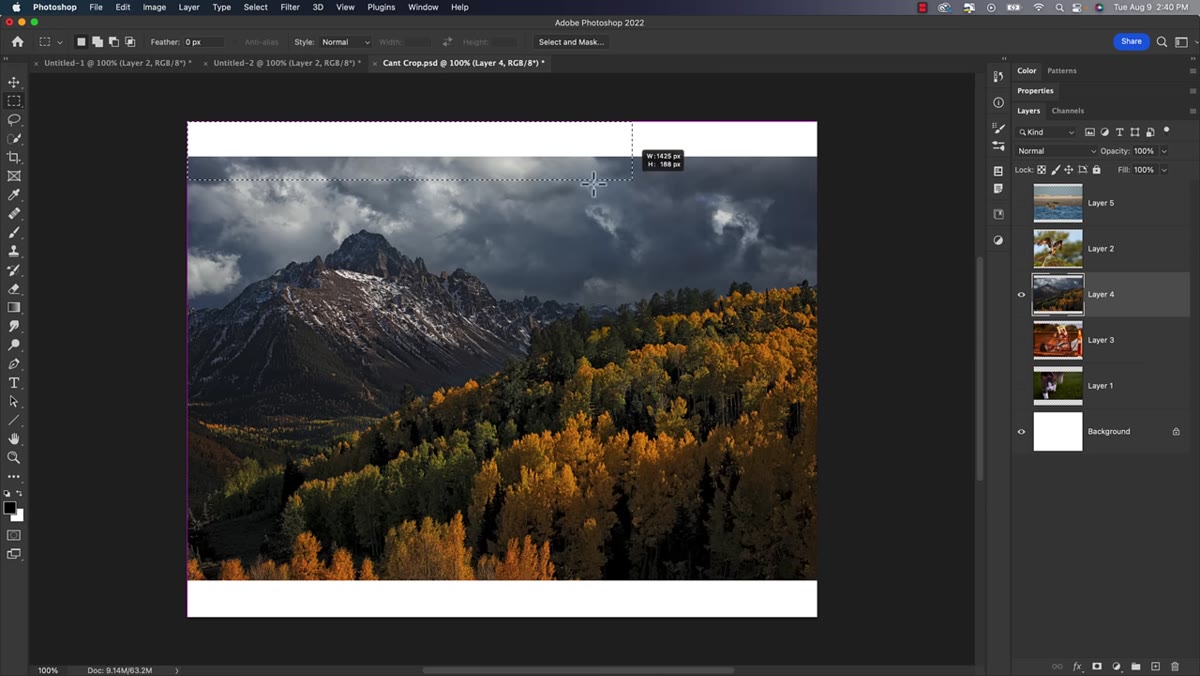 Rectangular marquee selection drawn over empty white canvas area
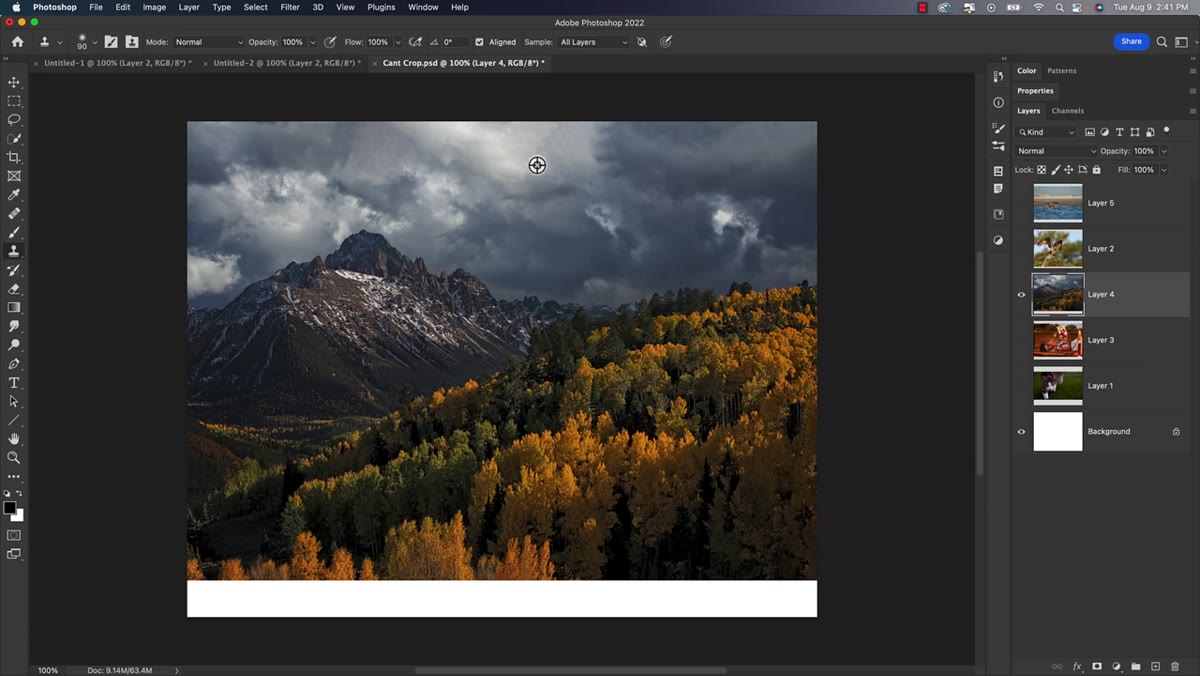
Grab the Rectangular Marquee Tool (M on your keyboard, since we’re all about shortcuts around here). Draw a selection that covers the empty strip of canvas. The key move: extend your selection slightly into the existing photo content, maybe 50 to 100 pixels worth. You want Photoshop to have some reference material to work from, not just a blank void.
Rectangular marquee selection drawn over empty white canvas area
Grab the Rectangular Marquee Tool (M on your keyboard, since we’re all about shortcuts around here). Draw a selection that covers the empty strip of canvas. The key move: extend your selection slightly into the existing photo content, maybe 50 to 100 pixels worth. You want Photoshop to have some reference material to work from, not just a blank void.
This overlap is important. If you select only the empty area, Content-Aware Fill has nothing to grab onto. Give it some of the real image to sample from and it does a much better job of blending the generated fill with what’s already there.
Step 3: Run Content-Aware Fill
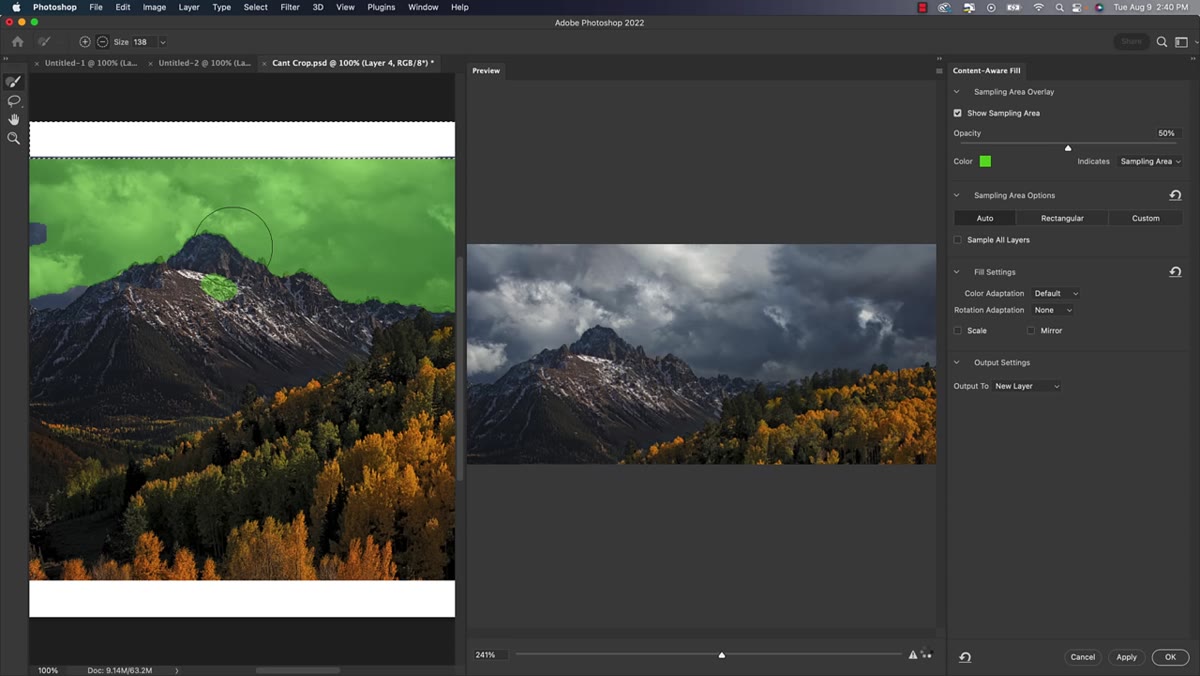 Content-Aware Fill dialog open with green sampling area visible
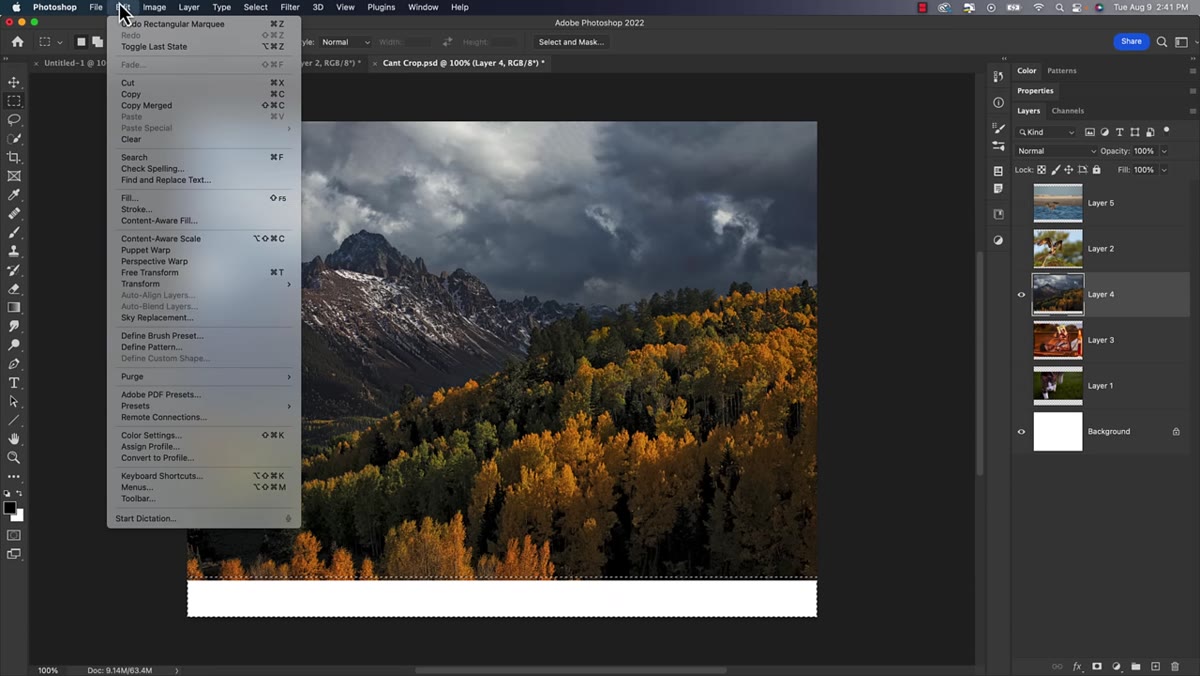
With your selection active, go to Edit > Content-Aware Fill. This opens a dedicated workspace where Photoshop shows you (in green) the areas it plans to sample when generating the fill. You can paint over parts of that green overlay to exclude them, which is useful if there’s a specific part of the image you don’t want it pulling texture from.
Content-Aware Fill dialog open with green sampling area visible
With your selection active, go to Edit > Content-Aware Fill. This opens a dedicated workspace where Photoshop shows you (in green) the areas it plans to sample when generating the fill. You can paint over parts of that green overlay to exclude them, which is useful if there’s a specific part of the image you don’t want it pulling texture from.
For the output setting at the bottom of the panel, Matt recommends choosing “Current Layer” unless you think you’ll need to tweak things separately. Outputting to a new layer just means you’ll merge it later anyway, so skip the extra step unless you’re feeling cautious. Click OK and watch Photoshop do its thing.
Step 4: Clean Up Any Repeating Patterns With the Clone Stamp
 Clone stamp tool selected, fixing a small repeating texture artifact
Content-Aware Fill is impressive but not magic. On images with strong repeating textures, like a sky with a distinct cloud pattern or a tiled background, you might notice a slightly obvious repeat where the fill stitches together. It’s subtle, but once you see it, you can’t unsee it.
Clone stamp tool selected, fixing a small repeating texture artifact
Content-Aware Fill is impressive but not magic. On images with strong repeating textures, like a sky with a distinct cloud pattern or a tiled background, you might notice a slightly obvious repeat where the fill stitches together. It’s subtle, but once you see it, you can’t unsee it.
This is a quick fix with the Clone Stamp Tool (S). Sample from an area with similar tone and texture, then paint over the offending spot. For sky fills especially, a large, soft brush with about 10 to 15% opacity lets you blend gradually instead of stamping in a hard patch. A couple of passes and it’s gone. The whole process takes less than a minute on a simple background.
Step 5: Repeat for Any Remaining Empty Edges
 New selection drawn over remaining empty strip on opposite edge
If your photo is leaving empty space on more than one side, you don’t do everything in a single selection. Work one edge at a time. Make a new selection for the next empty strip, again overlapping slightly into the good image content, and run Content-Aware Fill again. This iterative approach gives Photoshop fresh context with each pass, and the results tend to be cleaner than trying to grab everything at once.
New selection drawn over remaining empty strip on opposite edge
If your photo is leaving empty space on more than one side, you don’t do everything in a single selection. Work one edge at a time. Make a new selection for the next empty strip, again overlapping slightly into the good image content, and run Content-Aware Fill again. This iterative approach gives Photoshop fresh context with each pass, and the results tend to be cleaner than trying to grab everything at once.
This is also a good moment to zoom in and spot-check your edges as you go. At 100% zoom, small artifacts that looked fine at a glance become obvious. Better to catch them now than after you’ve sent the file to print.
Step 6: Know When to Use This and When to Walk Away
 Side-by-side of a workable sky photo versus a complex portrait
Matt is upfront about this: the technique works best on images with simple, consistent backgrounds. Open sky, grass, water, clean studio backdrops, architectural walls. The more complex and detailed the edge you’re trying to extend, the messier the fill gets.
Side-by-side of a workable sky photo versus a complex portrait
Matt is upfront about this: the technique works best on images with simple, consistent backgrounds. Open sky, grass, water, clean studio backdrops, architectural walls. The more complex and detailed the edge you’re trying to extend, the messier the fill gets.
Portraits where you need to extend a person’s arm or jacket collar? That’s a different and much harder problem. Photoshop can sometimes pull it off with Generative Fill (the AI-powered cousin of Content-Aware), but results vary. For these techniques specifically, the sweet spot is landscapes, nature shots, and product photography with clean surrounds.
My Own Extension: When You’re Printing, Check Your Bleed Too
Here’s something the tutorial doesn’t cover that’s burned me on actual print jobs. If you’re sending this to a professional printer, they’re going to ask for a bleed, typically 0.125 inches on each side. That means your extended edges need to go slightly beyond the trim line, not just up to it.
When I set up the document, I now add 0.25 inches to both dimensions to account for bleed on all sides, and I extend my Content-Aware fill just past the bleed marks. Takes ten extra seconds and has saved me from reprints more than once. The first time I skipped this step, the printer cropped right into the edge of my carefully extended sky and it looked terrible. Learn from my pain.
The core idea here is simple but easy to overlook when you’re staring at a deadline: cropping isn’t your only option when aspect ratios don’t match. Content-Aware Fill can often manufacture the extra edge you need, and on the right photo, it’s genuinely hard to tell the difference from the original. The trick is knowing which images will cooperate and which will fight you.
Watch the full tutorial on YouTube to see Matt work through multiple image types, including some that don’t go quite as smoothly, which is honestly just as useful as seeing the technique at its best.
Comments
Leave a Comment