There’s a moment every retoucher knows. You’re looking at an otherwise great photo and something just feels slightly off. The lighting is good, the focus is sharp, but the pose is fighting you. Maybe an arm is angled weird, or a hip is jutting out in a way that looks awkward instead of dynamic. You could go back to the client and ask for a reshoot. Or you could spend ten seconds in Liquify and quietly fix it before anyone notices. I used to avoid Liquify almost entirely because every time I’d seen it used in the wild, someone had turned a perfectly normal human being into a funhouse mirror version of themselves. Waists cinched to anatomically impossible proportions. Eyes the size of dinner plates. You know the look.
What changed my mind was watching how pros actually approach it when they’re not trying to transform someone. Watch the full tutorial on YouTube - this episode of Photoshop User TV from KelbyOne is technically from 2012 but the technique is completely timeless. The specific Liquify workflow shown here is genuinely useful, subtle, and something I now use on portrait work more often than I’d care to admit.
The core idea is this: Liquify isn’t just for dramatic body reshaping. Used carefully with a large, soft brush and the restraint to only nudge things a few pixels, it’s one of the best tools you have for compensating for bad camera angles or mid-stride poses that would otherwise get a photo rejected by a client.
Step 1: Duplicate the Background Layer First
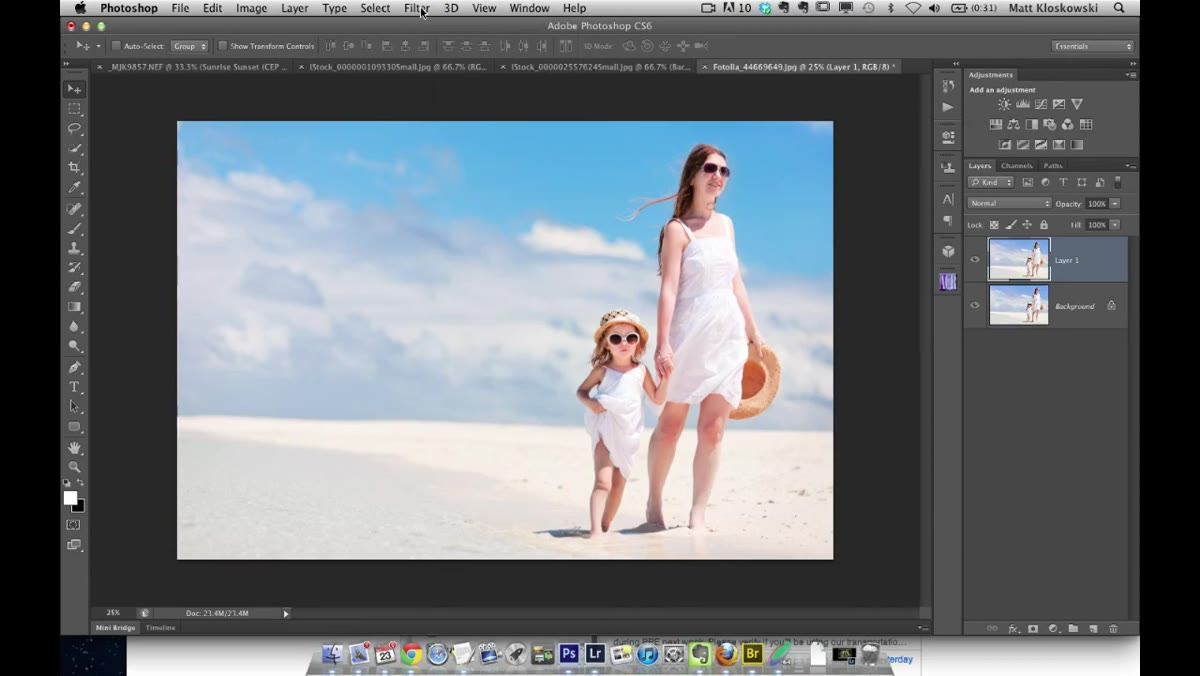 Duplicating a layer before opening the Liquify filter
Before you touch Liquify, press Command+J (Control+J on Windows) to duplicate your working layer. This sounds like housekeeping but it’s actually important. If you apply Liquify directly to your background layer and the result looks off, you’re either undoing everything or starting over. With a duplicate layer, you can lower the opacity, mask specific areas, or just throw the whole thing away and start fresh. I learned this the hard way years ago when I was doing retouching for a small marketing agency. Working non-destructively is the kind of habit that looks like paranoia right up until it saves your project.
Duplicating a layer before opening the Liquify filter
Before you touch Liquify, press Command+J (Control+J on Windows) to duplicate your working layer. This sounds like housekeeping but it’s actually important. If you apply Liquify directly to your background layer and the result looks off, you’re either undoing everything or starting over. With a duplicate layer, you can lower the opacity, mask specific areas, or just throw the whole thing away and start fresh. I learned this the hard way years ago when I was doing retouching for a small marketing agency. Working non-destructively is the kind of habit that looks like paranoia right up until it saves your project.
Step 2: Open the Liquify Filter
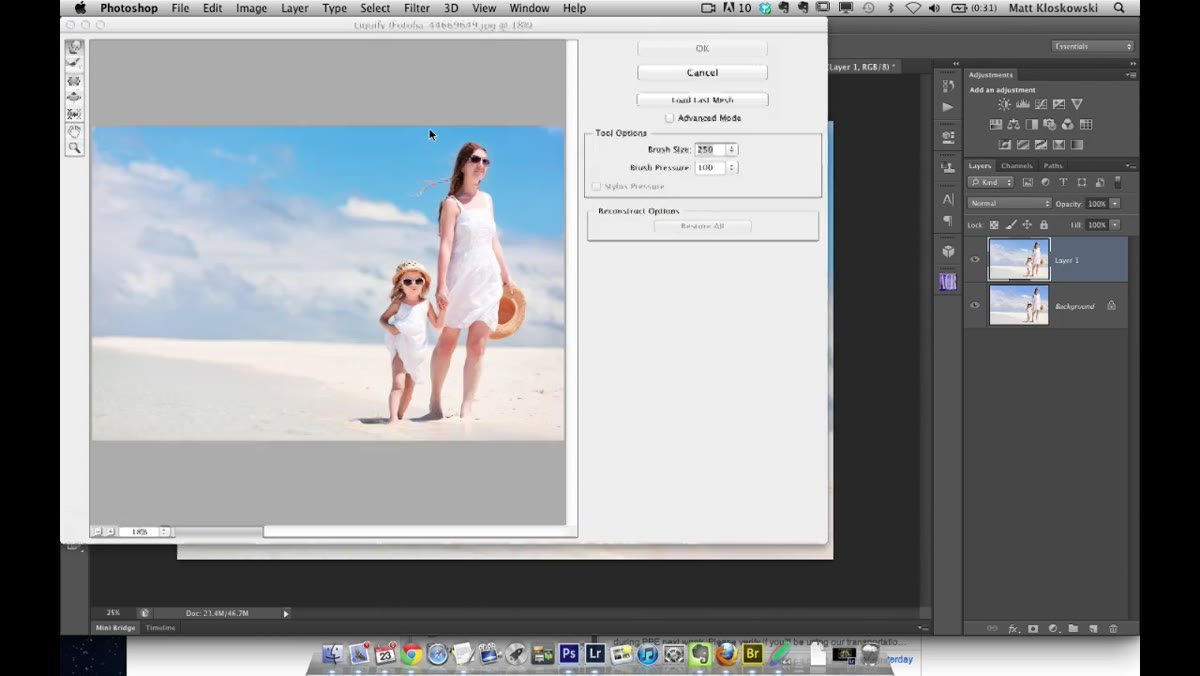 Navigating the Filter menu down to Liquify
Go to Filter and select Liquify from the dropdown. The Liquify workspace will open as a full-screen dialog with its own toolbar on the left and settings panel on the right. It can feel overwhelming the first time you’re in here, especially with all the mesh and reconstruction options staring at you. Ignore most of it for now. The tool you want for this technique is already selected by default: the Forward Warp Tool, which sits at the very top of the left toolbar and looks like a pointing finger icon.
Navigating the Filter menu down to Liquify
Go to Filter and select Liquify from the dropdown. The Liquify workspace will open as a full-screen dialog with its own toolbar on the left and settings panel on the right. It can feel overwhelming the first time you’re in here, especially with all the mesh and reconstruction options staring at you. Ignore most of it for now. The tool you want for this technique is already selected by default: the Forward Warp Tool, which sits at the very top of the left toolbar and looks like a pointing finger icon.
Step 3: Set Your Brush to a Large Size
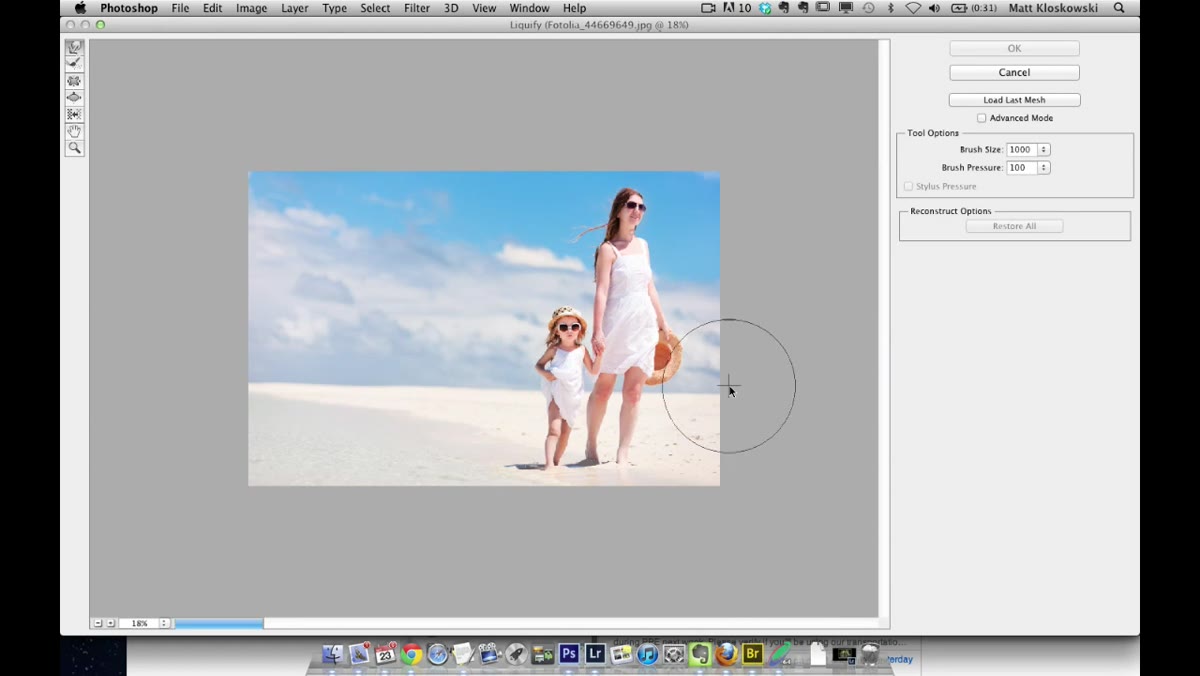 Increasing brush size with bracket key in Liquify workspace
Use the right bracket key to size your brush up considerably. The exact size depends on your image resolution, but the goal is a brush that covers roughly half the width of the body part you’re adjusting. This is actually the most counterintuitive part of the technique for people used to doing detailed retouching with small brushes. Small brushes in Liquify create the obvious, plastic-looking distortions you want to avoid. A large brush distributes the movement across a wider area, so the pixels shift gradually rather than bunching up. The result looks like the person simply moved, not like you grabbed them and pulled.
Increasing brush size with bracket key in Liquify workspace
Use the right bracket key to size your brush up considerably. The exact size depends on your image resolution, but the goal is a brush that covers roughly half the width of the body part you’re adjusting. This is actually the most counterintuitive part of the technique for people used to doing detailed retouching with small brushes. Small brushes in Liquify create the obvious, plastic-looking distortions you want to avoid. A large brush distributes the movement across a wider area, so the pixels shift gradually rather than bunching up. The result looks like the person simply moved, not like you grabbed them and pulled.
Step 4: Find the Problem Area and Plan a Small Move
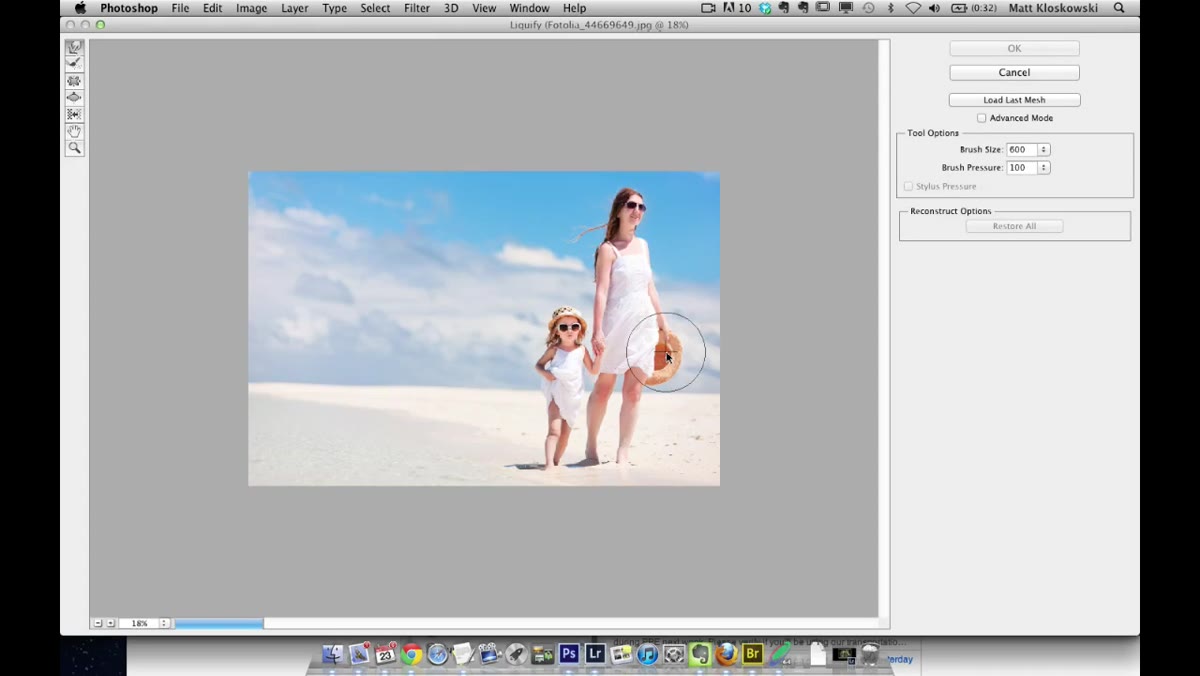 Identifying the hip area of a walking figure to be adjusted
Before you click and drag anything, look at the image and identify exactly what’s bothering you about the pose. In the example shown in the KelbyOne tutorial, it’s a walking pose where the hip is kicked out to one side in a way that reads as awkward rather than natural. The fix isn’t to dramatically reshape the silhouette. It’s to nudge that hip inward by just a few pixels. Think of what you’re doing as a gentle correction, not a transformation. If you can tell that Liquify was used, you went too far. The goal is for the finished photo to look like a better moment from the same shoot.
Identifying the hip area of a walking figure to be adjusted
Before you click and drag anything, look at the image and identify exactly what’s bothering you about the pose. In the example shown in the KelbyOne tutorial, it’s a walking pose where the hip is kicked out to one side in a way that reads as awkward rather than natural. The fix isn’t to dramatically reshape the silhouette. It’s to nudge that hip inward by just a few pixels. Think of what you’re doing as a gentle correction, not a transformation. If you can tell that Liquify was used, you went too far. The goal is for the finished photo to look like a better moment from the same shoot.
Step 5: Apply a Single, Slow Nudge
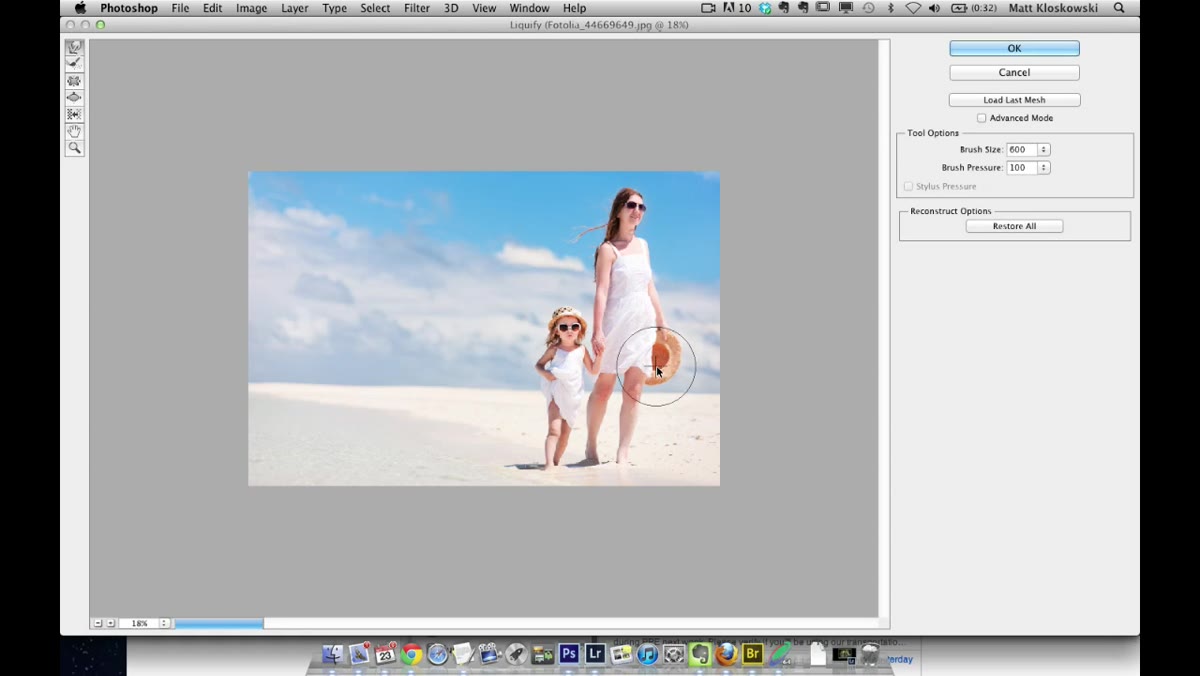 Using the Forward Warp tool to nudge the hip inward slightly
Position your large brush over the area you want to adjust, then click and drag slowly in the direction you want the pixels to move. For a hip that’s jutting out too far to one side, you’d drag it slightly inward toward the center of the body. The key word is slightly. You’re talking about a movement of maybe 10 to 20 pixels on a high-resolution image. Release the mouse, step back, and look at the whole figure. If it looks like a person in a more natural stance, you’re done. If you can see the edge warping or any distortion in the surrounding background, you overshot it. Use Reconstruct to back off a bit.
Using the Forward Warp tool to nudge the hip inward slightly
Position your large brush over the area you want to adjust, then click and drag slowly in the direction you want the pixels to move. For a hip that’s jutting out too far to one side, you’d drag it slightly inward toward the center of the body. The key word is slightly. You’re talking about a movement of maybe 10 to 20 pixels on a high-resolution image. Release the mouse, step back, and look at the whole figure. If it looks like a person in a more natural stance, you’re done. If you can see the edge warping or any distortion in the surrounding background, you overshot it. Use Reconstruct to back off a bit.
Step 6: Hit OK and Check Against the Original
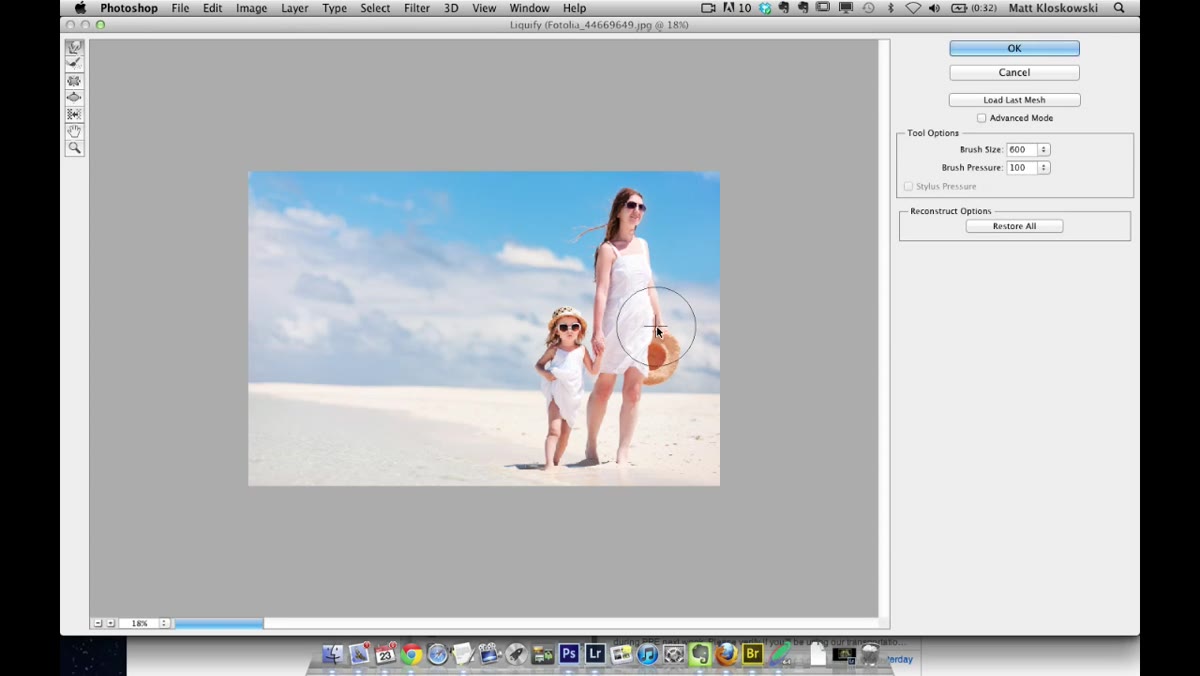 Viewing the corrected result with Forward Warp applied
Once you’re satisfied, click OK to apply. Back in the main Photoshop workspace, toggle the visibility of your duplicate layer on and off to compare it against the original. This is the moment of truth. What you want to see is a version that looks like a naturally better photo, not a retouched one. If anything looks rubbery or stretched, go back into Liquify and use the Reconstruct Tool to smooth it out. If the surrounding background has stretched noticeably around the adjusted area, you may need to patch that separately on a new layer.
Viewing the corrected result with Forward Warp applied
Once you’re satisfied, click OK to apply. Back in the main Photoshop workspace, toggle the visibility of your duplicate layer on and off to compare it against the original. This is the moment of truth. What you want to see is a version that looks like a naturally better photo, not a retouched one. If anything looks rubbery or stretched, go back into Liquify and use the Reconstruct Tool to smooth it out. If the surrounding background has stretched noticeably around the adjusted area, you may need to patch that separately on a new layer.
What I’d Add: Use a Mask to Protect the Background
One thing the tutorial doesn’t get into, but that I’ve added to my own workflow, is making a rough selection of the subject before entering Liquify. If you select just the person first using Quick Select or the Object Selection tool and then open Liquify, the filter will respect that boundary more cleanly. This is especially useful when the background has hard lines like door frames or furniture that will visibly warp if your brush strays. It takes an extra 30 seconds and saves you from having to manually fix a crooked wall behind someone’s shoulder.
The single most important takeaway from this technique is that Liquify’s reputation for looking fake comes almost entirely from people using it with brushes that are too small. Dial the brush size up, keep your movements minimal, and this filter goes from looking like a tabloid cover to being a genuinely invisible part of a professional retouching workflow. Watch the full tutorial on YouTube to see it in action with a real image.
Comments
Leave a Comment