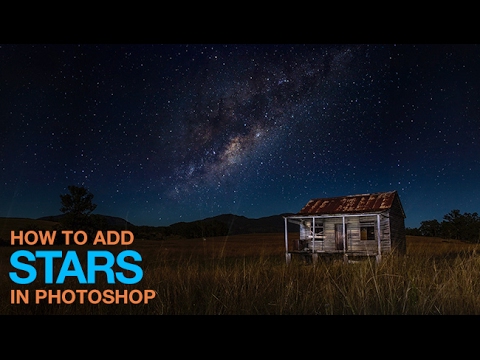
Night photography is a cruel joke sometimes. You drive forty minutes outside the city, set up your shot, nail the foreground, get home, and open Lightroom to find a sky that looks like a slightly dark version of your backyard. No stars. Just a gray-purple smear of light pollution and broken dreams. I’ve been there more times than I’d like to admit, and for a while I thought the only fix was to reshoot or just… accept it.
Turns out the fix is about ten minutes in Photoshop. In this Aaron Nace (PHLEARN) tutorial, Aaron walks through a clean, non-destructive method for compositing a star sky into any night photo using nothing but the Move tool, Screen blend mode, and a smart duplication trick that solves the sizing problem most people run into. Watch the full tutorial on YouTube
What I like about this approach is that it’s genuinely practical. You don’t need a perfectly matched star photo. You don’t need to spend hours masking. The technique is flexible enough to work with stock images or your own sky shots, and Screen blend mode does a lot of the heavy lifting for you. Here’s exactly how it works.
Step 1: Gather Your Two Images
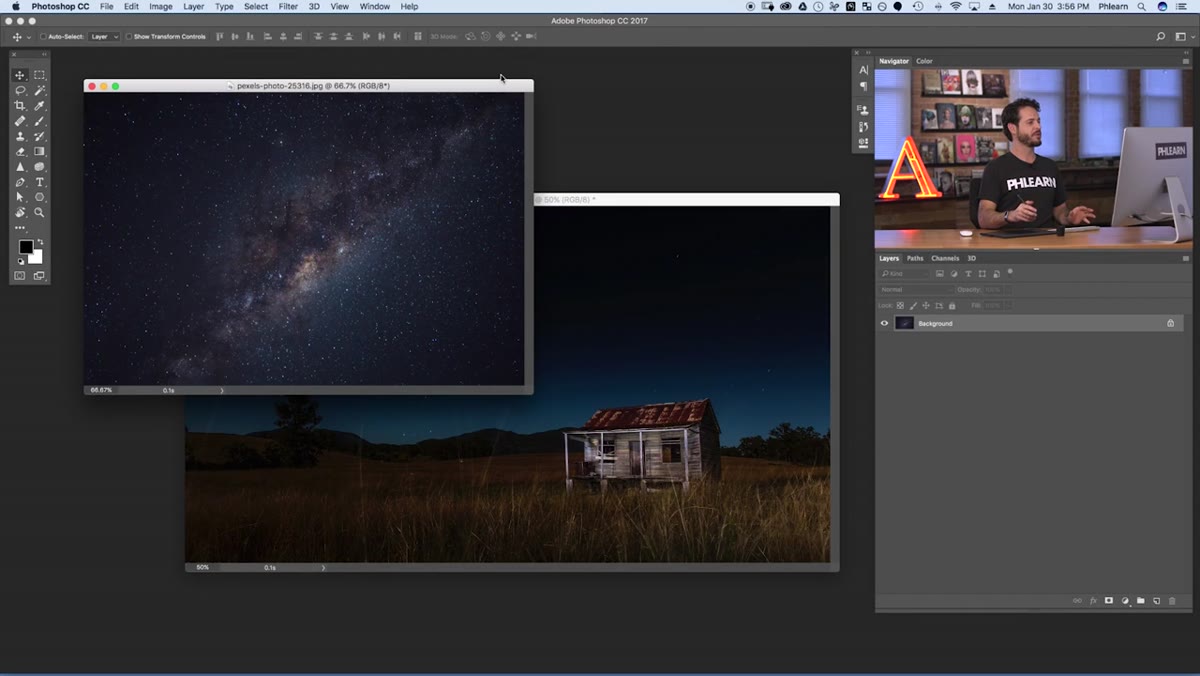 Two open photos — star sky and background night scene
You need two photos: your background image (the one with the great foreground but no stars) and a star photo to use as your sky layer. Aaron pulls both into Photoshop as separate documents. If you’re shooting your own star photos, great. If not, stock sites have plenty of Milky Way and star field images that work fine for this.
With both images open, grab the Move tool (V) and click-drag from the star photo directly into your background image. It drops in as a new layer above your background. Hit F to go full screen and get a clear look at what you’re working with.
Step 2: Scale the Star Layer to Fit
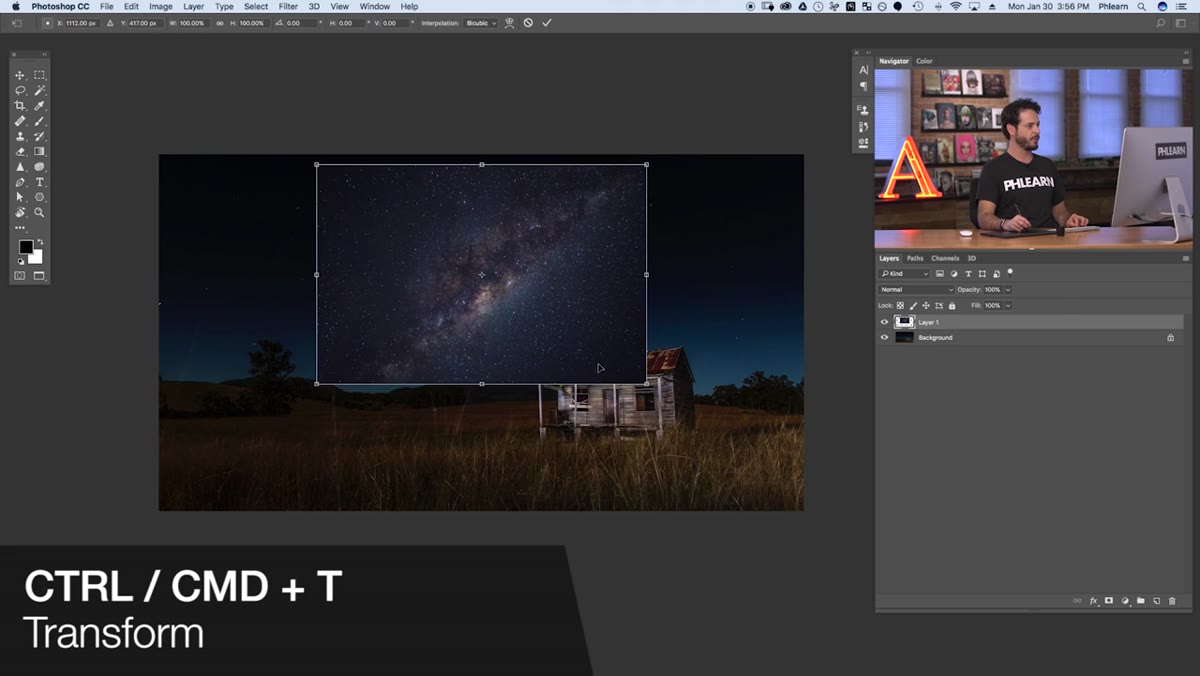 Transform handles around the star layer being scaled up
Here’s the first thing that’ll trip you up: your star photo probably isn’t the same size as your background, and it might not cover the full canvas. Hit Command/Ctrl + T to bring up Free Transform and scale it up until it covers the horizon line and the sky area you need to fill.
One thing Aaron specifically flags: don’t go crazy with the scaling. Stars are tiny. If you stretch the layer so much that individual stars start looking like blobs or orbs, the whole composite reads as fake immediately. Scale just enough to cover your composition, then commit the transform.
Step 3: Switch the Blend Mode to Screen
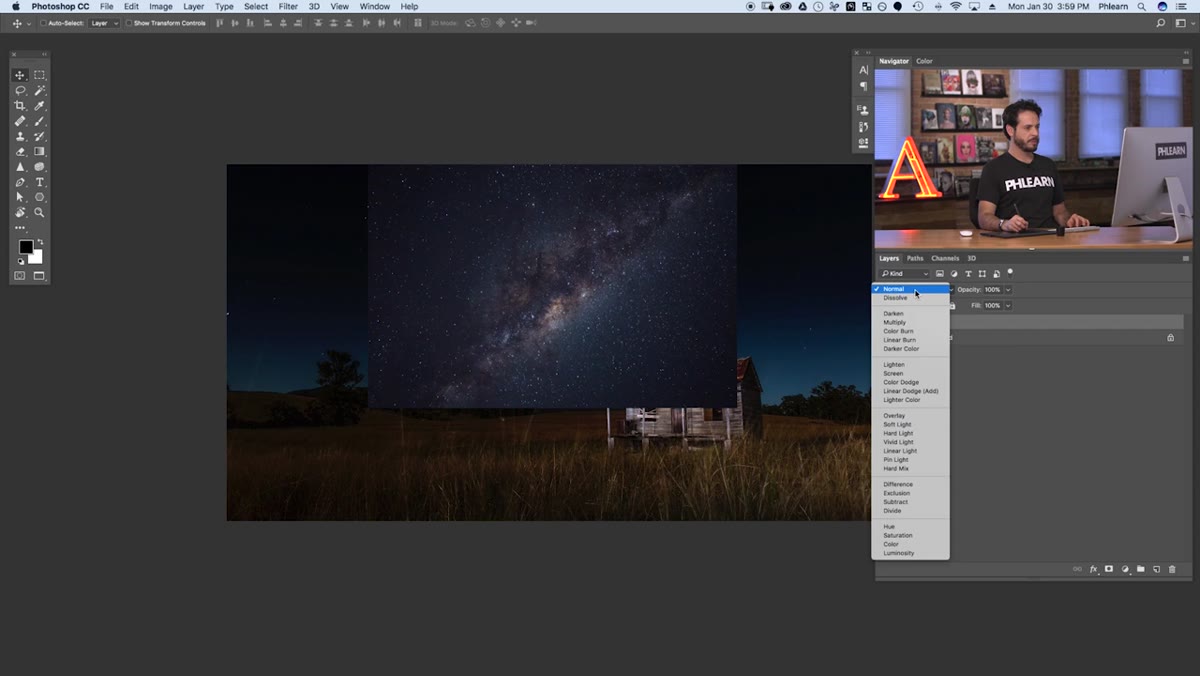 Layer panel showing Screen blend mode selected on star layer
This is the move that makes the whole technique work. With your star layer selected, go to the blend mode dropdown in the Layers panel (it says “Normal” by default) and switch it to Screen.
Screen blend mode treats black as completely transparent. Since a star photo is mostly black sky with bright pinpoints of light, switching to Screen instantly hides all that dark background and leaves only the stars visible over your image. You’ll immediately see your background showing through and the stars sitting on top. It’s one of those Photoshop moments that feels like a magic trick the first time you see it. Double-click the layer name and rename it “Stars” so your panel stays organized.
Step 4: Duplicate the Layer to Fill the Gaps
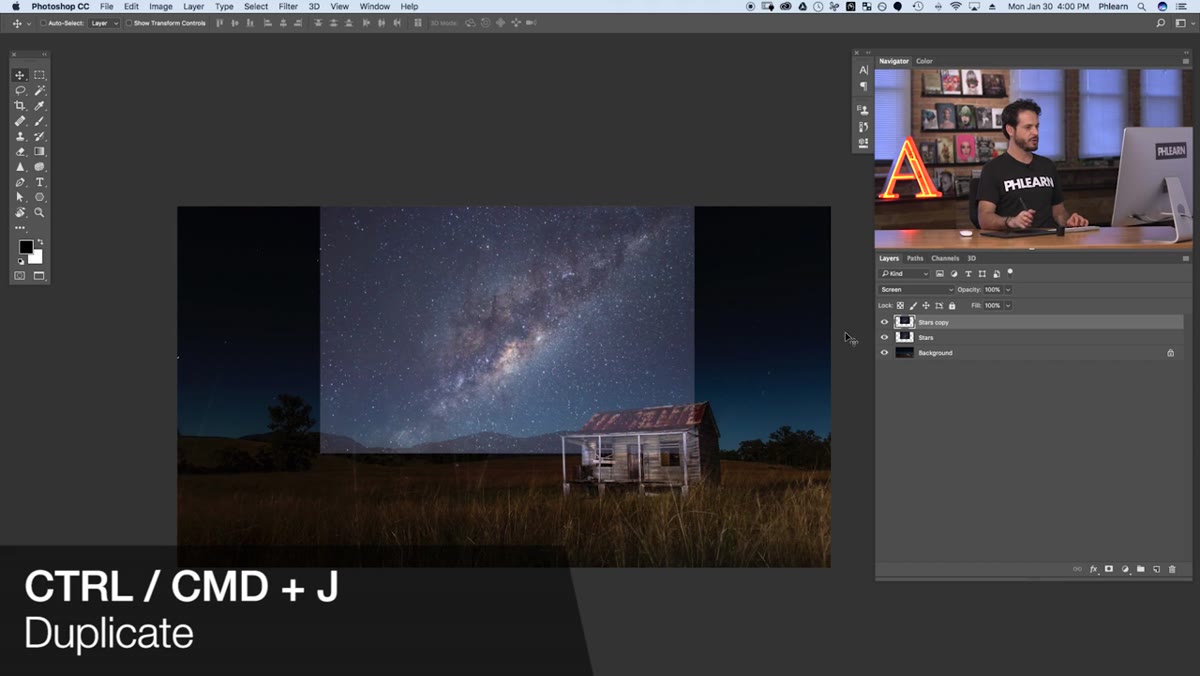 Duplicated star layer being dragged to fill left gap in canvas
Unless you got lucky with sizing, you’ll have gaps on the left and right edges where the star layer doesn’t reach. This is totally normal when you’re pulling a texture from one image into another. Instead of going to find a second star photo, Aaron’s solution is to just duplicate the layer and slide the copy over.
Hit Command/Ctrl + J to duplicate your Stars layer. Use the Move tool to drag the copy sideways until it fills the gap on one side. Zoom in and use the arrow keys for precise alignment so the seam between the two layers isn’t obvious. Then duplicate again (Command/Ctrl + J one more time) and drag that third copy to fill the gap on the other side.
Step 5: Deal With Repeating Pattern Issues
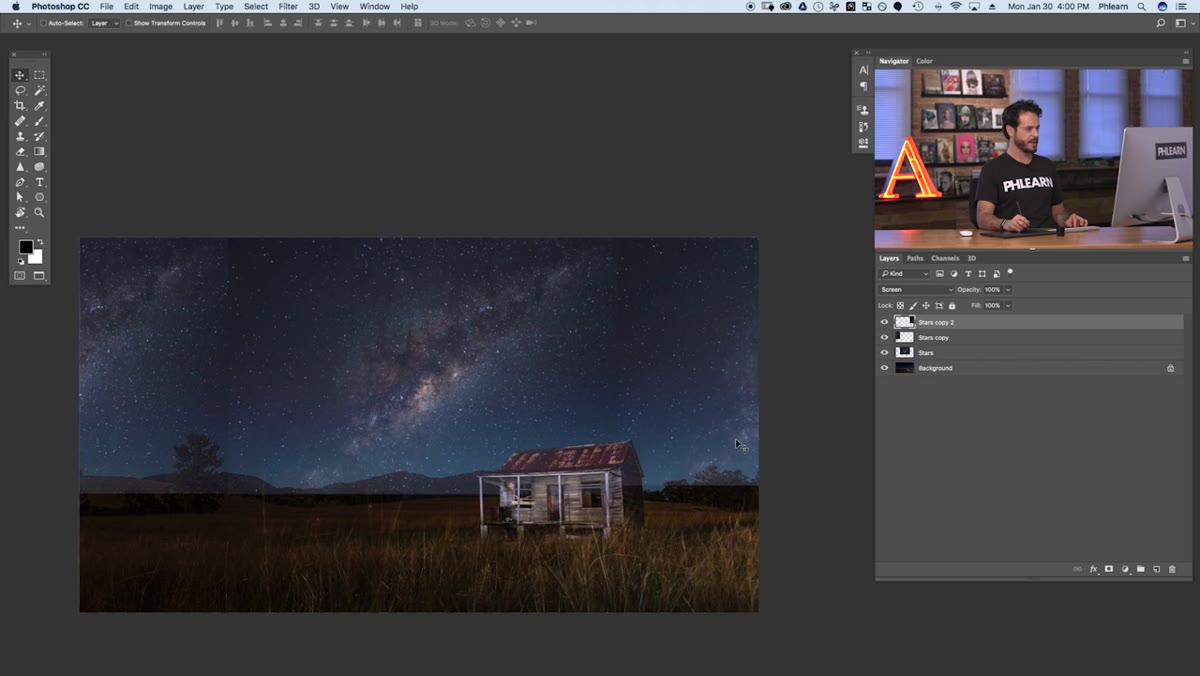 Milky Way band visibly repeating across the duplicated layers
When you duplicate and offset a star layer, you might notice that recognizable features, like the Milky Way band, start repeating in a way that looks obviously copy-pasted. Aaron’s fix here is simple: select the offending duplicate, hit Command/Ctrl + T again, and scale it up slightly until that repeated element moves out of frame.
Because Screen blend mode only shows the bright stuff, small scale adjustments don’t introduce any obvious artifacts or weirdness. The stars just shift position slightly, which actually reads as more natural variation across the sky. It’s one of those “good enough” solutions that actually works better than you’d expect.
A Note on Making It Actually Look Real
The technique Aaron covers gets the stars into your image cleanly and quickly. But if you want to push the composite a step further, there are a couple of things I’d add from my own workflow.
First, consider adding a very subtle Gaussian Blur (Filter > Blur > Gaussian Blur, somewhere between 0.3 and 0.8 pixels) to your star layers. Stars captured on a camera aren’t perfectly razor-sharp pinpoints. A tiny amount of blur brings them closer to how they look in real photographs and softens that “pasted on” quality that can sneak in with very high-res stock images.
Second, think about color matching. Your background photo has a color temperature, and so does your star image. If one is cooler and one is warmer, the sky and the foreground will feel disconnected. A quick Hue/Saturation or Color Balance adjustment layer clipped to your star layers can bring everything into the same color world. It’s the difference between a composite that makes people say “nice stars” and one that makes them wonder how you got that shot.
The core takeaway from this tutorial is that Screen blend mode removes the hardest part of sky compositing entirely. You don’t need a precise mask, you don’t need to cut out every rooftop or tree branch manually. Black becomes invisible, light becomes additive, and your stars sit on top of the image as if they were always there.
If you shoot any kind of nighttime or outdoor photography, this one belongs in your toolkit permanently. Watch the full tutorial on YouTube and follow along with Aaron’s original images to get the technique locked in before you try it on a client photo.
Comments (2)
Just subscribed. If the rest of your content is this good, I'm in.
I tried this on a client project yesterday and the results were way better than expected.
Leave a Comment