There’s a specific kind of frustration that hits when you know a tool exists, you’ve poked at it a few times, and it still produces results that look like a bad green-screen audition. Sky Replacement in Photoshop is exactly that tool for a lot of people. The feature showed up in Photoshop and everyone got excited, slapped a dramatic sunset behind a gray overcast shot, and then quietly closed the file when the edges looked like someone cut them out with kindergarten scissors.
Watch the full tutorial on YouTube
In this Matt Kloskowski tutorial on advanced Sky Replacement, the focus isn’t on the flashy before-and-after. It’s on every individual setting inside the dialog, which is the part most tutorials skip entirely. I’ve been using this feature on client work for landscape edits and real estate shots, and I’ll be honest, I was leaving a lot on the table by ignoring half the controls. Here’s the full walkthrough of what Matt covers, broken down so you can actually follow along without pausing the video every thirty seconds.
Step 1: Open the Sky Replacement Dialog
 Sky Replacement dialog box open in Photoshop
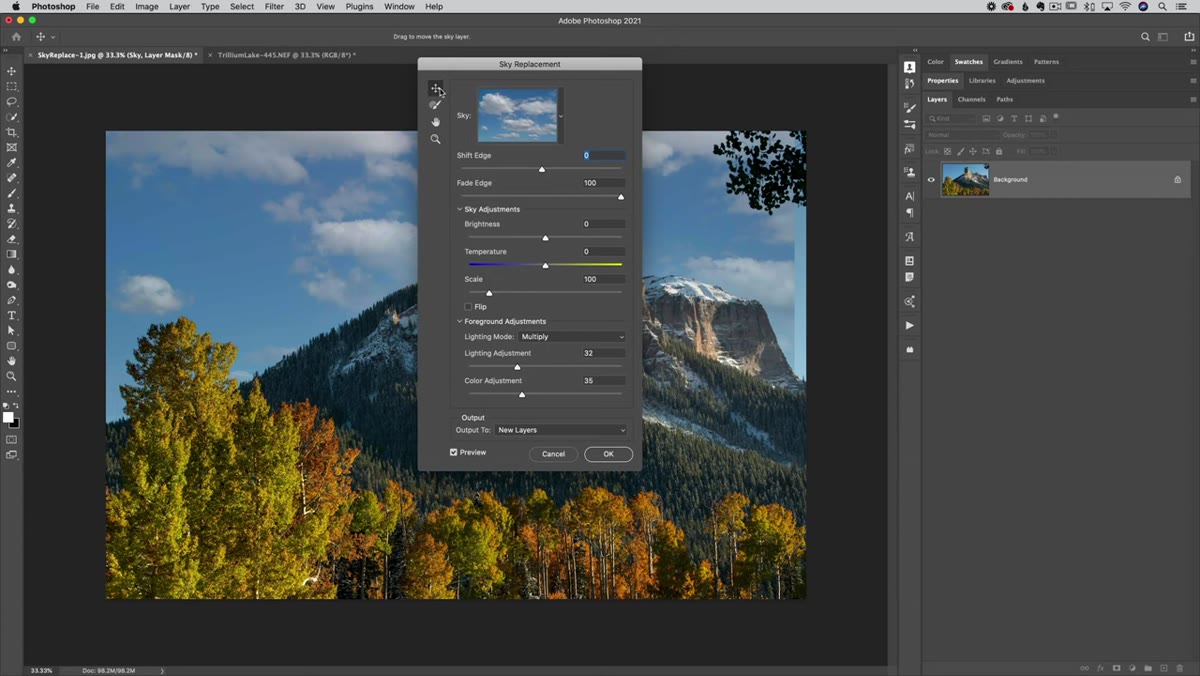
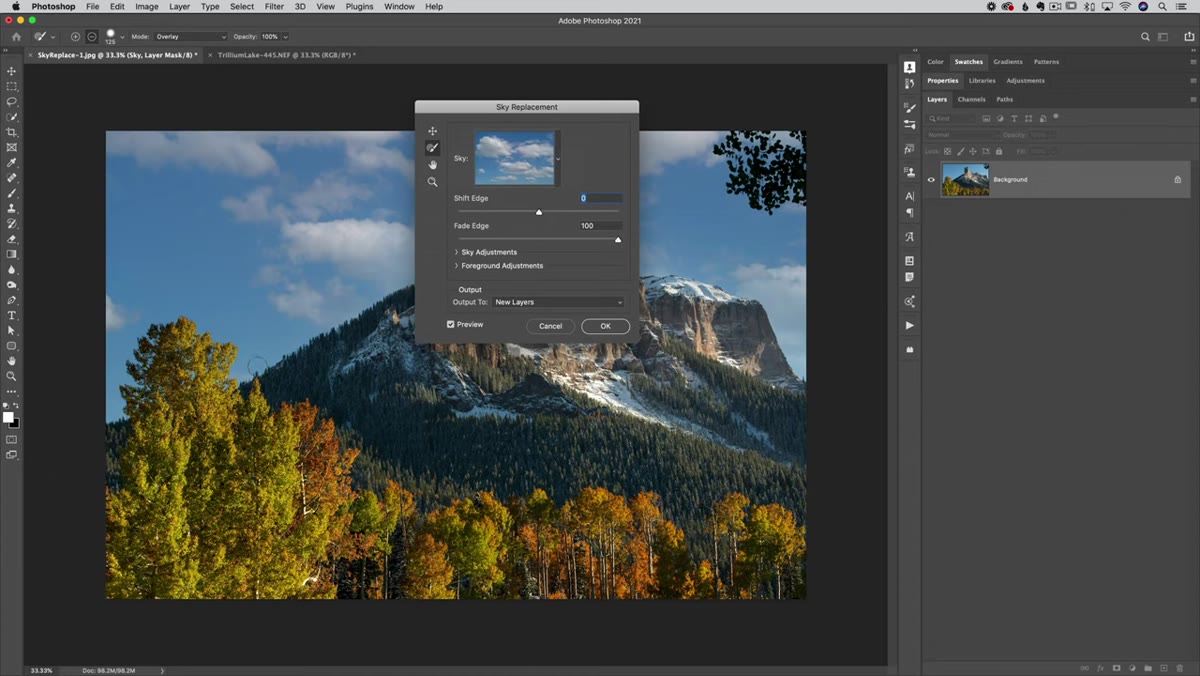
Start by going to Edit > Sky Replacement. Photoshop will immediately attempt to detect the sky in your image and apply a default replacement. Don’t get distracted by the initial result, it’s almost never what you want straight out of the gate. The goal right now is just to get into the dialog and understand the layout before you start tweaking. The panel has three main sections: the sky selection area at the top, the sky adjustments in the middle, and the output settings at the bottom. Knowing that structure before you touch anything saves a lot of random clicking.
Sky Replacement dialog box open in Photoshop
Start by going to Edit > Sky Replacement. Photoshop will immediately attempt to detect the sky in your image and apply a default replacement. Don’t get distracted by the initial result, it’s almost never what you want straight out of the gate. The goal right now is just to get into the dialog and understand the layout before you start tweaking. The panel has three main sections: the sky selection area at the top, the sky adjustments in the middle, and the output settings at the bottom. Knowing that structure before you touch anything saves a lot of random clicking.
Step 2: Choose and Customize Your Sky
 Sky browser open with multiple sky options visible
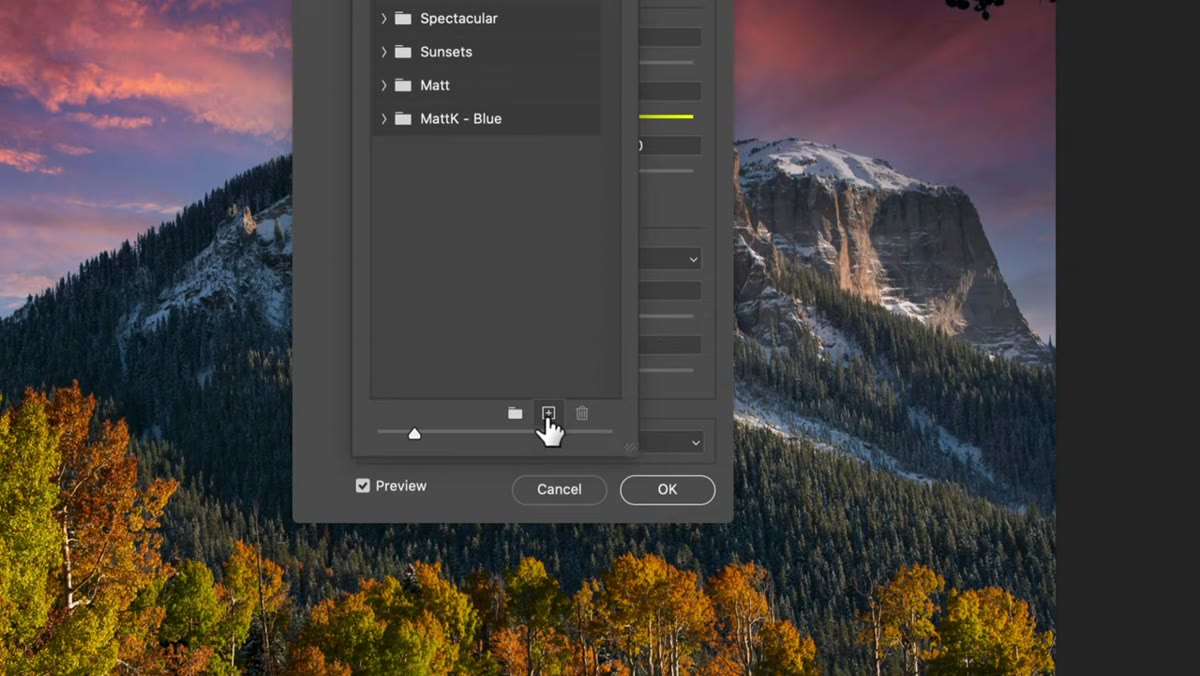
Click the sky thumbnail at the top of the dialog to open the sky browser. Photoshop ships with a solid set of skies organized into folders, and you can add your own, which is genuinely useful if you’ve built up a library of dramatic sky shots over the years. When you pick a sky, pay attention to the direction of light. Dropping a sky with the sun coming from the right into a scene where shadows fall from the left is the kind of thing that looks slightly wrong without people knowing why. Once you’ve selected a sky, the Shift Edge and Fade Edge sliders control how the mask blends at the horizon. Shift Edge moves the boundary up or down, Fade Edge softens the transition. Most images need at least a little Fade Edge or you get that sharp cut-out look that screams “I edited this in Photoshop.”
Sky browser open with multiple sky options visible
Click the sky thumbnail at the top of the dialog to open the sky browser. Photoshop ships with a solid set of skies organized into folders, and you can add your own, which is genuinely useful if you’ve built up a library of dramatic sky shots over the years. When you pick a sky, pay attention to the direction of light. Dropping a sky with the sun coming from the right into a scene where shadows fall from the left is the kind of thing that looks slightly wrong without people knowing why. Once you’ve selected a sky, the Shift Edge and Fade Edge sliders control how the mask blends at the horizon. Shift Edge moves the boundary up or down, Fade Edge softens the transition. Most images need at least a little Fade Edge or you get that sharp cut-out look that screams “I edited this in Photoshop.”
Step 3: Adjust Sky Brightness and Temperature
 Brightness and color temperature sliders being adjusted
The Sky Adjustments section gives you Brightness, Color, and Scale controls for the replacement sky itself. Brightness is the one you’ll use most, because the sky you’re placing almost never matches the exposure of your original shot by default. Pull it up or down until the luminosity reads as natural against your foreground. The Color slider is basically a temperature control, and it matters more than people think. A warm-toned foreground shot with a cool blue sky pasted behind it creates a color disconnect that feels off even to people who don’t know anything about photography. Nudge the color slider toward warmth to match the scene. Scale lets you resize the sky so the clouds don’t look either tiny and busy or massively out of proportion for the shot.
Brightness and color temperature sliders being adjusted
The Sky Adjustments section gives you Brightness, Color, and Scale controls for the replacement sky itself. Brightness is the one you’ll use most, because the sky you’re placing almost never matches the exposure of your original shot by default. Pull it up or down until the luminosity reads as natural against your foreground. The Color slider is basically a temperature control, and it matters more than people think. A warm-toned foreground shot with a cool blue sky pasted behind it creates a color disconnect that feels off even to people who don’t know anything about photography. Nudge the color slider toward warmth to match the scene. Scale lets you resize the sky so the clouds don’t look either tiny and busy or massively out of proportion for the shot.
Step 4: Use Foreground Adjustments to Blend the Scene
 Foreground lighting and color adjustment sliders in panel
This is where most people completely stop paying attention, which is a mistake. The Foreground Adjustments section has two sliders: Lighting Mode and Foreground Color Adjustment. Lighting Mode lets you choose between Multiply and Screen blending for how the sky’s light interacts with your ground elements. Multiply tends to work better for darker, moodier scenes. Screen opens things up for brighter replacements. The Foreground Color Adjustment slider is the secret weapon here. It shifts the color of your original foreground elements to match the new sky’s color cast. Drop a golden-hour sky into a shot taken on a flat overcast day, and your foreground still looks flat and gray. Bringing this slider up introduces that warm color relationship between the sky and the ground so the whole image feels like it was shot in the same light.
Foreground lighting and color adjustment sliders in panel
This is where most people completely stop paying attention, which is a mistake. The Foreground Adjustments section has two sliders: Lighting Mode and Foreground Color Adjustment. Lighting Mode lets you choose between Multiply and Screen blending for how the sky’s light interacts with your ground elements. Multiply tends to work better for darker, moodier scenes. Screen opens things up for brighter replacements. The Foreground Color Adjustment slider is the secret weapon here. It shifts the color of your original foreground elements to match the new sky’s color cast. Drop a golden-hour sky into a shot taken on a flat overcast day, and your foreground still looks flat and gray. Bringing this slider up introduces that warm color relationship between the sky and the ground so the whole image feels like it was shot in the same light.
Step 5: Refine the Edge Mask
 Sky Replacement brush tool active over tree line edge
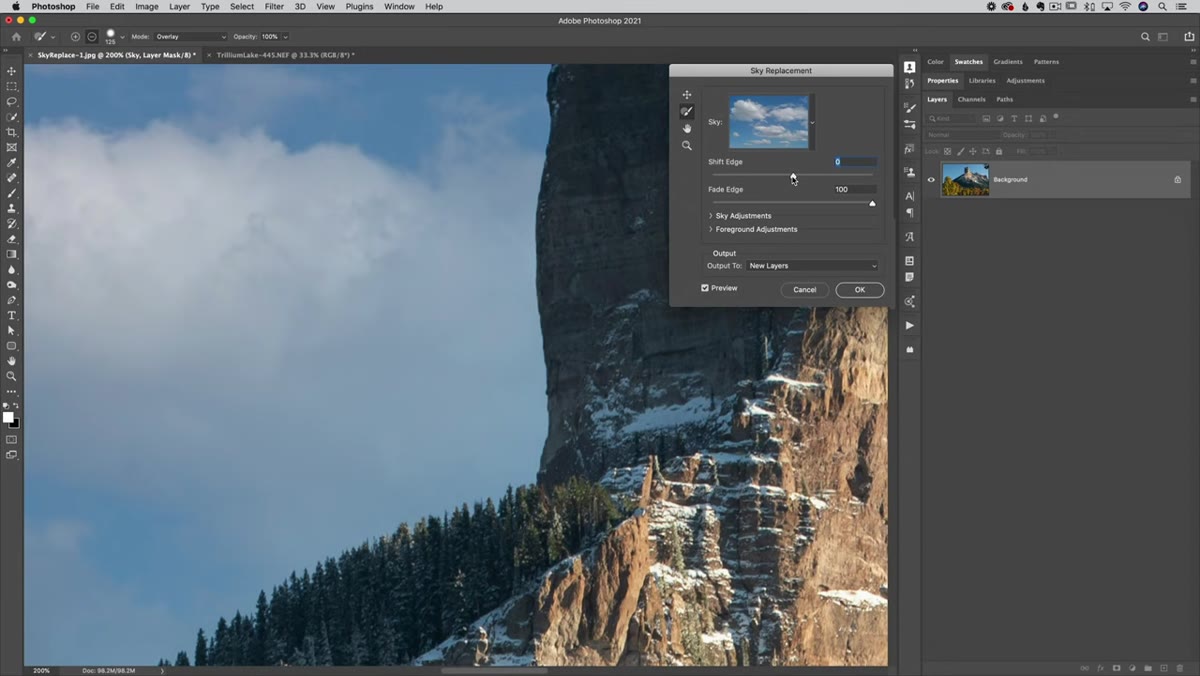
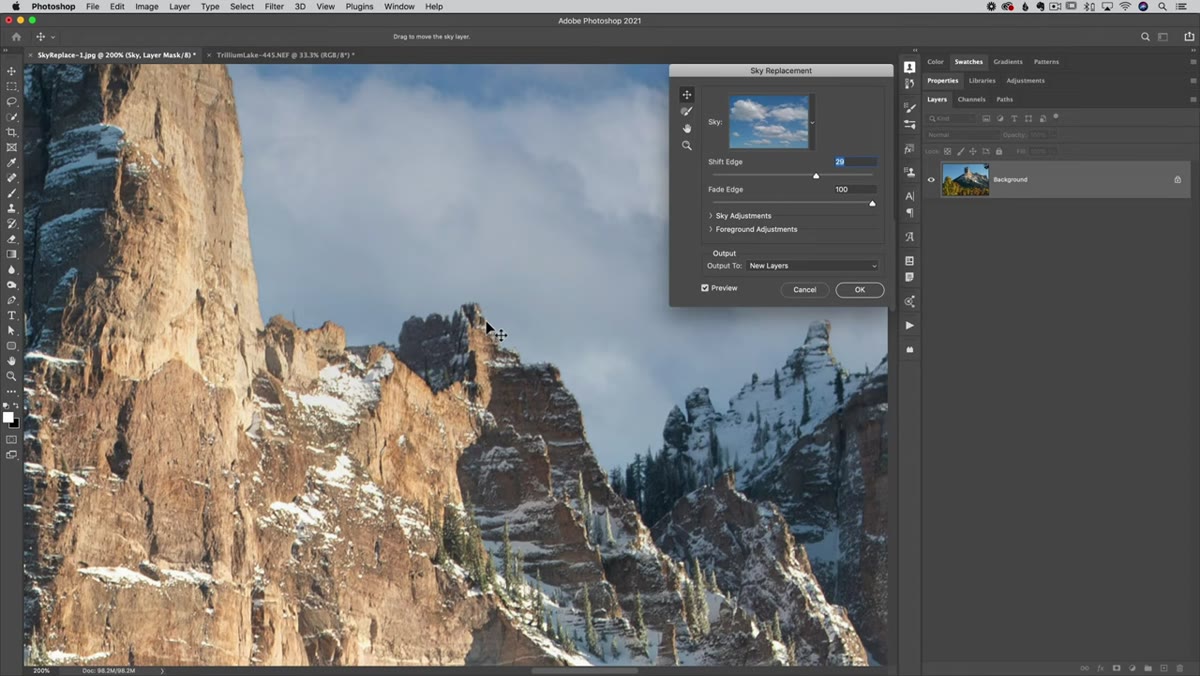
The Sky Replacement dialog has its own brush tool, accessible from the small toolbar on the left side of the panel. This lets you manually paint areas in or out of the sky mask when Photoshop’s automatic detection has missed something. Tree lines are the classic problem case. Photoshop does a genuinely impressive job most of the time, but fine branches against a complex background can fool the detection algorithm. Use the brush in Add or Subtract mode to clean up any areas where the replacement sky is bleeding into the foreground or vice versa. Work at a comfortable zoom level so you can actually see what you’re correcting. This step is where a decent result becomes a convincing one.
Sky Replacement brush tool active over tree line edge
The Sky Replacement dialog has its own brush tool, accessible from the small toolbar on the left side of the panel. This lets you manually paint areas in or out of the sky mask when Photoshop’s automatic detection has missed something. Tree lines are the classic problem case. Photoshop does a genuinely impressive job most of the time, but fine branches against a complex background can fool the detection algorithm. Use the brush in Add or Subtract mode to clean up any areas where the replacement sky is bleeding into the foreground or vice versa. Work at a comfortable zoom level so you can actually see what you’re correcting. This step is where a decent result becomes a convincing one.
Step 6: Choose Your Output Settings
 Output options showing New Layers selected in dropdown
At the bottom of the dialog, you choose how Photoshop outputs the result. New Layers is almost always the right call. This gives you a grouped set of layers including the sky image itself, the mask, and any color adjustment layers Photoshop generated for the foreground match. Outputting to New Layers means you can go back and tweak any individual component after you close the dialog, rather than being stuck with a flattened result. Duplicate Layer on the other hand merges everything into a single layer, which is a one-way door. Unless you’re completely done and certain about the result, always output to New Layers.
Output options showing New Layers selected in dropdown
At the bottom of the dialog, you choose how Photoshop outputs the result. New Layers is almost always the right call. This gives you a grouped set of layers including the sky image itself, the mask, and any color adjustment layers Photoshop generated for the foreground match. Outputting to New Layers means you can go back and tweak any individual component after you close the dialog, rather than being stuck with a flattened result. Duplicate Layer on the other hand merges everything into a single layer, which is a one-way door. Unless you’re completely done and certain about the result, always output to New Layers.
What I’d Add From My Own Workflow
One thing Matt’s tutorial reinforced for me is that Sky Replacement works best as a starting point, not a finish line. I almost always take the output layers and do additional grading on top with a Curves or Color Grading adjustment layer to unify everything. The automated foreground color adjustment gets you close, but “close” in compositing still reads as fake to a trained eye. Spending another five minutes on a global color grade after the replacement is done is what separates results you’d show a client from results you’d post in a “rate my edit” thread hoping for grace.
The other thing worth knowing: if your original image has a genuinely complex sky situation, like partially cloudy with patches of blue and gray, the detection can struggle. In those cases I’ll sometimes do a rough manual mask first before even opening the Sky Replacement dialog, just to give Photoshop a cleaner signal to work with.
The single most important thing I took from this tutorial is that the Foreground Color Adjustment slider is not optional. Skipping it is why Sky Replacement results so often look synthetic. The sky changes, but the ground stubbornly stays lit by a completely different sun. That one slider, used with restraint, is the difference between a composite that holds up and one that doesn’t.
Watch the full tutorial on YouTube and follow along with Matt’s breakdown directly. He covers edge cases and visual examples that are worth seeing in motion, especially the edge refinement section.
Comments
Leave a Comment