
There’s a specific kind of freelance panic that hits when a client photo has a distracting element right in the middle of an otherwise perfect shot. A shadow cutting across a clean background. A trash can lurking at the edge of a landscape. Some random blob that your eye keeps getting snagged on. You need it gone, and you need it gone without spending 45 minutes cloning pixels by hand like it’s 2009. Content-Aware Fill is the tool that has saved me from that exact situation more times than I can count, and I genuinely think it’s one of Photoshop’s most underrated capabilities.
The thing is, most people use it one way and one way only. They lasso a selection, hit Edit > Fill, choose Content-Aware, click OK, and hope for the best. Sometimes it works great. Sometimes Photoshop makes a creative decision that no one asked for. In this Matt Kloskowski tutorial, he lays out a smarter workflow: a two-step approach where you try the fast method first, and only escalate to the more powerful dialog when you actually need to. It sounds simple, but the keyboard shortcut he shares genuinely changed how I approach this tool day to day. Watch the full tutorial on YouTube
Step 1: Make a Loose Lasso Selection Around the Problem Area
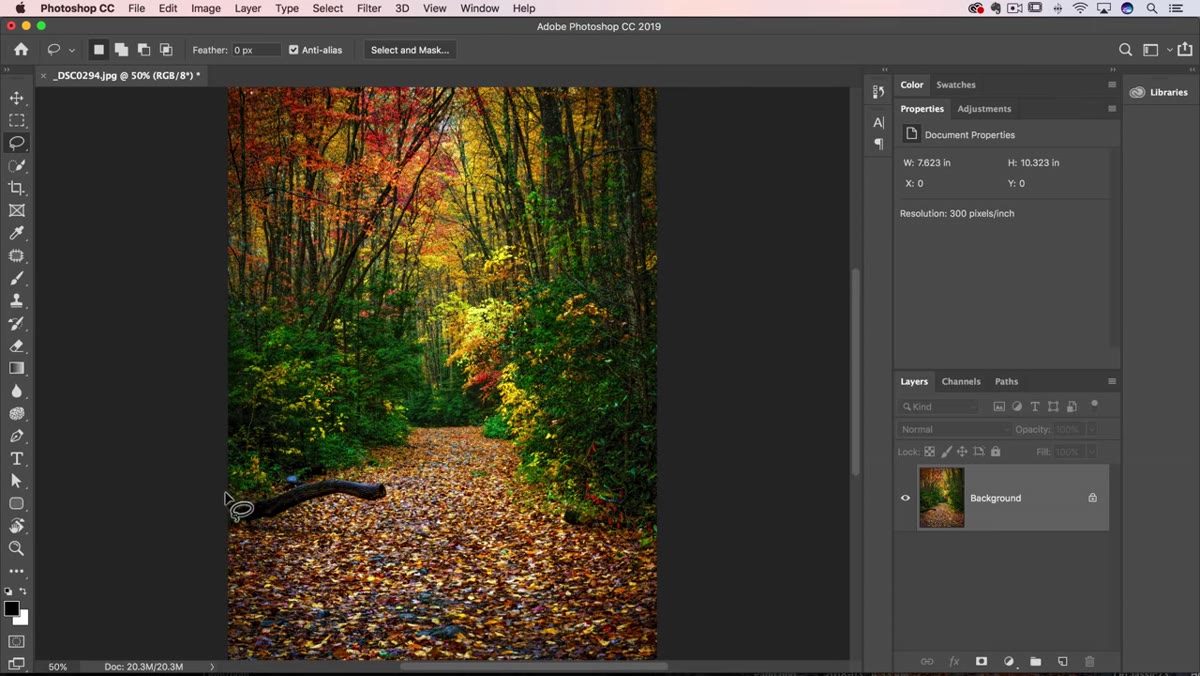 Lasso tool drawing a loose selection around a distraction
Grab the Lasso tool (L on your keyboard) and draw a rough selection around whatever you want to remove. This does not need to be precise. You’re not cutting hair or making a product composite. You’re just telling Photoshop the general neighborhood of the problem. Give yourself a little buffer around the edges of the object, but don’t go so wide that you’re pulling in wildly different textures or colors that will confuse the algorithm.
Lasso tool drawing a loose selection around a distraction
Grab the Lasso tool (L on your keyboard) and draw a rough selection around whatever you want to remove. This does not need to be precise. You’re not cutting hair or making a product composite. You’re just telling Photoshop the general neighborhood of the problem. Give yourself a little buffer around the edges of the object, but don’t go so wide that you’re pulling in wildly different textures or colors that will confuse the algorithm.
Loose is actually better here. Content-Aware Fill samples from the surrounding area to figure out what should replace your selection, so you want a natural-looking border for it to work from.
Step 2: Try the Fast Method First with Shift+Delete
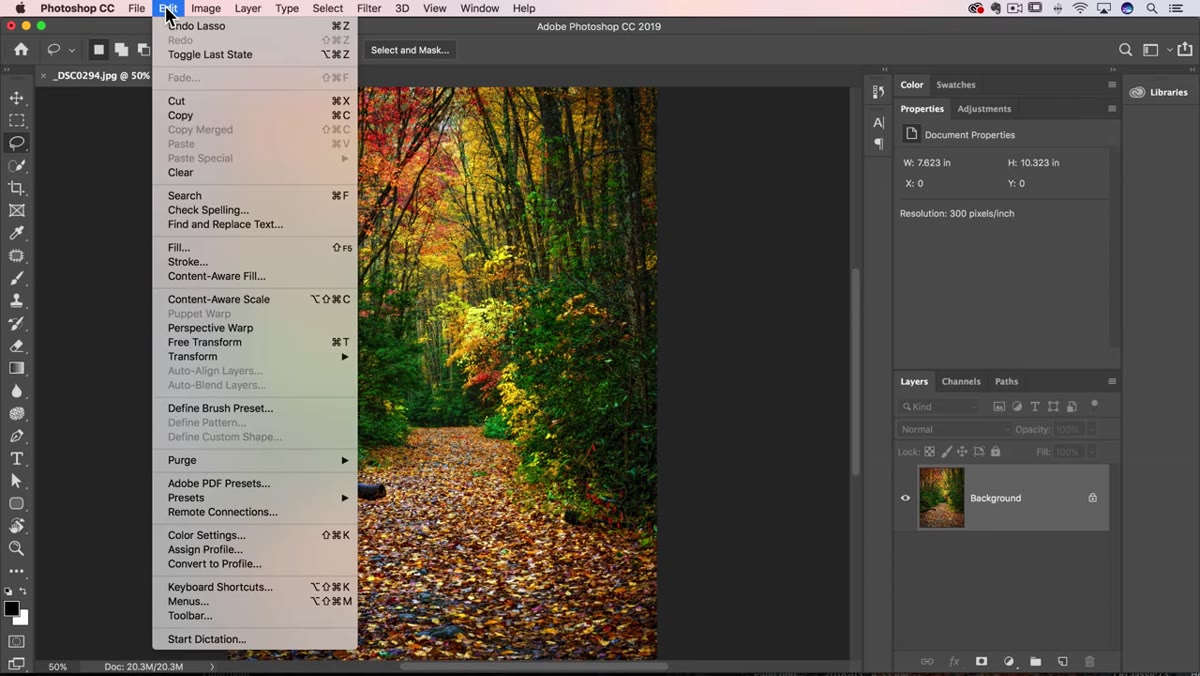 Edit menu open with Fill option highlighted
Here’s the shortcut that I wish I’d known earlier. Instead of going up to Edit > Fill every single time, press Shift+Delete on Mac or Shift+Backspace on Windows. That opens the Fill dialog box directly, no menu navigation required. If you’ve used Content-Aware Fill before, it’ll likely already be set to Content-Aware in the Contents dropdown. Click OK and let Photoshop take a swing at it.
Edit menu open with Fill option highlighted
Here’s the shortcut that I wish I’d known earlier. Instead of going up to Edit > Fill every single time, press Shift+Delete on Mac or Shift+Backspace on Windows. That opens the Fill dialog box directly, no menu navigation required. If you’ve used Content-Aware Fill before, it’ll likely already be set to Content-Aware in the Contents dropdown. Click OK and let Photoshop take a swing at it.
The whole process takes about three seconds. Make your selection, Shift+Delete, Enter. Done. On a good day, it nails it completely and you move on with your life. Matt’s point, and I think he’s right, is that this fast version works more often than you’d expect. There’s no reason to spend time inside the advanced dialog if the quick fill handles it cleanly.
Step 3: Evaluate the Result Before Committing
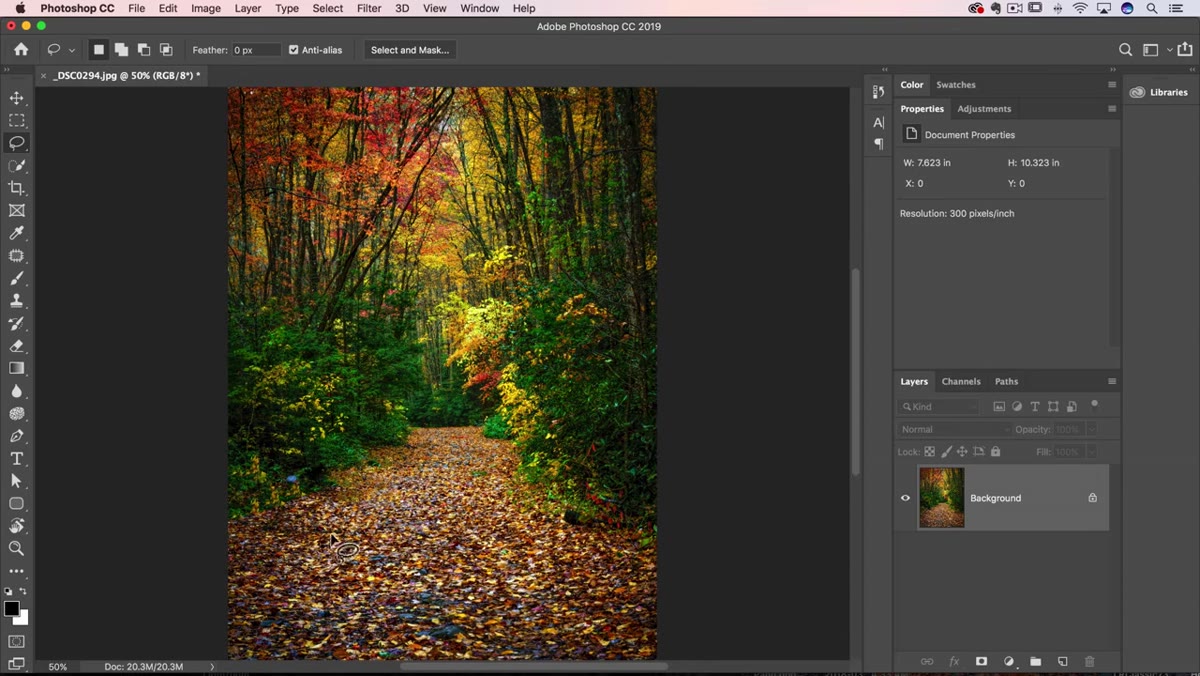 Filled result shown after quick Content-Aware Fill applied
After Photoshop fills the selection, deselect (Cmd+D or Ctrl+D) and actually look at what it did. Zoom in a little. Check for obvious artifacts, repeated texture patterns, or color mismatches. Photoshop sometimes picks up a shadow or a tonally different patch from nearby and tiles it into the filled area in a way that reads as obviously fake.
Filled result shown after quick Content-Aware Fill applied
After Photoshop fills the selection, deselect (Cmd+D or Ctrl+D) and actually look at what it did. Zoom in a little. Check for obvious artifacts, repeated texture patterns, or color mismatches. Photoshop sometimes picks up a shadow or a tonally different patch from nearby and tiles it into the filled area in a way that reads as obviously fake.
If the result looks good, you’re done. Move on. If something looks off, don’t try to patch over it. Just undo immediately with Cmd+Z (or Ctrl+Z on Windows) and make sure your selection is still active. You’re about to use the better tool.
Step 4: Escalate to the Content-Aware Fill Dialog When Needed
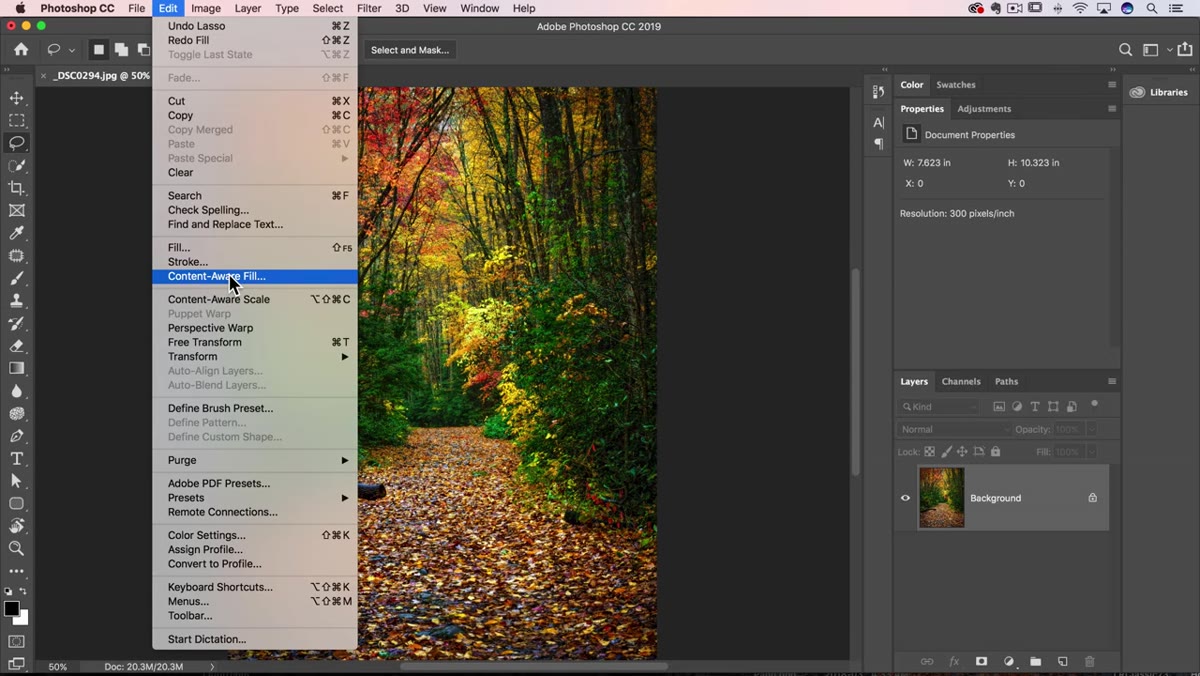 Content-Aware Fill dialog box open with green sampling overlay
When the quick fill doesn’t cut it, go to Edit > Content-Aware Fill to open the dedicated dialog. This is a completely different, more powerful interface than the basic Fill dialog. The canvas shows a green overlay on the areas Photoshop is currently sampling from to generate the fill. This is exactly where the magic control lives.
Content-Aware Fill dialog box open with green sampling overlay
When the quick fill doesn’t cut it, go to Edit > Content-Aware Fill to open the dedicated dialog. This is a completely different, more powerful interface than the basic Fill dialog. The canvas shows a green overlay on the areas Photoshop is currently sampling from to generate the fill. This is exactly where the magic control lives.
If the quick fill picked up a problematic shadow or an area with a different tone, you can see why right here. The sampling region is probably including that problem area.
Step 5: Paint Out the Bad Sampling Areas
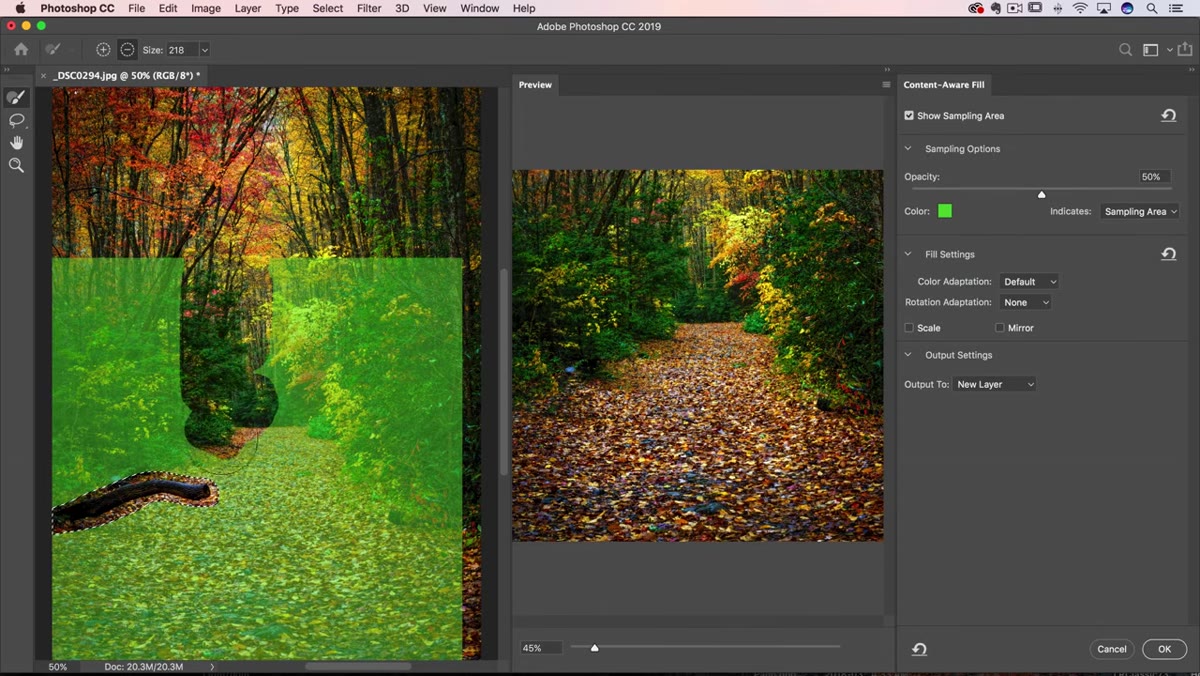 Painting over green sampling area to exclude problem zones
Inside the Content-Aware Fill dialog, you have a brush tool active by default. Anywhere covered in green is being used as reference material for the fill. If you can see that Photoshop is sampling from a shadowy corner or a weirdly textured patch, just paint over that area to remove it from the sampling zone.
Painting over green sampling area to exclude problem zones
Inside the Content-Aware Fill dialog, you have a brush tool active by default. Anywhere covered in green is being used as reference material for the fill. If you can see that Photoshop is sampling from a shadowy corner or a weirdly textured patch, just paint over that area to remove it from the sampling zone.
As soon as you lift your brush, the preview on the right side of the dialog updates in real time. This is incredibly useful. You’re not guessing blindly. You can see whether excluding that shadow actually gives you a cleaner fill, and keep adjusting until the preview looks right. It takes a little longer than the Shift+Delete method, but you have actual control over the output instead of just hoping the algorithm figures it out.
Step 6: Apply and Move On
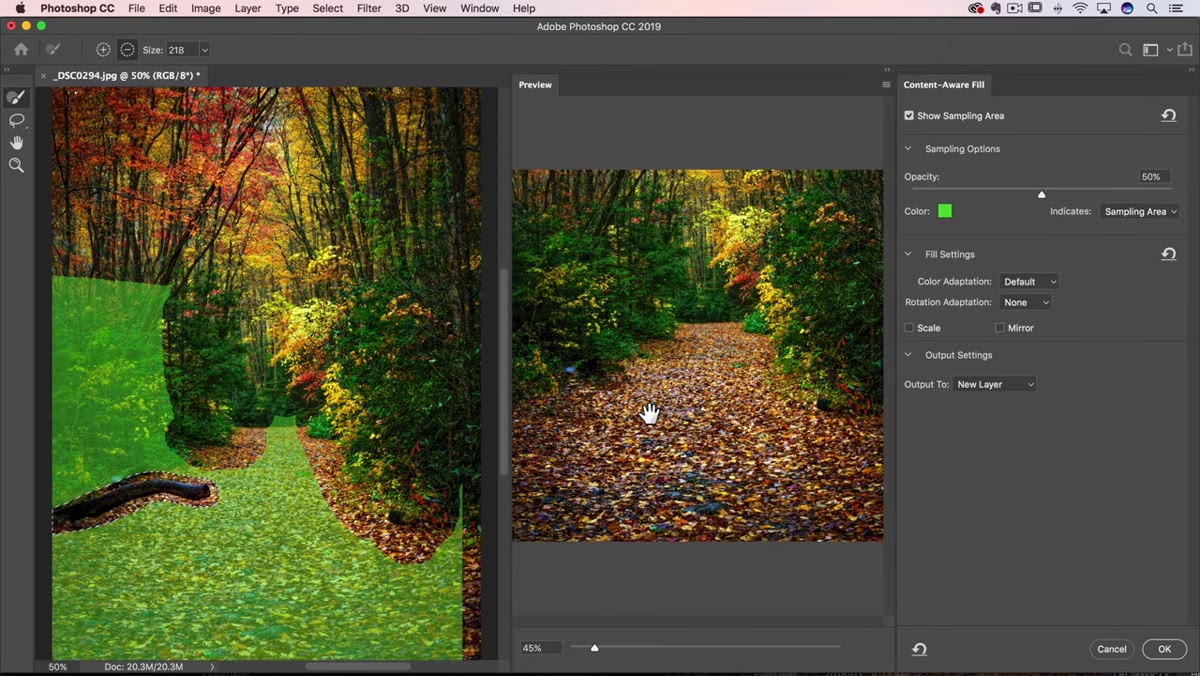 Preview panel showing clean fill result after sampling adjustment
Once the preview looks good, click OK. The fill gets applied to your image, and you can deselect to see the final result in context. Most of the time, if the quick method failed and you took two minutes to exclude the problematic sampling areas, the result from this dialog is noticeably better. Cleaner edges, more consistent tone, no weird repeated patches.
Preview panel showing clean fill result after sampling adjustment
Once the preview looks good, click OK. The fill gets applied to your image, and you can deselect to see the final result in context. Most of the time, if the quick method failed and you took two minutes to exclude the problematic sampling areas, the result from this dialog is noticeably better. Cleaner edges, more consistent tone, no weird repeated patches.
The workflow Matt lays out is essentially: try cheap first, upgrade only if you need to. It’s the same logic I apply to a lot of Photoshop work. Start with the thing that takes 10 seconds. If it doesn’t work, then spend the extra time.
One More Thing: This Works Even Better on a Duplicate Layer
I’ll add something from my own experience working with this. Before you run any Content-Aware Fill, whether quick or dialog-based, duplicate your layer first (Cmd+J / Ctrl+J). Run the fill on the copy. This costs you nothing and gives you an instant undo that’s non-destructive. If the fill looks great at first and then you notice a weird artifact three edits later, you still have the clean original underneath.
I learned this the slightly painful way on a client job where I had flattened the file before noticing a tiling issue in the fill. Working on a duplicate takes five seconds and saves you from that situation entirely. The Content-Aware Fill dialog does have an Output option at the bottom right where you can output to a new layer, which is also solid, but the duplicate-first habit works across both methods.
The single most important thing here is the Shift+Delete shortcut. It removes the friction of the quick method enough that you’ll actually use it as your first step instead of skipping straight to the dialog every time. Fast fill, evaluate, undo if needed, then go deeper. That’s the whole workflow.
Watch the full tutorial on YouTube to see Matt walk through both methods on a real photo, including how the sampling overlay behaves as you paint.
Comments
Leave a Comment