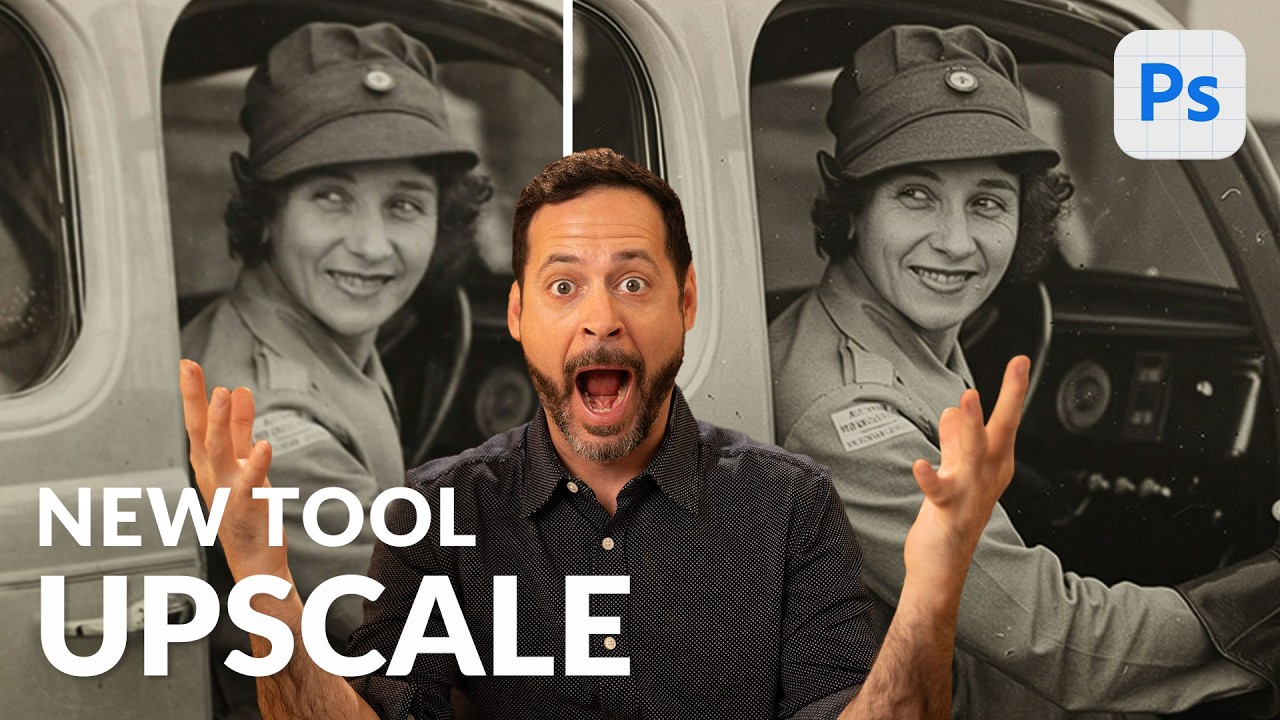
I have a folder on my hard drive called “Client Assets - HANDLE WITH CARE” and it is, genuinely, a disaster. Blurry product shots. Ancient family photos scanned at the wrong resolution. Images that looked fine on a phone screen but would print like a watercolor painting left in the rain. For years, my workaround was a combination of third-party upscaling apps, crossed fingers, and gently managing client expectations. Then Adobe quietly dropped a tool in Photoshop Beta that makes most of that song and dance completely unnecessary.
In this Aaron Nace (PHLEARN) tutorial, he walks through the new Generative Upscale feature built into Photoshop Beta, and I’ll be honest - it made me a little annoyed that it took this long to exist. Watch the full tutorial on YouTube if you want to see it in action before diving into the steps below.
The use case Aaron highlights is one I run into constantly: a small, low-resolution image that needs to be printed at a real size without looking like a pixelated mess. We’re talking 800x1000-ish pixel images that someone wants blown up to an 8x10. Previously that meant either breaking the bad news or doing a lot of manual cleanup after running it through an upscaler. Now it’s essentially one click - with a small asterisk we’ll get to.
Step 1: Check Your Starting Image Size
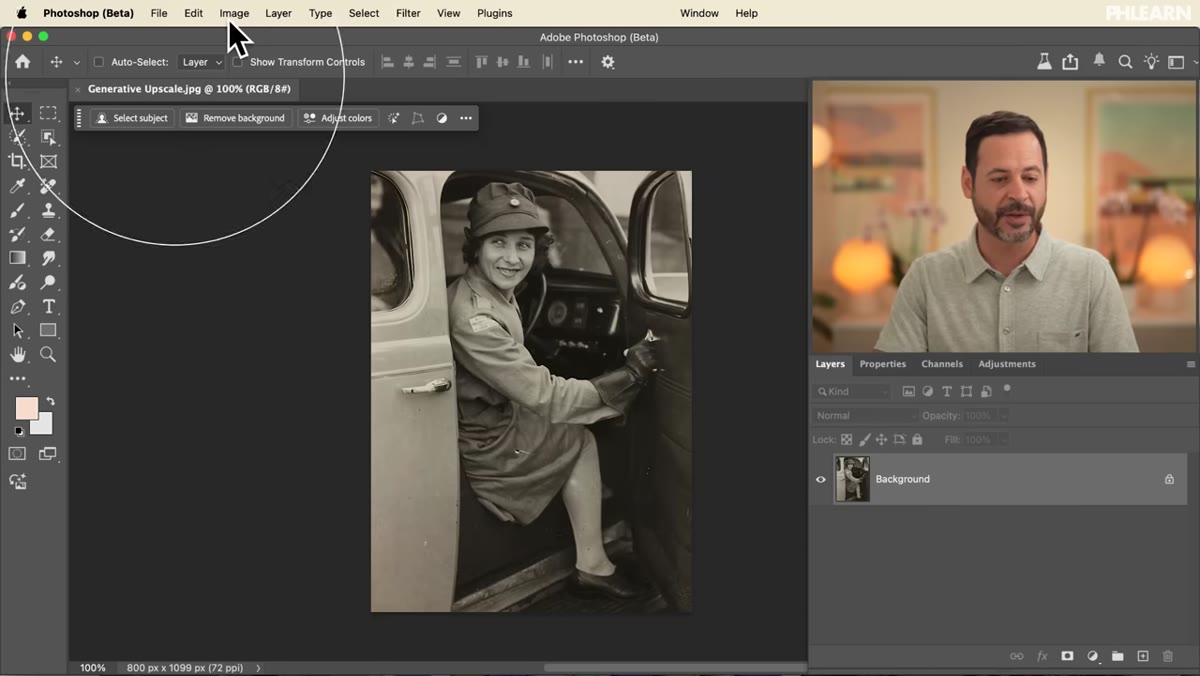 Image size dialog showing 800 by 1099 pixels
Before you do anything with Generative Upscale, go to Image > Image Size and take note of your pixel dimensions. Aaron’s example image comes in at around 800 x 1099 pixels - small enough that any attempt to print it at a standard photo size would result in visible pixelation. Zooming into 100% in Photoshop confirms the problem. You can see the individual pixels starting to break apart at even moderate zoom levels.
Image size dialog showing 800 by 1099 pixels
Before you do anything with Generative Upscale, go to Image > Image Size and take note of your pixel dimensions. Aaron’s example image comes in at around 800 x 1099 pixels - small enough that any attempt to print it at a standard photo size would result in visible pixelation. Zooming into 100% in Photoshop confirms the problem. You can see the individual pixels starting to break apart at even moderate zoom levels.
This step isn’t optional busywork. Knowing your starting dimensions matters because the beta version of this tool has an output ceiling, and if you don’t check first, you’ll hit it and wonder what went wrong.
Step 2: Reduce Image Size If Needed (Beta Quirk Alert)
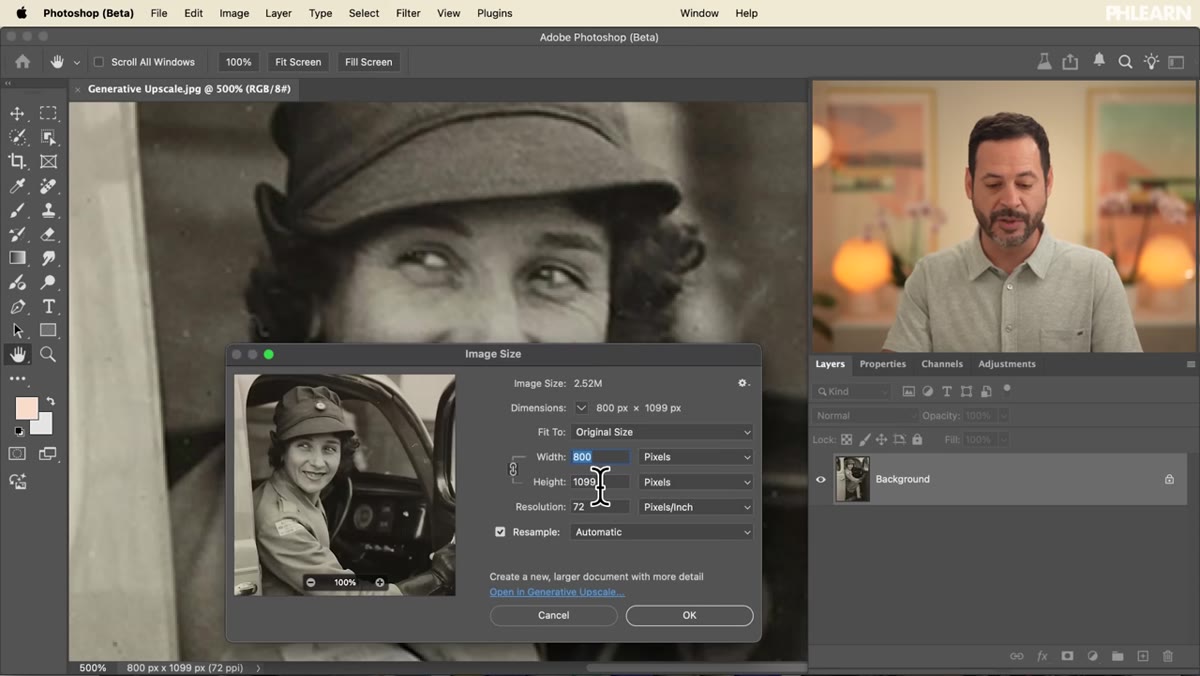 Image size dialog with width set to 700 pixels
Here’s the beta weirdness Aaron flags: if your image is too large, Generative Upscale will throw an error telling you the output exceeds the maximum dimensions allowed. In the current beta, the output cap sits somewhere around 4,096 pixels on the long edge. If a 4x upscale of your image blows past that, Photoshop won’t run it.
Image size dialog with width set to 700 pixels
Here’s the beta weirdness Aaron flags: if your image is too large, Generative Upscale will throw an error telling you the output exceeds the maximum dimensions allowed. In the current beta, the output cap sits somewhere around 4,096 pixels on the long edge. If a 4x upscale of your image blows past that, Photoshop won’t run it.
The fix is a little counterintuitive. You actually scale your image down before upscaling it. Aaron drops his image from 800px to 700px wide via Image > Image Size to get the final 4x output under the threshold. It feels weird to make your image smaller before making it bigger, but it works, and Aaron notes this limitation will likely disappear in the full release. Beta is beta.
Step 3: Navigate to Generative Upscale
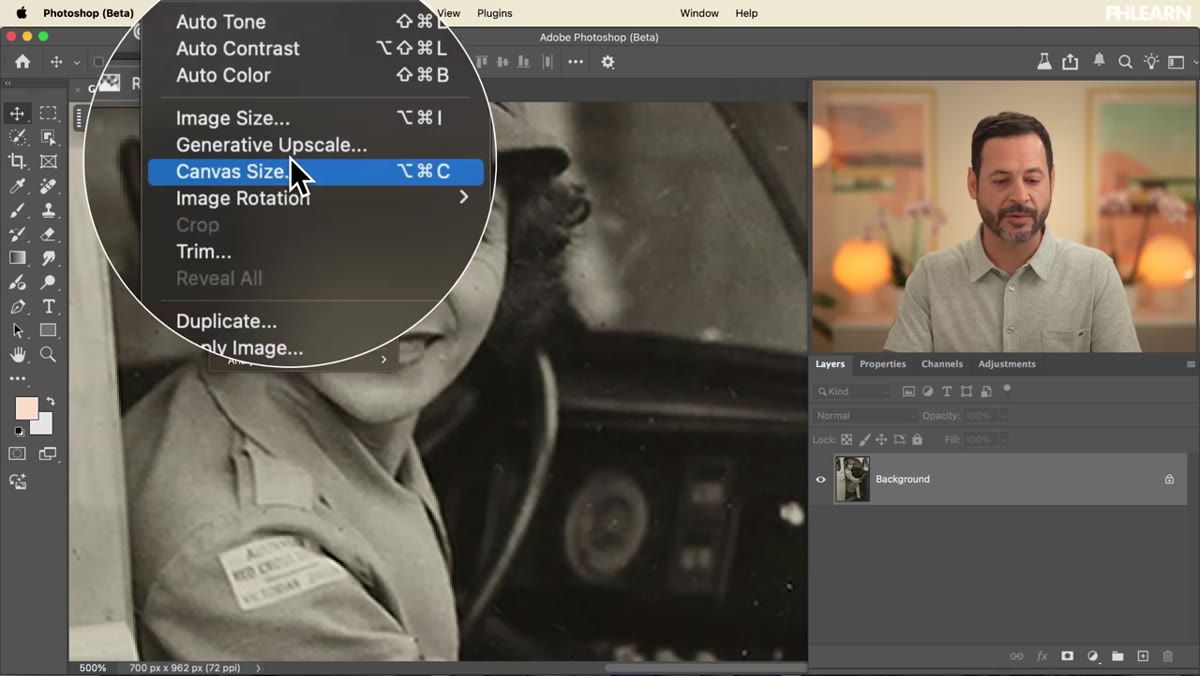 Photoshop Image menu open with Generative Upscale highlighted
With your image sized appropriately, go to Image > Generative Upscale. This option lives in the Image menu and is only available in Photoshop Beta, not the standard release. If you don’t see it, make sure you’ve downloaded the Beta version through the Creative Cloud app - it’s a separate install from your regular Photoshop.
Photoshop Image menu open with Generative Upscale highlighted
With your image sized appropriately, go to Image > Generative Upscale. This option lives in the Image menu and is only available in Photoshop Beta, not the standard release. If you don’t see it, make sure you’ve downloaded the Beta version through the Creative Cloud app - it’s a separate install from your regular Photoshop.
The dialog that opens is refreshingly simple. There’s no wall of sliders or intimidating options panel. You pick your scale multiplier, and that’s basically it.
Step 4: Set Your Scale and Run It
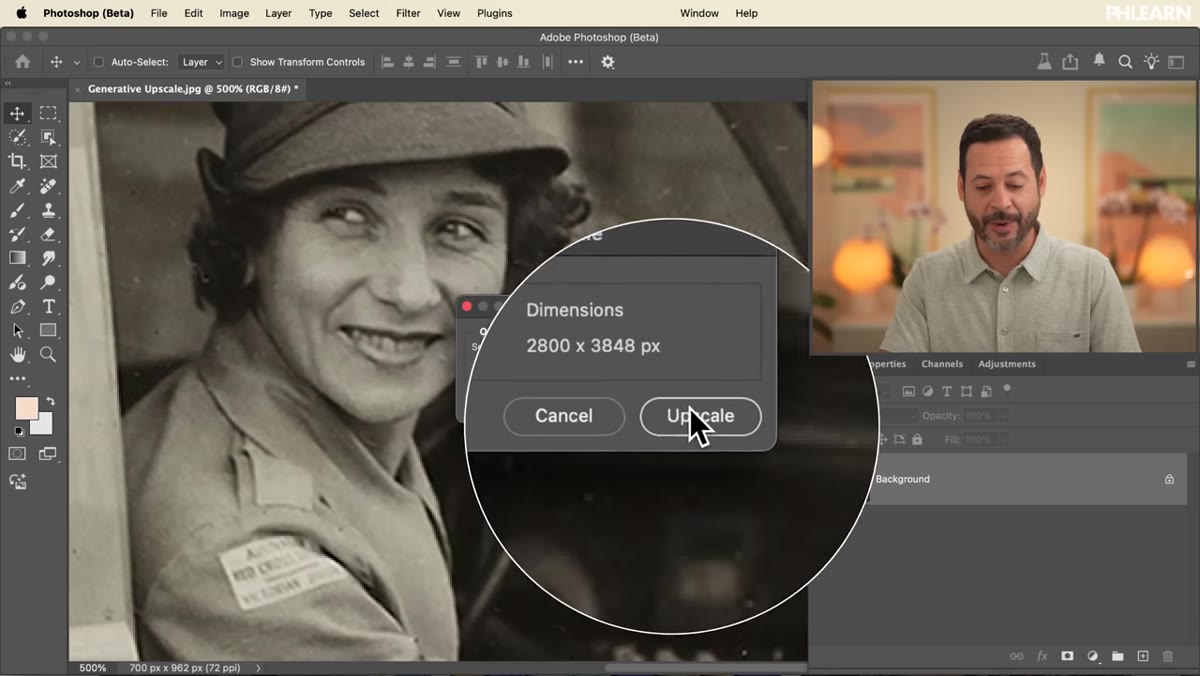 Generative Upscale dialog with 4x scale selected
Aaron selects 4x upscaling in the dialog, which takes the 700px image up to a much more print-friendly final size. Once you’ve selected your multiplier, click Upscale and let the AI do its thing.
Generative Upscale dialog with 4x scale selected
Aaron selects 4x upscaling in the dialog, which takes the 700px image up to a much more print-friendly final size. Once you’ve selected your multiplier, click Upscale and let the AI do its thing.
Two things worth knowing here. First, this process uses a generative credit from your Adobe account - the same credit pool used by Firefly-powered features like Generative Fill. It’s not a huge cost, but it’s worth being aware of if you’re on a plan with a limited credit allotment. Second, the upscaled result opens in a brand new document rather than replacing your original. That’s actually a thoughtful move on Adobe’s part.
Step 5: Compare the Original and Upscaled Layers
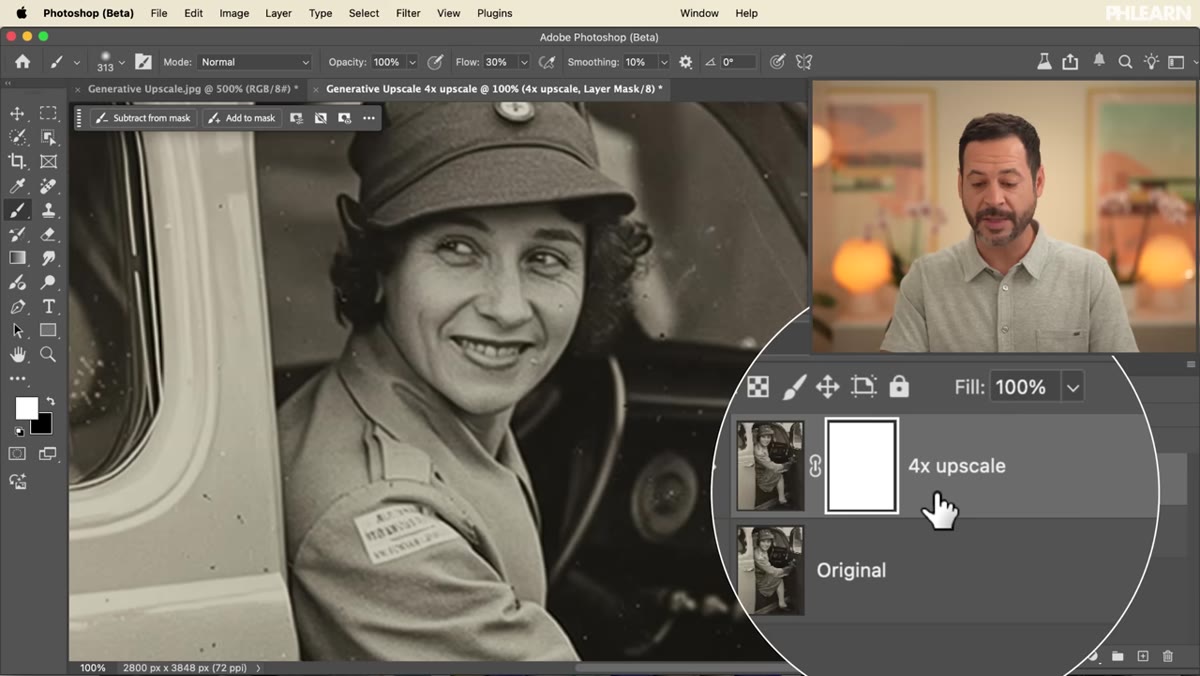 New document with upscaled and original layers visible in panel
When the new document opens, you’ll find both the 4x upscaled version and the original image sitting as separate layers. This makes side-by-side comparison genuinely easy. Toggle the upscaled layer on and off to see the difference without any extra setup.
New document with upscaled and original layers visible in panel
When the new document opens, you’ll find both the 4x upscaled version and the original image sitting as separate layers. This makes side-by-side comparison genuinely easy. Toggle the upscaled layer on and off to see the difference without any extra setup.
Aaron does this comparison at 100% zoom and the improvement is obvious - the upscaled version holds together at sizes where the original would completely fall apart. At 200% zoom you can see the AI has filled in and smoothed detail rather than just stretching pixels. For print purposes, this is a significant quality jump.
Step 6: Inspect the Details Critically
 Close-up comparison showing door reflection detail differences
This is the step most people skip, and Aaron deserves credit for not glossing over it. Zoom into specific areas of your image and look closely at fine details. Aaron spots a couple of places where the AI made decisions he wouldn’t have made - a door handle reflection and some shadows that get softened out in the upscaled version.
Close-up comparison showing door reflection detail differences
This is the step most people skip, and Aaron deserves credit for not glossing over it. Zoom into specific areas of your image and look closely at fine details. Aaron spots a couple of places where the AI made decisions he wouldn’t have made - a door handle reflection and some shadows that get softened out in the upscaled version.
The AI is essentially interpreting the image through its training data. Dust, scratches, and fine grain may be reduced or reinterpreted rather than preserved exactly. For a family photo you want to print and frame, that’s probably fine. For archival restoration work where every original detail matters, you’ll want to do a careful pass after upscaling and decide what to keep or restore manually.
What I’d Add From My Own Experience
The thing Aaron doesn’t have time to cover in a short tutorial is how well this plays with smart objects. Before I run anything through Generative Upscale, I convert my layer to a smart object first. It doesn’t change how the upscaler works, but it keeps my original document flexible if the client comes back with changes - which they always do, right before you’ve archived everything.
I’ve also found that pairing the output with a very subtle Camera Raw Filter sharpening pass brings back just a touch of crispness that the AI sometimes softens out. Nothing aggressive - just enough to make it feel like a real photograph again rather than an AI-smoothed approximation of one. It takes two minutes and makes a difference.
Generative Upscale is one of those tools that does exactly what it says, does it well, and doesn’t require you to become an expert to use it. The beta limitations are real but minor, and the output quality for everyday print work is genuinely impressive. If you’ve got a pile of small images that need new life, this is worth 20 minutes of your afternoon.
Watch the full tutorial on YouTube and see Aaron walk through the whole thing from start to finish.
Comments (1)
Finally someone explains this in a way that actually makes sense.
Leave a Comment