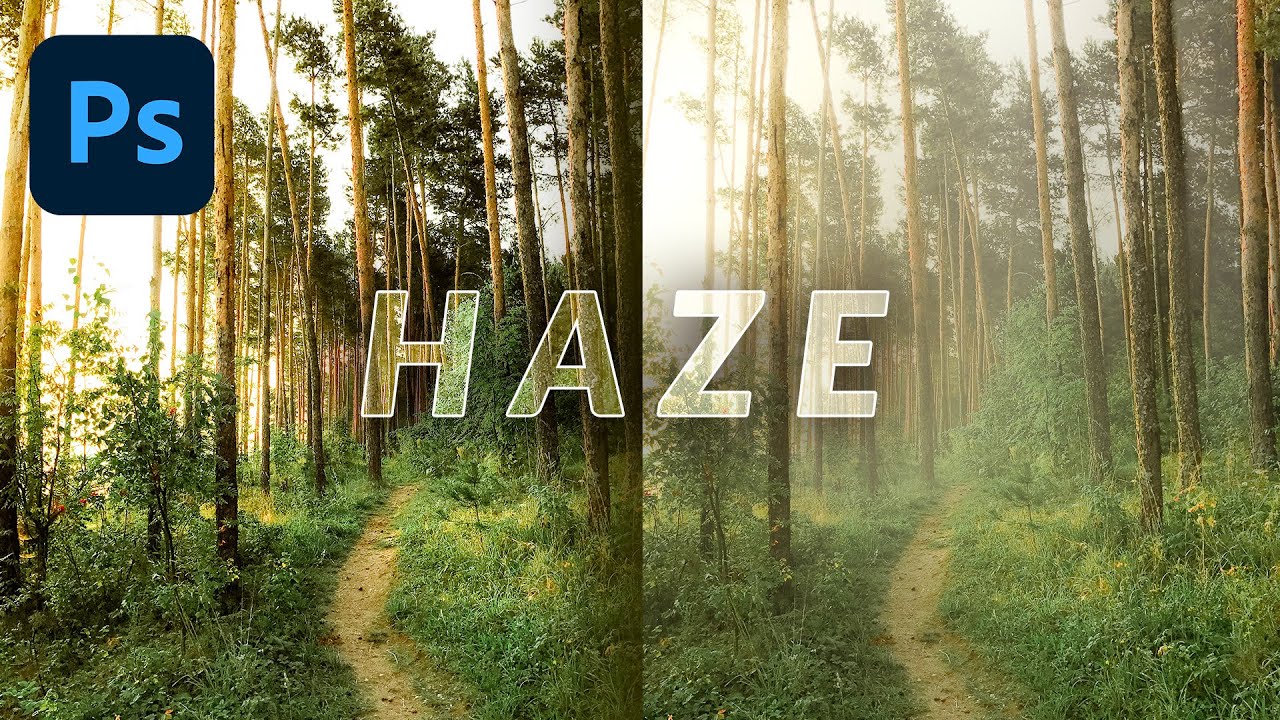
There’s a specific kind of frustration that hits when you’ve spent forty-five minutes masking hair, painting depth-of-field blur onto a background, and color-grading everything to sit right, and then a client asks if you can “make it look a little more dreamy.” I’ve been there more times than I care to admit, usually at a coffee shop with a lukewarm oat milk latte and a deadline that isn’t moving. The old workflow for faking shallow depth of field on a flat image involved layers, blur galleries, luminosity masks, and a whole lot of squinting. That’s why when Adobe quietly dropped Depth-Aware Haze into the Neural Filters panel, I immediately went looking for someone to actually put it through its paces.
In this Aaron Nace (PHLEARN) tutorial, Watch the full tutorial on YouTube, Aaron tests the filter on three different photographs, deliberately picking images with tricky edges and complex foreground-to-background transitions. He’s not just demoing the happy path here. He’s poking at it, which is exactly the kind of tutorial I trust. Here’s what the filter does, how to use it, and where you should pump the brakes before you commit to it on anything client-facing.
Step 1: Update Photoshop and Open Neural Filters
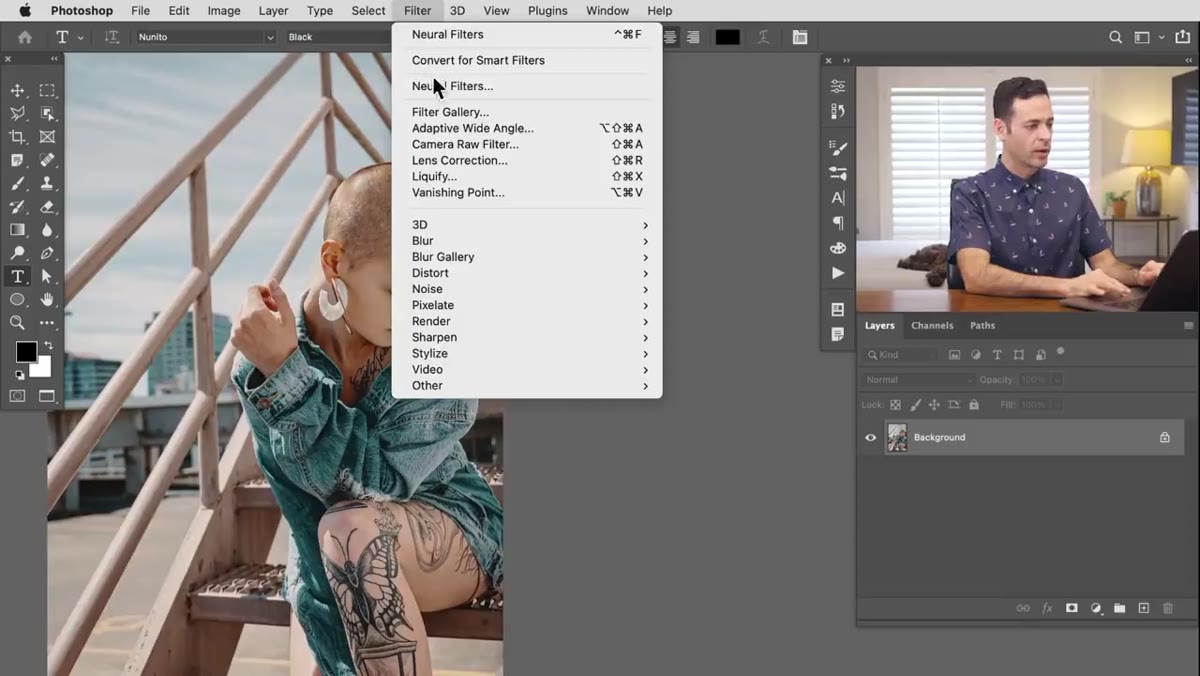 Neural Filters menu option inside the Filter dropdown
Before anything else, you need to confirm you’re running a version of Photoshop that includes Neural Filters. If you haven’t updated in a while, go do that now. Neural Filters aren’t available in older versions, and no amount of hunting through menus is going to surface them if your software is behind. Once you’re up to date, open your image and navigate to Filter, then Neural Filters. The panel will take a moment to load because it’s literally reaching out to Adobe’s cloud servers to initialize. This means one non-negotiable requirement: you must be connected to the internet. Turn off your WiFi and this panel becomes a very slow loading screen that goes nowhere.
Step 2: Locate Depth-Aware Haze Under Beta Filters
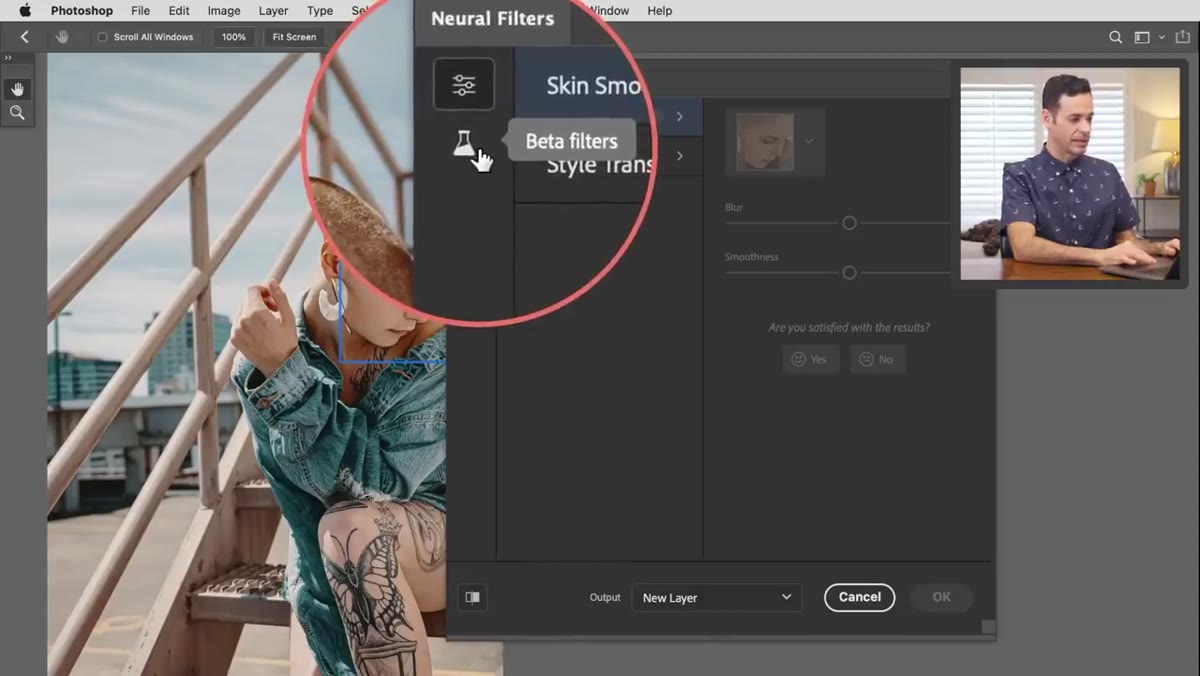 Beta Filters section open, Depth-Aware Haze visible in the list
Once the Neural Filters panel loads, look for the Beta Filters section. It’s marked with a little beaker icon, which feels appropriate because you are essentially experimenting. Depth-Aware Haze lives in here, not in the main filters list. This is Adobe’s way of letting you use features that are still in active development without waiting for a full software release cycle. The practical upside is that you get access to new tools faster. The practical downside is that you should treat anything in that beta section as a “wow, that’s promising” feature rather than a “bet the whole project on this” feature. Toggle Depth-Aware Haze on to activate it.
Step 3: Let the AI Analyze Your Image
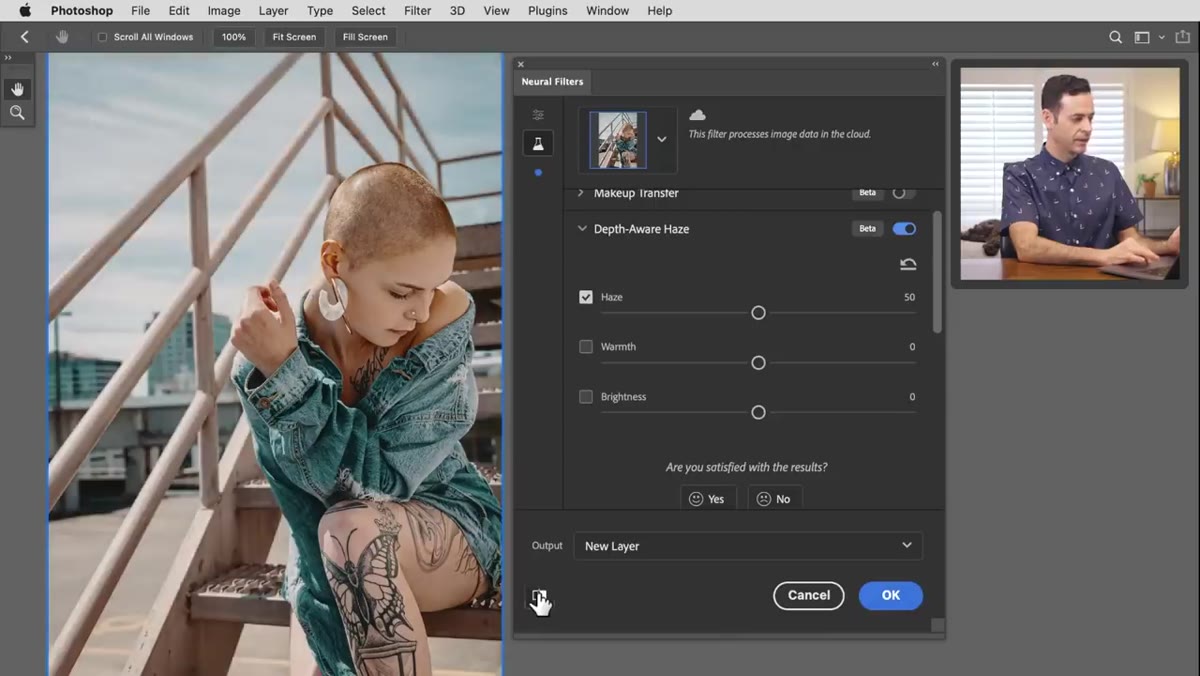 Preview toggling off and on, showing subject isolation in progress
After activating the filter, give it a moment. It’s sending your image data to Adobe’s servers, running it through an AI depth-detection model, and returning a processed result. You’ll see a preview toggle at the bottom of the panel. Switch it off and back on to compare before and after. What the AI is doing here is genuinely impressive: it’s identifying the primary subject, estimating a depth map for the entire scene, and using that depth information to determine how much haze to apply at different distances. On Aaron’s test image, with a subject in the foreground and a staircase receding into the background, the AI correctly reads the spatial relationships and keeps the subject sharp while pushing atmosphere into the depth of the scene.
Step 4: Adjust the Haze Amount
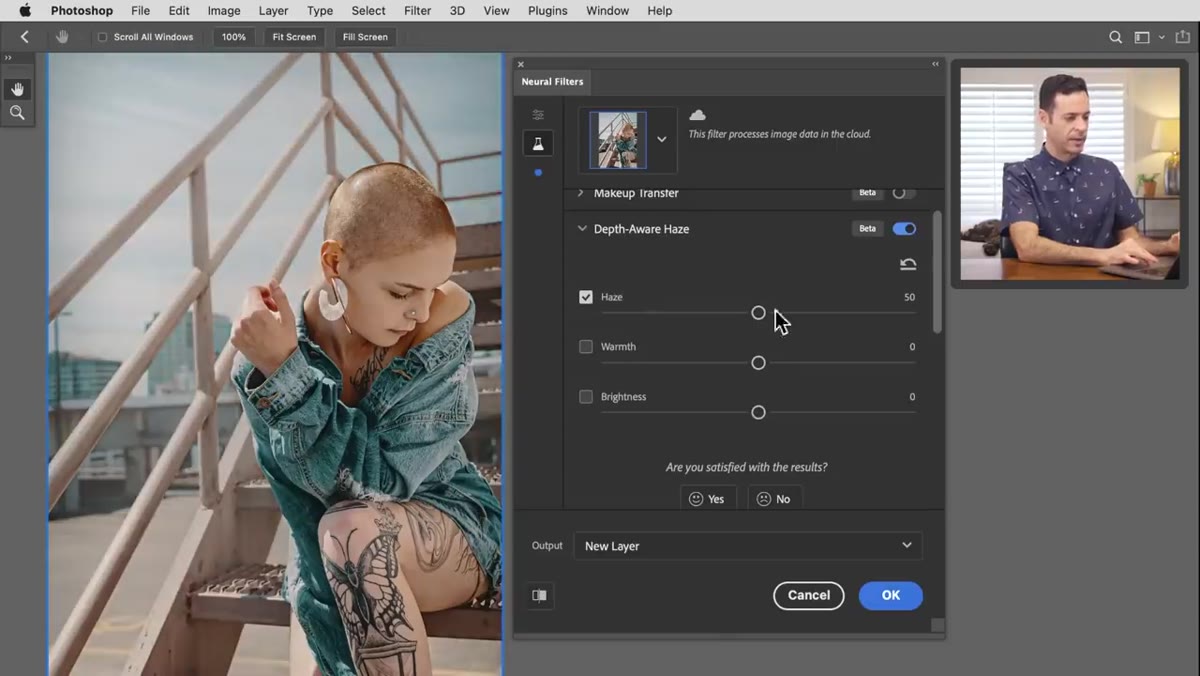 Haze amount slider being adjusted in the Neural Filters panel
The main control you’ll reach for first is the Haze Amount slider. Pull it up to push more atmospheric diffusion into the background, or back off if you want something more subtle. The key thing to notice here is that increasing the haze does not blow out your subject. The depth detection keeps the foreground anchor sharp while the background absorbs the effect. For most portrait or environmental work, you won’t need to push this to extremes. A moderate setting reads as natural. A maxed-out setting starts to look like someone is fogmachining the back of the studio, which may or may not be what you’re after.
Step 5: Decide Whether to Touch the Warmth Slider
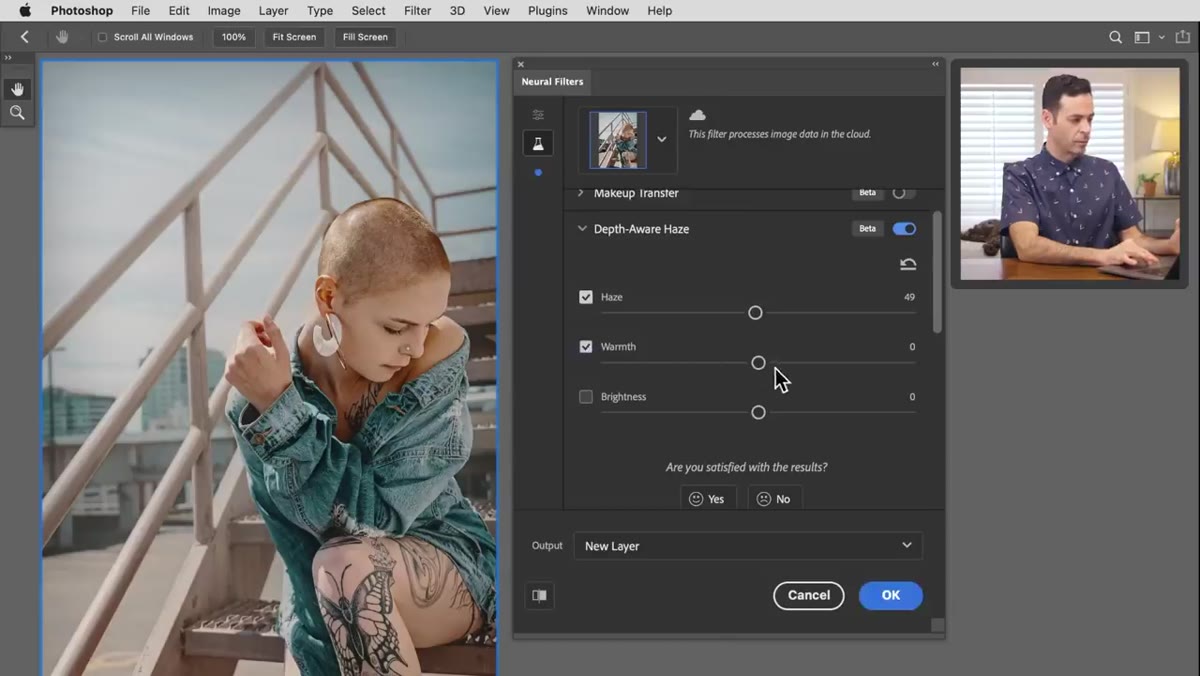 Warmth slider being moved, background color shift visible
There’s a Warmth slider that adjusts the color temperature of the haze effect. Aaron is pretty candid about this one: it needs work. Pushing it toward warm tips quickly into a blown-out orange that doesn’t read as real light. Pulling it cool goes cyan fast, which looks more like a mistake than an artistic choice. If you’re going for a golden-hour feel, the warmth slider is not your tool. You’d be better off applying a separate color grade as a layer above the Neural Filter output. For most applications, leave warmth at zero and handle color in a dedicated adjustment layer where you have actual control.
Step 6: Check the Brightness Setting, Then Leave It Alone
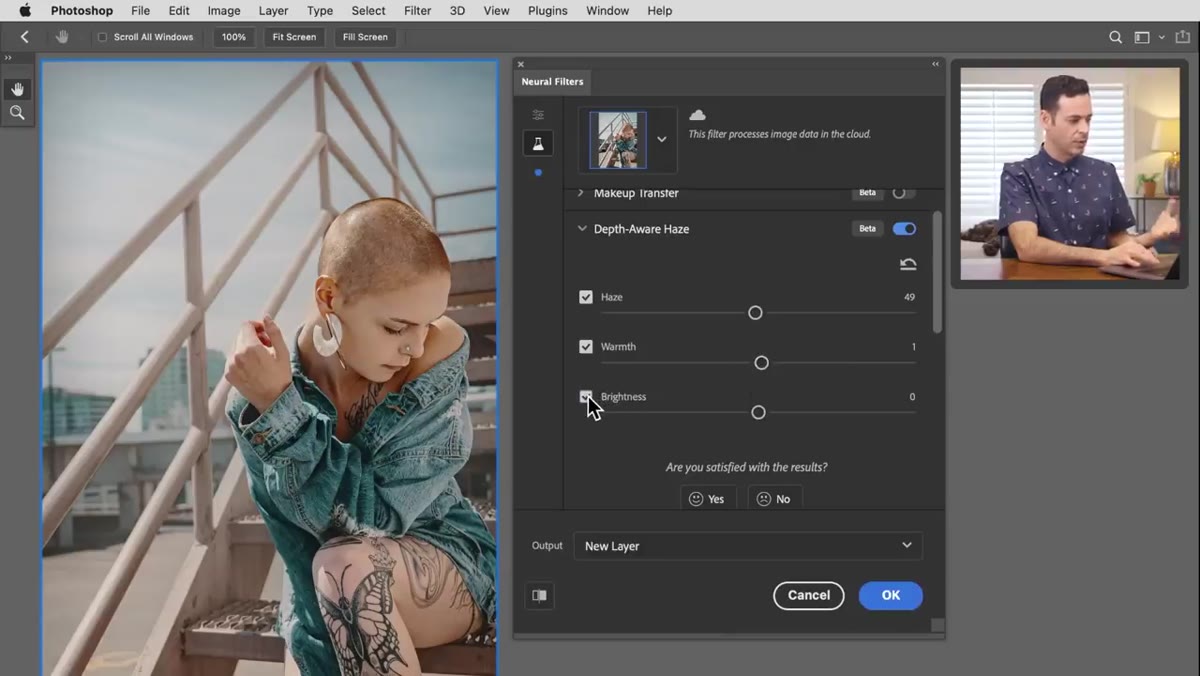 Brightness slider adjusted, overall image luminosity changing
The Brightness slider can push the haze lighter or pull it darker. Aaron demonstrates that going darker with it can actually look quite convincing, particularly when you want to sell the sense of distance fading to shadow. Where it gets interesting is in scenes where the background naturally darkens with depth, like a forest or a long corridor. In those cases, nudging brightness down a touch reinforces the spatial illusion the haze is already creating. For most images though, the default sits fine. Don’t overcorrect here. Like the warmth slider, small movements are all you need if you move it at all.
Step 7: Choose Your Output Method
 Output dropdown at the bottom of the Neural Filters panel
This is the step most people rush past and then regret. At the bottom of the Neural Filters panel is an Output dropdown. You have options: apply the effect directly to the current layer, output to a new layer, create a smart filter, or generate a new document. Pick “New Layer” or the Smart Filter option every single time. Applying directly to your working layer means you’re baking in a cloud-processed AI result with no way back. I have enough stories about non-destructive workflows I wish I’d used to fill a separate blog entirely. Keep yourself an out. Output to a new layer, label it clearly, and your future self will thank you.
Where This Gets Interesting for Compositing
I want to be clear about something: Depth-Aware Haze is not a replacement for a carefully built depth-of-field composite. If you’re placing a subject against a background plate and matching real lens physics, you still need to do that work properly. Where this filter actually earns its keep is in two situations. First, single-image photography where the background is in focus but you want more separation without a complex mask-and-blur workflow. Second, quick client comps where you’re showing a direction, not delivering a finished file. In both cases, the time savings are real. What used to take twenty minutes of blur gallery work and masking takes about ninety seconds here, and the depth detection gets the edge quality right in most cases without any manual cleanup.
The single biggest takeaway here is that Depth-Aware Haze is genuinely useful, but it’s still in beta and it shows around the edges, specifically in the Warmth control. Use it for the haze. Handle color and brightness elsewhere. And always output to a new layer.
Watch the full tutorial on YouTube to see Aaron test it across three different images, including the trickier examples that really show where the AI earns its confidence and where it hedges.
Comments (1)
Would love to see a follow-up going deeper into this topic.
Leave a Comment