I’ll be honest with you. The first time I opened Photoshop, I closed it within ten minutes. Too many panels, too many menus, too many little icons that looked like abstract art. I went back to making terrible memes in MS Paint like a coward. What eventually broke the cycle wasn’t some innate talent for design software. It was finding someone who could actually explain where things live and why the layout makes sense once you understand the logic behind it. That person, for a lot of people, is Aaron Nace over at PHLEARN. Watch the full tutorial on YouTube
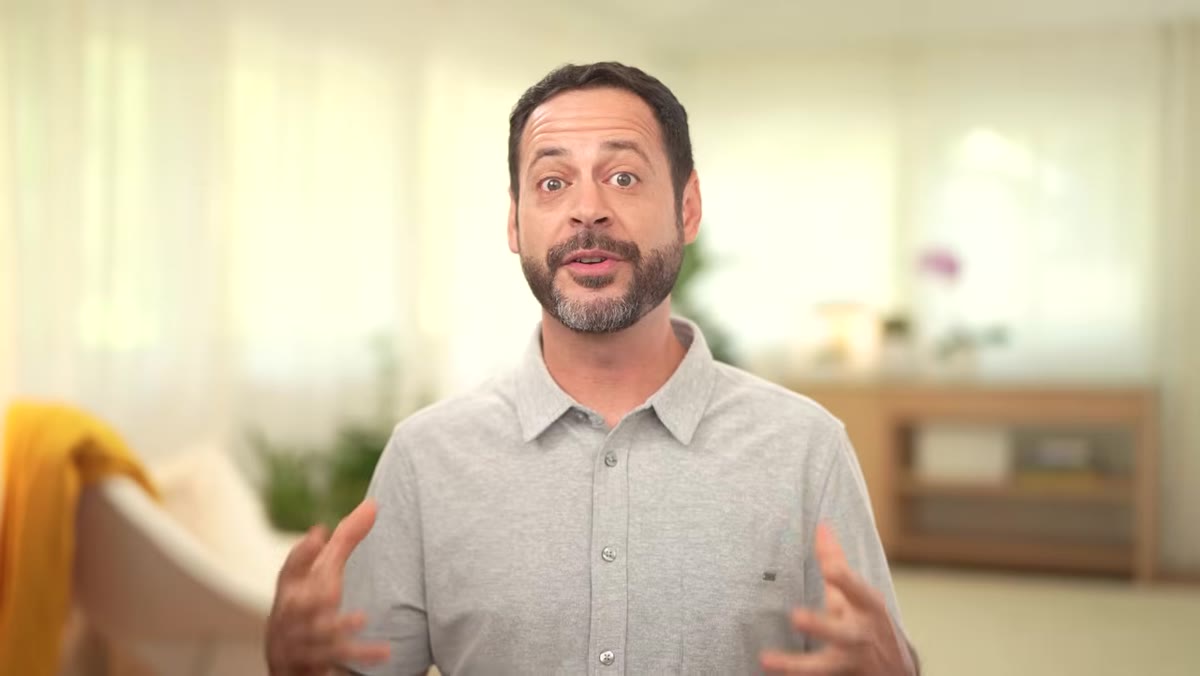
In his “Taking a Tour of Photoshop - Day 1” video, the first installment of his 30 Days of Photoshop series, Aaron does something genuinely useful. He doesn’t try to teach you everything. He makes the point early that Photoshop has a massive feature set, but day-to-day professional work leans on a surprisingly small core of tools. Knowing where those tools live and how the interface is organized is the actual foundation. Everything else builds from there. Even now, when a client project pulls me into a workflow I haven’t touched in months, I’m back to asking myself the same orientation questions Aaron covers here.
This walkthrough breaks down his tour step by step so you can follow along in Photoshop without having to scrub through the video constantly. Let’s get into it.
Step 1: Get Your Bearings on the Home Screen
 Photoshop 2025 home screen showing recent files and top navigation
When you first launch Photoshop 2025, you land on a home screen that’s cleaner than you’d expect from a program with this much going on under the hood. Recent projects show up in the main area so you can jump back in quickly. Up at the top left, you’ve got two primary options: create a new file or open an existing one. This screen is your launchpad, not decoration. Spend thirty seconds orienting yourself here before diving in.
Photoshop 2025 home screen showing recent files and top navigation
When you first launch Photoshop 2025, you land on a home screen that’s cleaner than you’d expect from a program with this much going on under the hood. Recent projects show up in the main area so you can jump back in quickly. Up at the top left, you’ve got two primary options: create a new file or open an existing one. This screen is your launchpad, not decoration. Spend thirty seconds orienting yourself here before diving in.
The home screen also gives you a quick way to see what you’ve been working on without digging through folders. If you’re returning to Photoshop after a break, this is where you’ll pick up the thread. Think of it as your front door rather than a loading screen to click past.
Step 2: Create a New Document (and Don’t Ignore the Templates)
 New Document dialog with width, height, resolution fields visible
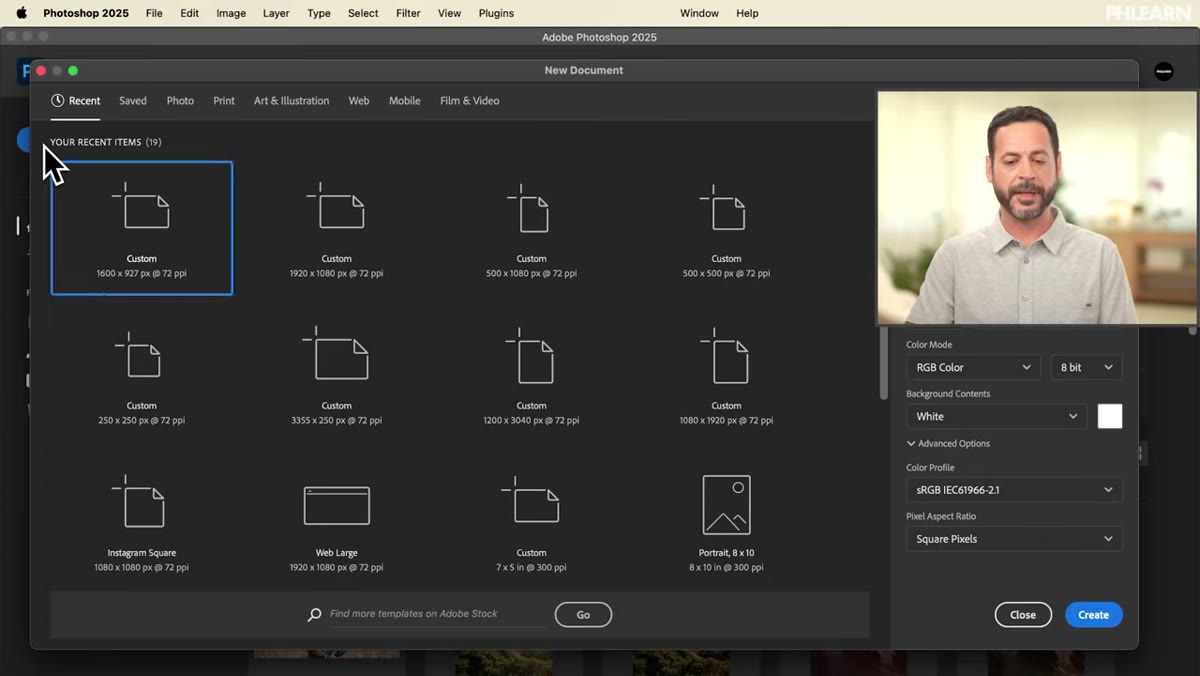
Click “New File” in the top left and the New Document dialog opens up. The core settings are straightforward: width, height, and resolution. If you know the final dimensions of your project, just type them in. Print work at 300 DPI, web work at 72 DPI. That’s a rule you’ll internalize fast. You can also set the background color for your canvas here, which saves you a step later.
New Document dialog with width, height, resolution fields visible
Click “New File” in the top left and the New Document dialog opens up. The core settings are straightforward: width, height, and resolution. If you know the final dimensions of your project, just type them in. Print work at 300 DPI, web work at 72 DPI. That’s a rule you’ll internalize fast. You can also set the background color for your canvas here, which saves you a step later.
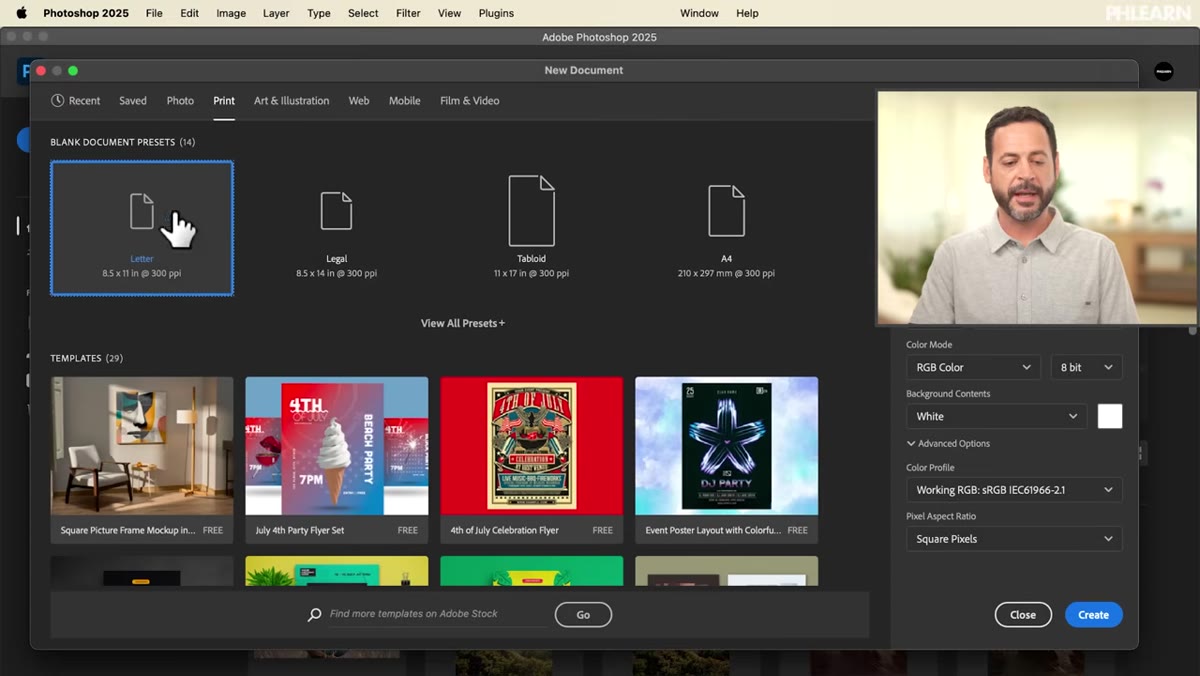
Here’s the part people skip and shouldn’t: the template library at the top of this dialog. Adobe has organized templates by category, including Photo, Print, and Web. These aren’t just blank presets. Some of them are full layered documents you can download for free right into Photoshop. Click on something like the Print category and you’ll find actual flyer layouts ready to customize. If you’re learning and aren’t sure what you want to build yet, grabbing one of these templates gives you a structured document to poke around in. It’s a much better sandbox than staring at a blank white canvas.
Step 3: Explore Template Categories Relevant to Your Work
 Web category templates showing laptop mockup option in New Document dialog
Inside the New Document dialog, the category tabs across the top (Photo, Print, Web, Mobile, Film and Video, Art and Illustration) filter the templates to match different types of work. This isn’t just organizational tidiness. It’s a signal that Photoshop is genuinely built for multiple disciplines, and the settings that matter for web design are different from the settings that matter for print.
Web category templates showing laptop mockup option in New Document dialog
Inside the New Document dialog, the category tabs across the top (Photo, Print, Web, Mobile, Film and Video, Art and Illustration) filter the templates to match different types of work. This isn’t just organizational tidiness. It’s a signal that Photoshop is genuinely built for multiple disciplines, and the settings that matter for web design are different from the settings that matter for print.
If you’re doing client work in a specific category repeatedly, the Photo and Print sections are your most likely starting points. The Web section includes mockup templates for things like desktop screens and browser windows, which saves real time when you’re presenting design concepts. Aaron specifically calls out the Web category here, and it’s worth clicking through each tab at least once so you know what’s available before you assume you need to build everything from scratch.
Step 4: Know When to Use a Template vs. a Custom Document
 Closing New Document dialog to open a custom image from local files
Templates are great for learning and for standard project types. But eventually you’ll be working with specific client specs or your own photography, and you need a document sized to match. Aaron’s point here is simple: type your dimensions in, set your resolution, and go. Don’t overthink it. The “Saved” tab in the New Document dialog also lets you save custom document sizes you return to often, so if you’re always creating 1080x1080 square graphics for social media, save that as a preset and stop entering it manually every time.
Closing New Document dialog to open a custom image from local files
Templates are great for learning and for standard project types. But eventually you’ll be working with specific client specs or your own photography, and you need a document sized to match. Aaron’s point here is simple: type your dimensions in, set your resolution, and go. Don’t overthink it. The “Saved” tab in the New Document dialog also lets you save custom document sizes you return to often, so if you’re always creating 1080x1080 square graphics for social media, save that as a preset and stop entering it manually every time.
When you’re bringing in your own images rather than starting from scratch, close the New Document dialog and use the Open command instead. Photoshop will create a document automatically sized to match your image. This is the most common real-world workflow: you’ve got a photo, you open it, and Photoshop knows what to do with it.
Step 5: Open Your Own Image to Start Working
 File browser opening to select a sample image from local storage
From the home screen, clicking “Open” launches your system’s file browser. Navigate to wherever your image is saved, select it, and Photoshop opens it as a new document. The canvas size matches the image dimensions automatically, which means you’re ready to start working without any additional setup. This is the entry point for most real editing sessions and the workflow you’ll use every single time you work with photography or client-supplied assets.
File browser opening to select a sample image from local storage
From the home screen, clicking “Open” launches your system’s file browser. Navigate to wherever your image is saved, select it, and Photoshop opens it as a new document. The canvas size matches the image dimensions automatically, which means you’re ready to start working without any additional setup. This is the entry point for most real editing sessions and the workflow you’ll use every single time you work with photography or client-supplied assets.
One thing worth noting: the file format you’re opening matters. RAW files from a camera will route through Adobe Camera Raw first before landing in Photoshop proper. That’s a separate interface and its own topic, but knowing it exists means you won’t panic the first time it appears instead of your expected Photoshop workspace.
What I’d Add From My Own Experience
The template exploration Aaron recommends in this first lesson is something I genuinely underused for the first couple years of doing design work. I was so focused on building everything from scratch because it felt more “professional” that I missed out on time-saving starting points that were sitting right in the software. The first time I opened a layered template and started pulling it apart to understand how it was built, I learned more about smart layer organization in twenty minutes than I had from a lot of deliberate practice.
If you’re just getting started and the blank canvas feels paralyzing, download three or four free templates from different categories and spend an hour dissecting them. Look at what layers are grouped, how adjustment layers are used, how the document is structured. It’s free education built right into the New Document dialog, and most people scroll past it without a second look.
The single most important thing this tutorial reinforces is that Photoshop is not a wall you need to climb all at once. The interface is big, but your daily working area is small. Learn where the front door is, know how to set up a document correctly, and the rest follows naturally.
Watch the full tutorial on YouTube and follow along with Aaron’s full 30-day series if you want the most structured path through Photoshop fundamentals available for free online.
Comments (2)
Printing this out and pinning it next to my monitor. That good.
My workflow just got 10x faster. Not even kidding.
Leave a Comment