
There’s a particular kind of freelance pain that comes from spending fifteen minutes cleaning up a busy background with the Clone Stamp tool, only to realize the result looks like a crime scene painted by someone who’s never seen grass before. The Remove Tool changed that for me when it first showed up, but it always had a ceiling. Big objects, complex backgrounds, anything that required more than a light touch — it would choke. You’d end up jumping over to a lasso selection and running Generative Fill anyway, which felt like admitting defeat.
Adobe’s October 2024 update, Photoshop 2025 (version 26 if you’re checking your About screen), changed that equation. In this Matt Kloskowski tutorial, he walks through what’s new in the update, and the Remove Tool improvements alone are worth the five minutes it takes to watch. Watch the full tutorial on YouTube — but if you want the step-by-step breakdown before you dive in, keep reading.
The short version is this: the Remove Tool now has Generative AI baked directly into it, which closes a workflow loop that used to require three separate tools. For anyone doing commercial retouching or composite work where removing distracting elements is just part of the job, this is a meaningful quality-of-life improvement.
Step 1: Update to Photoshop 2025 and Confirm Your Version
 Photoshop 2025 version number shown in software
Open Adobe Creative Cloud and check for updates. The new version is Photoshop 2025, running as software version 26. Once you see that number in the title bar or under Help > About Photoshop, you’re in the right place. If the updater doesn’t show anything, try restarting the Creative Cloud desktop app or rebooting your machine. Adobe support is your friend here, not your YouTube tutorial guy.
Photoshop 2025 version number shown in software
Open Adobe Creative Cloud and check for updates. The new version is Photoshop 2025, running as software version 26. Once you see that number in the title bar or under Help > About Photoshop, you’re in the right place. If the updater doesn’t show anything, try restarting the Creative Cloud desktop app or rebooting your machine. Adobe support is your friend here, not your YouTube tutorial guy.
Once you’re updated, you can safely delete the previous version if you want to recover some drive space. Just make sure everything is working first.
Step 2: Find the Remove Tool (and Reset Your Toolbar If It’s Missing)
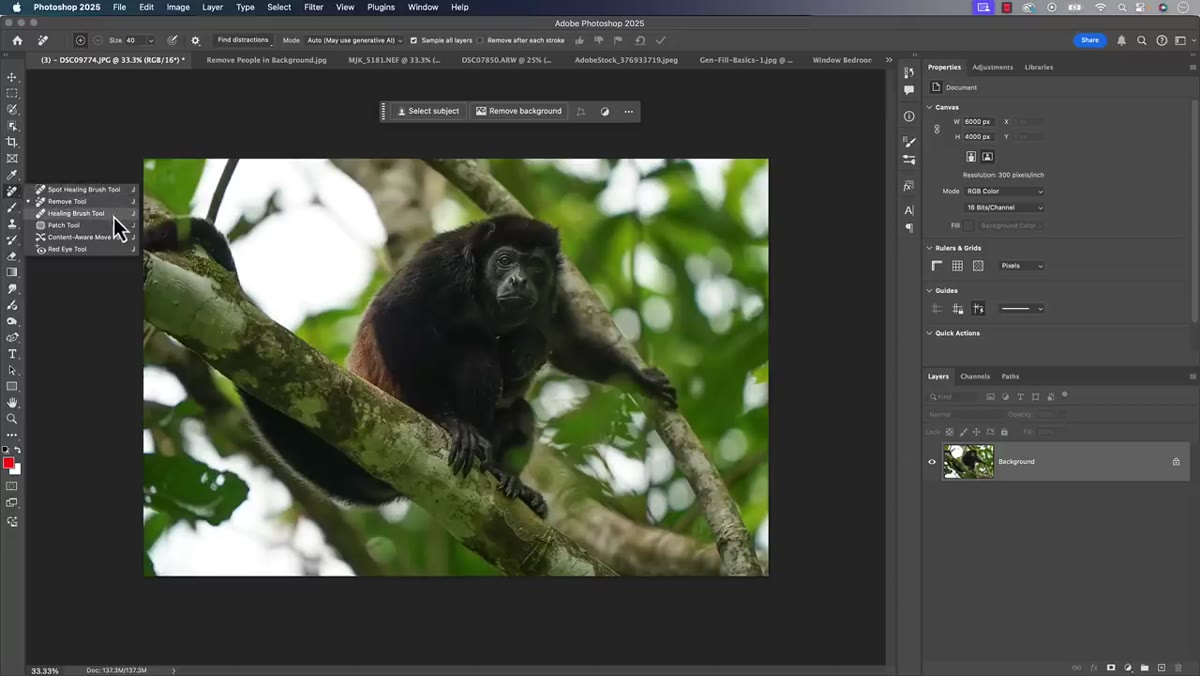 Toolbar showing Remove Tool grouped with healing tools
The Remove Tool lives in the same group as the Spot Healing Brush and the Healing Brush, so look for that cluster in your toolbar. If an update scrambled your layout and you can’t find it, click the three dots at the very bottom of the toolbar. That opens the Edit Toolbar panel. Hit “Restore Defaults” and everything snaps back into place, including any tools that got shuffled into the hidden overflow column on the right side of that panel.
Toolbar showing Remove Tool grouped with healing tools
The Remove Tool lives in the same group as the Spot Healing Brush and the Healing Brush, so look for that cluster in your toolbar. If an update scrambled your layout and you can’t find it, click the three dots at the very bottom of the toolbar. That opens the Edit Toolbar panel. Hit “Restore Defaults” and everything snaps back into place, including any tools that got shuffled into the hidden overflow column on the right side of that panel.
This is worth knowing any time a Photoshop update leaves your workspace looking like someone shook it.
Step 3: Understand the New Mode Options in the Options Bar
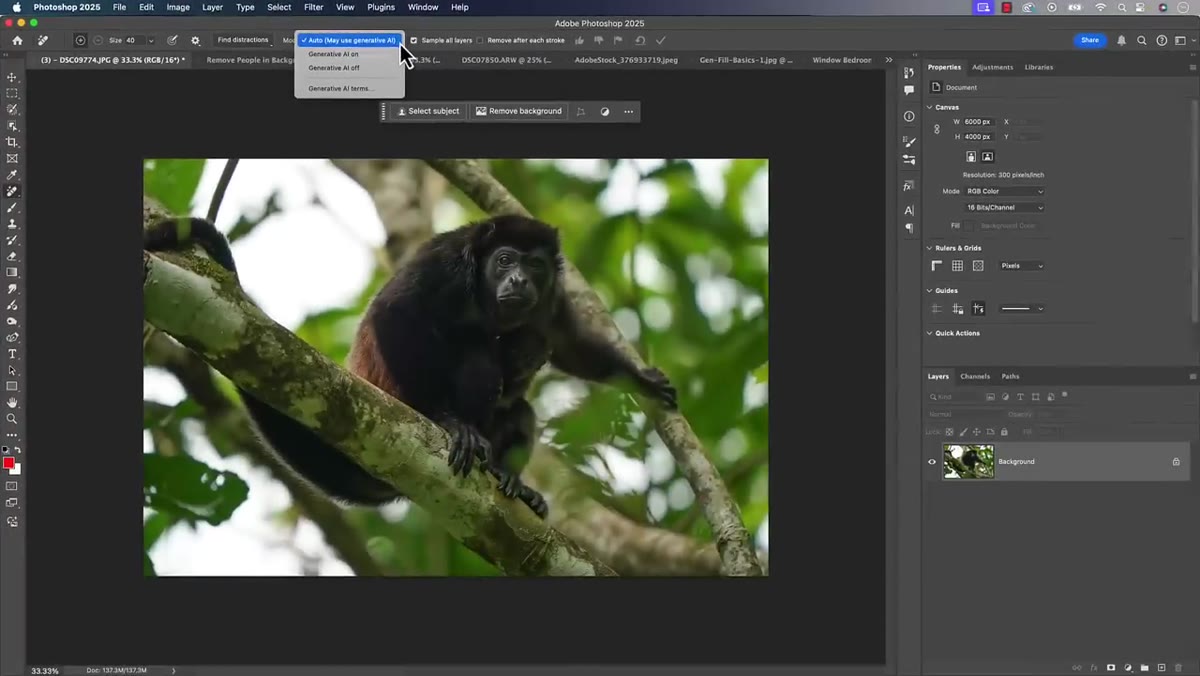 Options bar showing Mode dropdown with Auto and Generative AI options
Once the Remove Tool is active, look at the Options Bar across the top of the screen. You’ll see a Mode dropdown that did not exist before this update. Previously the tool was AI-powered, but it was using technology closer to Content-Aware Fill under the hood. Now you have explicit choices.
Options bar showing Mode dropdown with Auto and Generative AI options
Once the Remove Tool is active, look at the Options Bar across the top of the screen. You’ll see a Mode dropdown that did not exist before this update. Previously the tool was AI-powered, but it was using technology closer to Content-Aware Fill under the hood. Now you have explicit choices.
The two main options are Auto and Generative AI. Auto uses Adobe’s standard AI fill engine, similar to the older behavior. Generative AI uses Adobe Firefly to fill in the removed area, which handles larger or more complex content much more convincingly. Kloskowski recommends Auto for most work, and that matches my experience too. Generative AI is the right call when you’re removing something substantial and the standard fill is struggling.
Step 4: Turn Off “Remove After Each Stroke”
 Options bar with Remove After Each Stroke checkbox unchecked
This is a small setting that makes a big difference in how the tool feels to use. In the Options Bar, uncheck “Remove After Each Stroke.” By default the tool tries to process and remove content after every single brush pass, which can be slow and gives you less control over what you’re selecting before you commit.
Options bar with Remove After Each Stroke checkbox unchecked
This is a small setting that makes a big difference in how the tool feels to use. In the Options Bar, uncheck “Remove After Each Stroke.” By default the tool tries to process and remove content after every single brush pass, which can be slow and gives you less control over what you’re selecting before you commit.
With it unchecked, you paint over everything you want gone, all in one go, and then click the checkmark button in the Options Bar to trigger the removal. You’re telling it what to do rather than letting it guess after every swipe. For anything more than a single small object, this workflow is faster and cleaner.
Step 5: Paint Over the Area You Want Removed
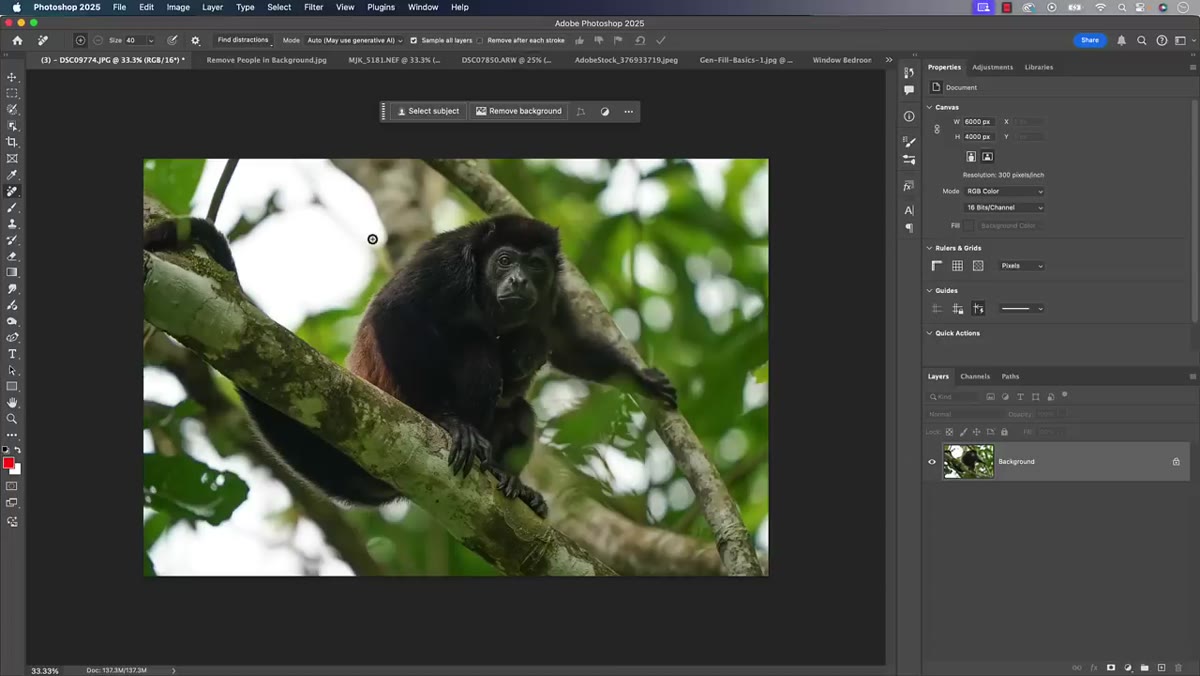
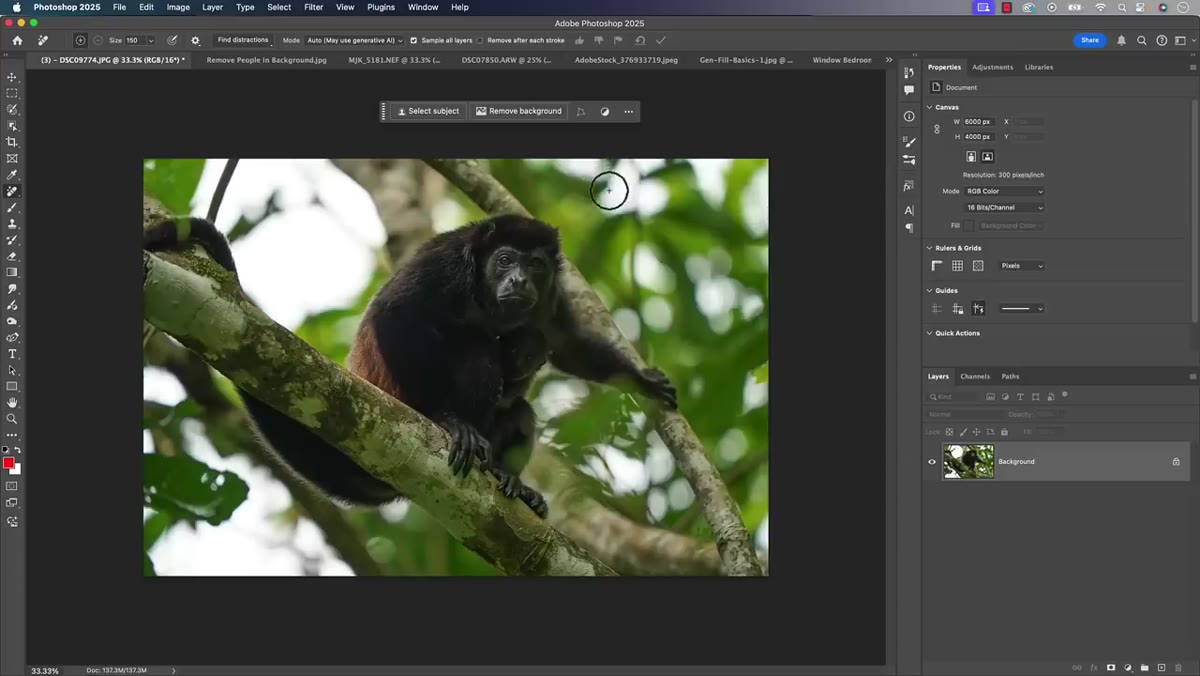 Remove Tool brush painting over a distraction in the image
Use the left and right bracket keys to resize the brush, same as always. Paint directly over whatever you want to remove. The brush shows a red overlay as you paint, so you can see exactly what you’ve covered. You don’t need to be surgical about it, a rough pass over the area is enough. Trying to be too precise here actually works against you.
Remove Tool brush painting over a distraction in the image
Use the left and right bracket keys to resize the brush, same as always. Paint directly over whatever you want to remove. The brush shows a red overlay as you paint, so you can see exactly what you’ve covered. You don’t need to be surgical about it, a rough pass over the area is enough. Trying to be too precise here actually works against you.
If you’re removing something large, like a person in the background or a piece of equipment that wandered into a product shot, paint over the whole thing in a couple of broad strokes. Don’t trace the outline.
Step 6: Click the Checkmark to Apply the Removal
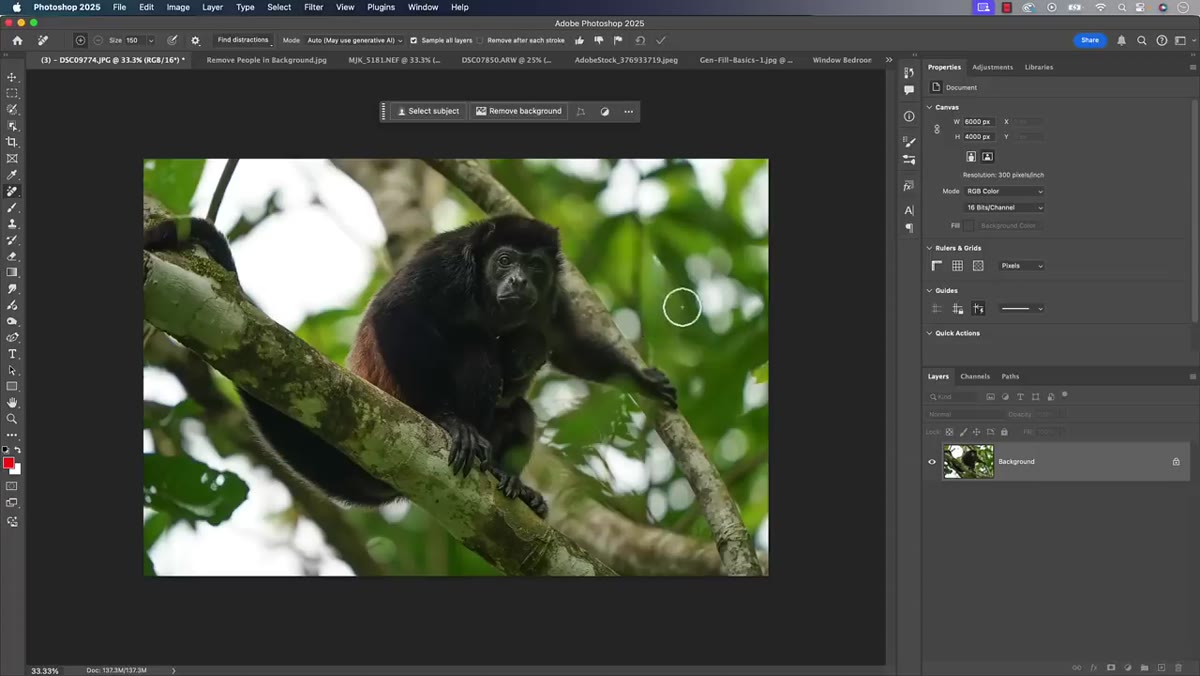 Checkmark button in Options Bar being clicked to commit removal
Once you’ve painted over everything you want gone, click the checkmark in the Options Bar to run the removal. This is where the Generative AI integration earns its keep. Before this update, removing anything larger than a blemish with the Remove Tool meant getting a muddy, unconvincing result that sent you back to Generative Fill manually. Now it’s running that same engine from inside the Remove Tool itself.
Checkmark button in Options Bar being clicked to commit removal
Once you’ve painted over everything you want gone, click the checkmark in the Options Bar to run the removal. This is where the Generative AI integration earns its keep. Before this update, removing anything larger than a blemish with the Remove Tool meant getting a muddy, unconvincing result that sent you back to Generative Fill manually. Now it’s running that same engine from inside the Remove Tool itself.
The result isn’t always perfect on the first try, but it’s dramatically better than what the tool produced six months ago on complex content. If you’re not happy with it, hit the checkmark again to generate a new variation, or undo and try a slightly different brush area.
My Caveat: Know When to Still Use Generative Fill Directly
The Remove Tool improvements are real, but I wouldn’t retire the Generative Fill workflow entirely. For very large removals, or situations where the replacement content needs to match a specific texture or lighting condition precisely, I still get better results from making a deliberate selection with the Lasso Tool and running Generative Fill with a descriptive text prompt. The Remove Tool is excellent at “make this thing disappear and I don’t care what fills it.” Generative Fill gives you more creative control over what the replacement actually looks like.
Think of the updated Remove Tool as the fast lane for 80% of your retouching work. The other 20% still deserves the longer route.
The single most important thing to take away here is this: that annoying three-step process of lasso, switch tools, generate is now one step for most jobs. That’s not a minor update. That’s time back in your session on every retouching job you do. Check the Mode dropdown, turn off the auto-remove-per-stroke behavior, and you’ll wonder how you worked without it.
Watch the full tutorial on YouTube for Kloskowski’s walkthrough of all the October 2024 updates, including the Find Distractions feature that I didn’t even get to cover here.
Comments (1)
The tip about photoshop 2025s remove tool ju was the missing piece for me. Thank you.
Leave a Comment