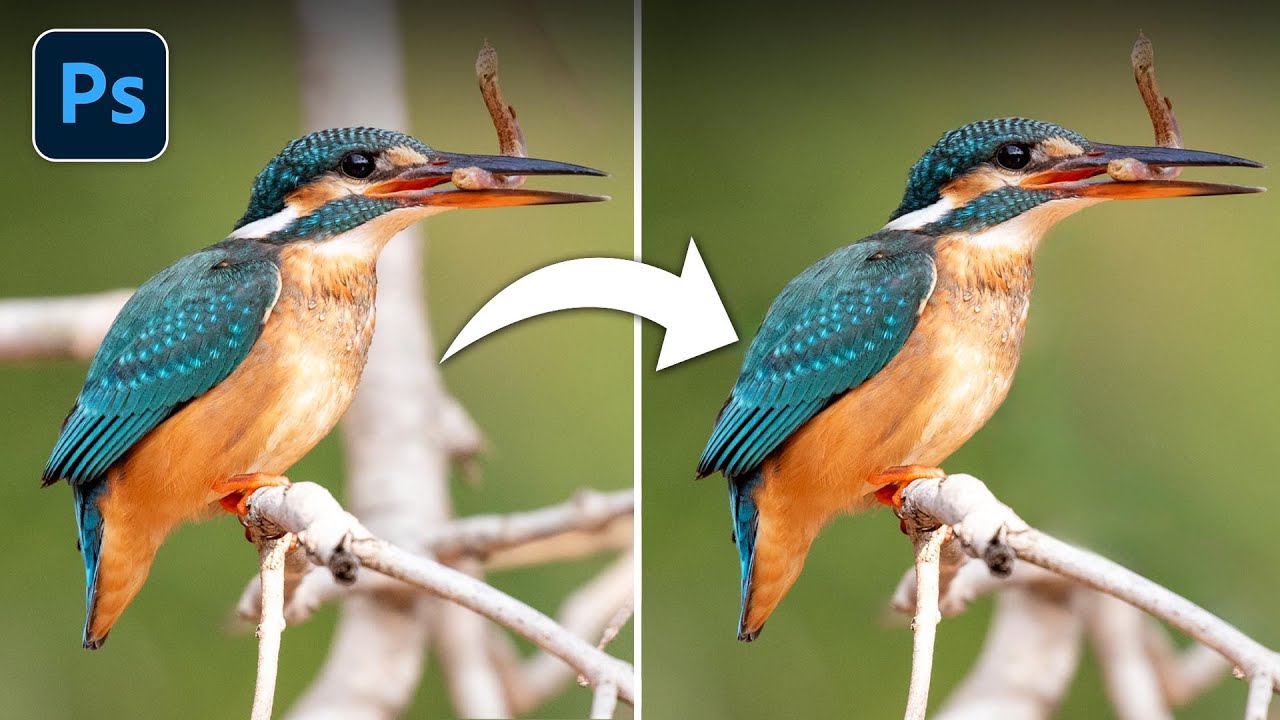
There’s a specific kind of frustration that hits when you’re three tools deep into removing a distraction from a photo and you can still see the seam. Clone stamp, healing brush, patch tool, content-aware fill – I’ve cycled through all of them on a single edit before, and half the time I end up with something that looks like the photo has a skin condition. So when I came across Watch the full tutorial on YouTube from Matt Kloskowski, the promise of handling all of that with a single tool made me sit up straighter in my coffee shop chair.
Matt’s a photographer and educator whose tutorials lean practical and fast-moving, which is exactly the kind of content my brain can handle before noon. In this one, he takes a beautifully shot wildlife photo and removes multiple distracting elements from it using almost exclusively Photoshop’s Remove Tool. Not the healing brush. Not content-aware fill. The Remove Tool. And the results are genuinely impressive, with one smart layer mask trick tucked in for the moments when the tool gets a little overconfident.
What sold me wasn’t just the before-and-after. It was the workflow logic underneath it. Do your crop first so you’re not wasting time cleaning up parts of the image you’ll never use. Duplicate your layer so you always have an escape hatch. Use the mask to blend where the tool stumbles. Simple architecture, powerful results.
Step 1: Start in Lightroom, Crop Before You Jump to Photoshop
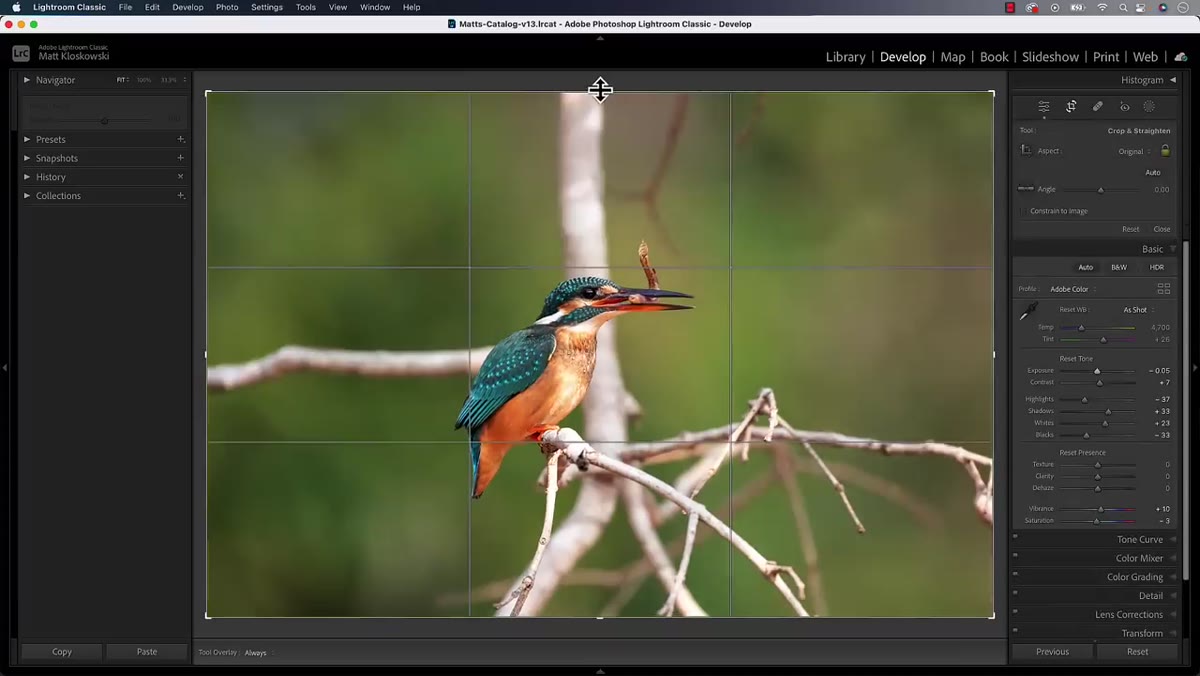 Crop being applied tightly to the photo in Lightroom
Before touching Photoshop at all, Matt makes a point of doing basic tone adjustments and – more importantly – cropping the image first. He hits the Auto button in Lightroom to get a quick contrast and saturation boost, nudges the exposure up slightly, and then crops in tight to the subject.
Crop being applied tightly to the photo in Lightroom
Before touching Photoshop at all, Matt makes a point of doing basic tone adjustments and – more importantly – cropping the image first. He hits the Auto button in Lightroom to get a quick contrast and saturation boost, nudges the exposure up slightly, and then crops in tight to the subject.
The reasoning is practical: why spend time removing distractions in areas you’re going to crop out anyway? Crop first, retouch second. It sounds obvious but I’ve definitely done it backwards more times than I want to admit. Once the crop is set, he sends the file over to Photoshop via Photo > Edit In.
Step 2: Duplicate Your Layer Immediately
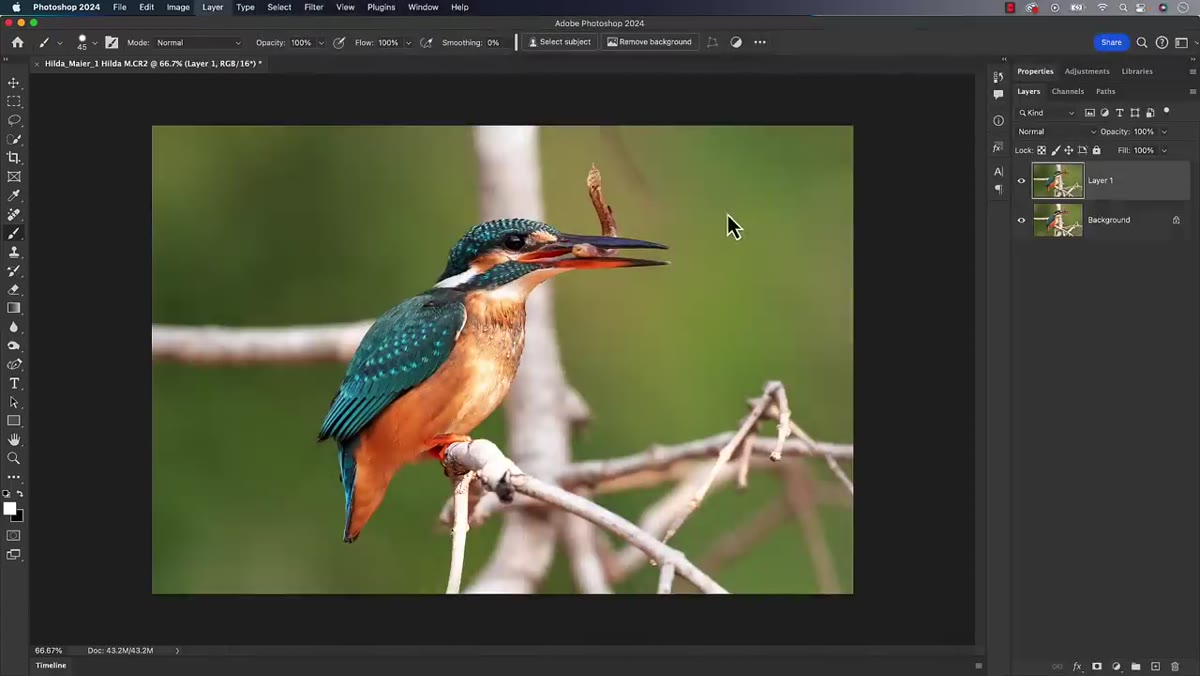 Layers panel showing duplicate layer being created
The first thing Matt does in Photoshop is press Cmd+J (Ctrl+J on Windows) to duplicate the background layer. All the Remove Tool work happens on that duplicate, not the original.
Layers panel showing duplicate layer being created
The first thing Matt does in Photoshop is press Cmd+J (Ctrl+J on Windows) to duplicate the background layer. All the Remove Tool work happens on that duplicate, not the original.
This matters more than it might seem in the moment. If the Remove Tool does something weird at an edge – which it will, because it’s still AI doing spatial guesswork – you need the original layer sitting underneath, intact, ready to be revealed through a mask. Think of it as setting up your own undo button that’s more surgical than Ctrl+Z.
Step 3: Configure the Remove Tool
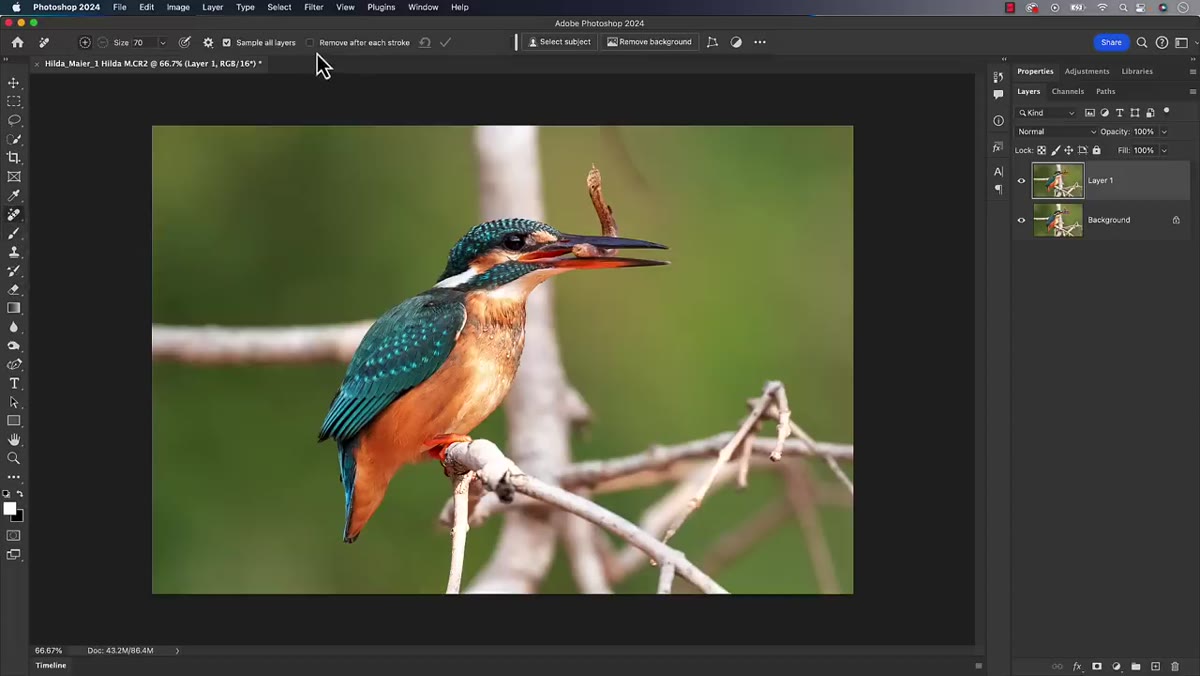 Remove Tool options bar showing “Remove After Each Stroke” setting
With the duplicate layer selected, grab the Remove Tool from the toolbar (it looks like a bandage with a small sparkle icon). The default settings are fine for most things, but Matt makes one change: he turns off “Remove After Each Stroke.”
Remove Tool options bar showing “Remove After Each Stroke” setting
With the duplicate layer selected, grab the Remove Tool from the toolbar (it looks like a bandage with a small sparkle icon). The default settings are fine for most things, but Matt makes one change: he turns off “Remove After Each Stroke.”
With that option on, Photoshop processes the removal every time you lift the brush, which can interrupt your flow if you’re painting over a non-continuous area. With it off, you paint everything you want gone, then manually click the checkmark to commit. It gives you more control over what gets grouped into a single removal pass, and the results tend to be cleaner because Photoshop has more context to work with.
Step 4: Paint Over the Distractions and Commit
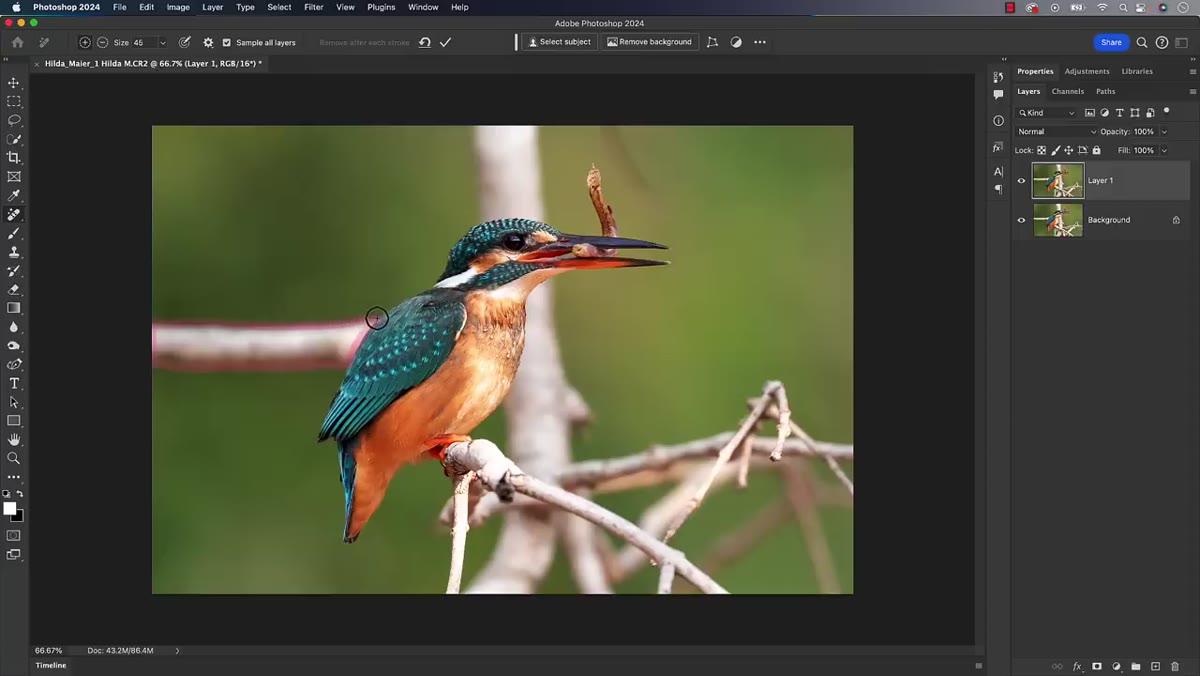 Remove Tool brush painting over distraction area in the photo
Now the actual removal. Paint directly over whatever you want gone – Matt draws a loose shape around the distracting element, almost like circling it. You don’t need to be precise. The tool is looking for the object, not the exact pixels under your brush stroke.
Remove Tool brush painting over distraction area in the photo
Now the actual removal. Paint directly over whatever you want gone – Matt draws a loose shape around the distracting element, almost like circling it. You don’t need to be precise. The tool is looking for the object, not the exact pixels under your brush stroke.
Once you’ve painted your selection, click the checkmark in the options bar (or press Enter) to let Photoshop do its thing. For large or complex areas, it helps to work in sections rather than trying to paint over everything at once. Commit one removal, evaluate the result, then move on to the next area. You’ll catch problems earlier and the tool tends to perform better with focused, smaller removal tasks.
Step 5: Add a Layer Mask to Fix Edge Problems
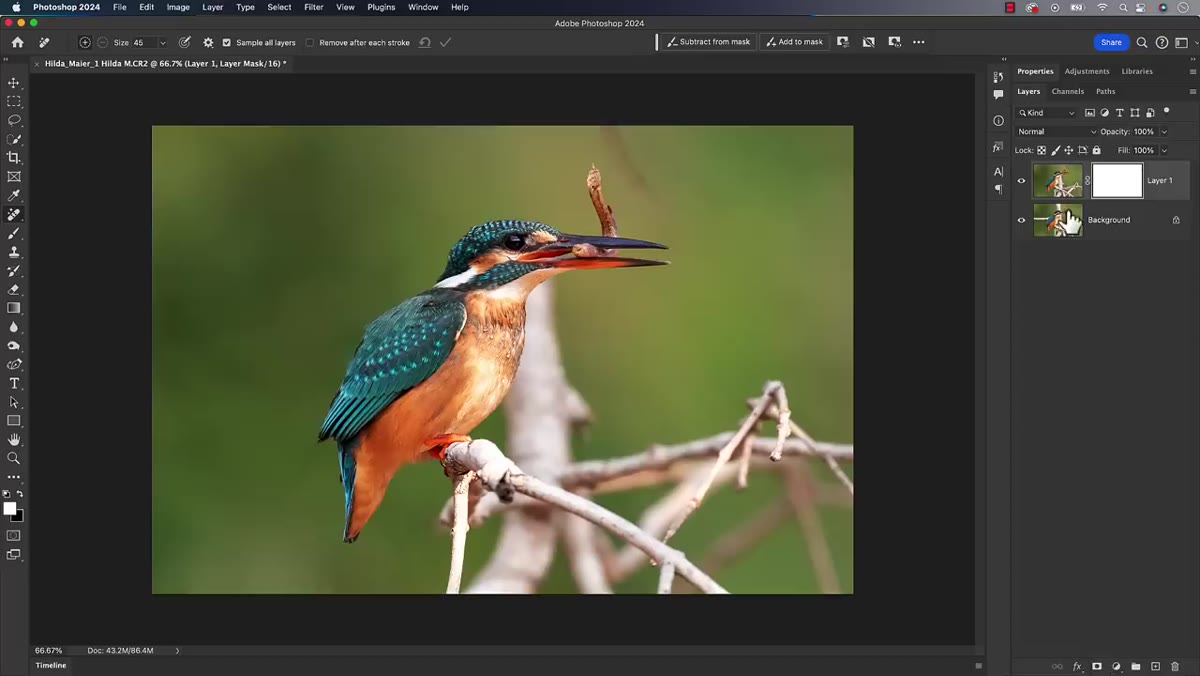 Layer mask being added to the duplicate layer in the Layers panel
Here’s where the duplicate layer setup pays off. After a removal, you’ll sometimes see a rough or unnatural edge where the AI interpreted the boundary a little too liberally. Matt’s fix is clean: add a layer mask to the duplicate layer by clicking the mask icon at the bottom of the Layers panel.
Layer mask being added to the duplicate layer in the Layers panel
Here’s where the duplicate layer setup pays off. After a removal, you’ll sometimes see a rough or unnatural edge where the AI interpreted the boundary a little too liberally. Matt’s fix is clean: add a layer mask to the duplicate layer by clicking the mask icon at the bottom of the Layers panel.
The mask defaults to white, which means the entire duplicate layer is visible. What you want to do is paint black on the mask in the specific spots where the removal looks off. Black on a mask hides that part of the layer, which lets the original layer underneath show through instead. You’re essentially telling Photoshop: “I trust the Remove Tool everywhere except right here.”
Step 6: Paint Back the Original with a Soft Brush
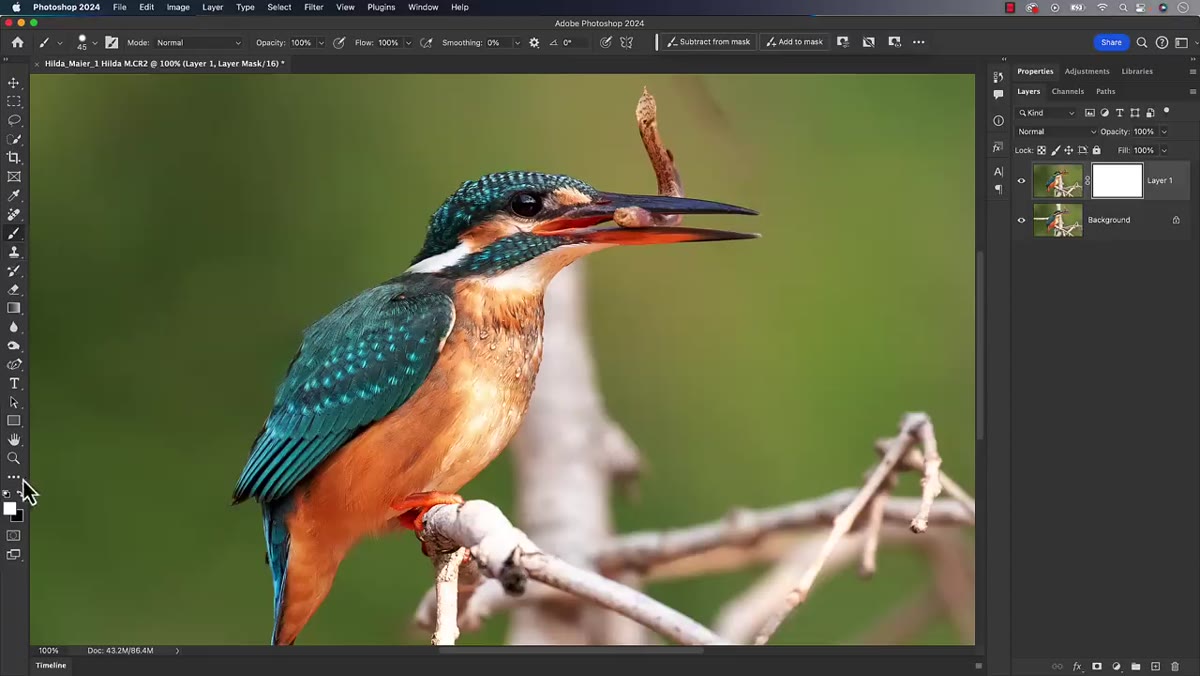 Black brush painting on layer mask to reveal original layer beneath
Switch to the Brush Tool (B), set your foreground color to black, and use a brush with hardness around 50-60%. Matt keeps his brush fairly small for this part – you’re doing detail work, not broad strokes.
Black brush painting on layer mask to reveal original layer beneath
Switch to the Brush Tool (B), set your foreground color to black, and use a brush with hardness around 50-60%. Matt keeps his brush fairly small for this part – you’re doing detail work, not broad strokes.
Paint directly on the mask over the problem edges. As you paint, you’ll see the original layer come back in those spots, blending with the removal work on the duplicate. If you overdo it and reveal too much of the original (including the thing you were trying to remove), just hit X to flip to a white brush and paint it back. The mask is non-destructive, so you can toggle back and forth as many times as you need until the edge looks natural.
Step 7: Touch Up Stragglers with the Remove Tool Again
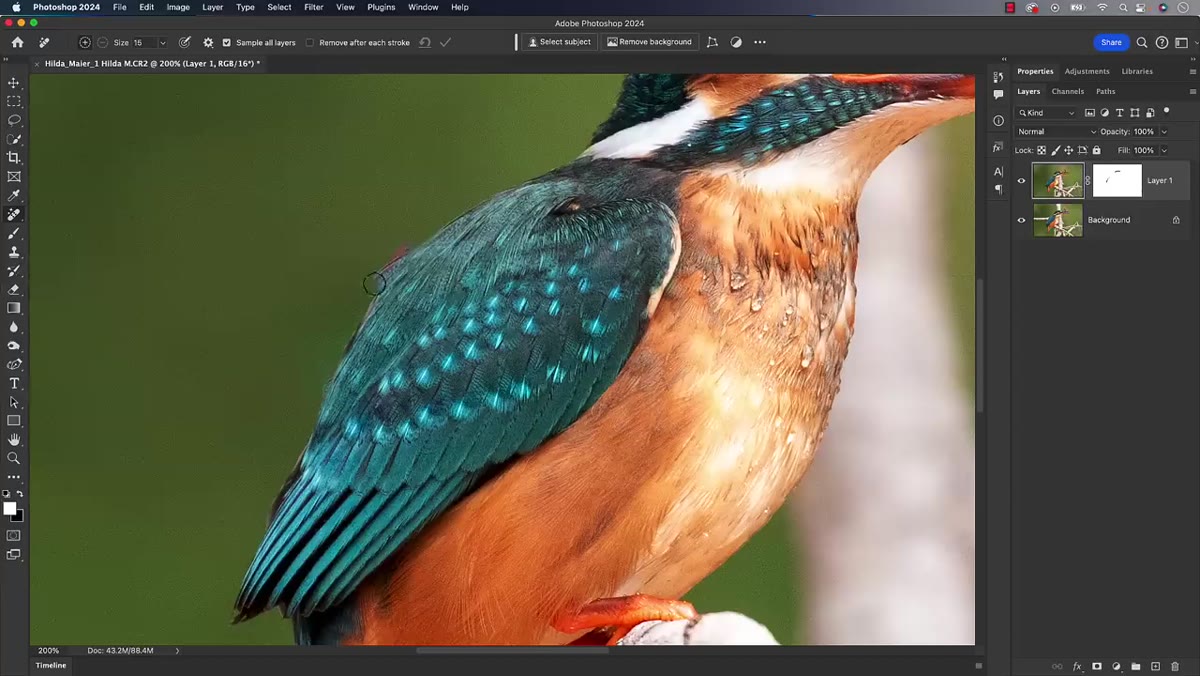 Remove Tool being used again on a small remaining artifact
After the mask work, there may be small leftover bits that the mask didn’t address because they’re not edge issues, they’re just spots the tool missed the first time. Matt handles these by clicking back onto the duplicate layer itself (not the mask) and running the Remove Tool again over the remaining problem areas.
Remove Tool being used again on a small remaining artifact
After the mask work, there may be small leftover bits that the mask didn’t address because they’re not edge issues, they’re just spots the tool missed the first time. Matt handles these by clicking back onto the duplicate layer itself (not the mask) and running the Remove Tool again over the remaining problem areas.
Small, isolated artifacts respond really well to a second targeted pass. Keep the brush tight and close to the size of what you’re trying to remove. Commit, check the result, and repeat if needed. At this scale, the Remove Tool is basically magic.
My Own Experience: When to Bail on the Remove Tool
I’ve been testing this workflow on product shots, which are usually more geometrically demanding than organic nature photos. Straight lines and hard edges are where the Remove Tool sometimes loses the plot – it’ll patch a background but leave a subtle warp along a corner that drives me insane. My workaround has been the same mask-and-blend approach Matt shows, but I’ll sometimes use the Polygonal Lasso to make a precise selection before running the Remove Tool, so it has a cleaner boundary to work within. It’s one extra step, but for anything with architecture or hard geometry, it saves a lot of mask cleanup afterward.
The core lesson here is the one that keeps showing up in every good retouching tutorial: your tool order and your layer setup matter as much as which tool you pick. Crop early, duplicate always, mask what breaks. The Remove Tool is genuinely impressive, but the workflow around it is what makes the results look professional.
Watch the full tutorial on YouTube to see the before and after side by side – and stick around for the Lightroom tips Matt drops at the end, which are worth the extra few minutes on their own.
Comments
Leave a Comment