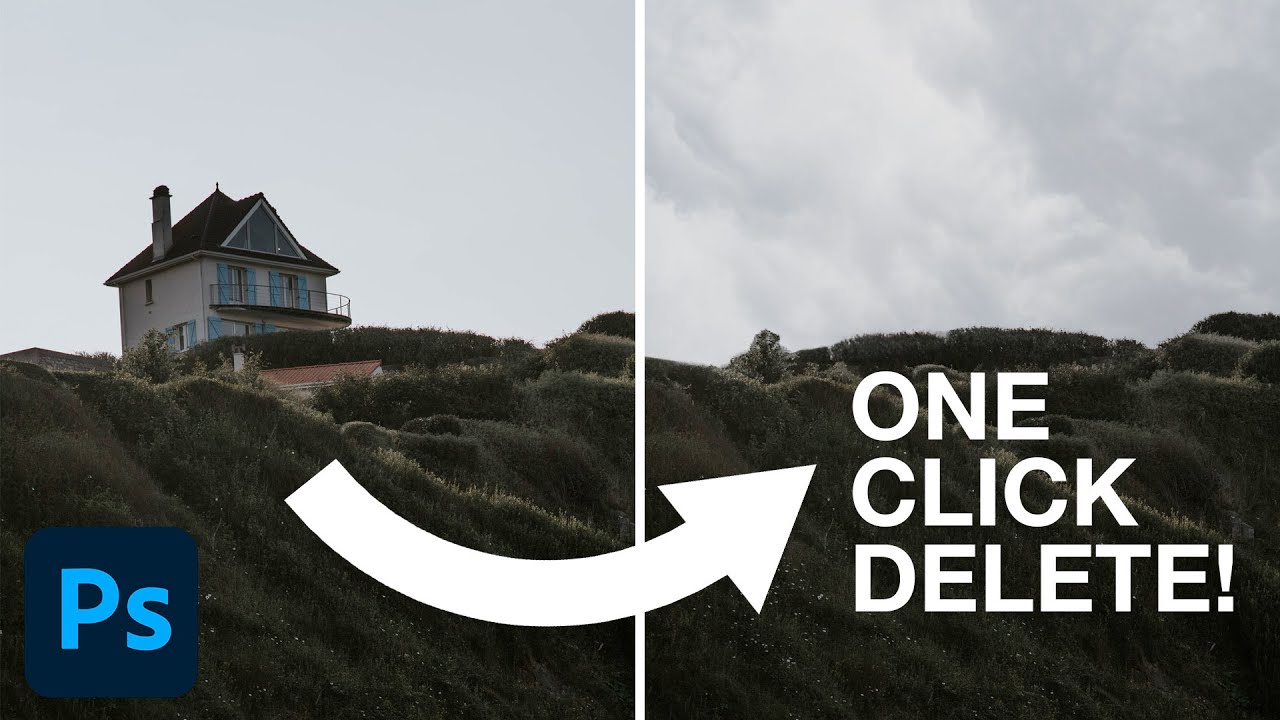
I’ve spent an embarrassing amount of time manually patching out unwanted objects in photos. We’re talking tedious clone stamp work, content-aware fill with mixed results, patching layer by layer while drinking my third coffee of the morning. It’s the kind of task that makes you question your life choices right around the 45-minute mark. So when I stumbled onto this PHLEARN tutorial from Aaron Nace showing off a legitimately new one-click removal tool baked into Photoshop 2023, I had to stop what I was doing and watch the whole thing.
In this Aaron Nace (PHLEARN) tutorial, he walks through the new Delete and Fill feature tied directly to the Object Selection tool, and it is genuinely one of those updates that changes how fast you can clean up a photo. Watch the full tutorial on YouTube before reading on if you want to see the results in real time, but everything below will get you through the technique step by step.
The short version: Adobe finally connected smart object detection with content-aware removal in a way that actually works. The Object Selection tool now hovers over your image and identifies selectable objects automatically, and then a single keyboard shortcut wipes the thing out and fills the gap intelligently. For anyone doing real estate edits, product photography cleanup, or composite work, this is going to save you serious time.
Step 1: Duplicate Your Background Layer
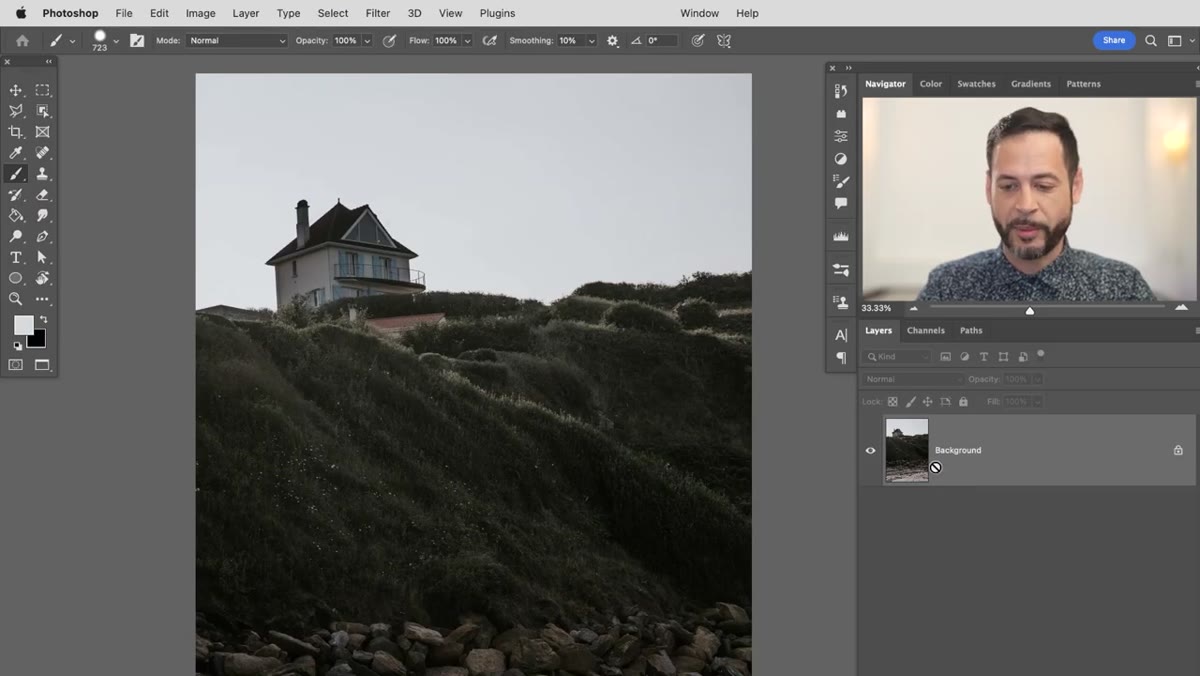 Duplicating background layer before any edits begin
Before touching anything, duplicate your background layer. Hit Ctrl+J (or Cmd+J on Mac). This keeps your original image intact so you can always backtrack if the fill does something weird, and trust me, sometimes it does. Work on the duplicate from here on out. This is non-negotiable housekeeping, and if you skip it you will eventually regret it.
Duplicating background layer before any edits begin
Before touching anything, duplicate your background layer. Hit Ctrl+J (or Cmd+J on Mac). This keeps your original image intact so you can always backtrack if the fill does something weird, and trust me, sometimes it does. Work on the duplicate from here on out. This is non-negotiable housekeeping, and if you skip it you will eventually regret it.
Step 2: Activate the Object Selection Tool
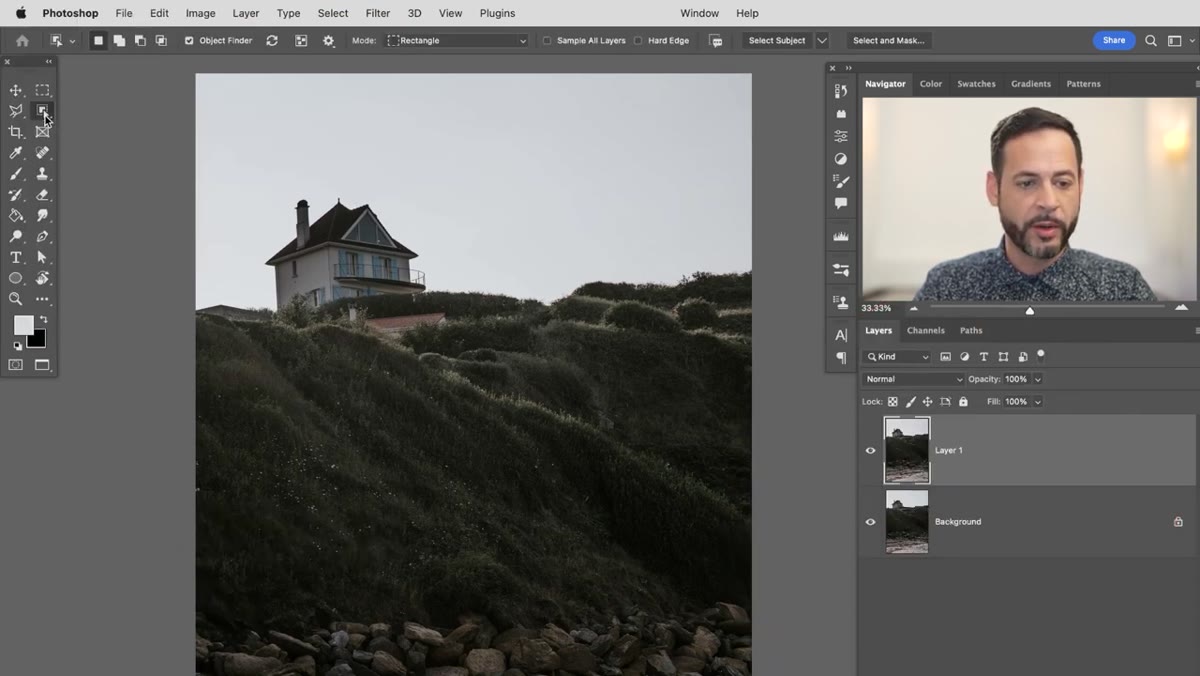 Object Selection tool highlighted in the Photoshop toolbar
Grab the Object Selection tool from the toolbar. The keyboard shortcut is W, which also cycles through the Magic Wand. These tools share the same slot, so if W gives you the Magic Wand, just right-click or hold the icon and switch over to Object Selection. It looks like a small rectangle with a dashed border and a star-shaped cursor beside it.
Object Selection tool highlighted in the Photoshop toolbar
Grab the Object Selection tool from the toolbar. The keyboard shortcut is W, which also cycles through the Magic Wand. These tools share the same slot, so if W gives you the Magic Wand, just right-click or hold the icon and switch over to Object Selection. It looks like a small rectangle with a dashed border and a star-shaped cursor beside it.
Step 3: Turn On Object Finder and Let It Analyze the Image
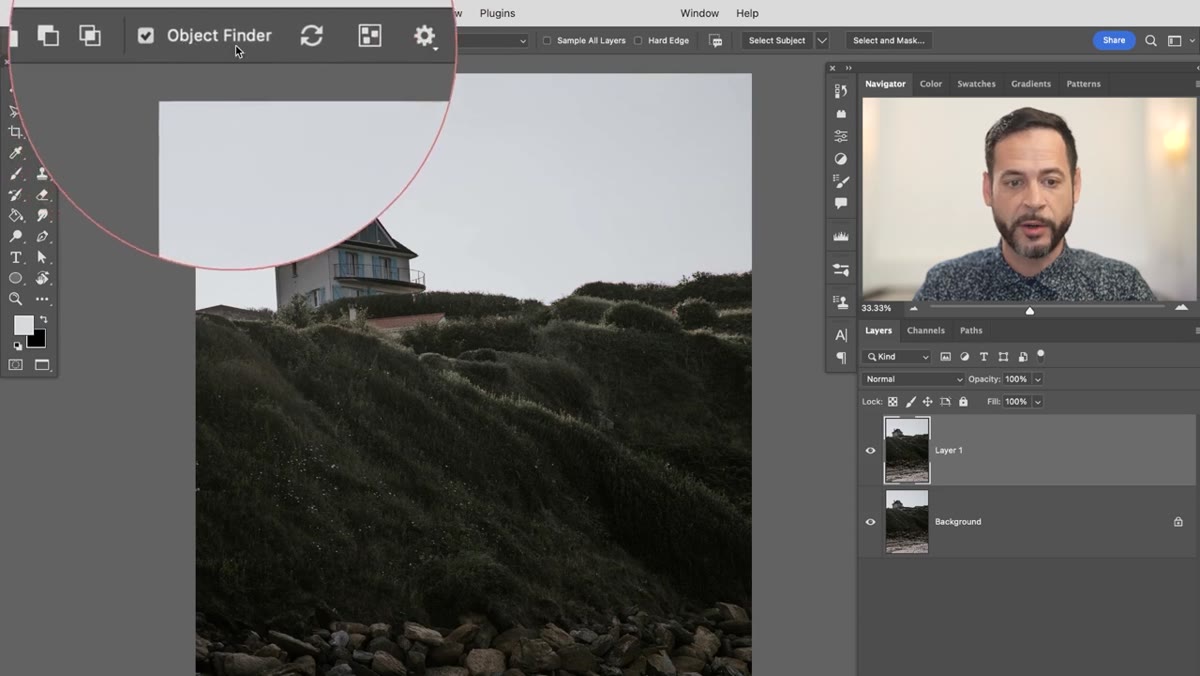 Object Finder enabled, image showing magenta overlay on detected objects
Up in the options bar at the top of the screen, make sure Object Finder is checked. Once it’s active, click the little refresh icon next to it and let Photoshop scan your image. You’ll see a colored overlay, magenta by default, highlight everything the tool has identified as a distinct object. It’s doing the thinking for you. If the overlay isn’t showing up, click the icon that looks like a small layered square in the options bar to toggle the visualization on.
Object Finder enabled, image showing magenta overlay on detected objects
Up in the options bar at the top of the screen, make sure Object Finder is checked. Once it’s active, click the little refresh icon next to it and let Photoshop scan your image. You’ll see a colored overlay, magenta by default, highlight everything the tool has identified as a distinct object. It’s doing the thinking for you. If the overlay isn’t showing up, click the icon that looks like a small layered square in the options bar to toggle the visualization on.
One setting worth noting: you can choose to process the selection on your device or in the cloud. The cloud option produces noticeably sharper, more accurate selections, but you need an internet connection. At a coffee shop with spotty wifi, your mileage will vary. I stick to cloud when I can.
Step 4: Hover and Click to Select Your Object
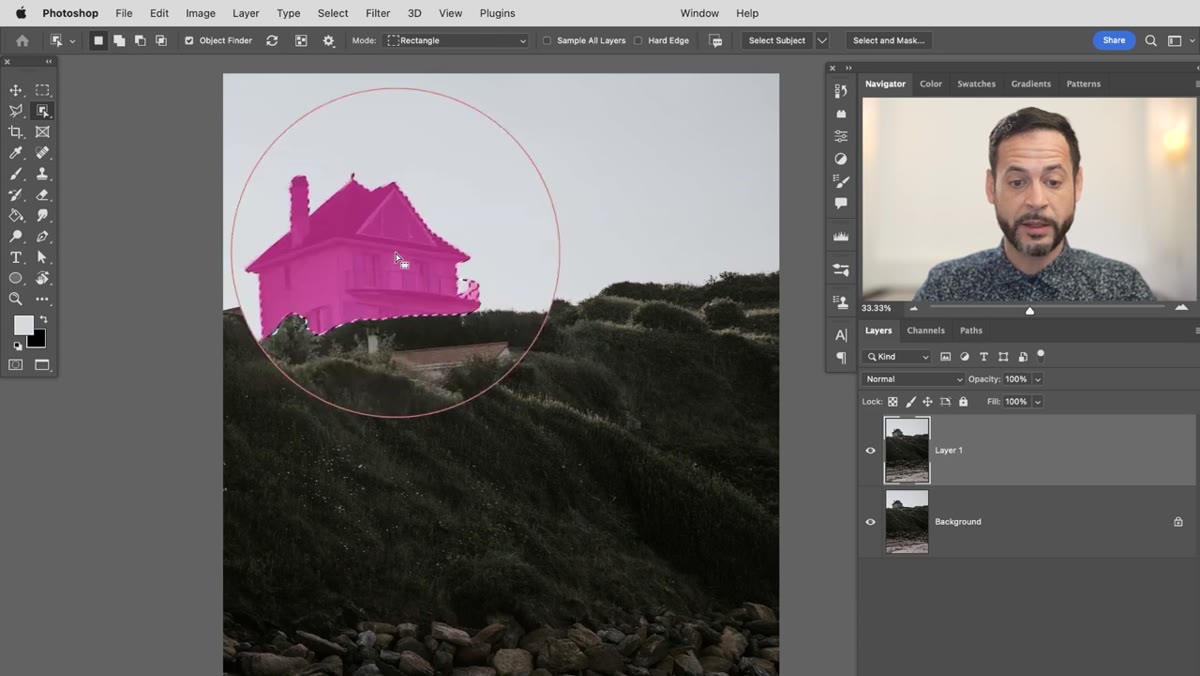 Hovering over house, magenta selection highlight active before clicking
Here’s where it gets satisfying. Just move your mouse over the object you want to remove. Without clicking anything, Photoshop will preview the selection for you in real time. Once the highlight looks right, click once. You’ll see the marching ants appear around your selected object. No dragging, no refining edges, no painting masks. Just hover and click.
Hovering over house, magenta selection highlight active before clicking
Here’s where it gets satisfying. Just move your mouse over the object you want to remove. Without clicking anything, Photoshop will preview the selection for you in real time. Once the highlight looks right, click once. You’ll see the marching ants appear around your selected object. No dragging, no refining edges, no painting masks. Just hover and click.
If the selection grabs too much or misses part of the object, you can hold Shift and click additional areas to add to the selection, or hold Alt (Option on Mac) and click to subtract. The tool handles most cases cleanly on the first try, especially for well-defined objects like buildings or cars.
Step 5: Delete and Fill with One Keyboard Shortcut
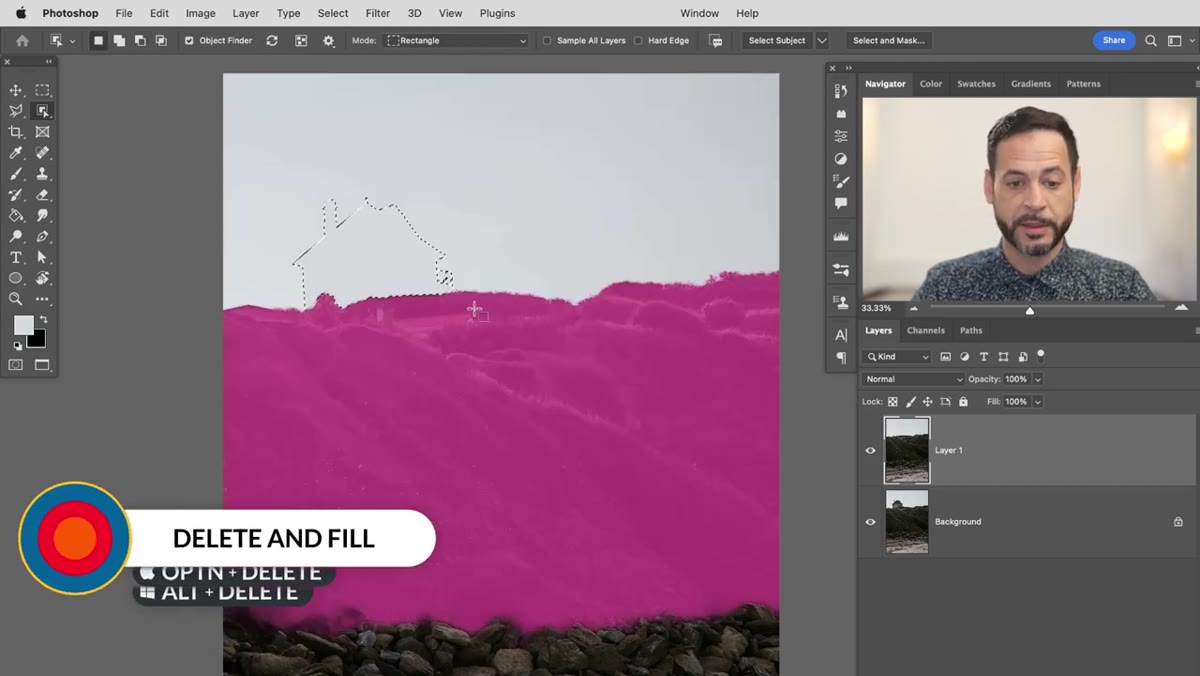 House removed and filled after using Delete and Fill shortcut
With your selection active, press Option+Delete on Mac. On Windows, the equivalent is Alt+Delete. Photoshop will delete the selected area and immediately fill it using content-aware technology. The object disappears and the background fills in. Deselect with Ctrl+D (Cmd+D) to see the full result.
House removed and filled after using Delete and Fill shortcut
With your selection active, press Option+Delete on Mac. On Windows, the equivalent is Alt+Delete. Photoshop will delete the selected area and immediately fill it using content-aware technology. The object disappears and the background fills in. Deselect with Ctrl+D (Cmd+D) to see the full result.
Aaron also mentions that Shift+Delete brings up the Fill dialog box, where you can manually choose Content-Aware and hit OK for the same effect. In his demo, the Option+Delete method produced cleaner results, so that’s the one to reach for first. Keyboard shortcut behavior can vary depending on your system setup, so if one doesn’t behave, try the other.
Step 6: Use Right-Click for the Same Feature with Any Selection Tool
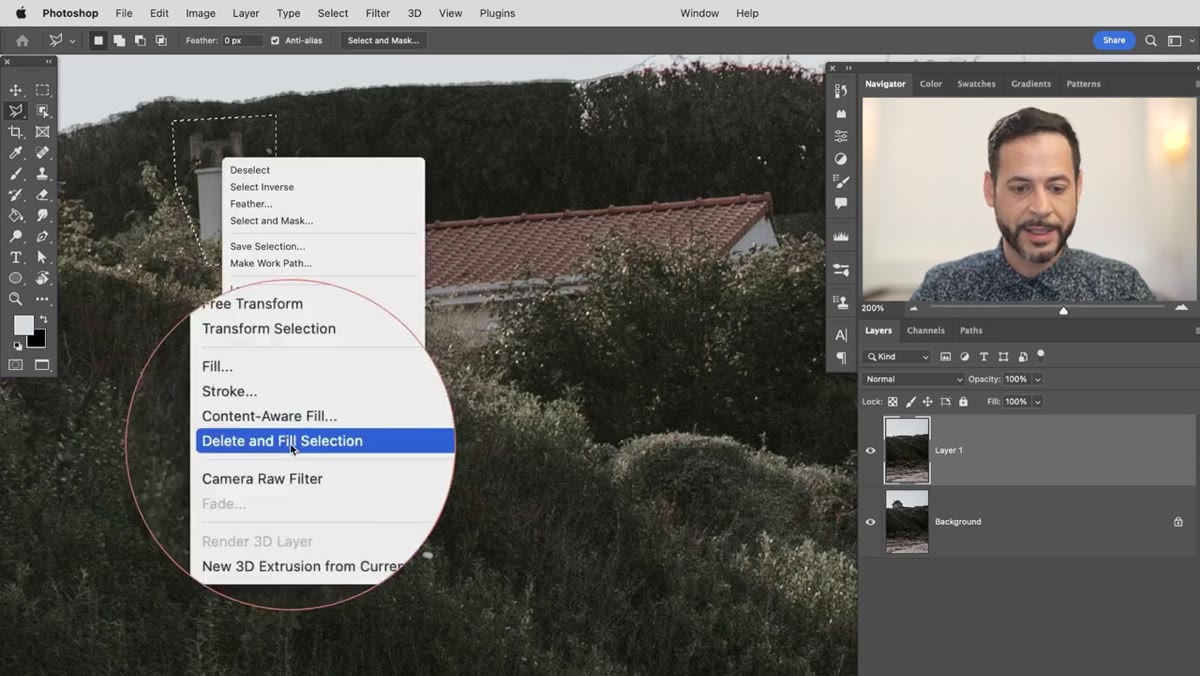 Right-click context menu showing Delete and Fill Selection option
You don’t have to use the Object Selection tool to access Delete and Fill. If you already have a selection made with the Polygonal Lasso, the regular Lasso, or any other selection tool, just right-click inside the selection and choose “Delete and Fill Selection” from the context menu. Same result, different path. This is useful when the Object Finder doesn’t isolate exactly what you need, or when you want to hand-draw a precise selection around something irregular.
Right-click context menu showing Delete and Fill Selection option
You don’t have to use the Object Selection tool to access Delete and Fill. If you already have a selection made with the Polygonal Lasso, the regular Lasso, or any other selection tool, just right-click inside the selection and choose “Delete and Fill Selection” from the context menu. Same result, different path. This is useful when the Object Finder doesn’t isolate exactly what you need, or when you want to hand-draw a precise selection around something irregular.
A Few Real-World Caveats Worth Knowing
Content-aware fill is smart, but it’s not magic. It works best when the background behind the object you’re removing is relatively consistent, like grass, sky, pavement, or sand. The more complex the background, the more likely you’ll need to do a little cleanup afterward with the Clone Stamp or Healing Brush. I’ve also found that removing large objects in stages (rather than selecting the whole thing at once) sometimes gives the algorithm better surrounding context to work from and produces a cleaner fill.
Also, this tool does not play well with fine edge details or objects that are interacting with shadows or other elements in complicated ways. A house sitting in an open field? Gone in seconds. A person standing in front of a reflective surface with complex shadows? You’ll probably still need to do manual cleanup on the edges. Use the one-click method as a first pass, not a final answer, and you’ll rarely be disappointed.
The single most important thing to take away from this technique is that the Object Selection tool is no longer just a selection tool. It’s become the front door to a much faster removal workflow, and if you haven’t updated your habits around it, you’re leaving a lot of time on the table. Between the automatic object detection and the built-in content-aware fill, what used to take 15 to 20 minutes of careful patching now takes about 30 seconds on a good image.
Watch the full tutorial on YouTube to see Aaron walk through the sky replacement bonus segment at the end, which pairs nicely with everything covered here.
Comments
Leave a Comment