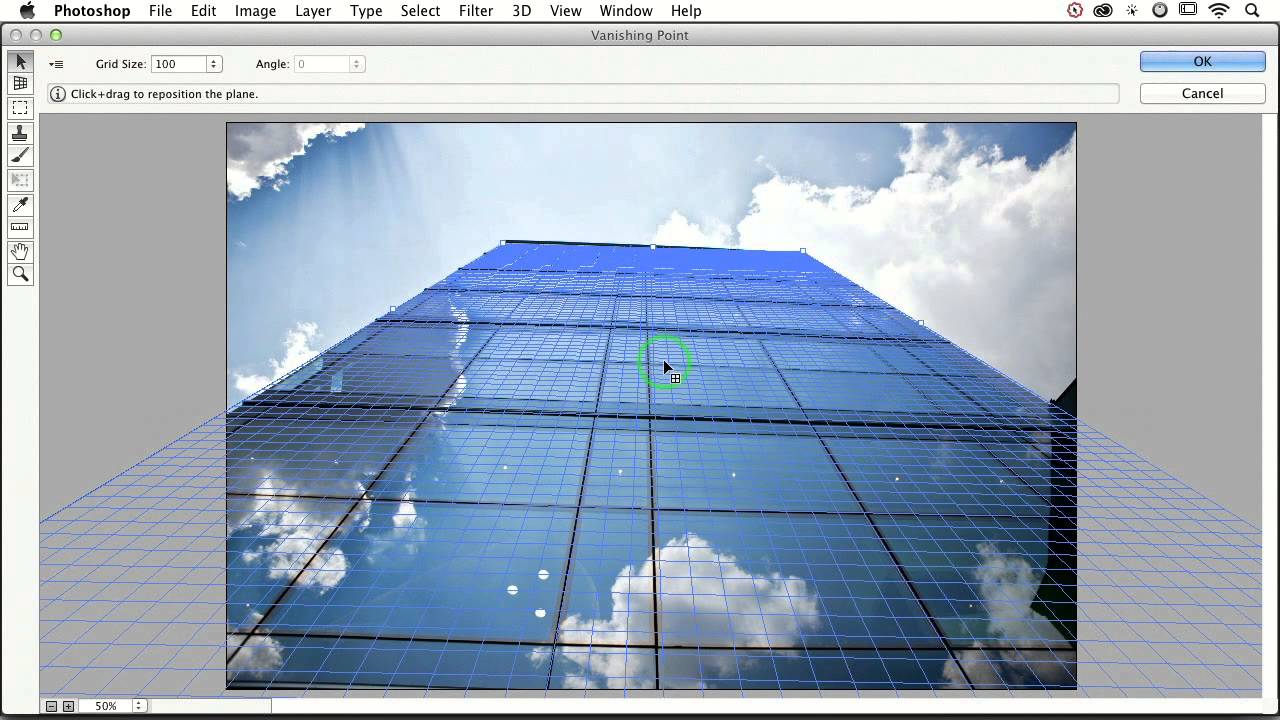
A friend of mine once spent three days building a composite where he placed a graphic onto the side of a building. Manually warped it. Nudged every corner point. Matched the lighting. It looked… fine. Plausible. Then someone in his feedback thread said “couldn’t you just use Vanishing Point for that?” and his soul briefly left his body. I watched this happen in real time. I also had no idea what Vanishing Point was, so I stayed quiet and nodded like I absolutely knew.
That was the push I needed to actually learn this filter. The good news: it’s one of those Photoshop tools that looks intimidating from the outside and then turns out to be weirdly straightforward. This CreativeLive tutorial cuts right to it, showing you how to define a perspective plane on a surface in your photo and then paste an image directly onto it so Photoshop handles all the foreshortening automatically. No manual warping. No guessing angles. The filter does the geometric heavy lifting for you.
Watch the full tutorial on YouTube
Here’s the full walkthrough so you can follow along without pausing and rewinding every thirty seconds.
Step 1: Open the Vanishing Point Filter
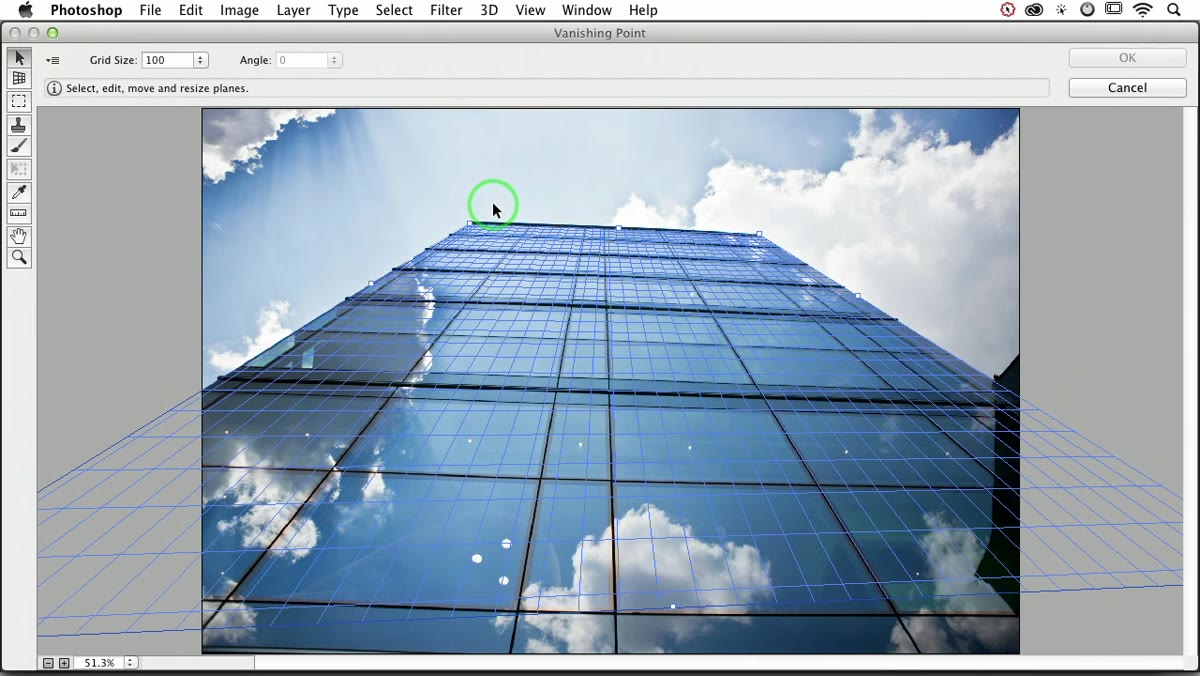 Vanishing Point dialogue box opening in Photoshop
Go to Filter > Vanishing Point. A large dialogue box takes over your screen. If you’ve used this filter before, it may show a leftover grid from your last session. Don’t panic. Just hit Delete to clear it and start fresh. What you’re left with is a blank canvas showing your image, ready for you to define a perspective plane.
Vanishing Point dialogue box opening in Photoshop
Go to Filter > Vanishing Point. A large dialogue box takes over your screen. If you’ve used this filter before, it may show a leftover grid from your last session. Don’t panic. Just hit Delete to clear it and start fresh. What you’re left with is a blank canvas showing your image, ready for you to define a perspective plane.
Step 2: Set Your Perspective Plane with the Create Plane Tool
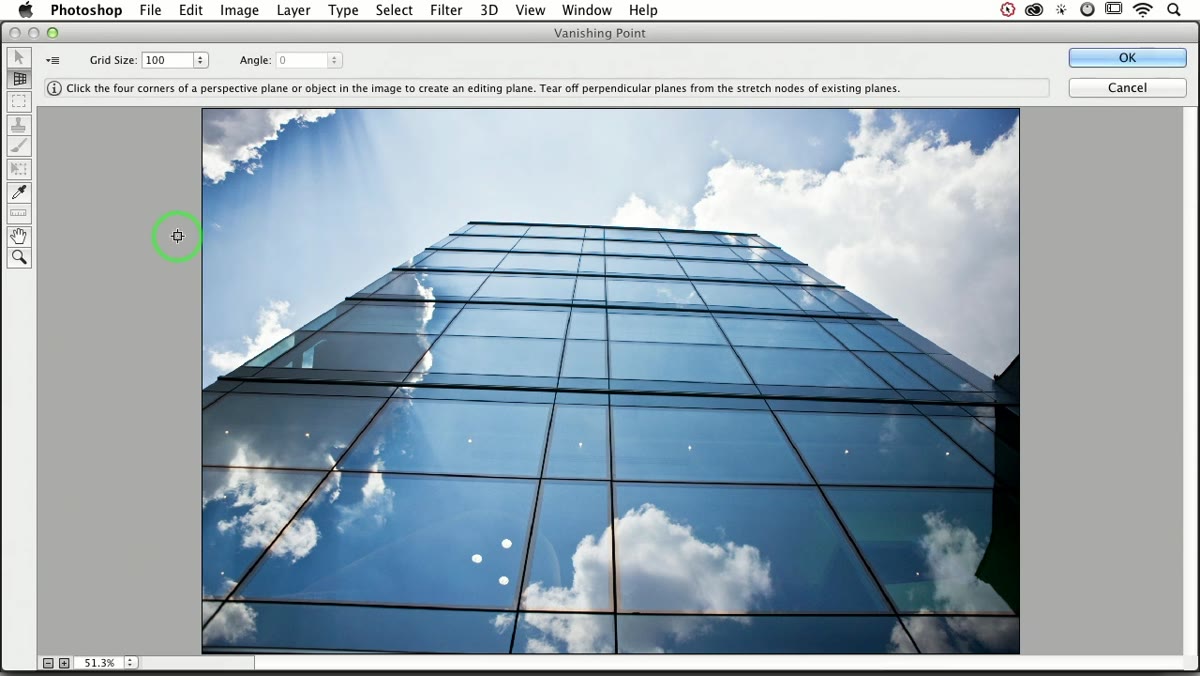 Four corner points being placed on building edges
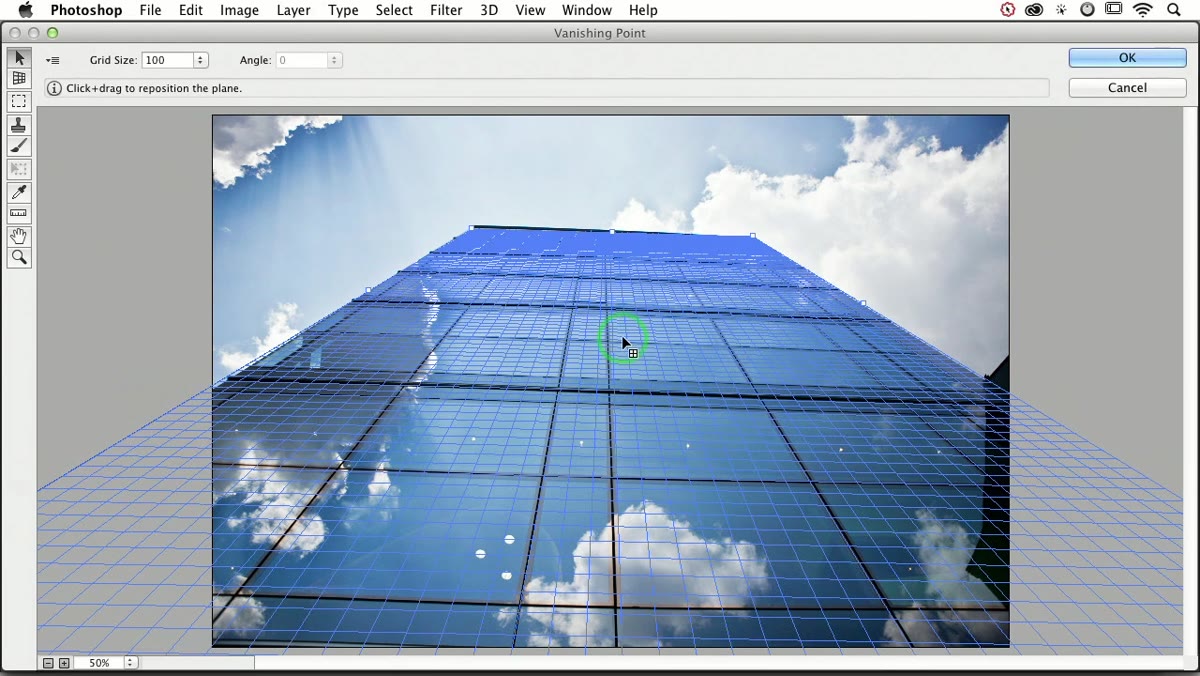
This is the core of the whole thing. The Create Plane Tool should already be active when the dialogue opens. It’s the grid icon in the top-left toolbar of the Vanishing Point window. Your job is to click the four corners of the surface you want to map onto, whether that’s the side of a building, a wall, a billboard, whatever has a flat face with perspective.
Four corner points being placed on building edges
This is the core of the whole thing. The Create Plane Tool should already be active when the dialogue opens. It’s the grid icon in the top-left toolbar of the Vanishing Point window. Your job is to click the four corners of the surface you want to map onto, whether that’s the side of a building, a wall, a billboard, whatever has a flat face with perspective.
Click each corner in order, working your way around the shape. Photoshop draws lines between your points as you go. The trick here is that you’re not just clicking visible corners. If part of your surface extends beyond the frame, you click where that corner would theoretically be. Zoom out inside the dialogue if you need more room to place those outer points accurately.
Step 3: Fix a Red Grid Before You Move On
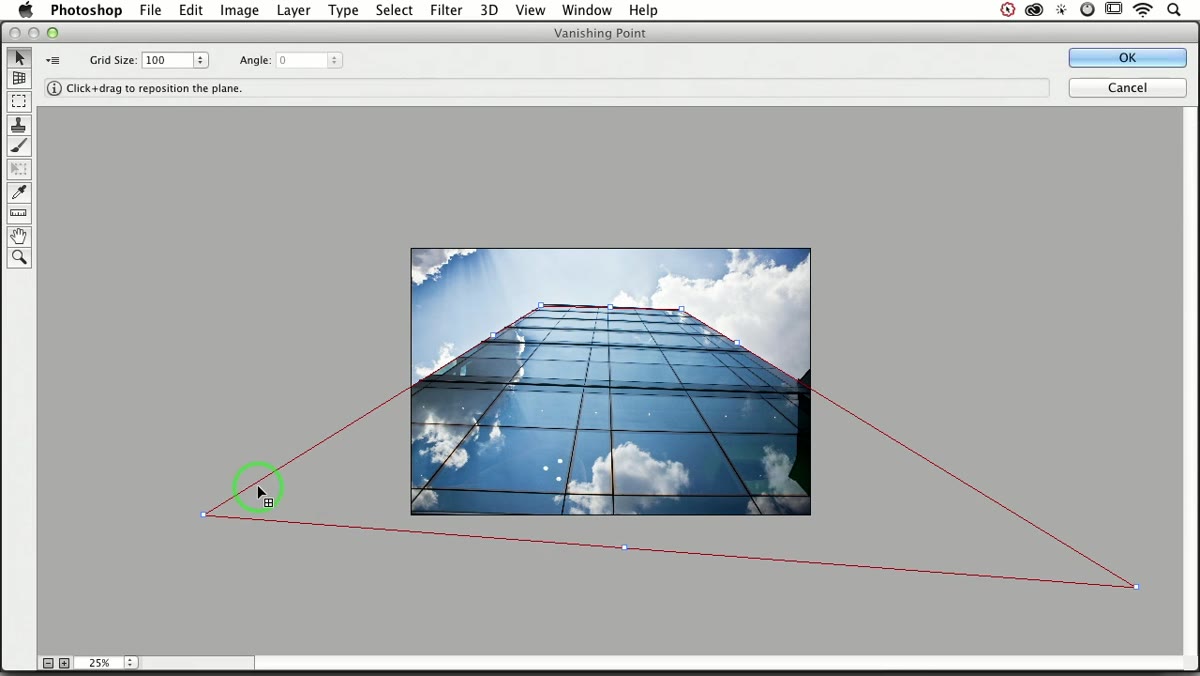 Red perspective plane indicating an invalid grid
Here’s something that trips people up the first time: if the grid turns red, that’s Photoshop telling you the perspective plane you’ve drawn is geometrically impossible. It can’t make sense of the angle you’ve given it. This is not a disaster. It’s just feedback.
Red perspective plane indicating an invalid grid
Here’s something that trips people up the first time: if the grid turns red, that’s Photoshop telling you the perspective plane you’ve drawn is geometrically impossible. It can’t make sense of the angle you’ve given it. This is not a disaster. It’s just feedback.
Grab any one of the four corner handles and drag it slightly until the grid turns blue. You’re fine-tuning the angle so Photoshop can actually calculate the perspective math. Sometimes it’s a tiny nudge. Sometimes you need to pull a corner a bit further out. Keep adjusting until you see a clean blue grid, which means the plane is valid and you’re good to proceed.
Step 4: Copy Your Source Image Before Entering the Filter
 Pasted image appearing flat inside Vanishing Point dialogue
This is a step that happens before you even open Vanishing Point, and it’s easy to forget. You need to copy the image you want to paste into the perspective plane before you open the filter. Go to your source file, select all or make your selection, copy it (Command+C on Mac, Ctrl+C on Windows), and then open your destination file and launch Vanishing Point. The filter holds onto your clipboard so you can paste directly inside the dialogue.
Pasted image appearing flat inside Vanishing Point dialogue
This is a step that happens before you even open Vanishing Point, and it’s easy to forget. You need to copy the image you want to paste into the perspective plane before you open the filter. Go to your source file, select all or make your selection, copy it (Command+C on Mac, Ctrl+C on Windows), and then open your destination file and launch Vanishing Point. The filter holds onto your clipboard so you can paste directly inside the dialogue.
Once you’re inside Vanishing Point with your plane defined, press Command+V (or Ctrl+V) to paste. Your image will appear in the upper-left corner of the dialogue, floating flat and completely out of perspective. That’s normal. It’s parked there waiting for you to place it.
Step 5: Drag the Pasted Image onto the Plane
 Superhero image snapping into perspective on building plane
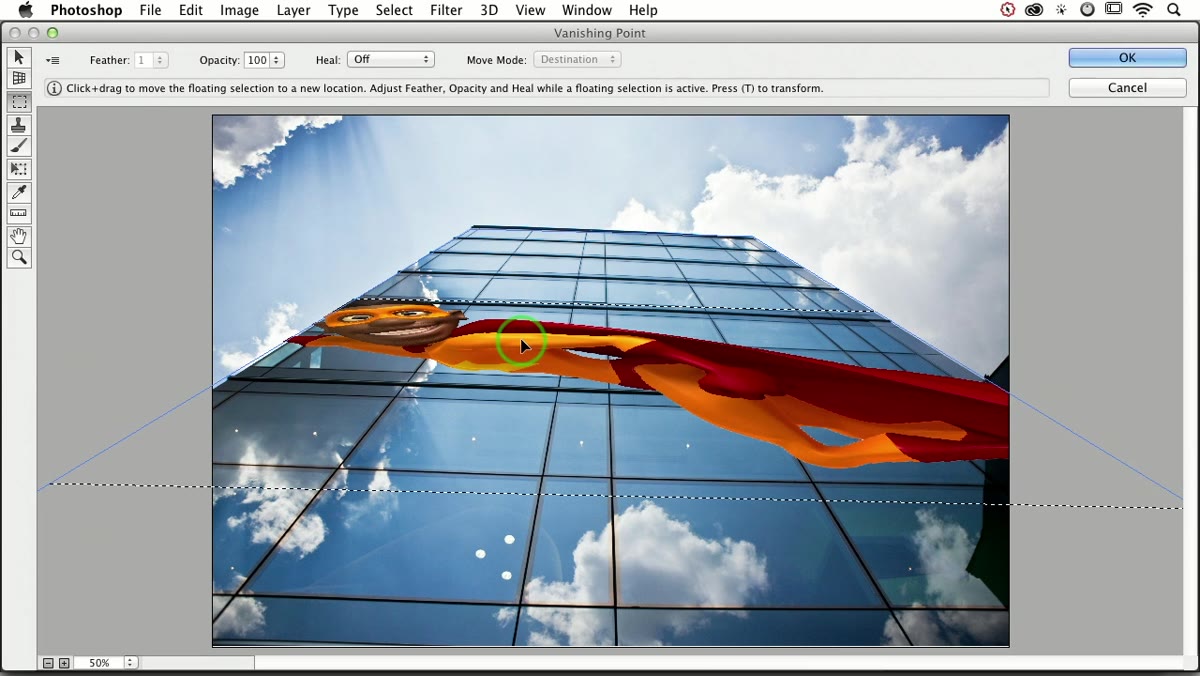
Here’s the satisfying part. Click somewhere outside your perspective plane grid to keep the pasted image in its floating state, then click and drag it onto the grid. The moment it crosses into the plane, it snaps to the correct perspective. Photoshop warps it automatically to match the angle of the surface you defined.
Superhero image snapping into perspective on building plane
Here’s the satisfying part. Click somewhere outside your perspective plane grid to keep the pasted image in its floating state, then click and drag it onto the grid. The moment it crosses into the plane, it snaps to the correct perspective. Photoshop warps it automatically to match the angle of the surface you defined.
One thing to know: if you click inside the plane by accident, the image snaps immediately. If that happens before you’re ready, just undo (Command+Z) and reposition. It’s forgiving. Click and drag from outside the plane, steer it onto the mesh, and let Photoshop do the math.
Step 6: Resize or Reposition Inside the Plane
 Transform handles active on pasted image inside Vanishing Point
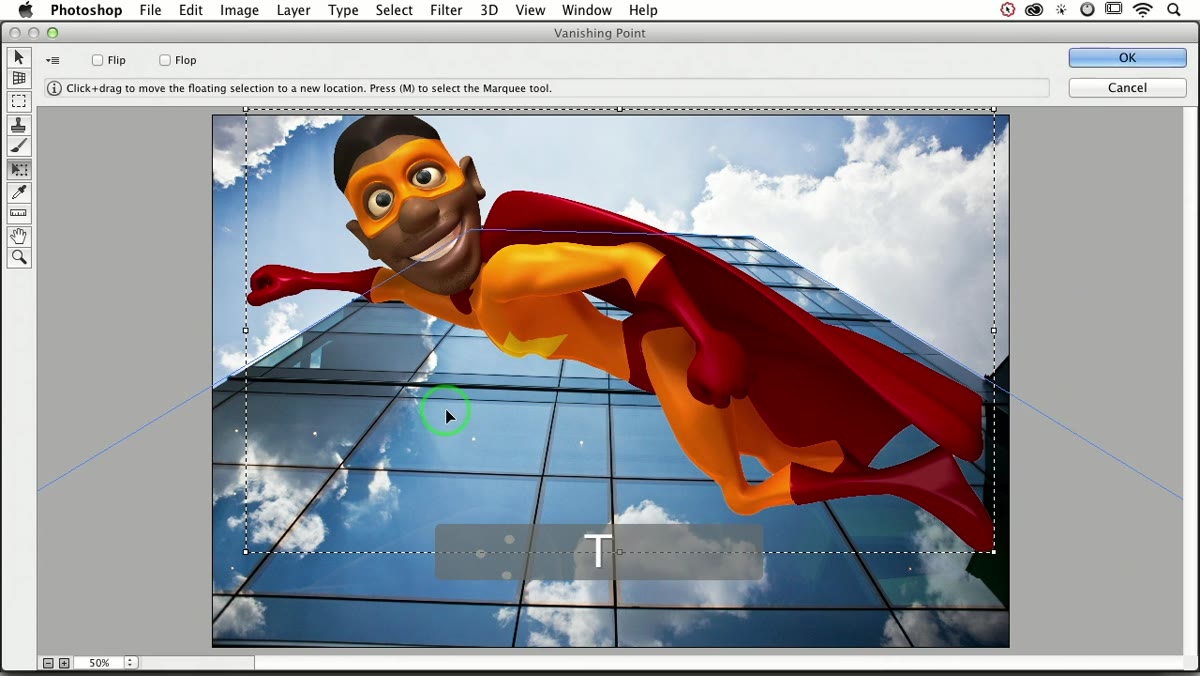
Once your image is sitting on the plane, press T (just T, not Command+T) to bring up transform handles. You can Shift+drag a corner to resize the pasted image while keeping it locked to the perspective of the surface. Everything scales and warps in proportion to the plane you drew, so it continues to look like it belongs there even as you adjust the size.
Transform handles active on pasted image inside Vanishing Point
Once your image is sitting on the plane, press T (just T, not Command+T) to bring up transform handles. You can Shift+drag a corner to resize the pasted image while keeping it locked to the perspective of the surface. Everything scales and warps in proportion to the plane you drew, so it continues to look like it belongs there even as you adjust the size.
You can also click and drag the image around while it’s on the plane. It stays locked to the surface perspective as you move it, which is genuinely useful when you’re trying to line something up with a specific area of the building or wall.
One Thing I’d Add From Experience
The Vanishing Point filter is great, but it works best when you prep your pasted layer before you go in. Get your sizing roughly right beforehand. If you’re pasting something that’s wildly larger or smaller than the target surface, you’ll spend a lot of time fussing with the transform handles inside the dialogue, which gets fiddly. I usually do a quick rough resize on the source image first, copy that, then go into Vanishing Point. Saves a lot of back-and-forth.
Also worth knowing: whatever you paste inside Vanishing Point gets applied to the layer you had active when you opened the filter. Work on a duplicate or a blank layer above your base image so you’re not committing permanent changes to the original. That habit alone has saved me from some genuinely ugly moments.
The single most important thing here is the red grid feedback. Once you understand that red means “fix your corner points” rather than “start over,” the whole tool clicks into place. Everything else is just clicking and dragging.
Watch the full tutorial on YouTube and see the plane-to-perspective snap happen live. Seeing that moment when a flat image suddenly warps onto a surface is one of those small Photoshop things that never gets old.
Comments (2)
Just subscribed. If the rest of your content is this good, I'm in.
Tried this technique this morning. Game changer for real.
Leave a Comment