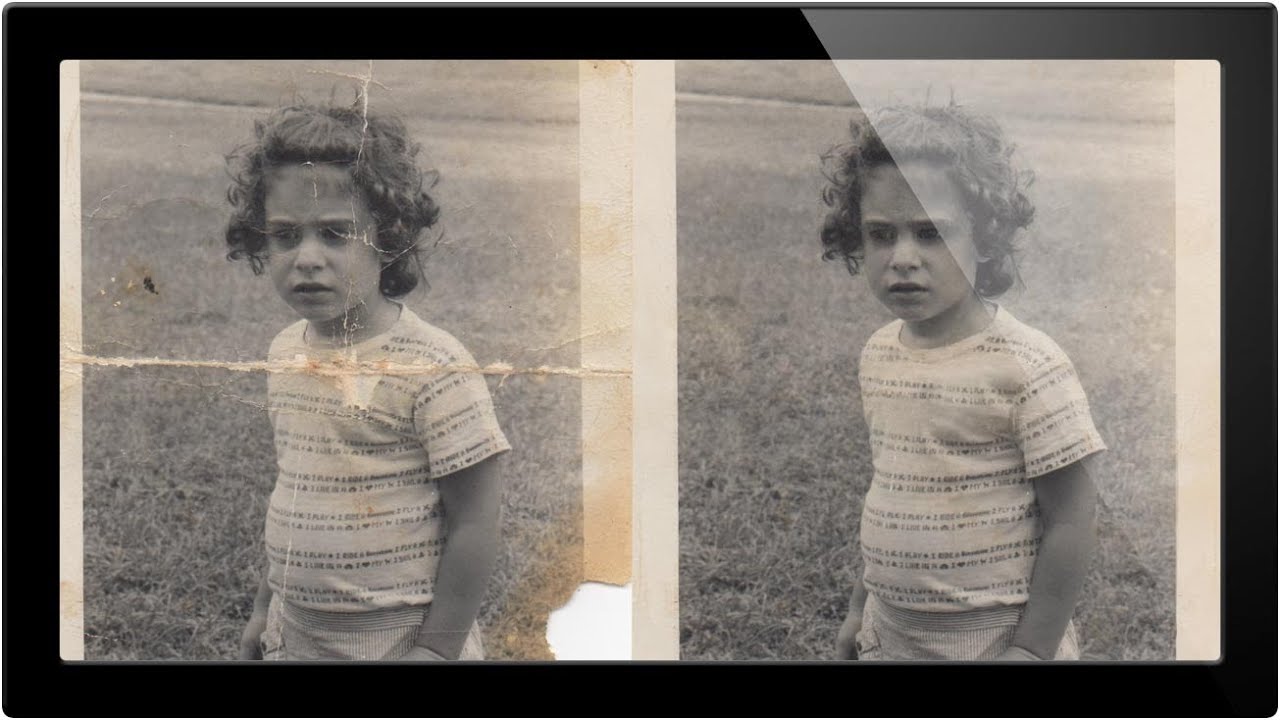
Client work will humble you fast. Early in my freelance run, someone handed me a scanned family photo that looked like it had survived a move, a flood, and a toddler with a crayon. I opened it in Photoshop and immediately started clone-stamping like a maniac, no plan, no structure, just vibes. Two hours later I had a mess that somehow looked worse than the original. That experience stuck with me, mostly because I invoiced for it anyway, but also because it taught me that photo restoration has a correct order of operations and I had been ignoring it.
That is exactly what makes this tutorial from Aaron Nace over at PHLEARN so worth your time. Watch the full tutorial on YouTube before or after reading this, but ideally use this breakdown as your working reference while you have Photoshop open. Aaron is working through a real photo, an actual scan of his mom as a three-year-old with creases, damage, and a big ugly fold running right through the middle. It is not a demo photo. It is a real problem, and the way he approaches it is worth breaking down step by step.
The core lesson of Part 1 is this: before you reach for the healing brush or clone stamp, you assess the damage and figure out what you can steal from elsewhere in the image. Copying good data from one side of a photo to patch the bad data on the other side is faster, cleaner, and produces more natural results than painting over damage by hand. Aaron calls it cheating. I call it working smart.
Step 1: Assess the Damage and Make a Plan
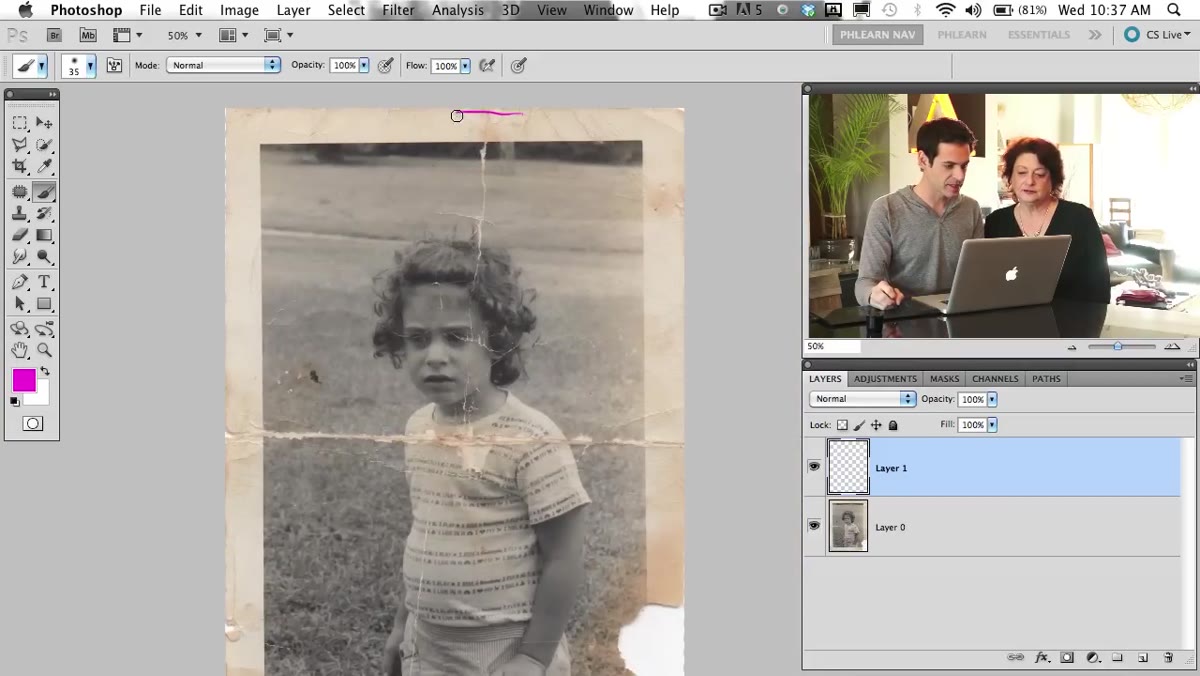 Aaron pointing out creases and a major fold in the scanned photo
Before you touch a single tool, zoom in and actually look at what you are dealing with. In Aaron’s photo, there are minor surface creases and one significant fold cutting through a key area of the image. These are different problems that need different solutions. Small creases can often be handled with the Healing Brush or Spot Healing Brush. A large fold or tear is a different animal entirely, especially when it runs through a detailed area like a face or clothing.
Aaron pointing out creases and a major fold in the scanned photo
Before you touch a single tool, zoom in and actually look at what you are dealing with. In Aaron’s photo, there are minor surface creases and one significant fold cutting through a key area of the image. These are different problems that need different solutions. Small creases can often be handled with the Healing Brush or Spot Healing Brush. A large fold or tear is a different animal entirely, especially when it runs through a detailed area like a face or clothing.
The smart move, which Aaron demonstrates here, is to identify areas of the photo that are undamaged and symmetrical enough to be mirrored or copied across. In this case, the left side of the frame is relatively clean, which means it can be used to reconstruct the damaged right side. Taking five minutes to map this out before you start editing will save you from undoing an hour of bad clone work later. I have done both. The planning version is better.
Step 2: Duplicate Your Base Layer First
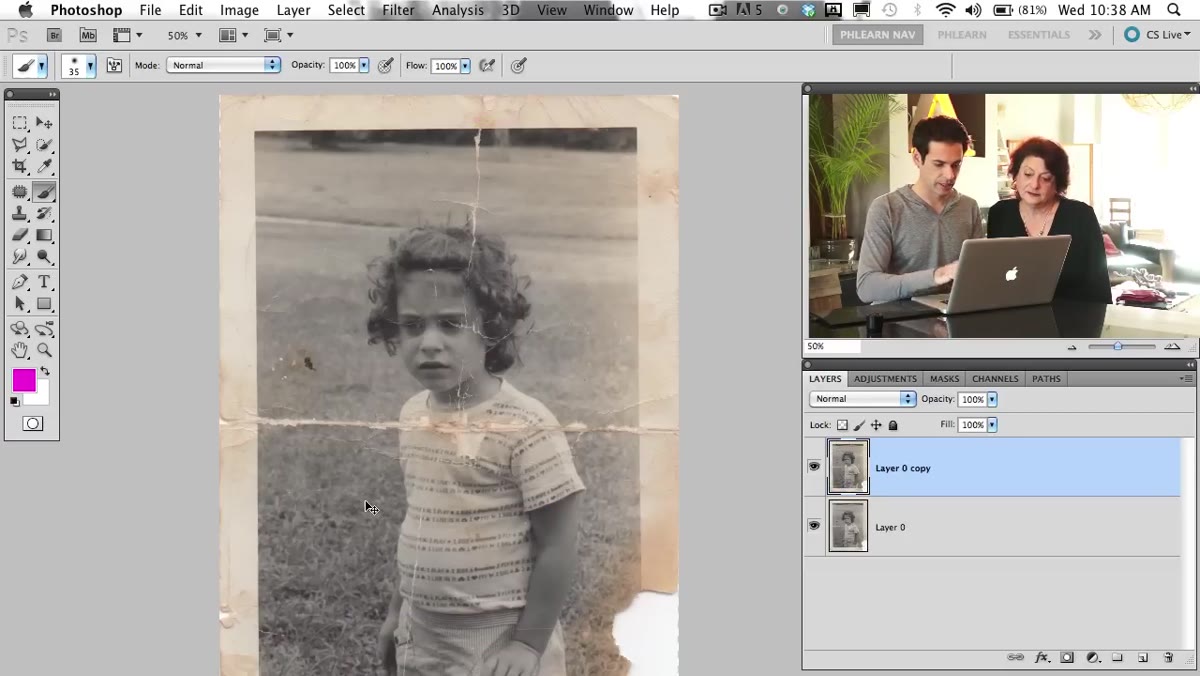 Aaron pressing Command J to duplicate the background layer in Layers panel
This should be muscle memory by now, but if it is not, here it is: hit Command+J (Ctrl+J on Windows) immediately after opening your file. This duplicates your base layer so you always have the untouched original sitting underneath. If anything goes sideways, your original is right there.
Aaron pressing Command J to duplicate the background layer in Layers panel
This should be muscle memory by now, but if it is not, here it is: hit Command+J (Ctrl+J on Windows) immediately after opening your file. This duplicates your base layer so you always have the untouched original sitting underneath. If anything goes sideways, your original is right there.
Aaron does this before making any selections or edits. It is a non-negotiable habit in restoration work because you will need to compare your edited version against the original constantly to make sure you are not introducing new problems while fixing old ones. Work on the duplicate, leave the original locked at the bottom.
Step 3: Select the Clean Area You Want to Copy
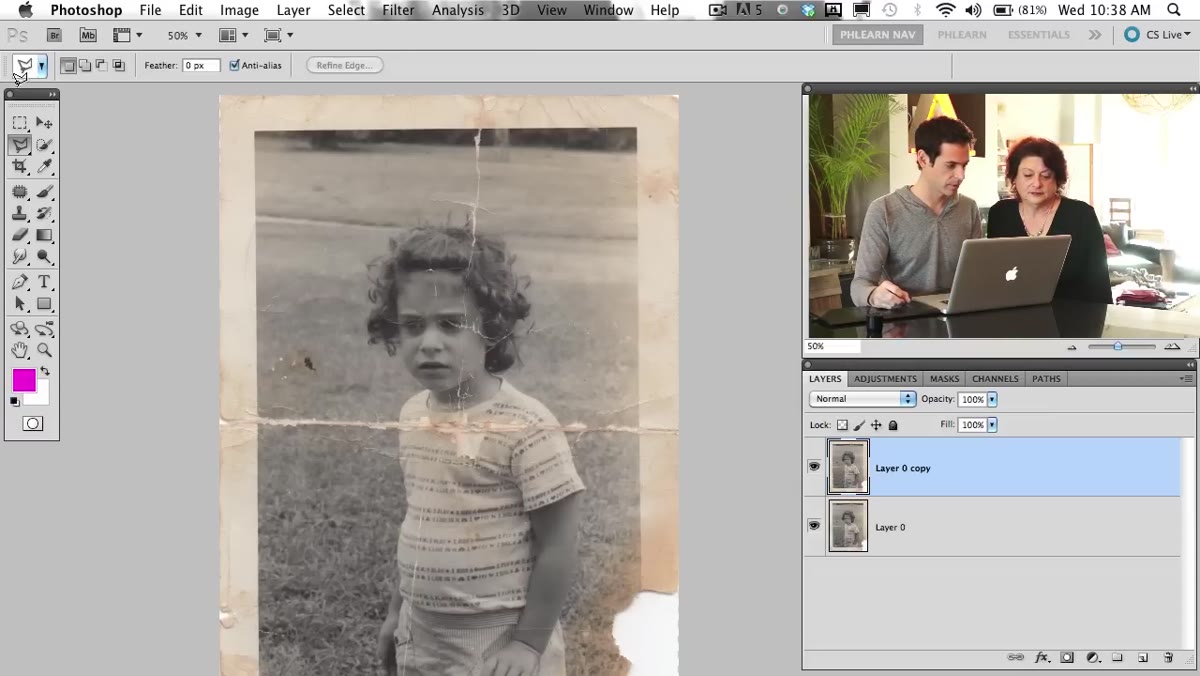 Lasso tool active, selection being drawn around undamaged section of the photo
With your duplicate layer selected, grab the Lasso Tool (L). You do not need a precise or tight selection here. Draw a loose selection around a clean, undamaged section of the image that is roughly the same size and content as the area you need to repair. Aaron is selecting a portion of the frame border on the cleaner side of the photo.
Lasso tool active, selection being drawn around undamaged section of the photo
With your duplicate layer selected, grab the Lasso Tool (L). You do not need a precise or tight selection here. Draw a loose selection around a clean, undamaged section of the image that is roughly the same size and content as the area you need to repair. Aaron is selecting a portion of the frame border on the cleaner side of the photo.
The shape and accuracy of your lasso selection matters less than its size. You want enough good material to work with, without selecting so much that you are dragging in content from different areas of the image that will not blend properly. A loose, generous selection is fine. You will clean up the edges later.
Step 4: Duplicate the Selection onto Its Own Layer
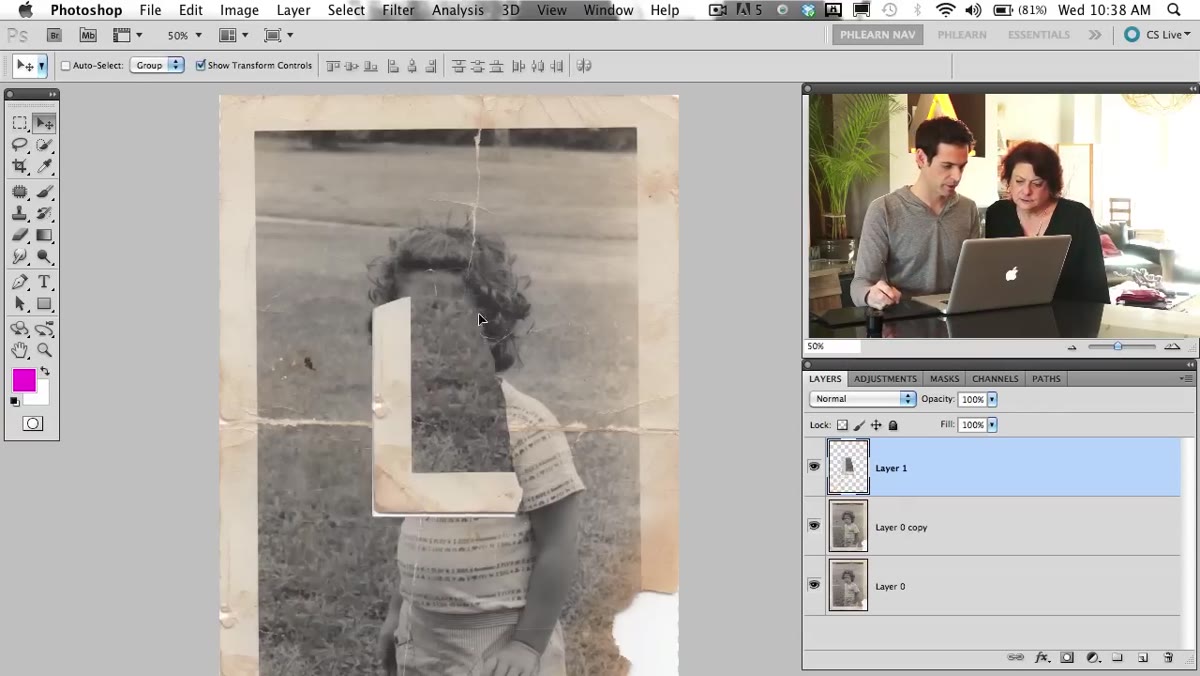 New layer appearing in Layers panel containing only the copied selection
Here is where the real trick lives. With your lasso selection active, hit Command+J again. This does not just duplicate the full layer. It takes only the selected area and lifts it onto its own new layer. You now have a floating patch of clean image data that you can move, flip, and position independently of everything else.
New layer appearing in Layers panel containing only the copied selection
Here is where the real trick lives. With your lasso selection active, hit Command+J again. This does not just duplicate the full layer. It takes only the selected area and lifts it onto its own new layer. You now have a floating patch of clean image data that you can move, flip, and position independently of everything else.
This is the foundation of the entire repair strategy. Instead of painting over damage with a brush and hoping it looks natural, you are using actual photo data from the same image. The texture, grain, tone, and color are already a perfect match because they came from the same scan. That is why this technique produces cleaner results than cloning by hand, especially on high-resolution scans where brush work tends to look soft or smeared.
Step 5: Position Your Patch Over the Damaged Area
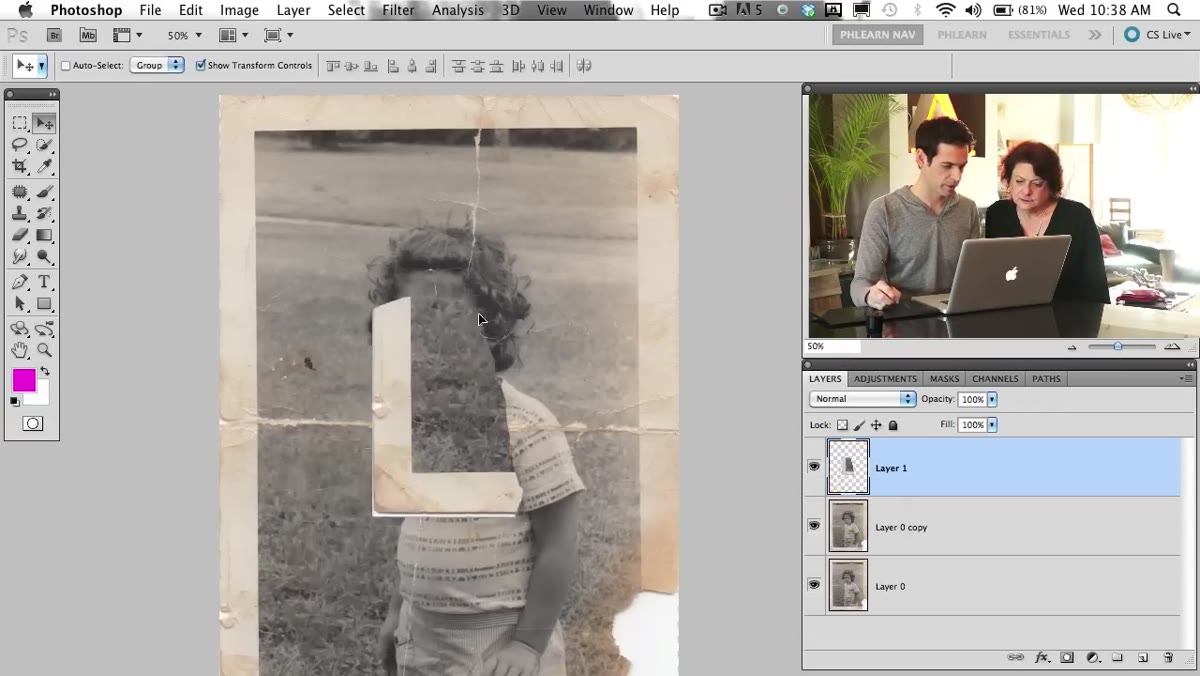 Newly duplicated layer being moved across the canvas toward the damaged region
Switch to the Move Tool (V) and drag your new patch layer over the damaged area. Depending on the image, you may also need to flip it horizontally so the content mirrors correctly. Go to Edit, Transform, then Flip Horizontal. This is especially useful when you are patching one side of a symmetrical subject using content from the opposite side.
Newly duplicated layer being moved across the canvas toward the damaged region
Switch to the Move Tool (V) and drag your new patch layer over the damaged area. Depending on the image, you may also need to flip it horizontally so the content mirrors correctly. Go to Edit, Transform, then Flip Horizontal. This is especially useful when you are patching one side of a symmetrical subject using content from the opposite side.
Get the patch roughly into position before worrying about precision. You can fine-tune placement once you see how the content lines up with what is underneath. Zoom in to at least 100 percent so you can see whether the edges and content are aligning naturally.
My Own Addition: Use a Layer Mask Instead of Erasing
Once your patch is in place, resist the urge to erase the edges with the Eraser Tool. Instead, add a Layer Mask to the patch layer and paint the edges to black using a soft brush at low opacity. This lets the patch blend into the surrounding image gradually and, crucially, it is fully reversible. If you erase and decide later that you cut too much, you are out of luck. If you mask, you can paint back in white to recover anything you removed.
I learned this the painful way after erasing a patch edge too aggressively on a client file with no smart objects and no history states left. A layer mask would have taken ten extra seconds to set up and saved me from rebuilding twenty minutes of work.
The single most important thing Aaron demonstrates in this tutorial is not a specific tool. It is the habit of surveying the damage and identifying existing clean data before you start editing. Good image data beats painted-in repairs every time. Copy it, move it, mask it in. The photo already has the answer. You just have to find the right part.
Watch the full tutorial on YouTube to see Aaron walk through the complete restoration across all three parts, including the actual photo retouching and the distressed border technique.
Comments
Leave a Comment