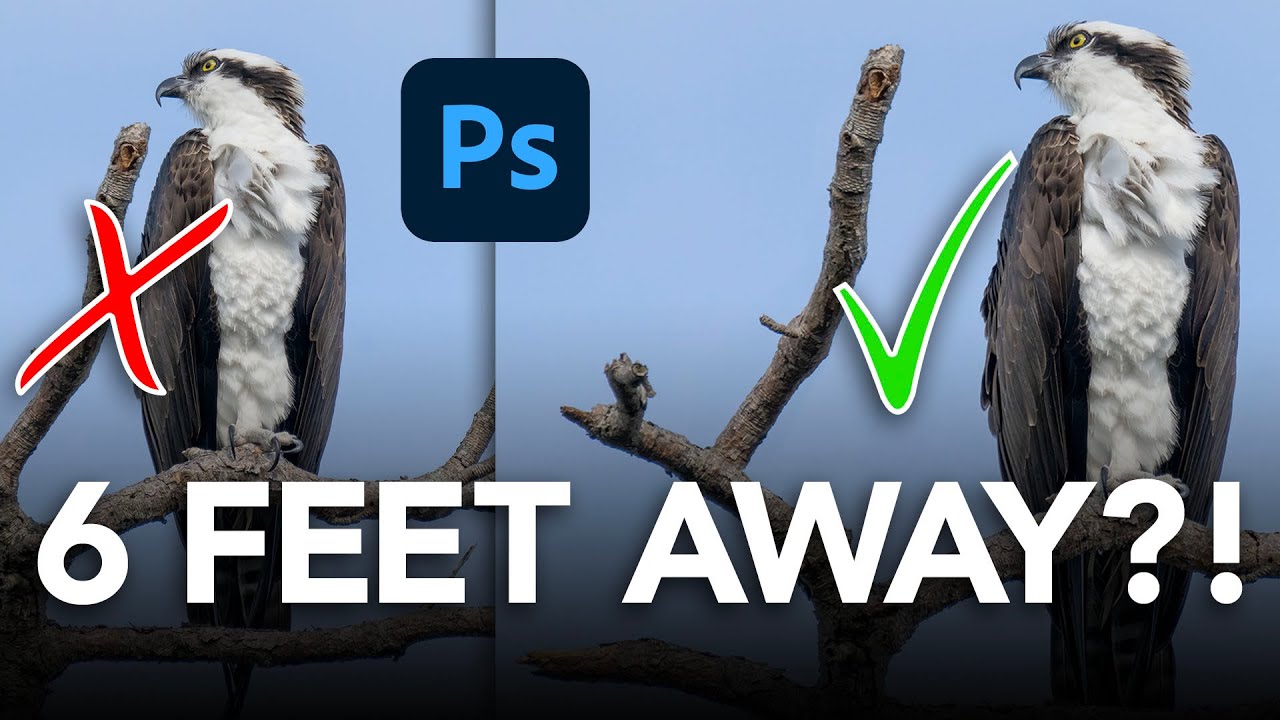
There’s a specific kind of frustration I feel when I nail a shot compositionally — good light, great subject, clean background — and then notice that some branch, pole, or random object is practically breathing on my subject. Not close enough to remove without wrecking the composition, but close enough to look like a mistake. I used to either crop aggressively (losing the frame I wanted) or spend 20 minutes cloning and healing until it looked almost right. Turns out there’s a much cleaner approach, and I stumbled onto it watching this Matt Kloskowski tutorial on adding space in Photoshop.
Matt works through the problem using a bird-on-a-branch photo where the branch is uncomfortably close to the subject. But he’s clear right up front: the same workflow applies to portrait photography, landscape shots, really anything where two elements are too close and you want separation without nuking the composition entirely. That framing clicked for me immediately, because “breathing room” is something I think about constantly in design work. The technique is the same whether it’s a bird or a person or a mountain.
The workflow lives primarily in two tools most people have skipped over: the Patch Tool and the Content-Aware Move Tool. Here’s how it works.
Step 1: Assess What You Actually Want to Do
 Before and after comparison showing branch too close to bird
Before you grab any tools, make a decision. Do you want to remove the element entirely, or do you want to keep it and just create more space? These are two different goals and they use slightly different approaches. Matt’s example has a branch he likes because it frames the bird. He just needs it further away. If you want the element gone completely, Content-Aware Fill or even the Patch Tool dragging to clean sky will handle that in seconds. If you want to move the element, keep reading.
Before and after comparison showing branch too close to bird
Before you grab any tools, make a decision. Do you want to remove the element entirely, or do you want to keep it and just create more space? These are two different goals and they use slightly different approaches. Matt’s example has a branch he likes because it frames the bird. He just needs it further away. If you want the element gone completely, Content-Aware Fill or even the Patch Tool dragging to clean sky will handle that in seconds. If you want to move the element, keep reading.
Knowing your intent upfront saves you from doing the wrong operation twice. Commit before you start selecting.
Step 2: Make a Lasso Selection Around the Offending Element
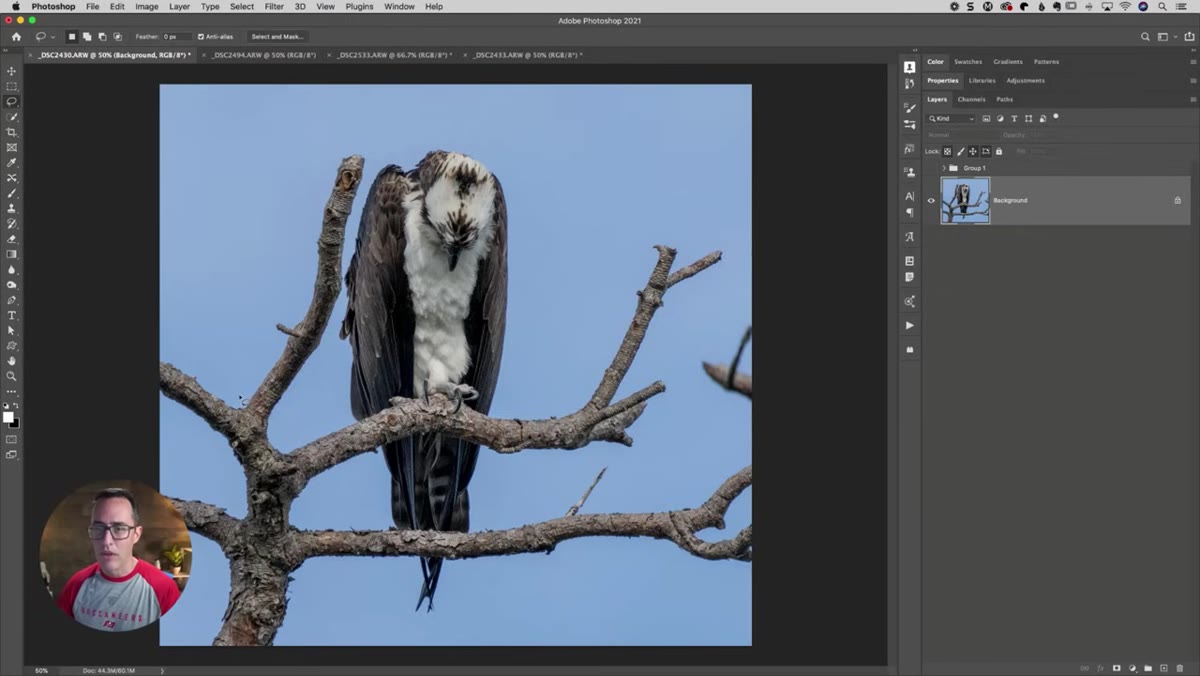 Lasso selection drawn loosely around the branch
Grab the Lasso Tool (L) and draw a loose selection around the element you want to move. Loose is the key word here. You don’t need a precise, pixel-hugging selection. In fact, a generous selection with plenty of buffer around the object gives Photoshop more context to work with when it fills in the area you’re moving away from. Think of it like giving the algorithm room to think.
Lasso selection drawn loosely around the branch
Grab the Lasso Tool (L) and draw a loose selection around the element you want to move. Loose is the key word here. You don’t need a precise, pixel-hugging selection. In fact, a generous selection with plenty of buffer around the object gives Photoshop more context to work with when it fills in the area you’re moving away from. Think of it like giving the algorithm room to think.
Matt selects the branch with a comfortable margin around it. The selection doesn’t need to be pretty. It just needs to fully contain what you’re moving, with some breathing room baked into the selection itself.
Step 3: Duplicate the Layer First
 Layers panel showing duplicated layer via Command J
Before you do anything destructive, press Command+J (Mac) or Ctrl+J (Windows) to duplicate your background layer. This gives you a clean before state to compare against, and it means you’re not working directly on your original pixels. Non-destructive habits are the kind of thing I had to learn the hard way. Burn it into your workflow now.
Layers panel showing duplicated layer via Command J
Before you do anything destructive, press Command+J (Mac) or Ctrl+J (Windows) to duplicate your background layer. This gives you a clean before state to compare against, and it means you’re not working directly on your original pixels. Non-destructive habits are the kind of thing I had to learn the hard way. Burn it into your workflow now.
With your duplicate layer active, go to Select > Reselect to bring back your lasso selection from the previous step. You’re now ready to actually move something.
Step 4: Try the Patch Tool for Removal (Optional Route)
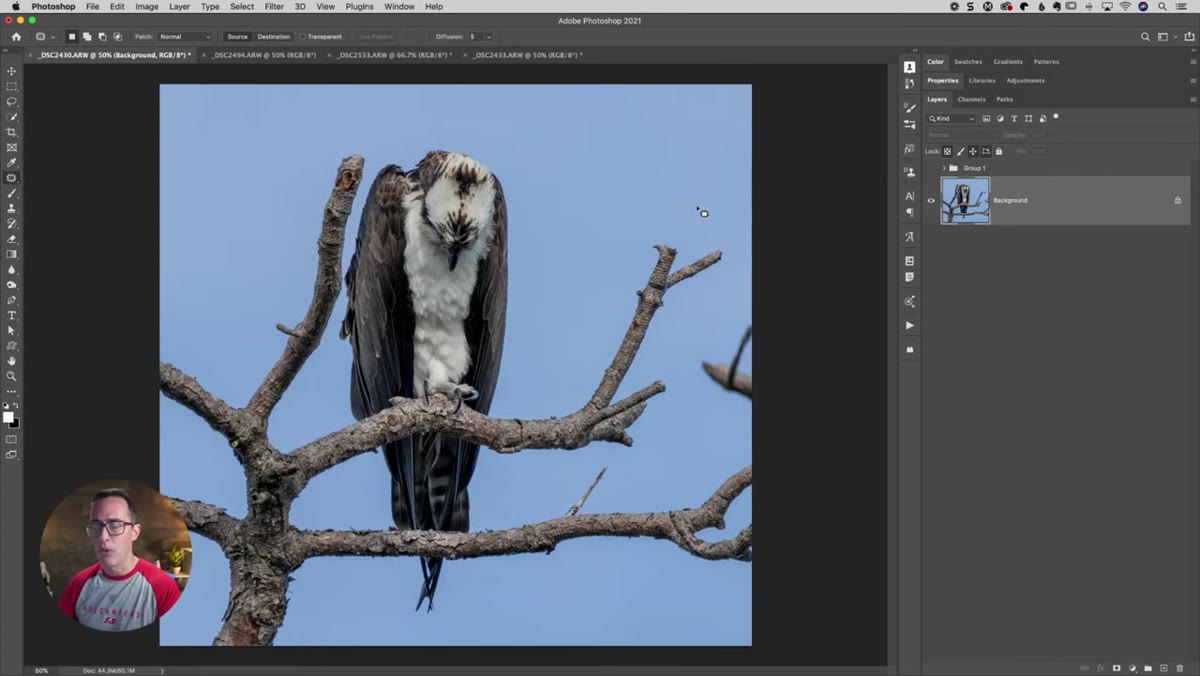
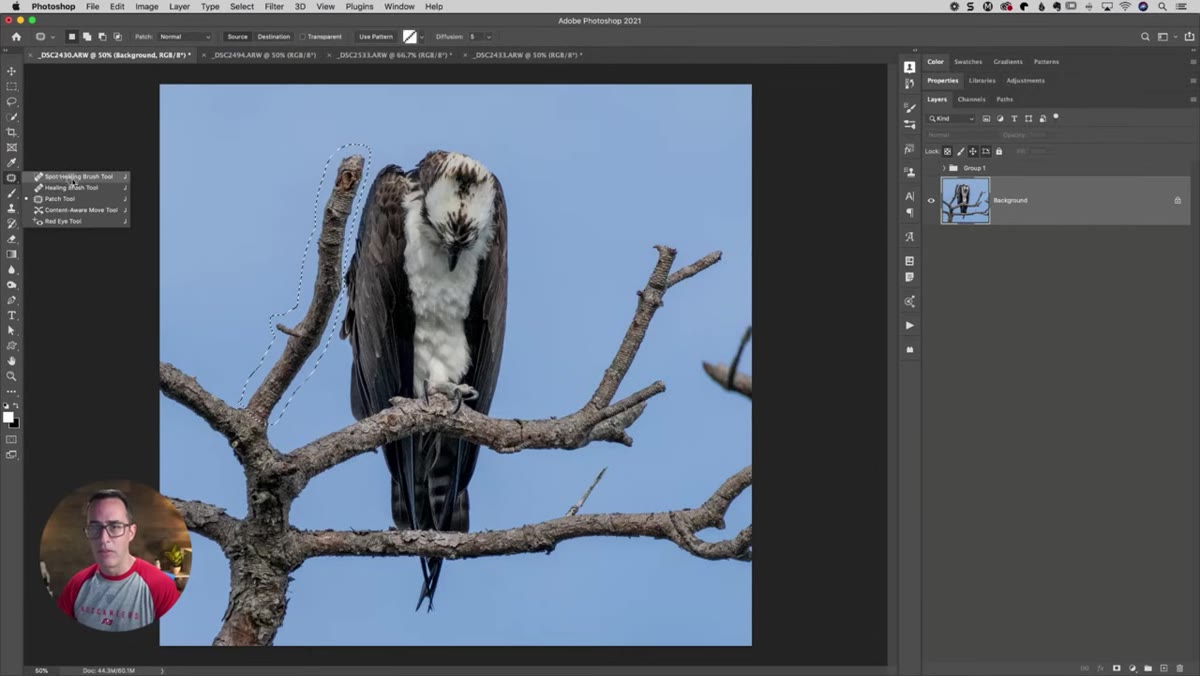 Patch Tool active, selection being dragged to clean area
The Patch Tool lives in the same toolbar group as the Spot Healing Brush. Hit J to cycle through that group until you see it, or right-click the Spot Healing Brush icon to find it in the flyout menu. With your selection active and the Patch Tool selected, just drag the selected area to a clean part of the image. Photoshop blends the destination texture into the original location.
Patch Tool active, selection being dragged to clean area
The Patch Tool lives in the same toolbar group as the Spot Healing Brush. Hit J to cycle through that group until you see it, or right-click the Spot Healing Brush icon to find it in the flyout menu. With your selection active and the Patch Tool selected, just drag the selected area to a clean part of the image. Photoshop blends the destination texture into the original location.
This is the “remove it entirely” route, and honestly it works surprisingly well. If you don’t care about keeping the element in the frame at all, this is your fastest path. Matt keeps the branch because it adds compositional value, which is the right call for that photo. But for a lot of edits, this is where you stop.
Step 5: Use the Content-Aware Move Tool to Reposition
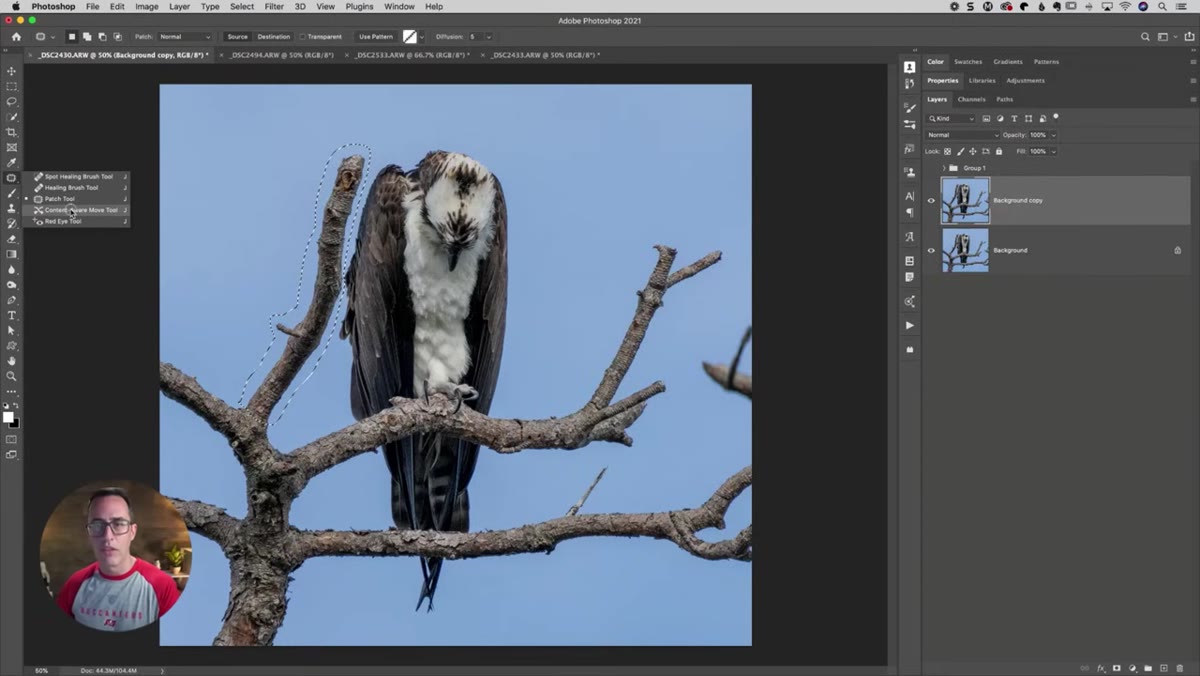 Content-Aware Move Tool selected from the healing brush group
Still inside that J-key tool group, find the Content-Aware Move Tool. It looks like two arrows pointing in opposite directions with a dotted selection around them. This is the tool that does the heavy lifting for the “keep it but move it” operation.
Content-Aware Move Tool selected from the healing brush group
Still inside that J-key tool group, find the Content-Aware Move Tool. It looks like two arrows pointing in opposite directions with a dotted selection around them. This is the tool that does the heavy lifting for the “keep it but move it” operation.
With your selection still active and this tool selected, drag the selected element to where you want it. Photoshop does two things simultaneously: it moves the content to the new location, and it fills in the original location using Content-Aware logic based on the surrounding pixels. The quality of the fill depends on how complex your background is. Simple skies and smooth textures work great. Busy foliage or patterned backgrounds will need some cleanup afterward with the Healing Brush.
Step 6: Clean Up the Edges and Compare
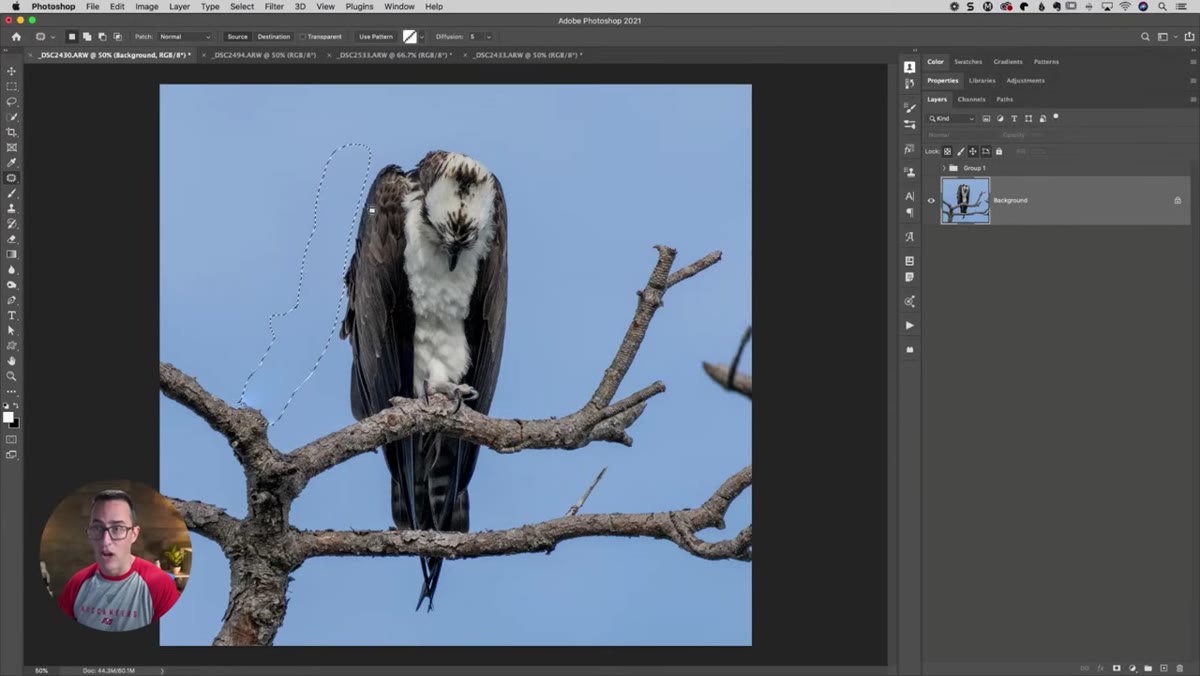 Before and after showing branch repositioned with more breathing room
After the move, deselect (Command+D or Ctrl+D) and zoom in to inspect both the moved element and the area it left behind. Content-Aware is impressive but not magic. You’ll often see some ghosting, blurry edges, or mismatched texture that needs a quick pass with the Spot Healing Brush or Clone Stamp Tool.
Before and after showing branch repositioned with more breathing room
After the move, deselect (Command+D or Ctrl+D) and zoom in to inspect both the moved element and the area it left behind. Content-Aware is impressive but not magic. You’ll often see some ghosting, blurry edges, or mismatched texture that needs a quick pass with the Spot Healing Brush or Clone Stamp Tool.
Toggle the visibility of your duplicate layer on and off to compare the before and after. This is where the Command+J step from earlier pays off. Seeing the side-by-side confirms whether you’ve actually improved the composition or just moved the problem.
What I’d Add From My Own Work
The Content-Aware Move Tool is genuinely underused, and I think it’s because people don’t trust it. I spent years going straight to clone-and-heal when I needed to reposition something, mostly out of habit. The first time I actually leaned into this tool on a portrait edit, where a window frame was cutting too close to my subject’s shoulder, I was annoyed at how fast it worked.
One thing the tutorial doesn’t cover but that I’ve found useful: if your fill result looks patchy, try running Filter > Noise > Add Noise with a very low value (1-2%) over the filled area. It breaks up that telltale “too smooth” look that Content-Aware sometimes leaves behind, especially on textured backgrounds. Tiny fix, but it makes the blend look more organic when you’re printing large.
The single biggest lesson from this whole technique is that “remove it” isn’t always the right answer. Sometimes the element that’s bothering you is actually serving the composition. It just needs space. Moving something a few hundred pixels can be the difference between an image that feels cramped and one that breathes.
Watch the full tutorial on YouTube to see Matt walk through the whole process on his osprey photo. It’s a short watch and the technique will stick immediately.
Comments
Leave a Comment