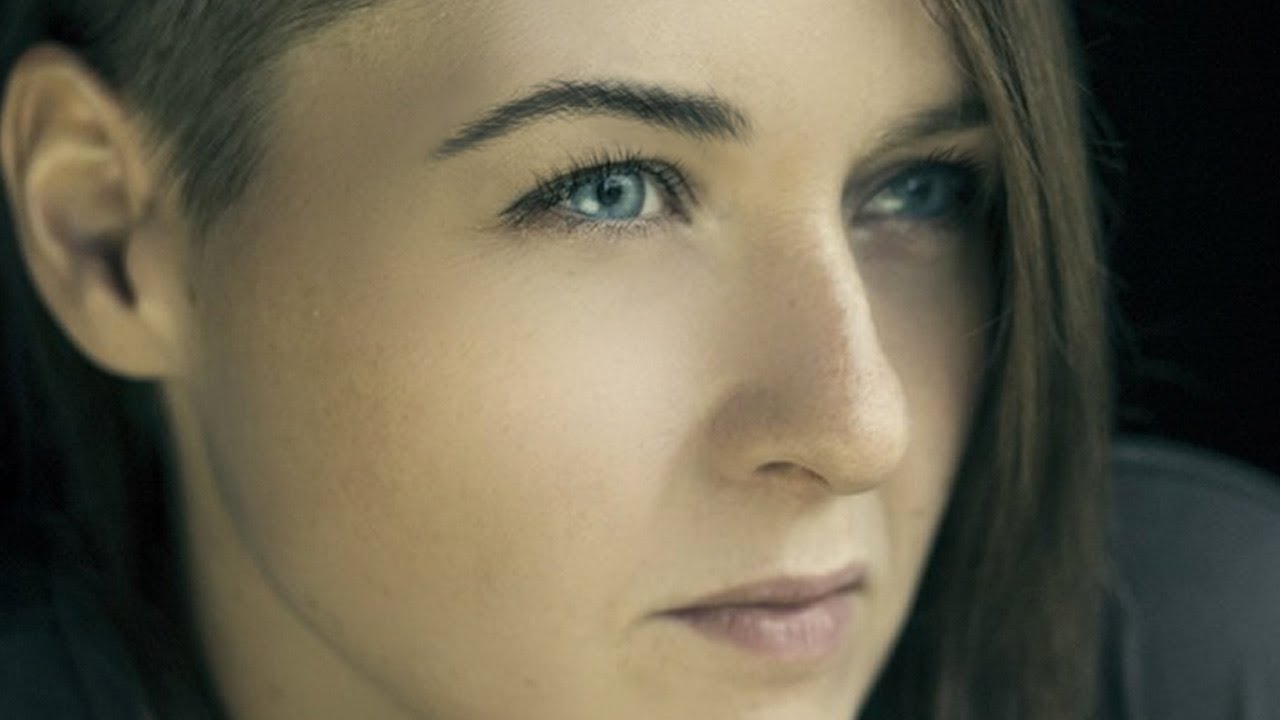
I shoot a lot of portrait work, and if there’s one thing that’ll quietly tank an otherwise great retouch, it’s eyebrows. Not the dramatic stuff, either. I’m talking about the subtle cases: sparse patches, uneven arches, one brow that’s noticeably thinner than the other. You can spend an hour perfecting skin texture and then have the whole thing fall apart because the brows look like they were drawn on with a crayon. Finding a technique that actually handles this convincingly felt like a small miracle.
In this Aaron Nace tutorial from PHLEARN (Watch the full tutorial on YouTube), the approach isn’t to fake it with a solid fill or a blur-edged blob. Instead, Aaron builds a custom brush that mimics a single strand of hair, complete with tapered ends, and then uses it to paint in brow hairs that actually hold up under scrutiny. The same brush works on eyelashes, which is a nice bonus. The setup takes a few minutes, but once you have it, you’ll use it constantly.
Step 1: Create a New Document Layer and Sketch a Hair Shape with the Pen Tool
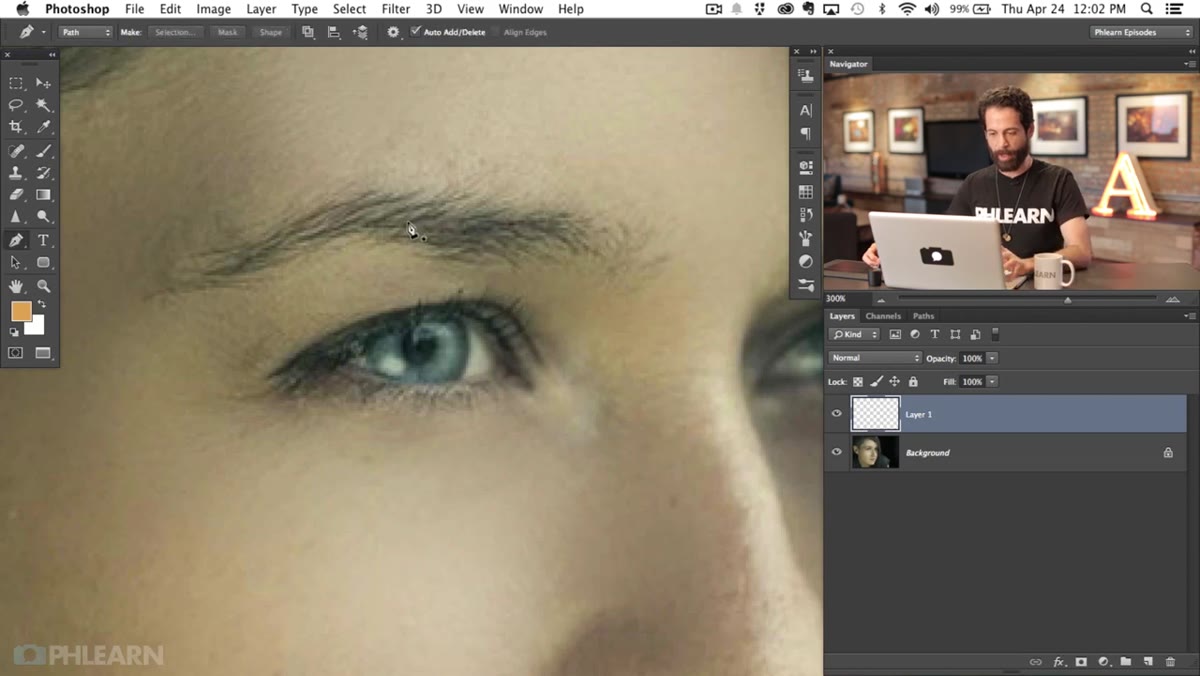 Pen tool path drawn in a subtle curve on canvas
Start on a new layer. Grab the Pen tool and click once to set your starting anchor point. Move along the canvas roughly the length of a single eyebrow hair, then click and drag slightly to introduce a gentle curve into the path. You’re not trying to draw a full eyebrow here, just one hair. The curve doesn’t need to be dramatic. A subtle arc is enough to keep things from looking stiff and mechanical.
Keep the path short. Real eyebrow hairs aren’t long, and if you overdo the length at this stage, the final brush will look wrong when you’re painting. Think in terms of proportion to the face, not the document size.
Step 2: Size Your Brush to Match a Single Hair
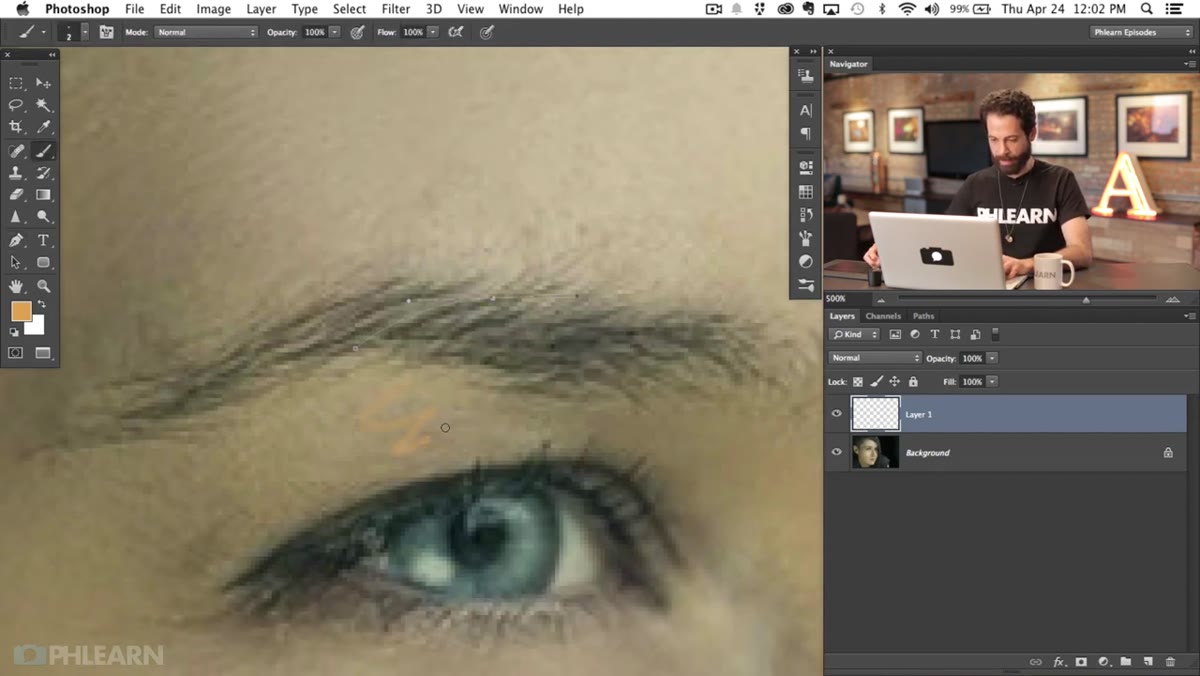 Brush tool selected, size adjusted to match a hair
Switch to the Brush tool and dial in a hard round brush. The key here is size: you want the brush diameter to approximate the width of one actual eyebrow hair in your image. Aaron samples a color from the existing brow to eyeball this, which is a smart move. Too thick and the strokes read as drawn, not grown. Too thin and they disappear into the image.
You don’t need a tablet for this step. The magic of this whole technique is that pressure simulation gets handled later by the pen path itself, so a mouse works fine here.
Step 3: Use Stroke Path with Simulate Pressure to Create a Tapered Hair
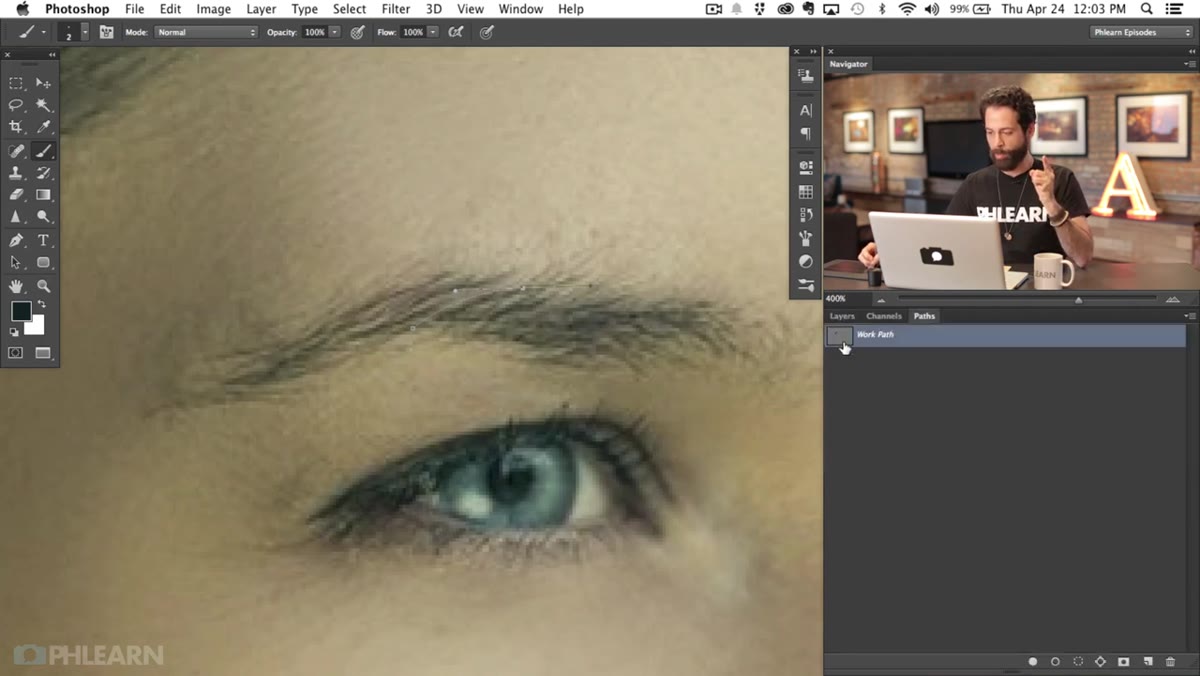 Right-click on work path, Stroke Path dialog with Simulate Pressure checked
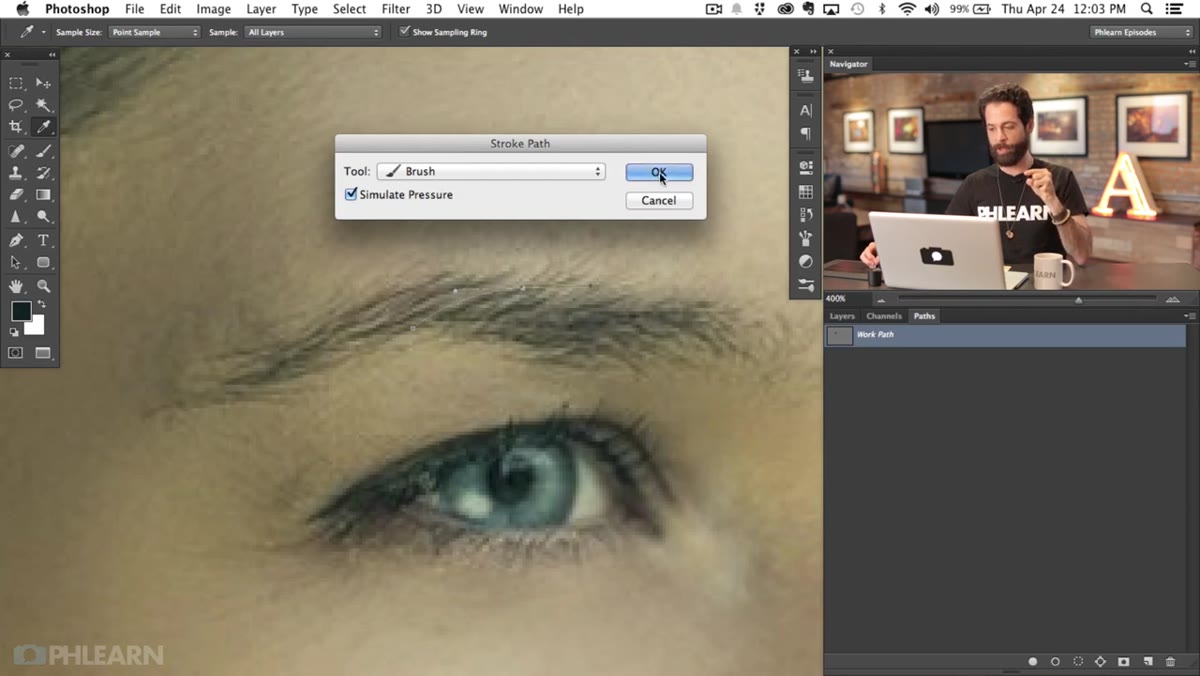
This is where the technique gets genuinely clever. Open the Paths panel, right-click your work path, and choose “Stroke Path.” In the dialog that appears, make sure the tool is set to Brush, and check the “Simulate Pressure” box before hitting OK.
That checkbox is doing a lot of heavy lifting. It tells Photoshop to taper the stroke at both ends, thicker through the middle and pointy at the tips, exactly like a real hair. Without it, you just get a uniform tube that looks fake. With it, you get something that can genuinely pass for a strand of hair on a human face. It’s one of those options that’s been sitting in Photoshop forever and almost nobody talks about.
Step 4: Clean Up and Define the Brush Preset
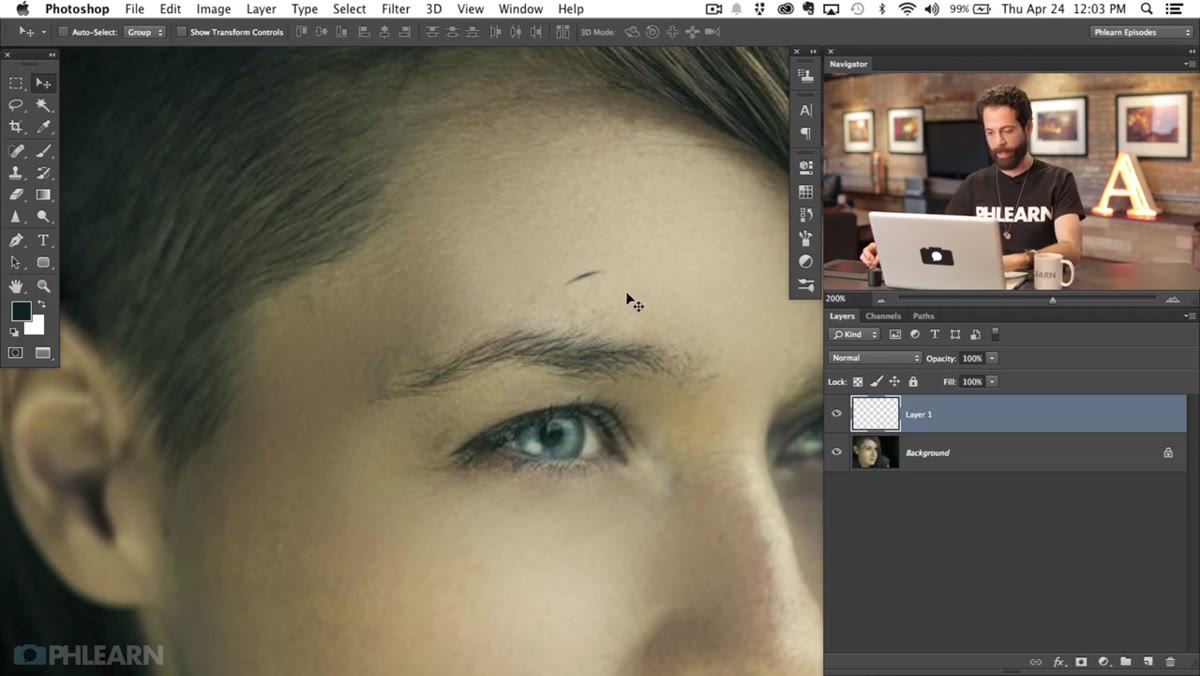
 Single tapered hair stroke visible on isolated layer
After stroking the path, you should have a single, tapered hair shape on your layer against a transparent background. Delete the path (you don’t need it anymore) and zoom in to inspect the stroke. If the weight looks off, undo, adjust your brush size in Step 2, and re-stroke.
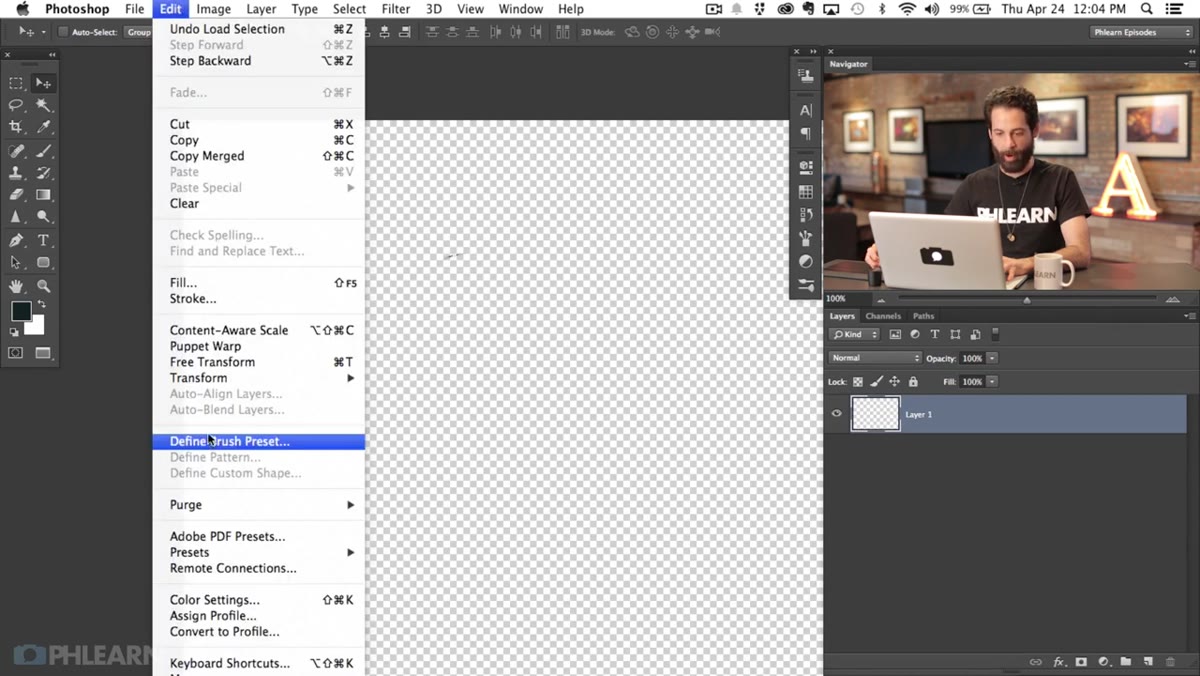
Once you’re happy with the shape, go to Edit > Define Brush Preset and give it a descriptive name. Something like “single-hair-brow” works. This saves the shape as a reusable brush you can pull from anytime. If you’re on a deadline and don’t want to build it yourself, Aaron’s version is available through PHLEARN.
Step 5: Configure the Brush Settings for Natural Variation
 Brush Settings panel open, Shape Dynamics visible
Now open the Brush Settings panel (Window > Brush Settings) and do a little configuration. The goal is to make repeated strokes feel organic rather than stamped. You’ll want to add some angle jitter under Shape Dynamics, so each stroke is oriented slightly differently. Ticking Scattering adds subtle spacing variation between strokes.
The exact values depend on your image and how dense the brows need to be, but start conservatively. A little jitter goes a long way. Eyebrows have structure and direction, so you don’t want the brush running completely wild. Think of it like directing traffic: some variation, but everyone’s still heading roughly the same way.
Step 6: Paint in the Brows on a New Layer, Sampling Color from the Subject
 New layer above subject, painting strokes along brow line
Create a new layer above your subject and, using the Alt/Option key, sample a color directly from the existing brow hairs. This step matters more than people realize. Even in the same person, brow hair color shifts across the arch, darker at the inner corner, sometimes lighter toward the tail. Sampling as you go keeps the painted hairs cohesive with what’s already there.
Paint in short, directional strokes that follow the natural growth pattern of the brow. Inner hairs tend to grow more vertically, while hairs along the arch and tail angle outward and downward. Respecting that growth direction is what separates a convincing retouch from something that reads as airbrushed.
The Part Nobody Mentions: Layer Blend Mode and Opacity Are Your Friends
Here’s something I’ve added to my own workflow after using this technique on client work. After painting the brow layer, I almost always drop the layer opacity to somewhere between 70 and 85 percent and experiment with blend modes. Multiply, in particular, tends to blend painted hairs into the underlying skin more naturally than Normal mode, especially in lighter brow areas where translucency matters.
It’s a small adjustment, but it smooths out that last 10 percent of “something looks slightly off” that can sneak in when painting on top of a realistic photograph. The technique Aaron teaches gets you 90 percent there. Playing with opacity and blend mode closes the gap.
If there’s one thing worth walking away with, it’s this: the Simulate Pressure option in Stroke Path is one of the most underused features in Photoshop for anyone doing beauty or portrait retouching. It gives you the tapered, natural-looking stroke that would otherwise require a tablet and years of pressure-sensitivity practice, and it does it consistently, every single time.
Watch the full tutorial on YouTube to see Aaron build the brush from scratch and paint the full brow transformation in real time.
Comments
Leave a Comment