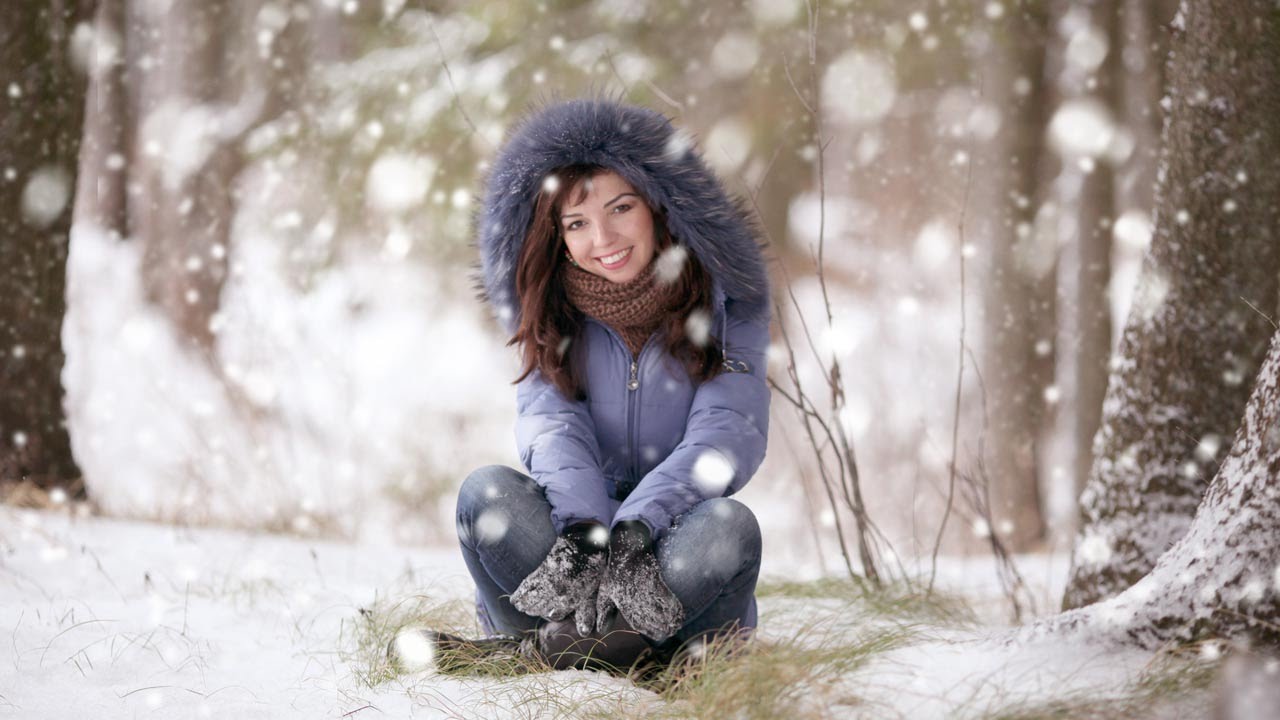
There’s a specific kind of frustration that comes from shooting outdoors in winter, getting a genuinely great shot, and then realizing the scene looks flat because the snow isn’t falling. The ground is white, the subject is bundled up, the mood is there. But the sky is just… sky. I’ve been in that situation more times than I’d like to admit, and my usual fix was to either accept it or spend an embarrassing amount of time smearing a Gaussian blur over a noise layer and hoping for the best. The results were unconvincing at best.
Then I watched this Aaron Nace tutorial from PHLEARN, and the approach he takes is so much smarter than what I’d been doing. Watch the full tutorial on YouTube. Instead of trying to fake snow with filters after the fact, he builds a custom brush that mimics how snowflakes actually behave in a photo. Dots, not crystals. Variation in size. Randomized spacing. Once you build the brush, you own it forever, and that’s the part that got me. This is a one-time setup that pays out on every winter shoot you do from here on out.
The technique works on almost any outdoor photo taken in cold-weather conditions. It’s not going to save a beach photo taken in July, but if the scene already reads as winter, this effect will feel completely believable. Here’s how to do it.
Step 1: Create a New Document for Your Brush
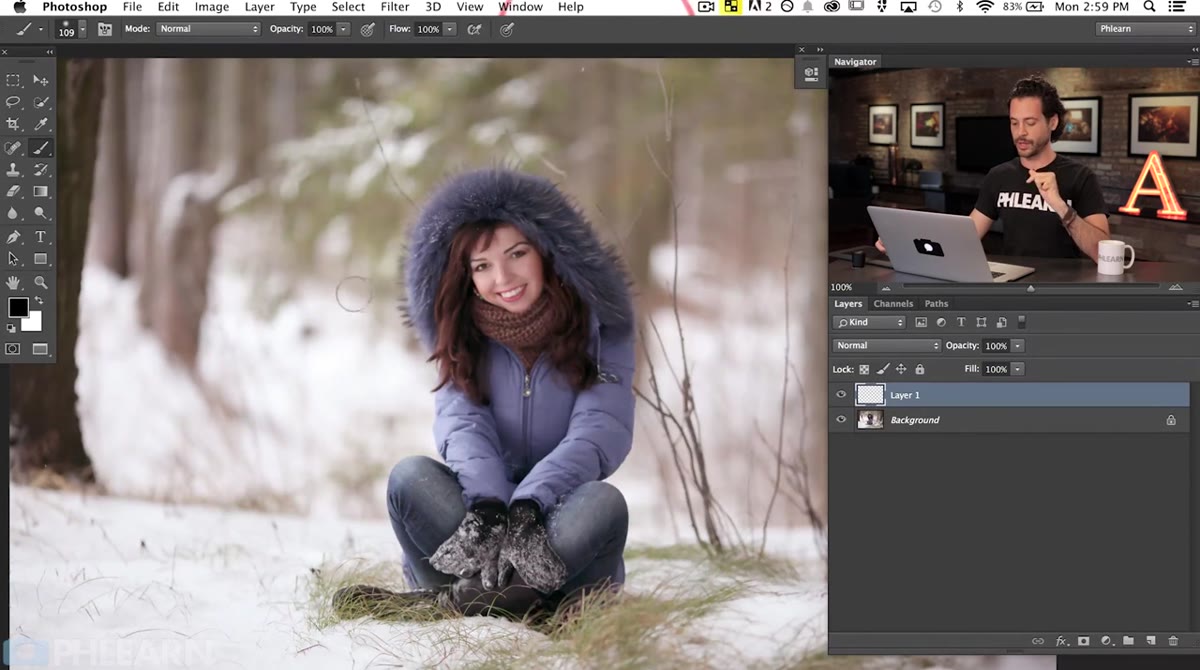 New Document dialog open with 500x500 pixel settings
Custom brushes in Photoshop need to be built in a separate document before you can define them. Press Command + N (Mac) or Control + N (Windows) to open the New Document dialog. Set the width and height both to 500 pixels. You don’t need anything larger for a snow brush. Hit OK and you’ve got a clean square canvas to work on.
New Document dialog open with 500x500 pixel settings
Custom brushes in Photoshop need to be built in a separate document before you can define them. Press Command + N (Mac) or Control + N (Windows) to open the New Document dialog. Set the width and height both to 500 pixels. You don’t need anything larger for a snow brush. Hit OK and you’ve got a clean square canvas to work on.
Make sure the background is white. This matters because Photoshop reads dark values as the brush shape and light values as transparency. If your canvas is white and your dots are black, you’re already set up correctly.
Step 2: Draw Two Black Circles as Snowflake Shapes
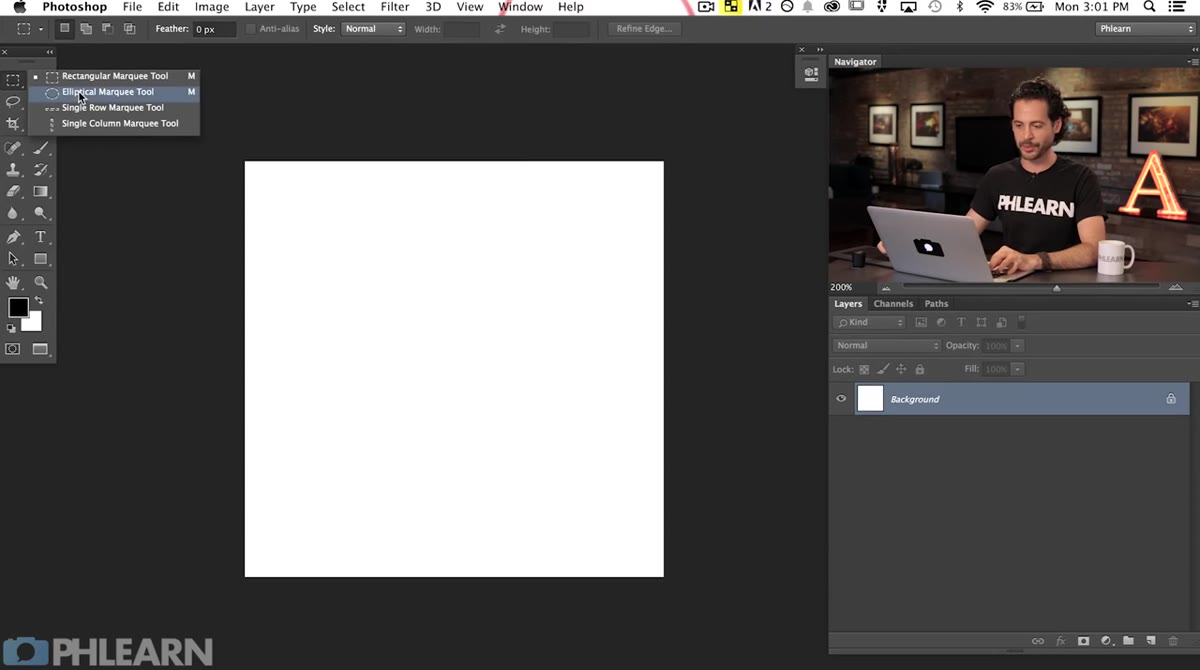 Two black circles of different sizes on a white canvas
Grab the Elliptical Marquee Tool (M), hold Shift to constrain the shape to a perfect circle, and draw a circle somewhere in the upper portion of the canvas. On a new layer, press Shift + Delete (or Shift + Backspace on Windows) to open the Fill dialog, choose Black, and hit OK. That’s your first snowflake.
Two black circles of different sizes on a white canvas
Grab the Elliptical Marquee Tool (M), hold Shift to constrain the shape to a perfect circle, and draw a circle somewhere in the upper portion of the canvas. On a new layer, press Shift + Delete (or Shift + Backspace on Windows) to open the Fill dialog, choose Black, and hit OK. That’s your first snowflake.
Now draw a second circle, smaller than the first, somewhere else on the canvas. Fill it with black the same way. The reason you’re drawing two dots instead of one is that Photoshop will use this whole 500x500 canvas as the repeating unit of the brush. Having two circles of different sizes inside that unit means each “stamp” of the brush already has built-in variation. It keeps the result from looking like a polka dot pattern, which is a very different vibe from snow.
Step 3: Define the Brush Preset
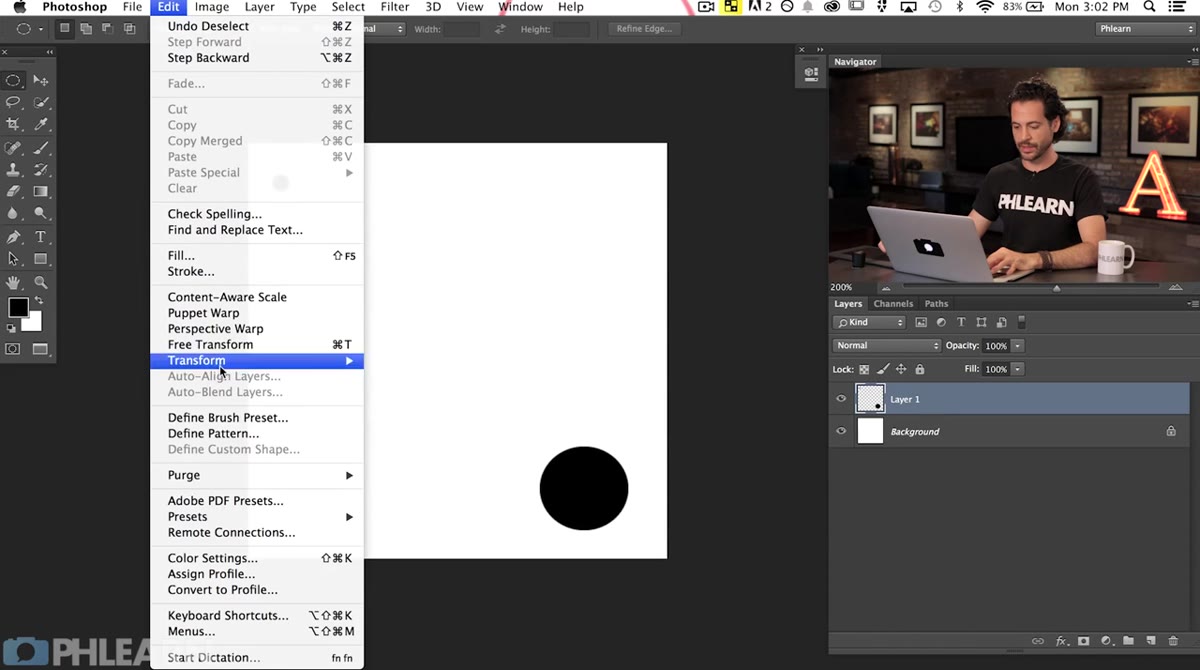 Edit menu open with Define Brush Preset option highlighted
Go to Edit in the top menu and scroll down to “Define Brush Preset.” Click it. Photoshop will ask you to name the brush. Call it “snow” or “falling snow” or whatever you’ll actually remember six months from now. Press Enter and you’re done with the separate document. You can close it or leave it open. The brush is now saved into Photoshop and will show up in your brush library.
Edit menu open with Define Brush Preset option highlighted
Go to Edit in the top menu and scroll down to “Define Brush Preset.” Click it. Photoshop will ask you to name the brush. Call it “snow” or “falling snow” or whatever you’ll actually remember six months from now. Press Enter and you’re done with the separate document. You can close it or leave it open. The brush is now saved into Photoshop and will show up in your brush library.
This is the step that makes the whole technique worth doing. You build the brush once and it lives in your Photoshop installation permanently.
Step 4: Select the Snow Brush and Set Paint Color to White
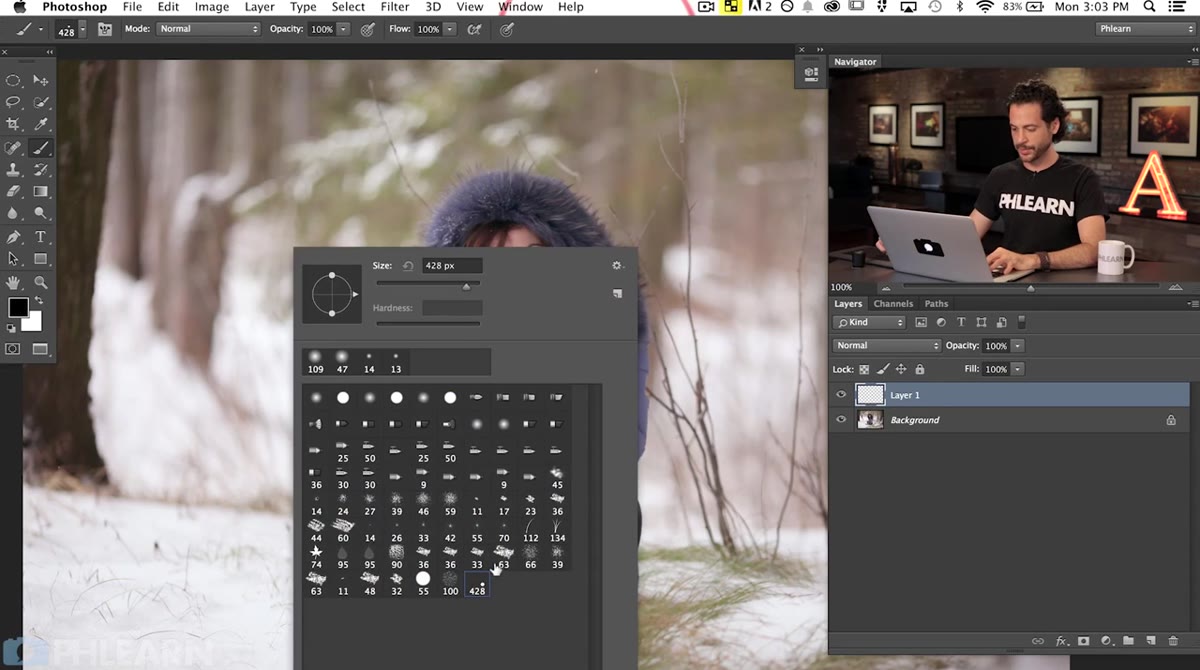 Brush picker open with newly created snow brush selected
Switch back to your main photo document. Add a new empty layer above everything else. This is where your snow will live, and keeping it on its own layer means you can adjust opacity, add blur, or mask it later without touching the actual photo.
Brush picker open with newly created snow brush selected
Switch back to your main photo document. Add a new empty layer above everything else. This is where your snow will live, and keeping it on its own layer means you can adjust opacity, add blur, or mask it later without touching the actual photo.
Select the Brush Tool (B), then right-click on the canvas to open the brush picker. Scroll to the bottom of the list and you’ll see your snow brush as the most recently added preset. Click it. Set your foreground color to white. At this point if you click or drag across the image, you’ll see white dots appearing, but they’ll look too uniform and clumped. That’s fine. The next step is where the brush actually becomes snow.
Step 5: Configure Brush Settings for Natural-Looking Snow
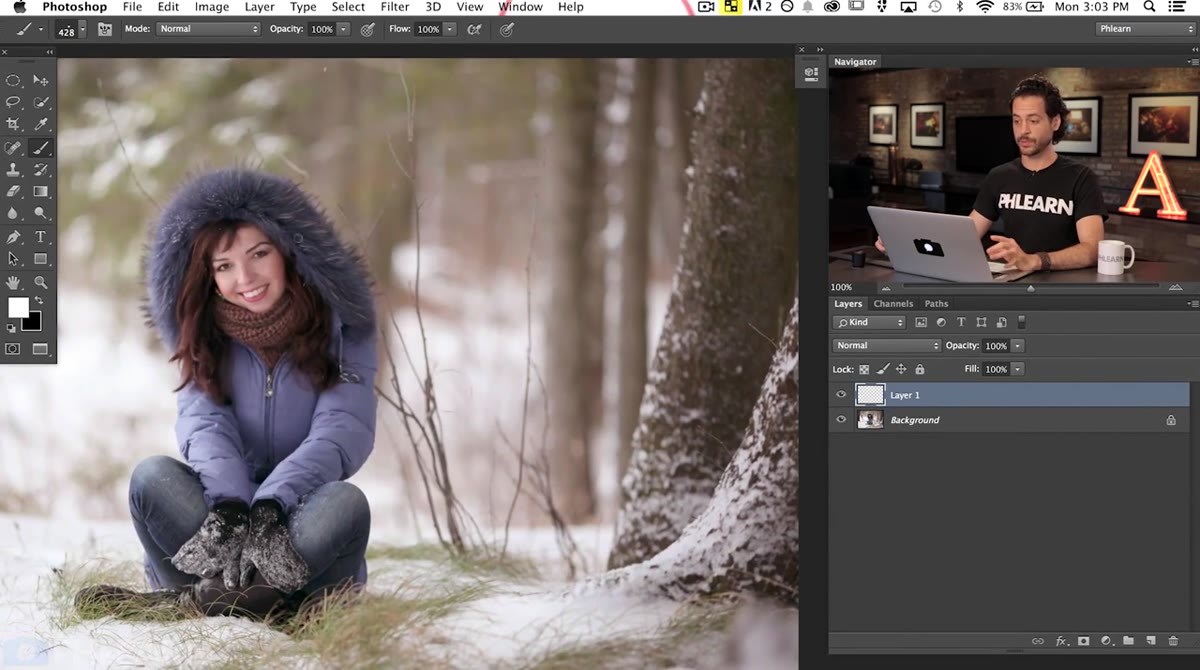 Brush Settings panel open with Shape Dynamics selected
Open the Brush Settings panel by going to Window and selecting Brush (or just press F5). This panel is where the magic actually happens, and it’s also where a lot of people bail because it looks intimidating. Don’t. You only need to touch a few things.
Brush Settings panel open with Shape Dynamics selected
Open the Brush Settings panel by going to Window and selecting Brush (or just press F5). This panel is where the magic actually happens, and it’s also where a lot of people bail because it looks intimidating. Don’t. You only need to touch a few things.
Click on “Shape Dynamics” in the left column. This controls how the size and angle of each brush stamp varies as you paint. Crank up Size Jitter to add random variation in how large each snowflake dot appears. This single setting does more for realism than almost anything else in this technique. You can also increase Scatter under the Scatter section of the panel, which spreads the dots across a wider area rather than painting them in a straight line. Play with Spacing under the Brush Tip Shape section as well. Pushing Spacing up higher means fewer dots per stroke, which looks more like actual falling snow and less like white confetti.
Step 6: Paint the Snow and Add Blur
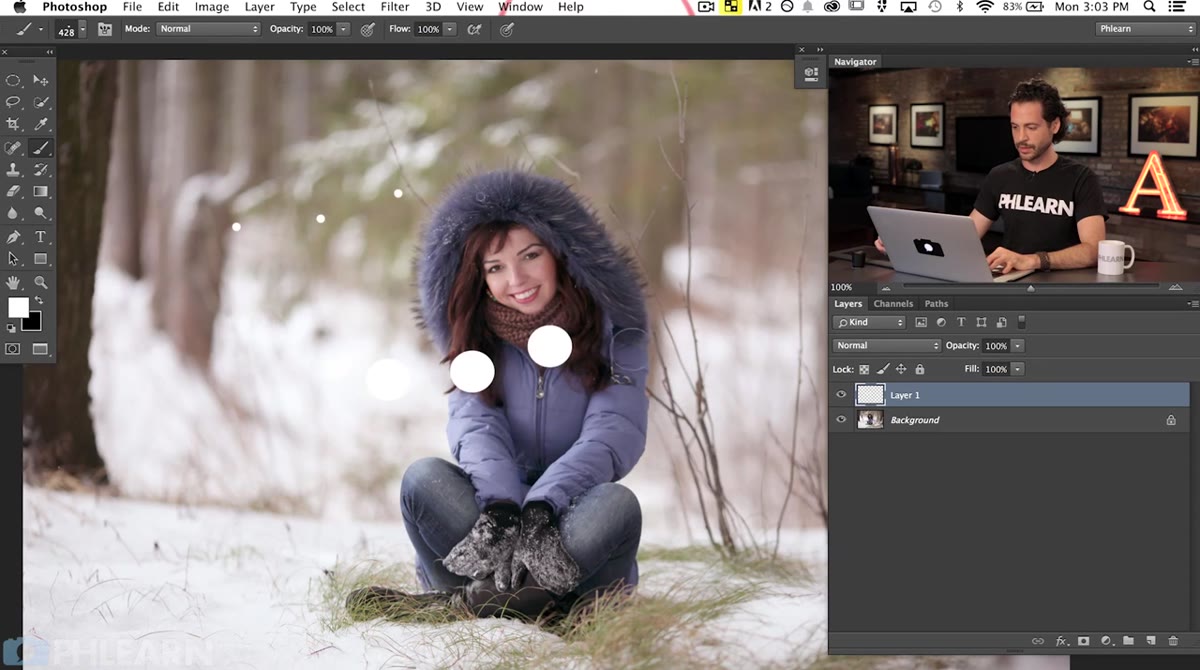 White snow dots painted across the photo with brush settings applied
With your settings dialed in, make a few broad strokes across the image. Don’t overdo it. Snow is sparse. A common mistake is painting until the image looks like a blizzard, which just reads as noise. Try one or two passes with a large brush at lower opacity first, then add a second pass with a slightly smaller brush at even lower opacity for the snow that’s further away or out of focus.
White snow dots painted across the photo with brush settings applied
With your settings dialed in, make a few broad strokes across the image. Don’t overdo it. Snow is sparse. A common mistake is painting until the image looks like a blizzard, which just reads as noise. Try one or two passes with a large brush at lower opacity first, then add a second pass with a slightly smaller brush at even lower opacity for the snow that’s further away or out of focus.
Once you’re happy with the placement, apply a small Gaussian Blur to the snow layer. Go to Filter, then Blur, then Gaussian Blur. A radius of 1 to 3 pixels is usually enough. Real falling snow in a photo is never perfectly sharp, and this blur sells the depth. If some flakes are supposed to be closer to the camera, you can paint those on a separate layer and leave them sharper.
My Caveat: Depth Separation Makes or Breaks This Effect
The one thing I’d add from my own experience is that a single snow layer almost never looks as good as two or three. I now paint snow on at least two layers: one for background flakes (smaller brush, more blur, lower opacity) and one for foreground flakes (larger brush, slight blur, higher opacity). This creates a sense of depth that a flat single-layer approach just can’t fake. You can also use a layer mask on each snow layer to keep the flakes from appearing in front of subjects where it would look odd.
The biggest takeaway from this whole technique is that you’re building a tool, not just applying a filter. That custom brush is yours now. Every winter photo you shoot from this point on gets to benefit from the twenty minutes you spent setting this up. That’s the kind of thinking that separates people who fight Photoshop from people who get it to work for them.
Watch the full tutorial on YouTube to see Aaron walk through each of these steps with his source image. His approach to the brush settings panel in particular is worth watching in motion.
Comments
Leave a Comment