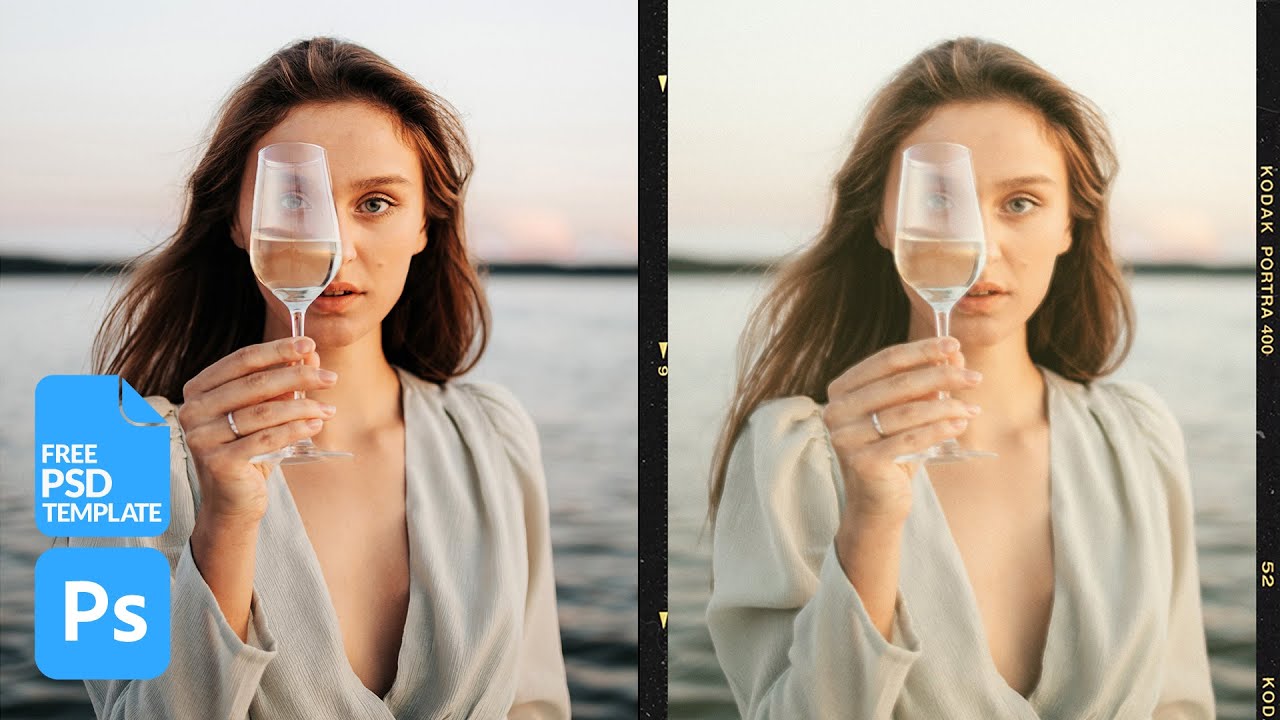
There’s a specific kind of job that shows up in my freelance queue every few months. A client wants their photos to feel “analog” or “cinematic” or, my personal favorite, “like it was shot on film but not too grainy.” They never quite know how to describe it, but they know it when they see it. For years, I was hacking together a solution: slap on a LUT, add some noise, call it done. It worked well enough, but it wasn’t flexible, and revisiting those files later was a nightmare of flattened layers and regret.
Then I worked through this Aaron Nace tutorial from PHLEARN, and it genuinely changed how I approach this kind of effect. Watch the full tutorial on YouTube - it runs just a few minutes and includes a free PSD template download. The thing that makes this approach worth your time isn’t just the end result, which looks legitimately good. It’s that the whole system is built on smart objects and smart filters, meaning every single decision stays editable long after you close the file.
I’ll be honest: I used to avoid smart filters because they felt like extra steps. Now I use them on almost everything, partly because of tutorials like this one and partly because I once handed off a “finished” file with baked-in effects and spent an embarrassing amount of time rebuilding it from scratch when the client wanted changes. Build non-destructively. Your future self will not send you a thank-you note, but they won’t curse your name either.
Step 1: Open the Free PSD Template
 Photoshop open with PHLEARN film effect template and instructions layer
Download the free PSD template from PHLEARN (link is in the video description) and open it in Photoshop. When it first loads, you’ll see an instructions layer sitting on top of the layer stack. Toggle that off so you can see what you’re working toward: a film-look composite with motion blur, color grading, noise, and a film border already baked into the template’s smart filter setup. Take a minute to study the layer structure before you start placing anything. Understanding how it’s organized saves you from fumbling around later.
Step 2: Place Your Photo as a Linked Smart Object
 File menu open with Place Linked option highlighted
Navigate to File, then choose “Place Linked” rather than “Place Embedded.” This is not a small distinction. Placing as linked keeps your original image file separate and maintains it as a smart object, which means you can swap photos in and out without rebuilding anything. Drop your image into the folder group labeled “Place Images Here” inside the layer panel. After placing, check the width and height fields in the options bar at the top and scale your image up just enough to fill the frame edge-to-edge. Hit Enter to confirm.
Step 3: Duplicate the Layer and Set Blending Modes
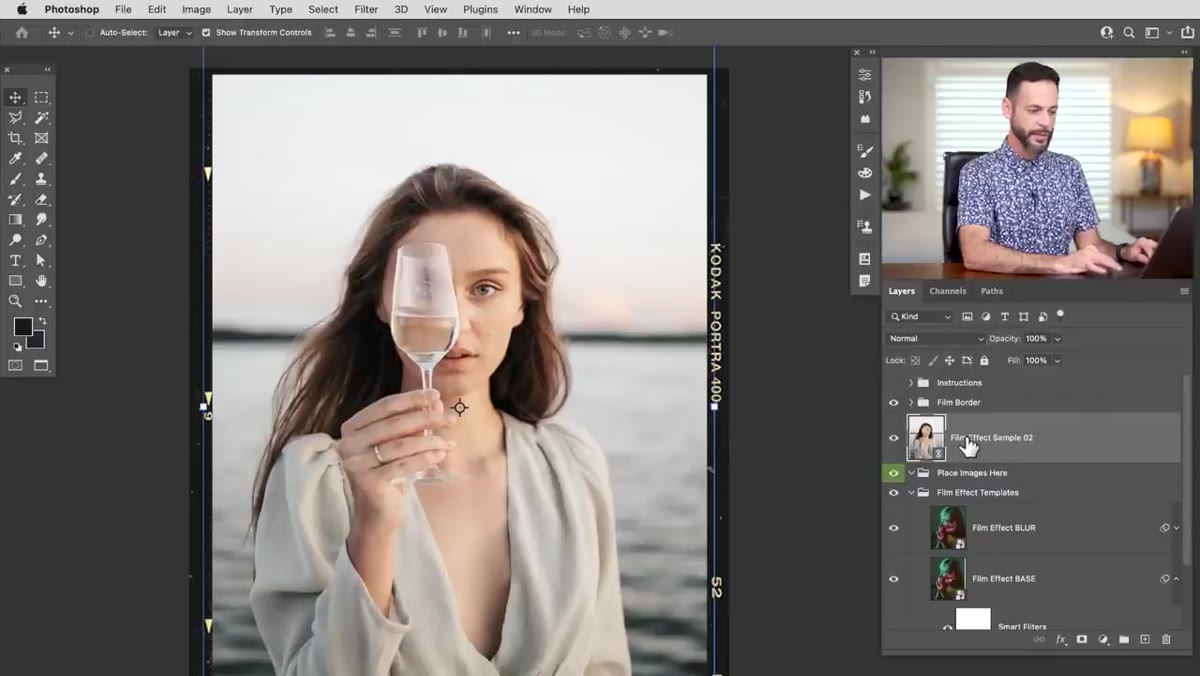 Two image layers visible, one set to Normal, one to Lighten blend mode
With your placed smart object selected, press Ctrl+J (Command+J on Mac) to duplicate it. You now have two copies of your photo stacked on top of each other. Leave the bottom copy at Normal blending mode. Set the top copy to Lighten. That Lighten blending mode is doing something specific here: when you apply the motion blur to this layer in the next step, only the pixels lighter than what’s underneath will show through. The result is a soft, glowing blur rather than a muddy smear. It’s a small thing that makes a big visual difference.
Step 4: Copy the Smart Filters from the Template’s Base Layer
 Smart filter icon being alt-dragged from template base layer to photo layer
This is where the template earns its keep. The base smart object in the template already has a full stack of smart filters applied: Levels, Gaussian Blur, Motion Blur, and Noise, among others. You don’t have to build that chain from scratch. Hold Alt (Option on Mac), then click and drag the smart filters icon from the template’s base layer directly onto your bottom photo layer. The Alt key tells Photoshop to copy rather than move. You’ll see a small icon indicating the duplication is happening. Repeat the same process to copy the filters to your top Lighten layer.
Step 5: Adjust the Smart Filters for Your Specific Image
 Motion Blur dialog open with Distance and Angle fields visible
Click the arrow next to the smart filters stack on either layer to expand it. Every filter in the chain is listed and can be toggled on or off independently. The one you’ll most likely want to dial in is Motion Blur. Double-click it to open the settings dialog. The two controls to focus on are Distance (how far the blur stretches) and Angle (the direction it travels). A subtle horizontal blur reads as a camera pan; increase the distance for a more dramatic effect or pull it back for something more restrained. There’s no universal right setting here, it depends entirely on your image and how much motion you want to sell.
Step 6: Reduce Opacity on the Lighten Layer to Taste
 Lighten layer opacity being adjusted to approximately 50 percent
Once your filters are adjusted, bring down the opacity of the top Lighten layer. Aaron drops his to around 50% in the tutorial, and that’s a reasonable starting point. Lowering the opacity controls how much of that glowing blur blends into the image. Toggle the layer on and off while you adjust to see the before and after. When the effect stops looking like a filter and starts looking like a choice, you’re in the right range.
A Note on Making This Your Own
The template gives you a solid starting point, but the noise filter is worth experimenting with specifically. The default settings add uniform noise, which reads as film grain in a general sense. If you want something that feels more like a specific film stock, try switching the noise distribution from Uniform to Gaussian inside the filter settings. Gaussian noise has more variation and tends to feel less digital. I also like reducing the strength of the Levels adjustment for photos that are already well-exposed, since the template’s default is calibrated for a broad range of inputs and can feel heavy-handed on images that don’t need much of a push.
The core lesson here is that non-destructive workflows aren’t just a best practice for organized professionals. They’re what lets you actually iterate. When every filter is live and every setting is double-clickable, you can revisit a file six months later and make a genuine change instead of starting over. That’s the habit worth building, and this particular template makes it easy to see it in action.
Watch the full tutorial on YouTube to grab the free PSD template and sample images from PHLEARN’s site.
Comments
Leave a Comment