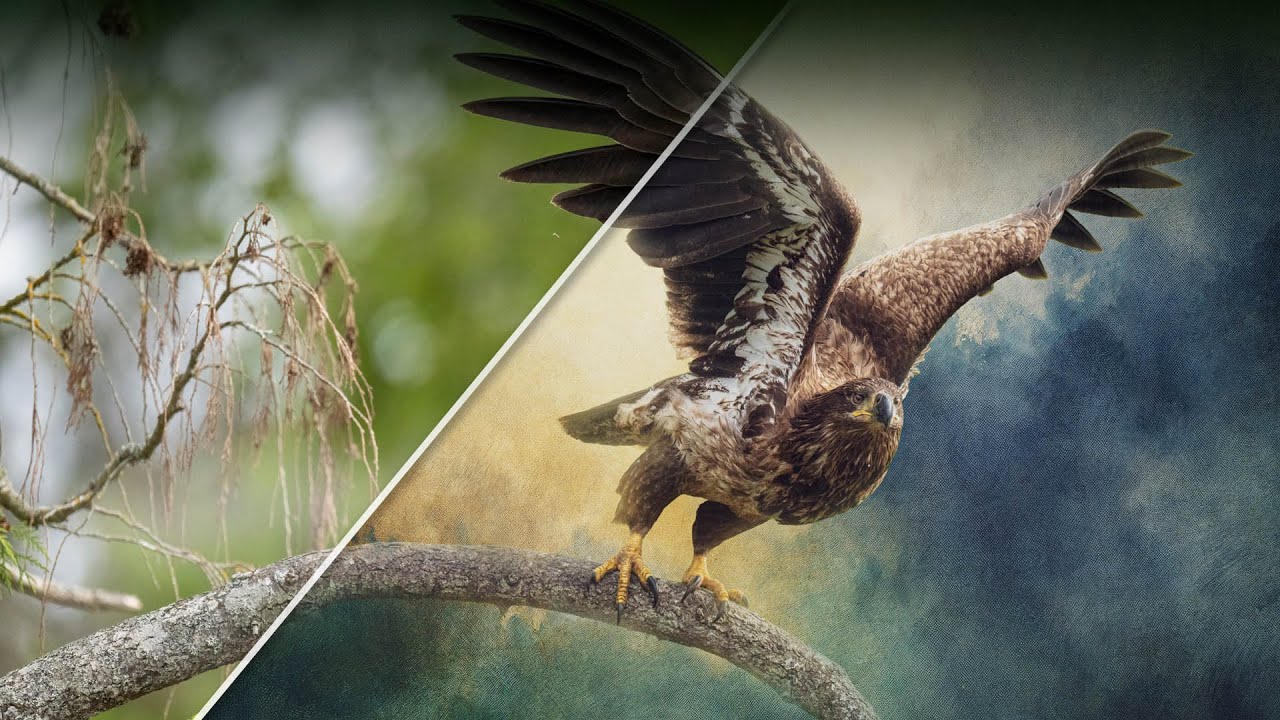
I have a hard drive full of photographs that are technically fine and creatively dead. A pelican I shot at golden hour with bad composition. A barn I pulled over for on a road trip outside of Austin, caught in the flattest midday light imaginable. A motorcycle at a car show, surrounded by other people’s shoulders and styrofoam cups. These aren’t bad photos exactly, they just have no reason to exist as finished work. For years they sat in a folder I called “maybe someday,” which is basically a folder called “never.”
Then I came across Matt Kloskowski’s texture blending technique, and honestly it cracked open a whole different way of thinking about those images. Watch the full tutorial on YouTube before or after reading this, but if you want a step-by-step you can follow without pausing and rewinding every 30 seconds, keep going. The core idea is this: you take a subject photo, layer one or two textures underneath it, and then use masking to blend the subject into the textures in a way that feels intentional rather than slapped together. It’s a composite, no question, but it’s one with a specific visual logic that makes even a mediocre source photo feel like a finished piece.
Matt mentions he reverse-engineered this from a single image he saw years ago. I respect that deeply. Half of what I know about Photoshop came from staring at something and asking “how did they do that” long enough that it eventually made sense.
Step 1: Set Up Your Layers
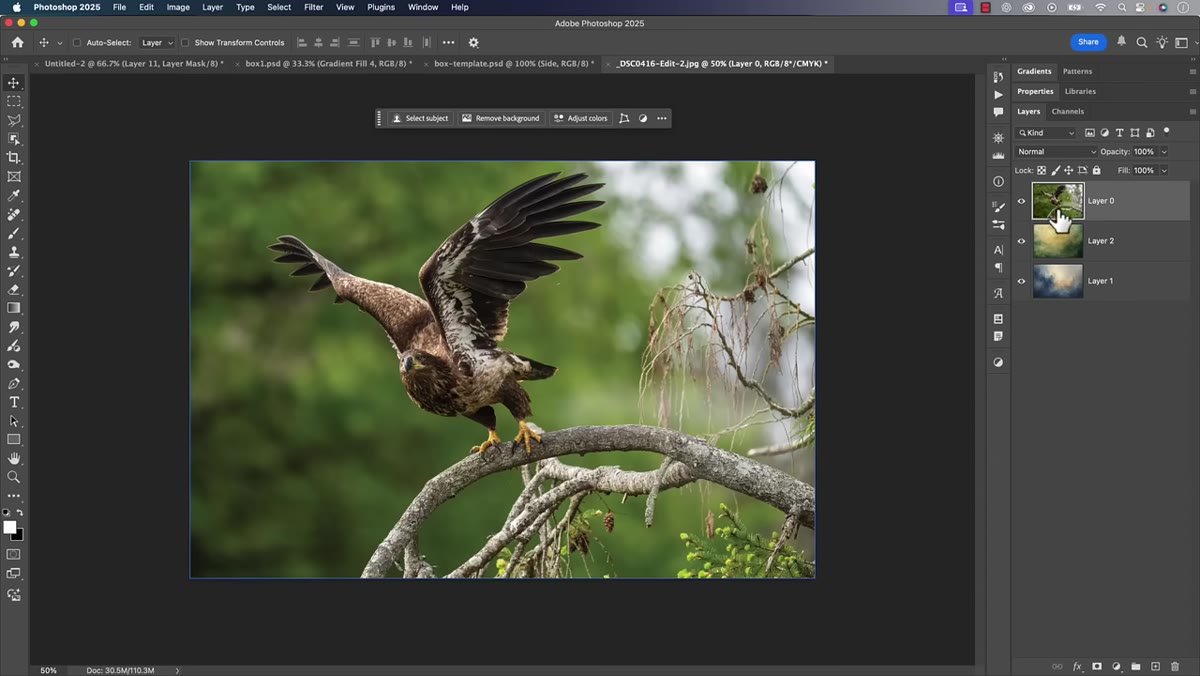 Photoshop document open showing two texture layers and subject photo layer stacked
Start with three layers in a single Photoshop document. Two texture photos sit at the bottom of the stack, and your subject photo goes on top. The textures can be anything with visual interest, abstract surfaces, weathered wood, cracked paint, aged metal. The subject should be something with a clear silhouette, animals, vehicles, and birds all work well for this.
Photoshop document open showing two texture layers and subject photo layer stacked
Start with three layers in a single Photoshop document. Two texture photos sit at the bottom of the stack, and your subject photo goes on top. The textures can be anything with visual interest, abstract surfaces, weathered wood, cracked paint, aged metal. The subject should be something with a clear silhouette, animals, vehicles, and birds all work well for this.
Sizing matters here. Resize everything before you start masking, because rearranging layers mid-process is a headache you don’t need. Use Free Transform (Ctrl/Cmd+T) to fit each layer to your canvas. There’s no single correct arrangement for which texture goes on which layer, but Matt’s default puts the subject photo on top, which keeps the masking logic straightforward.
Step 2: Remove the Background with One Click
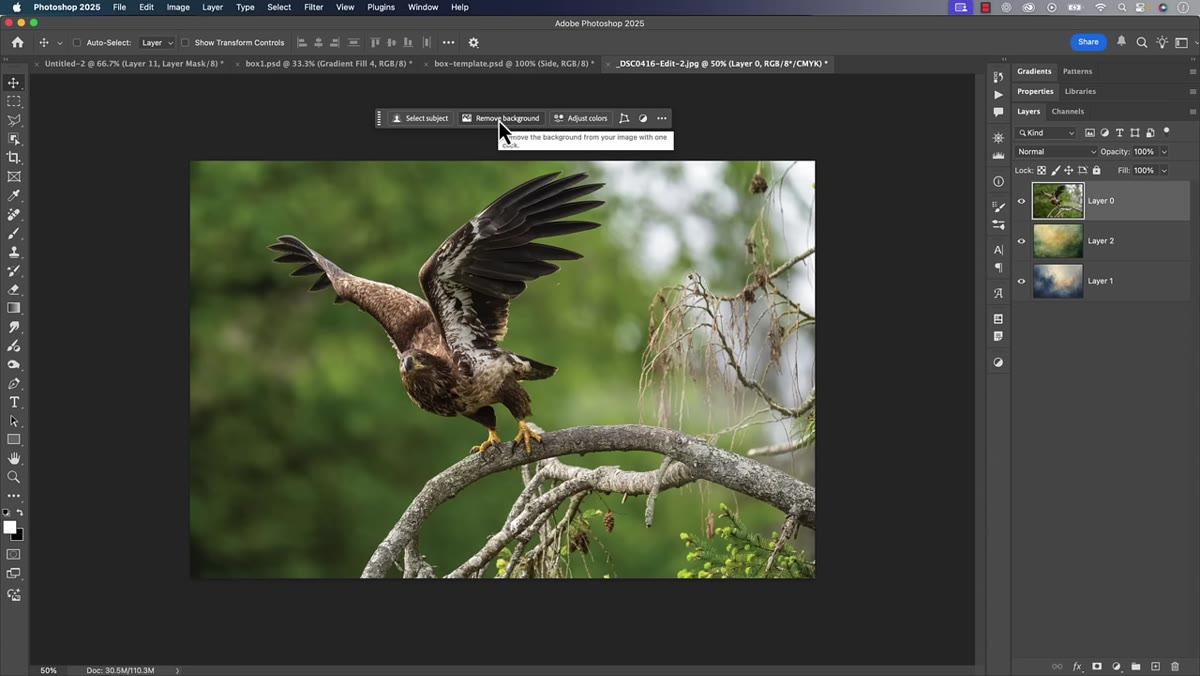 Contextual taskbar showing Remove Background button highlighted
Click on your subject layer to make it active, then look for the contextual taskbar that floats near the bottom of your canvas. Hit “Remove Background.” Photoshop’s AI does the heavy lifting here, isolating your subject and automatically generating a layer mask in the process.
Contextual taskbar showing Remove Background button highlighted
Click on your subject layer to make it active, then look for the contextual taskbar that floats near the bottom of your canvas. Hit “Remove Background.” Photoshop’s AI does the heavy lifting here, isolating your subject and automatically generating a layer mask in the process.
This is the part where a lot of people would manually select the subject, invert the selection, and delete. Don’t do that. Using Remove Background keeps the mask as a mask rather than permanently deleting pixels, which means you can paint back in parts of the original background later. That’s not a nice-to-have, it’s actually central to the whole technique.
Step 3: Set Up Your Brush for Mask Painting
 Brush settings panel open showing hardness at zero and flow controls
Press B to grab the Brush tool, then open the brush picker at the top. Two settings are non-negotiable here. Hardness goes to zero. Every time, no exceptions. A hard-edged brush on a mask looks like you cut your subject out with scissors, and that will destroy the effect you’re going for. You want a fully feathered, soft-edged brush.
Brush settings panel open showing hardness at zero and flow controls
Press B to grab the Brush tool, then open the brush picker at the top. Two settings are non-negotiable here. Hardness goes to zero. Every time, no exceptions. A hard-edged brush on a mask looks like you cut your subject out with scissors, and that will destroy the effect you’re going for. You want a fully feathered, soft-edged brush.
The second setting is Flow, not Opacity. Flow controls how much paint builds up with repeated strokes, which gives you gradual, controllable transitions. Keep it somewhere in the low-to-mid range and build up coverage slowly. If you’re working with a pen tablet, pressure sensitivity can do a lot of this work for you automatically. On a trackpad or mouse, Flow is your main lever for staying in control.
Step 4: Reveal Background Elements Through the Mask
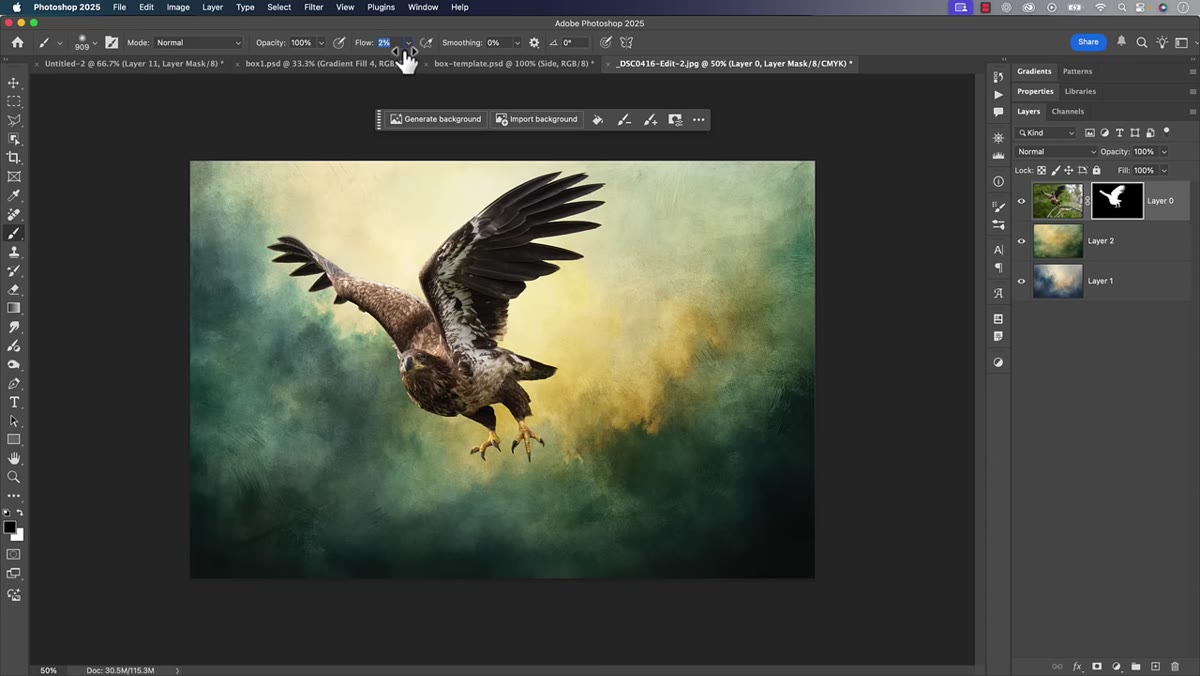 Bird photo with branch being painted back in on the layer mask
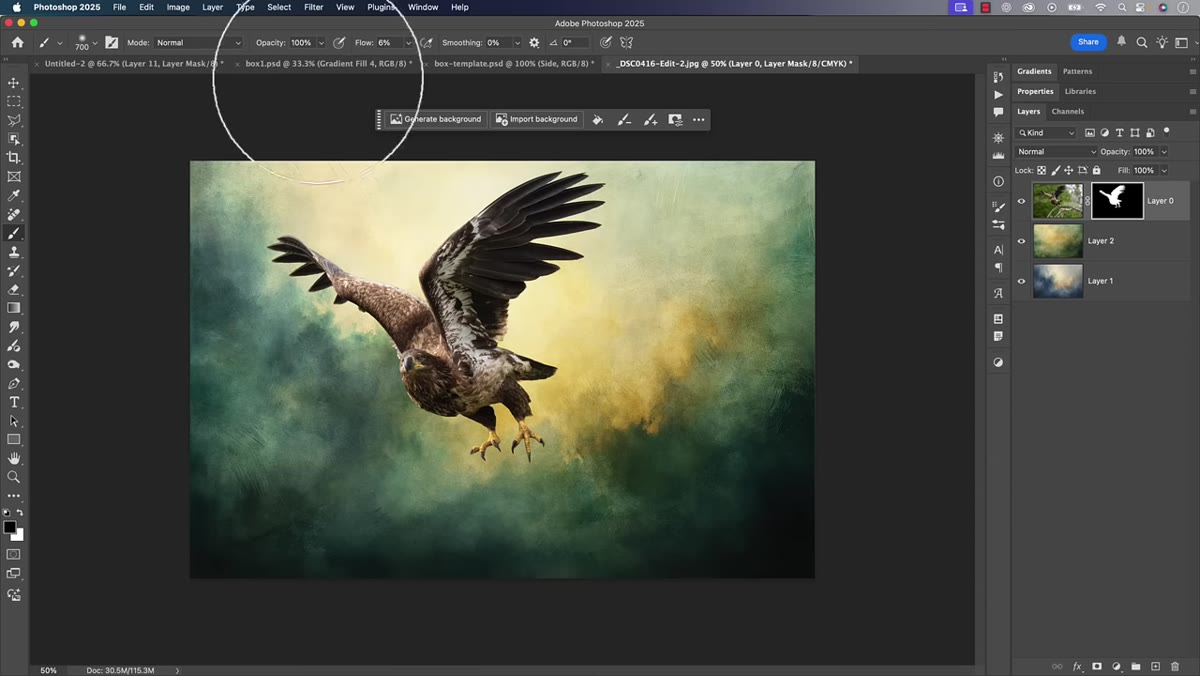
Here’s where the technique stops being just “cut out a subject” and becomes something more interesting. Make sure your subject’s layer mask is selected (click directly on the mask thumbnail in the Layers panel), set your foreground color to white, and start painting back in parts of the original background.
Bird photo with branch being painted back in on the layer mask
Here’s where the technique stops being just “cut out a subject” and becomes something more interesting. Make sure your subject’s layer mask is selected (click directly on the mask thumbnail in the Layers panel), set your foreground color to white, and start painting back in parts of the original background.
The goal is to connect your subject to something. A bird floating in mid-air against a texture looks like an accident. A bird sitting on a branch that fades into the texture looks intentional. Paint back the branch, or the ground, or the ledge, or whatever your subject was resting on in the original photo. Use a large brush and low Flow to bring these elements back gradually so they blend into the texture layers underneath rather than appearing as hard-edged chunks of the original background. Zoom out regularly to check how the overall image is reading.
Step 5: Refine the Subject Edges
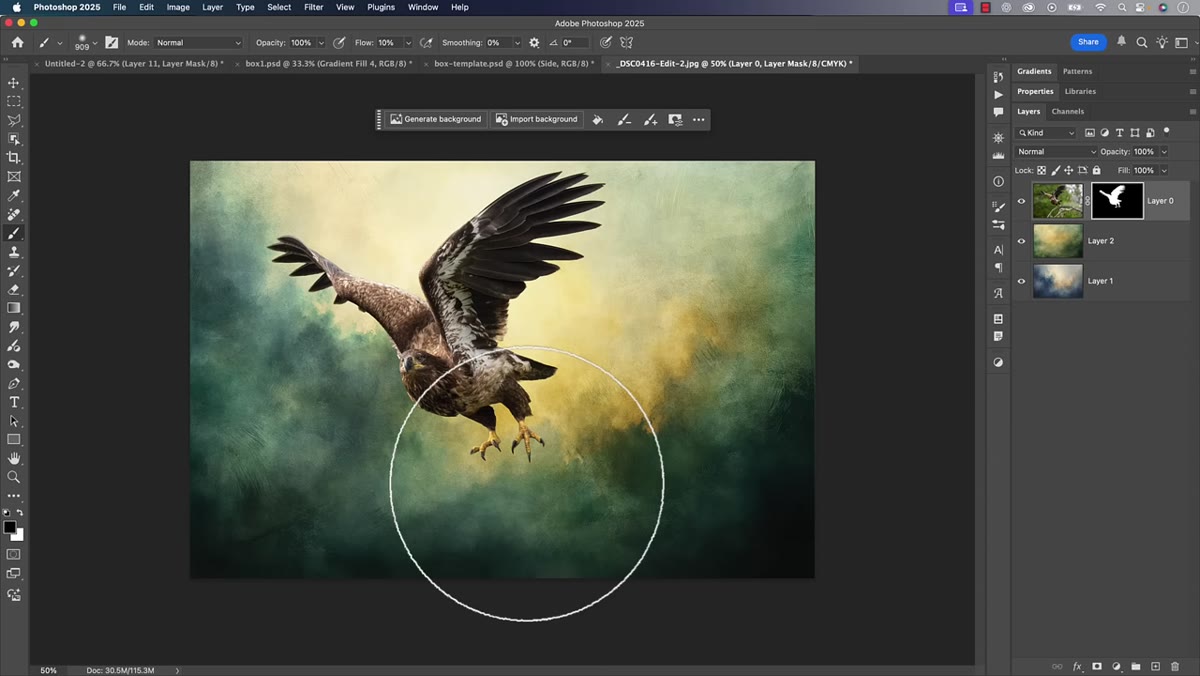 Mask being refined around the bird’s feathers with a smaller brush
Switch to a smaller brush and go around the edges of your subject with the same zero-hardness, low-Flow setup. You’re not cleaning up the mask like you would for a product photo or a clean cutout. You’re deliberately softening the boundary between subject and texture so the two feel like they exist in the same space.
Mask being refined around the bird’s feathers with a smaller brush
Switch to a smaller brush and go around the edges of your subject with the same zero-hardness, low-Flow setup. You’re not cleaning up the mask like you would for a product photo or a clean cutout. You’re deliberately softening the boundary between subject and texture so the two feel like they exist in the same space.
Paint with black to hide parts of the subject where the transition feels too sharp. Paint with white to recover detail you’ve accidentally hidden. The X key toggles between foreground and background colors, which makes switching between hide and reveal fast. Don’t aim for a clean edge. Aim for an edge that feels like it belongs.
What I’d Add From My Own Experience
The tutorial uses a bird on a branch, which is a forgiving subject because feathers have a naturally soft, irregular edge that plays nicely with textures. When I tried this on a motorcycle, the hard chrome surfaces created transitions that looked unnatural unless I pushed the brush Flow down much lower than I expected, around 10-15%, and made many more passes.
Also worth experimenting with: blend modes on the texture layers. Matt keeps things clean in the tutorial, but dropping the bottom texture layer to Multiply or Overlay can create color interactions between your textures and subject that push the whole thing in a more painterly direction. Start with the technique exactly as shown, then pull on that thread once you’ve got the core process down.
The single most important thing this technique taught me is that a throwaway photo isn’t necessarily a throwaway photo. It’s sometimes just missing context, and texture blending is a way of creating new context from scratch. If you’ve got a drive full of “maybe someday” images, this is a genuinely good reason to dig them out.
Watch the full tutorial on YouTube to see Matt walk through the entire process with his own images. His pacing is good and he explains his reasoning as he goes, which is how you actually learn a technique rather than just copy a result.
Comments (4)
The tip about how to blend textures into pho was the missing piece for me. Thank you.
Been doing this wrong for years apparently. Thanks for the wake-up call.
Solid advice. Especially the part about taking your time with it.
Well explained. I think my audience would really benefit from this — mind if I link to it?
Leave a Comment