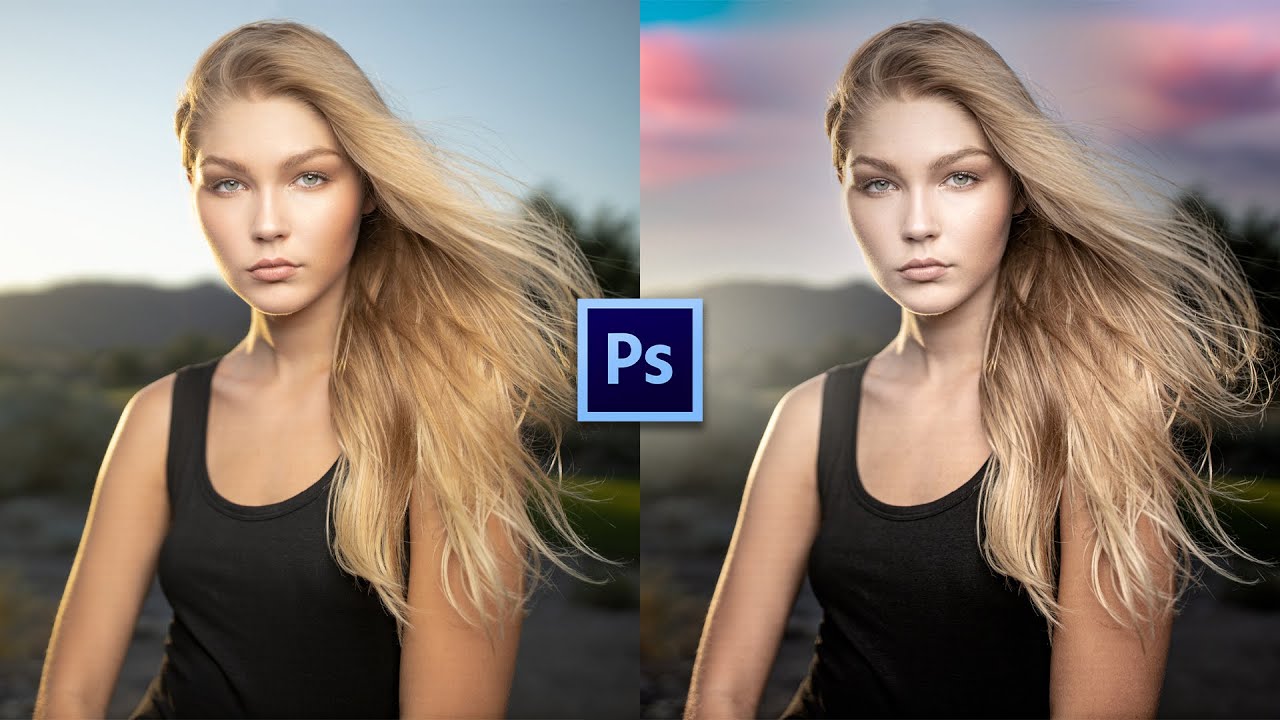
There’s a specific kind of disappointment that hits when you’ve got a technically solid portrait shot outdoors, good light on the subject, decent exposure, sharp eyes, and then you look at the background and it’s just… a flat blue nothing. The subject is doing all the heavy lifting and the rest of the image is coasting. I’ve sent images like that to clients and watched them nod politely. You know the nod. The “it’s fine” nod.
That’s exactly the problem Joel Grimes tackles in this tutorial, and he does it with a workflow that’s fast enough to actually use on real jobs. Watch the full tutorial on YouTube before or after reading this, because seeing his final result in motion is worth your time. Joel is a working commercial advertising photographer with nearly four decades of shoots behind him, and that experience shows in how deliberately he makes every decision. Nothing in his process is arbitrary.
The source image he’s working with is a portrait of a model named Faith, shot at the end of the day with a 1.2 aperture lens wide open. Extremely shallow depth of field, beautiful subject, but a plain sky that’s doing nothing for the mood. What follows is a three-part finishing workflow: sky replacement, background blur matching the optical reality of the shot, and sun streaks to sell the lighting. Here’s how each piece works.
Step 1: Duplicate Your Base Layer Before Anything Else
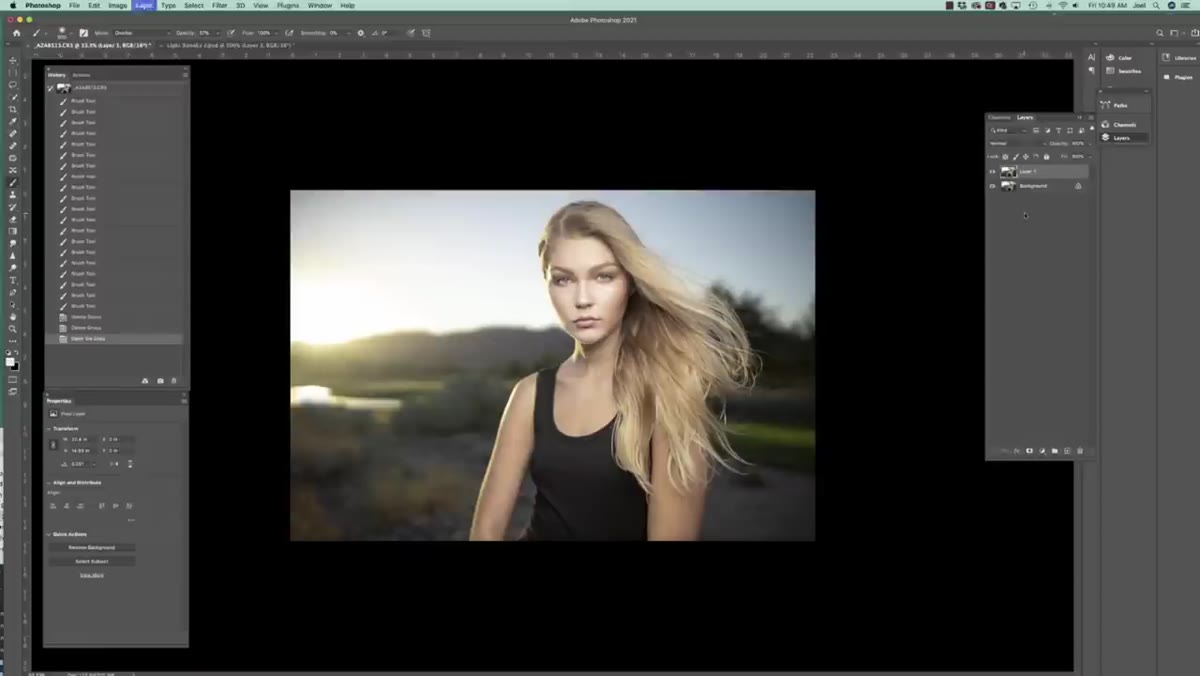 Joel hitting Command J to duplicate the base layer
Before touching a single pixel, hit Command+J (Ctrl+J on Windows) to duplicate your working layer. This isn’t just good hygiene, it’s the whole foundation of being able to back out of anything that goes sideways. Joel does this automatically, and if you’re the kind of person who skips this step and then regrets it twenty minutes later, well, I’ve been that person. It’s not fun. Keep your original locked and untouched at the bottom of the stack.
Joel hitting Command J to duplicate the base layer
Before touching a single pixel, hit Command+J (Ctrl+J on Windows) to duplicate your working layer. This isn’t just good hygiene, it’s the whole foundation of being able to back out of anything that goes sideways. Joel does this automatically, and if you’re the kind of person who skips this step and then regrets it twenty minutes later, well, I’ve been that person. It’s not fun. Keep your original locked and untouched at the bottom of the stack.
Step 2: Use Photoshop’s Sky Replacement Tool as a Starting Point
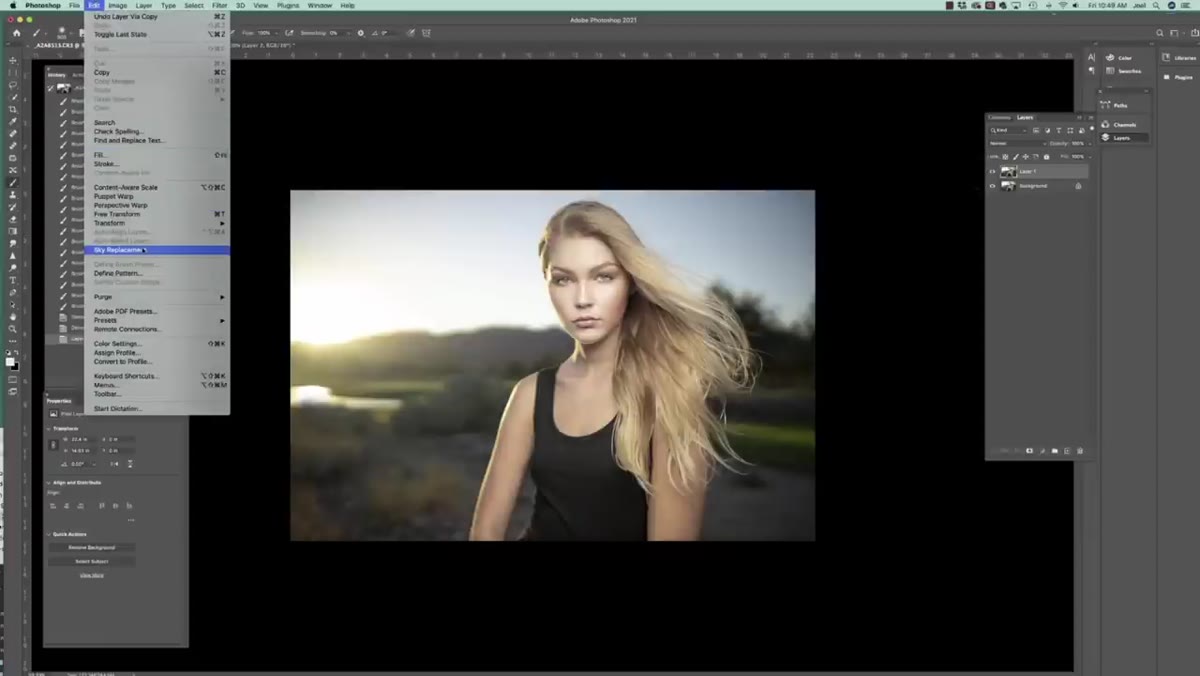 Sky Replacement dialog opening with automatic mask generating
Go to Edit > Sky Replacement. Photoshop will automatically generate a mask to isolate the sky and drop in a replacement. The first result is almost certainly going to look wrong, and that’s fine. Think of the auto result as a rough draft, not a finished product. The tool is doing the heavy lifting on masking, which is genuinely impressive, but the default sky choices tend to be either too dramatic or too generic for a specific shot.
Sky Replacement dialog opening with automatic mask generating
Go to Edit > Sky Replacement. Photoshop will automatically generate a mask to isolate the sky and drop in a replacement. The first result is almost certainly going to look wrong, and that’s fine. Think of the auto result as a rough draft, not a finished product. The tool is doing the heavy lifting on masking, which is genuinely impressive, but the default sky choices tend to be either too dramatic or too generic for a specific shot.
Joel skips the built-in sky presets almost immediately and loads his own custom sky images instead. You can do the same by clicking the sky thumbnail dropdown inside the dialog, then clicking the gear icon to load your own folder of sky images. If you’re shooting portraits with outdoor backgrounds regularly, building a personal library of quality sky photos is absolutely worth doing. Joel offers his own sky files as a free download linked from the video, which is a solid starting point if you don’t have your own yet.
Step 3: Flip the Sky to Match Your Light Source
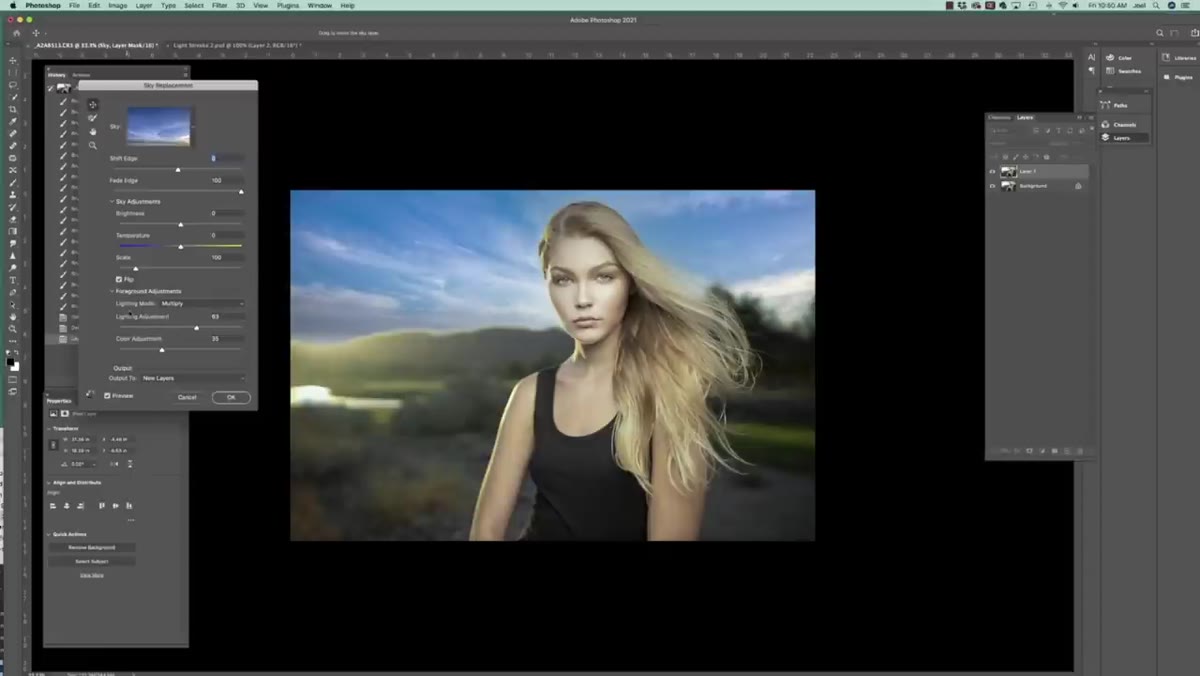 Flip checkbox enabled to mirror sky direction in the dialog
Here’s the detail that separates a believable composite from one that looks obviously pasted together: the light in your sky needs to match the direction of light on your subject. Joel’s model is lit from a specific side, and the sky he brings in has the sun on the wrong side. Inside the Sky Replacement dialog there’s a flip option. Use it. It takes two seconds and it’s the difference between a client saying “nice” and a client saying “something feels off but I can’t explain why.” They can’t explain it because they’re not thinking about light direction consciously, but their eyes are.
Flip checkbox enabled to mirror sky direction in the dialog
Here’s the detail that separates a believable composite from one that looks obviously pasted together: the light in your sky needs to match the direction of light on your subject. Joel’s model is lit from a specific side, and the sky he brings in has the sun on the wrong side. Inside the Sky Replacement dialog there’s a flip option. Use it. It takes two seconds and it’s the difference between a client saying “nice” and a client saying “something feels off but I can’t explain why.” They can’t explain it because they’re not thinking about light direction consciously, but their eyes are.
Take a minute to look at where the highlights are falling on your subject’s face and hair, then make sure the brightest part of the sky is coming from that same general direction. It doesn’t have to be mathematically precise, but it needs to feel consistent.
Step 4: Accept That the Sky Won’t Perfectly Match Your Lens Blur
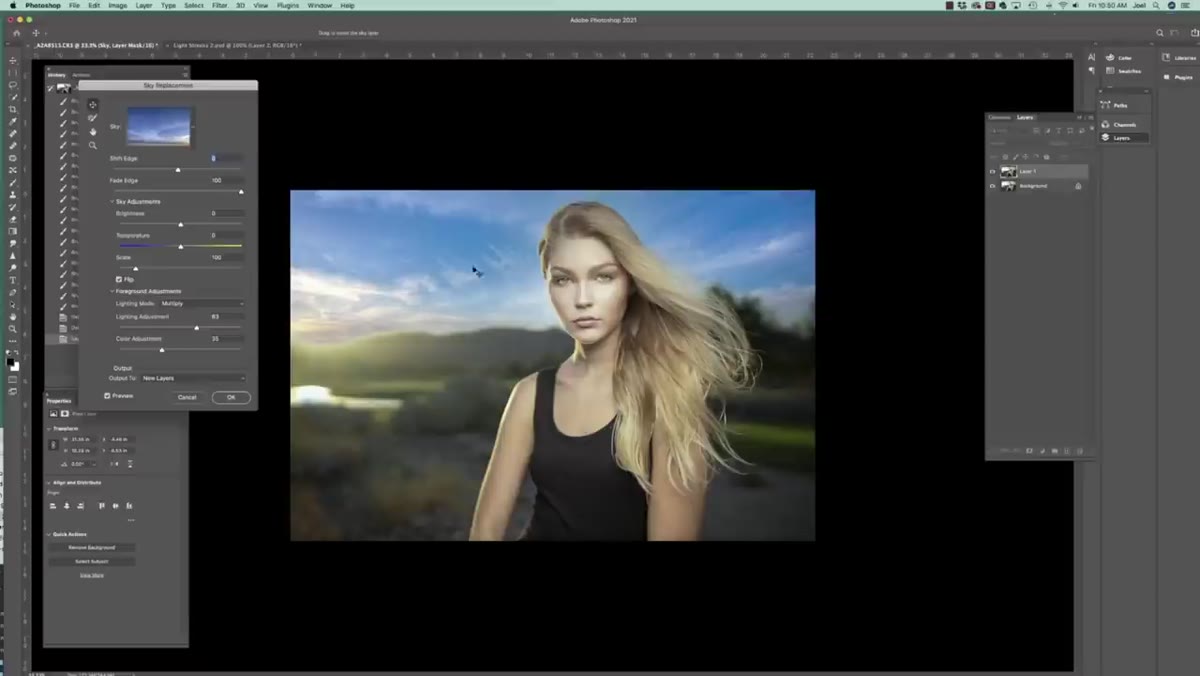 Sharp sky background contrasting with shallow depth of field portrait
This is the step most tutorials gloss over, and Joel addresses it directly. When you shoot at f/1.2, basically only the subject’s eyes are in sharp focus. Everything behind them is a soft blur. But a replaced sky drops in at full sharpness, and now you’ve got a tack-sharp dramatic cloudscape behind a dreamy, soft portrait. It looks wrong because it is wrong, optically speaking.
Sharp sky background contrasting with shallow depth of field portrait
This is the step most tutorials gloss over, and Joel addresses it directly. When you shoot at f/1.2, basically only the subject’s eyes are in sharp focus. Everything behind them is a soft blur. But a replaced sky drops in at full sharpness, and now you’ve got a tack-sharp dramatic cloudscape behind a dreamy, soft portrait. It looks wrong because it is wrong, optically speaking.
The fix is to blur the sky layer separately to approximate the bokeh characteristics of the original shot. Joel walks through how he handles this to make the composite feel like a single image rather than two separate photographs stacked on top of each other. The blur amount isn’t one-size-fits-all. It depends on your aperture, focal length, and how far the background was from your subject during the original shot. Start subtle and increase until it stops looking like a stock photo and starts looking like your photo.
Step 5: Drop in Sun Streaks to Sell the Light
 Sun streak overlay file being demonstrated on the image
This is the trick I genuinely didn’t know existed before watching this tutorial. Joel has created a set of sun streak overlays in Photoshop, basically stylized lens flare and light ray elements saved as layered files, that you drop directly onto your composite. They’re also available as a free download linked from the video.
Sun streak overlay file being demonstrated on the image
This is the trick I genuinely didn’t know existed before watching this tutorial. Joel has created a set of sun streak overlays in Photoshop, basically stylized lens flare and light ray elements saved as layered files, that you drop directly onto your composite. They’re also available as a free download linked from the video.
The key is blending mode. These overlays work on Screen or Lighten mode so the dark areas disappear and only the light elements show through. Position them so the streaks appear to be coming from the same direction as your sky’s light source. Scale them down or up depending on your image dimensions. When they’re placed right, they add a quality of light that makes the whole image feel like it was shot at golden hour even if the original was flat afternoon sun.
What I’d Add From My Own Experience
Joel’s workflow is clean and fast, which is why it actually gets used on real projects. The one thing I’d layer on top of it: do your frequency separation pass on the subject before you start the sky work. Joel mentions he already did this on Faith’s portrait before the tutorial begins. The reason it matters is that once you start adjusting the overall color temperature and tone to match your new sky, you want your subject’s skin to be sitting cleanly on its own layer so you can shift it independently. If the new sky runs cooler or warmer than your original ambient light, you need that flexibility. Doing it after the fact means fighting with selections while also trying to match tones across two completely different image sources. Front-loading the skin cleanup makes everything downstream easier.
The single most important takeaway from Joel’s approach is that finishing is its own skill, separate from shooting and separate from basic retouching. Knowing how to take a technically correct image and turn it into something that actually commands attention is what separates work people scroll past from work people stop for. His three-step system, replace the sky, match the blur to your optics, and add directional light elements, is repeatable enough that you can build it into a template and apply it consistently.
Watch the full tutorial on YouTube to see the before and after in full, and grab the free sky and sun streak files Joel links in the video description while you’re there.
Comments (1)
Applied this to my portfolio shots and the improvement is noticeable.
Leave a Comment