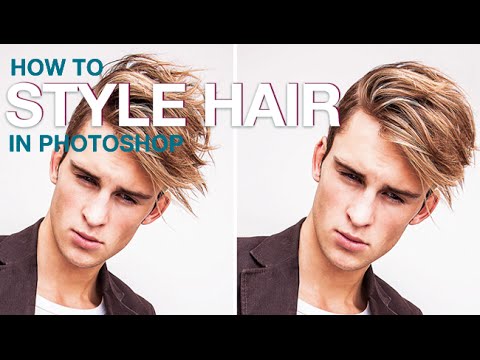
Hair is the one thing that can make a technically perfect portrait look like a disaster. You nail the lighting, the expression is great, the skin looks clean – and then there’s one rogue strand doing its own thing right across the subject’s face. Or the whole silhouette just looks a little… collapsed. I’ve lost count of how many times I’ve sat at my laptop in a coffee shop, staring at a portrait, wondering whether I should go back and reshoot or just fix it in post. Nine times out of ten, fixing it in post is the right call.
In this Aaron Nace tutorial from PHLEARN, the workflow breaks down into three clean phases: reshaping the overall silhouette with Liquify, cleaning up stray hairs, and filling in sparse areas with painted detail. It sounds like a lot, but each step builds on the last, and the tools involved are ones you probably already have open. The technique works on any portrait where the hair needs a little editorial polish – not a full makeover, just the difference between “candid snapshot” and “intentional photograph.”
Step 1: Duplicate Your Background Layer First
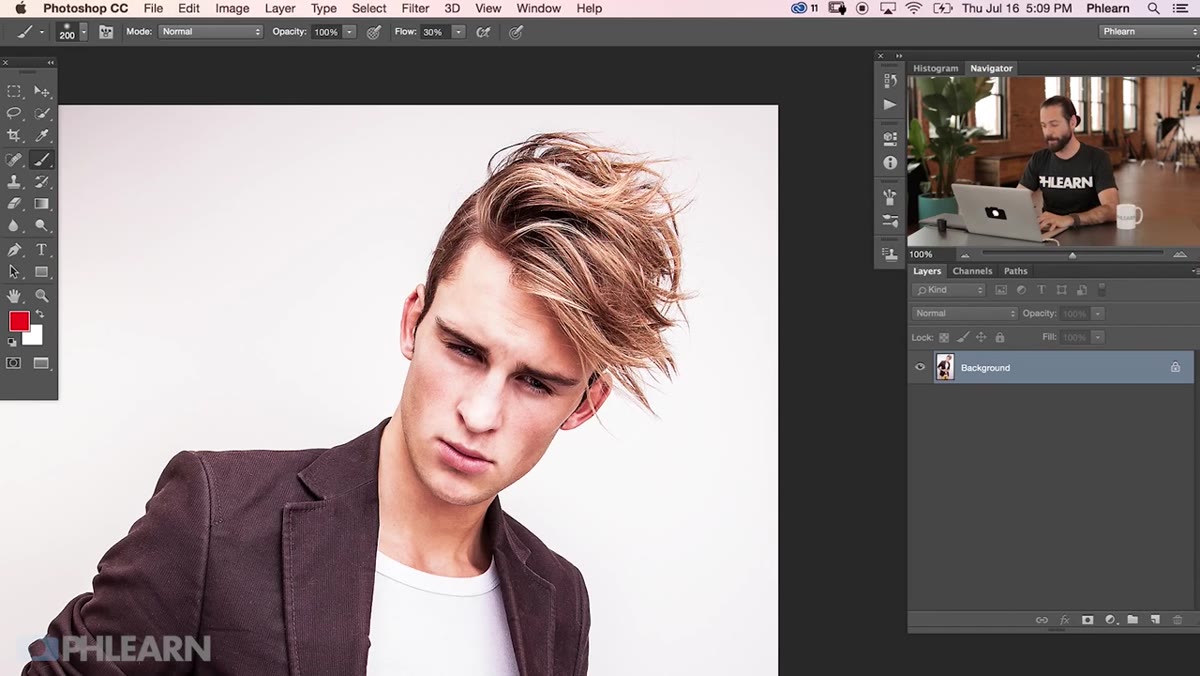 Duplicating background layer with keyboard shortcut
Before you touch anything, duplicate your background layer. Press Ctrl+J (or Cmd+J on Mac) and work on that copy. This is non-negotiable. Liquify is destructive – once you push pixels around and hit OK, you can’t go back without a history state or a preserved original. Keeping your background layer intact means you always have a clean fallback, and it costs you literally two seconds.
Duplicating background layer with keyboard shortcut
Before you touch anything, duplicate your background layer. Press Ctrl+J (or Cmd+J on Mac) and work on that copy. This is non-negotiable. Liquify is destructive – once you push pixels around and hit OK, you can’t go back without a history state or a preserved original. Keeping your background layer intact means you always have a clean fallback, and it costs you literally two seconds.
Name the duplicate something useful like “Liquify” or “Hair Shape” so future-you doesn’t spend three minutes trying to figure out which layer is which.
Step 2: Open Liquify and Set Up Your Brush
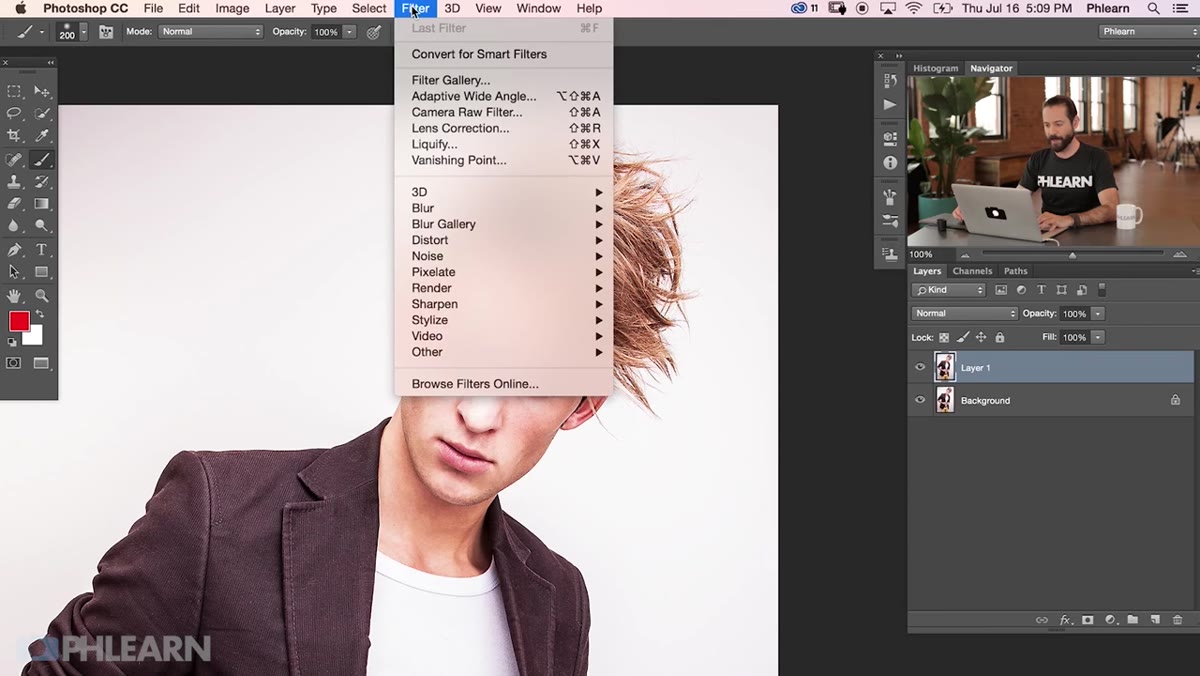 Liquify dialog box open with Forward Warp tool selected
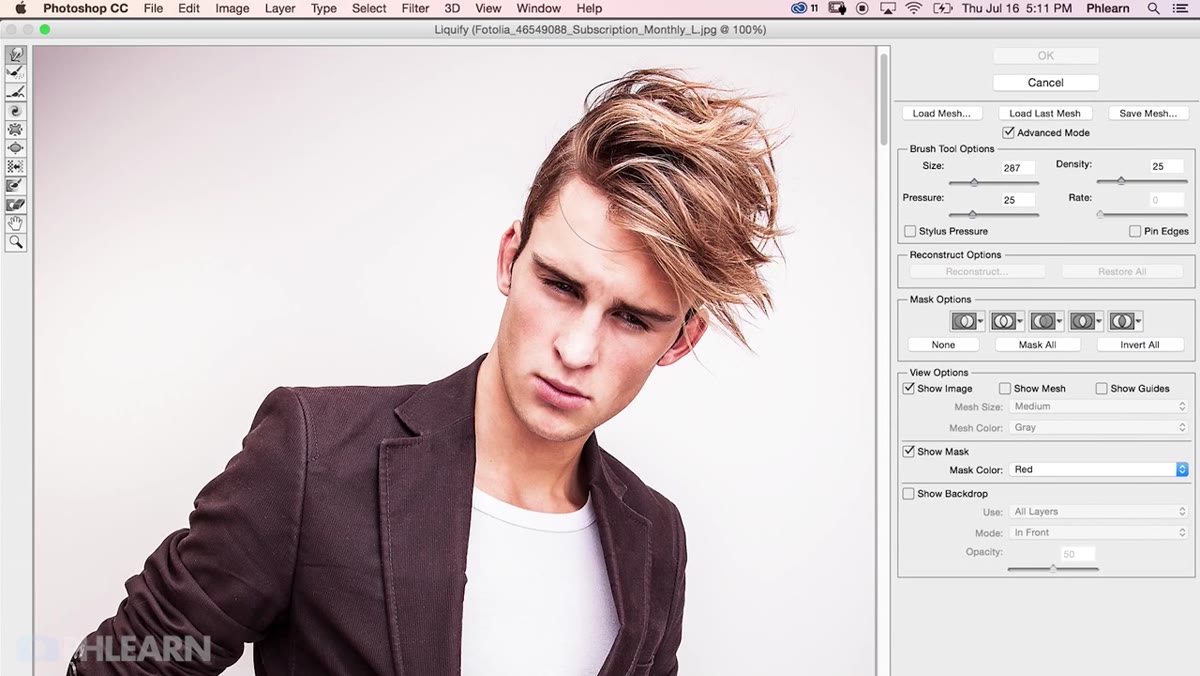
Go to Filter > Liquify. When the dialog opens, select the Forward Warp tool – it’s the top-left icon and looks like a pointing finger. This is the only tool you’ll need for reshaping hair. Ignore the rest of the panel for now.
Liquify dialog box open with Forward Warp tool selected
Go to Filter > Liquify. When the dialog opens, select the Forward Warp tool – it’s the top-left icon and looks like a pointing finger. This is the only tool you’ll need for reshaping hair. Ignore the rest of the panel for now.
If you’re not seeing the full set of brush options, check the “Advanced Mode” box. Once that’s on, you’ll have access to Size, Pressure, Density, and Rate. Aaron recommends keeping Pressure and Density both around 25. This is the key setting most people get wrong – they crank up the pressure and then wonder why everything looks smeared. Lower pressure means more control, more gradual movement, and results that actually look like hair instead of melted plastic.
For brush size, go slightly bigger than you think you need. A brush that’s too small creates choppy, uneven pushes. You can resize on the fly by holding Ctrl+Alt (or Cmd+Option on Mac) and dragging left or right.
Step 3: Push and Pull the Hair Into Shape
 Forward Warp tool moving hair strands toward center
Here’s the actual work. Click on a section of hair and drag it in the direction you want it to go. Short, controlled clicks and drags beat long sweeping strokes every time. Think of it less like painting and more like nudging – you’re coaxing pixels, not shoving them.
Forward Warp tool moving hair strands toward center
Here’s the actual work. Click on a section of hair and drag it in the direction you want it to go. Short, controlled clicks and drags beat long sweeping strokes every time. Think of it less like painting and more like nudging – you’re coaxing pixels, not shoving them.
For most portraits, the goal is to pull flyaways inward toward the main body of the hair and smooth out the silhouette so it reads cleanly against the background. Work from the top of the head downward, section by section. Zoom in to at least 100% so you can see what you’re actually doing. If you zoom out and work at 50%, you’re guessing.
Don’t try to do everything in one big drag. Small, repeated movements in the same direction give you a much more natural result. When you’re happy, click OK and compare the before and after – the difference in shape is usually bigger than you expect.
Step 4: Create a New Layer for Cleanup
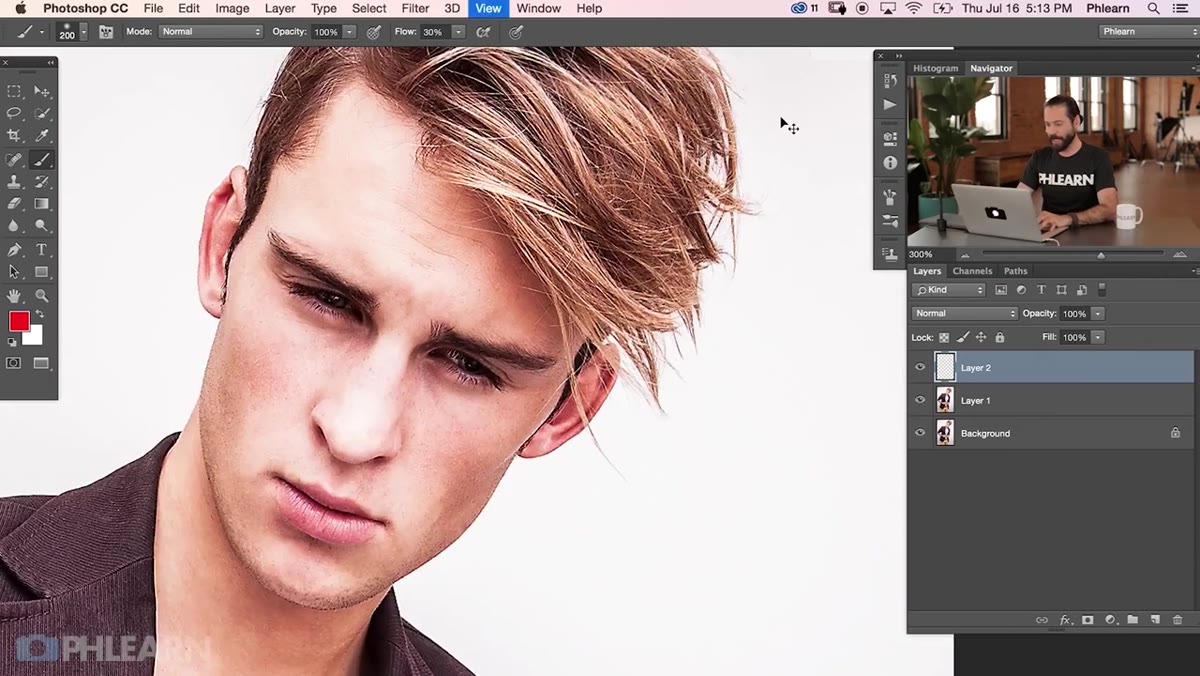 New layer created above Liquify layer for stray hair cleanup
Now you’re into the cleanup phase. Create a new empty layer above your Liquify layer. This is where you’ll handle the small stray hairs – the ones that Liquify can’t really fix because they’re too fine or too isolated to push around cleanly.
New layer created above Liquify layer for stray hair cleanup
Now you’re into the cleanup phase. Create a new empty layer above your Liquify layer. This is where you’ll handle the small stray hairs – the ones that Liquify can’t really fix because they’re too fine or too isolated to push around cleanly.
Working on a separate layer keeps your cleanup non-destructive and lets you dial back the opacity if anything looks too heavy-handed. It also means if you make a mess, you delete the layer and try again without touching anything underneath.
Step 5: Clone and Heal Stray Hairs Away
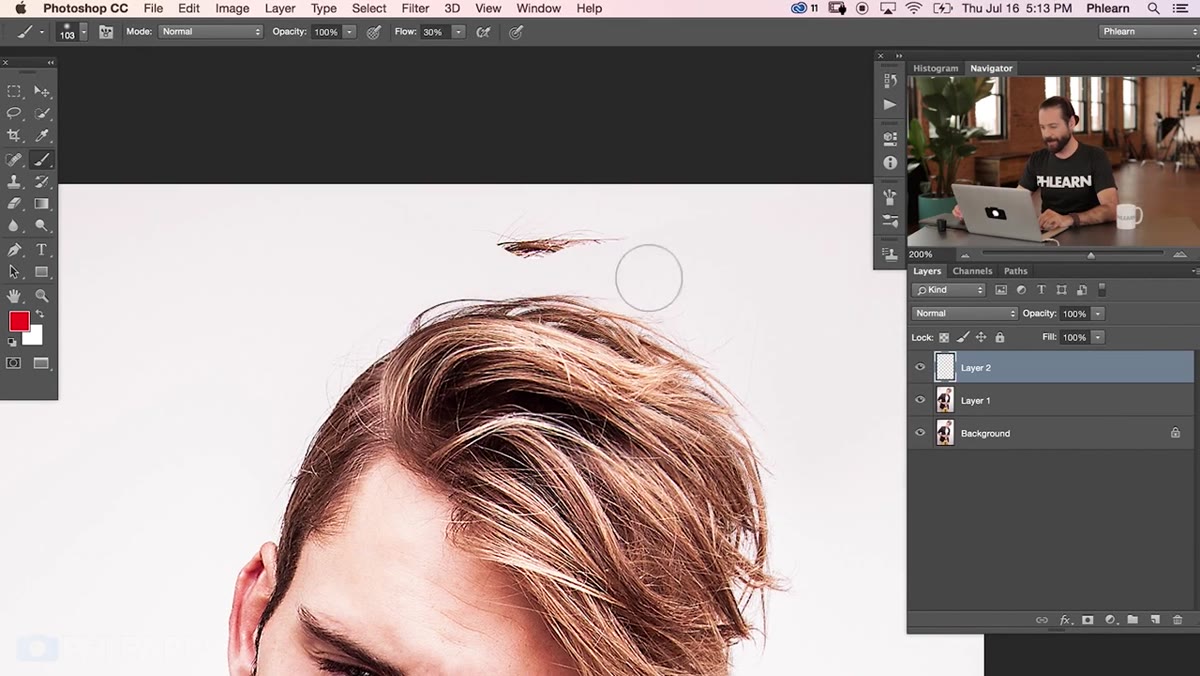 Zoomed in view of stray hairs at the top of the frame
Zoom in tight on the problem areas – usually around the hairline and at the top of the frame where stray hairs tend to escape. Use the Clone Stamp or Healing Brush set to “Current & Below” so you’re sampling from the layers underneath while painting on your clean layer.
Zoomed in view of stray hairs at the top of the frame
Zoom in tight on the problem areas – usually around the hairline and at the top of the frame where stray hairs tend to escape. Use the Clone Stamp or Healing Brush set to “Current & Below” so you’re sampling from the layers underneath while painting on your clean layer.
For stray hairs against a simple background, the Healing Brush is usually faster. For hairs over more complex areas (like another section of hair or clothing), the Clone Stamp gives you more control over exactly what you’re copying. Zoom in far enough that you can see individual strands clearly. Trying to heal a single hair at 25% zoom is how you end up with a blurry smear that looks worse than the original.
Step 6: Paint Hair Into Sparse Areas
 Example of thin or empty hair area that needs added detail
If there are areas where the hair looks thin or patchy, you can actually paint new hair strands in. Create another new layer, grab a small hard brush (somewhere between 1-3px depending on your image size), sample a color from the existing hair, and draw in fine strokes that follow the natural direction of the hair.
Example of thin or empty hair area that needs added detail
If there are areas where the hair looks thin or patchy, you can actually paint new hair strands in. Create another new layer, grab a small hard brush (somewhere between 1-3px depending on your image size), sample a color from the existing hair, and draw in fine strokes that follow the natural direction of the hair.
The trick here is line variation. Real hair doesn’t come out of the head in perfectly uniform strands. Vary your stroke length, curve slightly, and occasionally overlap strokes. Drop the layer opacity to around 70-80% so the painted strands blend with the existing texture instead of sitting on top of it like a drawing.
What I’d Add From My Own Experience
The Liquify step is where most people either win or completely wreck a portrait, and the reason is usually pressure settings. I’ve seen people set pressure to 100 and then wonder why their model looks like a funhouse mirror. The 25/25 pressure and density combination that Aaron uses isn’t arbitrary – it keeps the effect subtle enough that you can stack multiple passes without the distortion becoming obvious.
One thing the tutorial doesn’t cover but I’d recommend: save your Liquify mesh before you hit OK. There’s a “Save Mesh” button in the Liquify dialog. If a client comes back three weeks later wanting a tweak, you can load that mesh back in and adjust instead of starting over from scratch. I learned this after a reshoot situation that could have been avoided entirely.
The big takeaway here is that hair styling in Photoshop is a three-tool job – Liquify for shape, Clone/Heal for cleanup, and a brush for fill. None of these tools are doing anything exotic. The skill is knowing which one to reach for and when. Once you’ve run through this a couple of times, the whole process starts to feel less like retouching and more like editing, which is exactly what it should be.
Watch the full tutorial on YouTube to see Aaron work through the portrait in real time – seeing the before and after on an actual image makes the effect of each step a lot clearer than any description can.
Comments
Leave a Comment