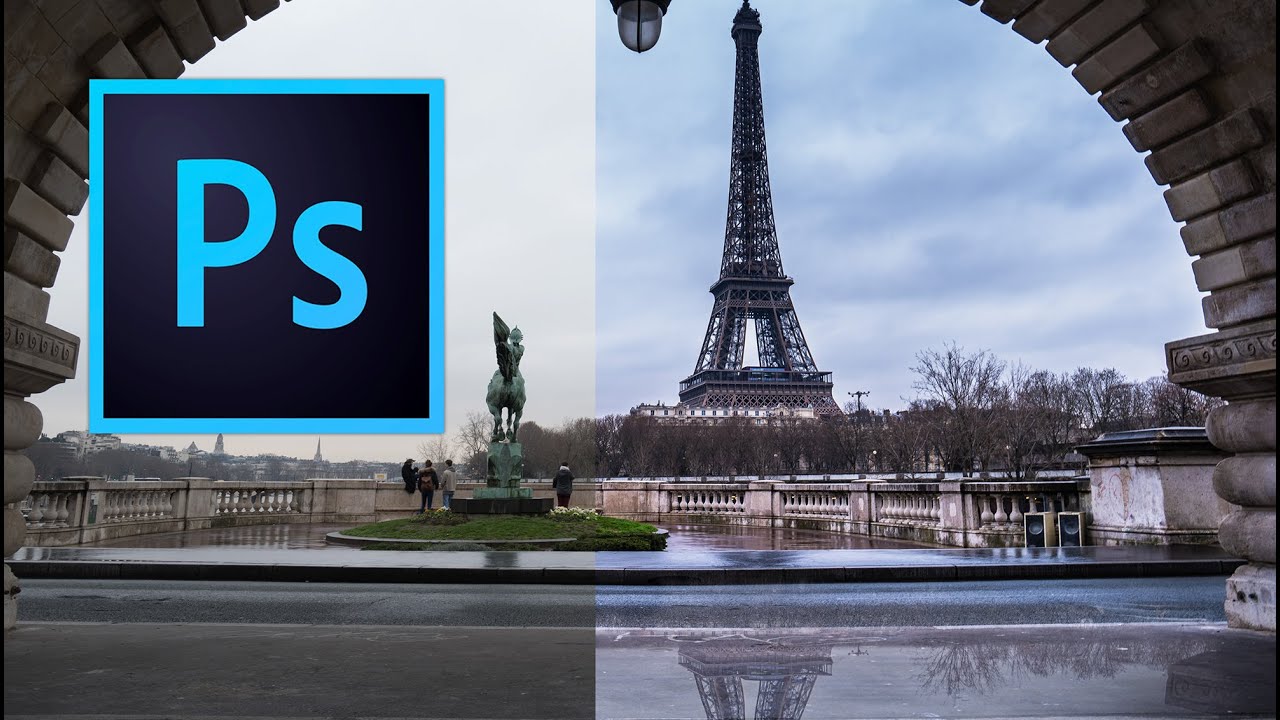
There’s a certain kind of photo that looks fine on its own but becomes genuinely cinematic with one extra ingredient: a puddle reflection. You’ve seen it. The city street shot where the skyline doubles itself in a millimeter of rainwater. The architecture photo that suddenly has atmosphere. That effect used to feel like something only people with actual rain and actual puddles could pull off. Turns out, you can fake it entirely in Photoshop, and fake it convincingly.
I stumbled onto Watch the full tutorial on YouTube from Kelvin Designs while looking for a way to rescue a flat architectural shot I’d delivered to a client that, honestly, needed more drama than the overcast London sky had provided. The technique Kelvin walks through is practical, not precious. It uses tools you already know, just in a sequence that actually works. Here’s how to follow along.
Step 1: Open Your Raw File as a Smart Object in Camera Raw
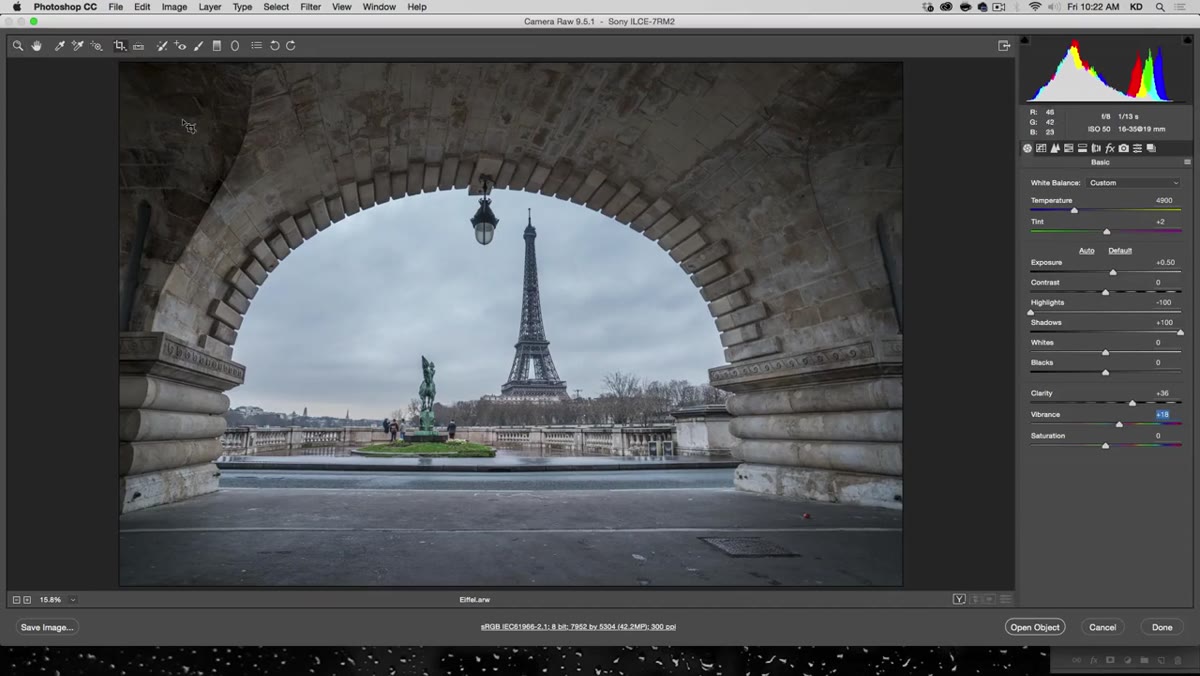
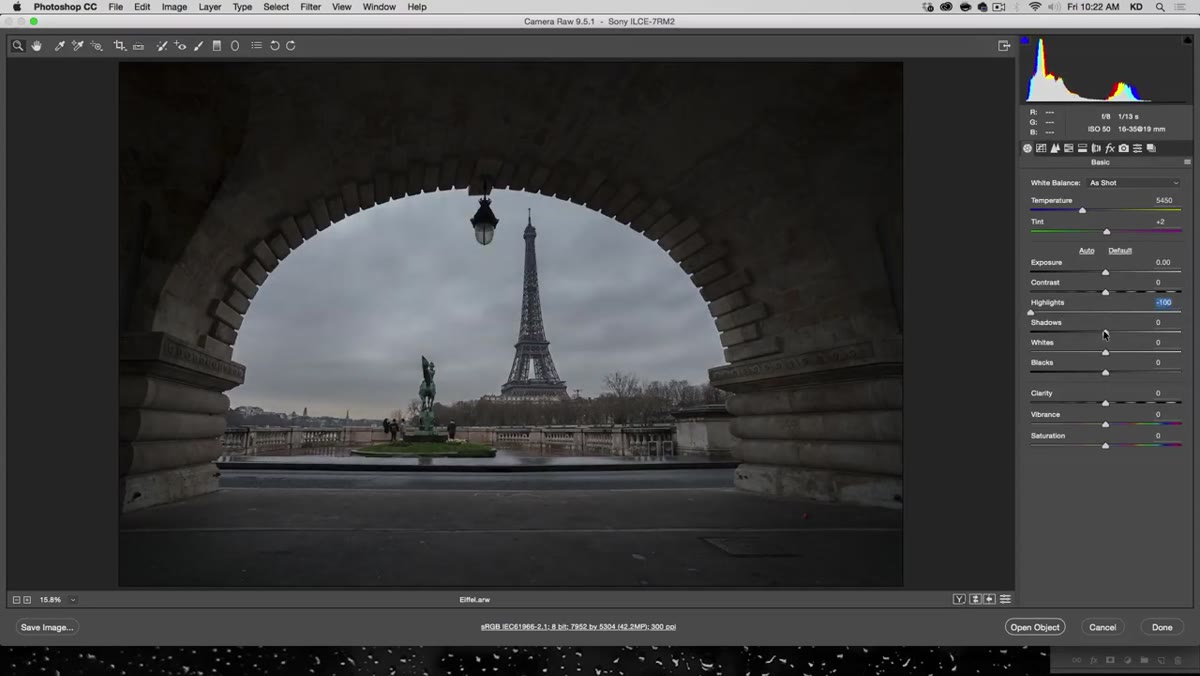 Camera Raw panel open with highlights and shadows sliders adjusted
Before you touch any reflection logic, get your base image looking the way you want it. If you’re working with a RAW file, drag it directly into Photoshop and it’ll open in Camera Raw automatically. Pull your highlights down, lift your shadows, and add a little clarity to give the image some texture. If you want that moody, rain-soaked feel, nudge the temperature slider toward the cool end of the scale. A touch of vibrance keeps it from going fully desaturated.
Camera Raw panel open with highlights and shadows sliders adjusted
Before you touch any reflection logic, get your base image looking the way you want it. If you’re working with a RAW file, drag it directly into Photoshop and it’ll open in Camera Raw automatically. Pull your highlights down, lift your shadows, and add a little clarity to give the image some texture. If you want that moody, rain-soaked feel, nudge the temperature slider toward the cool end of the scale. A touch of vibrance keeps it from going fully desaturated.
The important part here is how you open the file into Photoshop. Click the small text link at the bottom of the Camera Raw dialog (it usually says something like “Open Image”) and before you commit, make sure the option reads “Open in Photoshop as Smart Object.” This keeps the raw data live, meaning you can double-click back into Camera Raw later and tweak your color grade without destroying anything. I learned to love smart objects the hard way after an incident I still don’t like talking about. Just use them.
Step 2: Crop the Image to Your Working Composition
 Crop tool active with handles being dragged on the Eiffel Tower photo
Once you’re inside Photoshop, grab the crop tool and tighten up your frame. You’re about to double the canvas vertically to make room for the reflection, so any dead space at the edges is going to get amplified. For this kind of shot, you want your main subject sitting somewhere in the upper portion of the frame, with some ground or foreground at the bottom where the reflected version will eventually appear.
Crop tool active with handles being dragged on the Eiffel Tower photo
Once you’re inside Photoshop, grab the crop tool and tighten up your frame. You’re about to double the canvas vertically to make room for the reflection, so any dead space at the edges is going to get amplified. For this kind of shot, you want your main subject sitting somewhere in the upper portion of the frame, with some ground or foreground at the bottom where the reflected version will eventually appear.
Don’t stress too much about the rule of thirds here. The reflection is going to change your visual balance anyway, and you can always revisit the crop later. Just get the composition roughly where you want it and move on.
Step 3: Duplicate the Layer as a New Smart Object
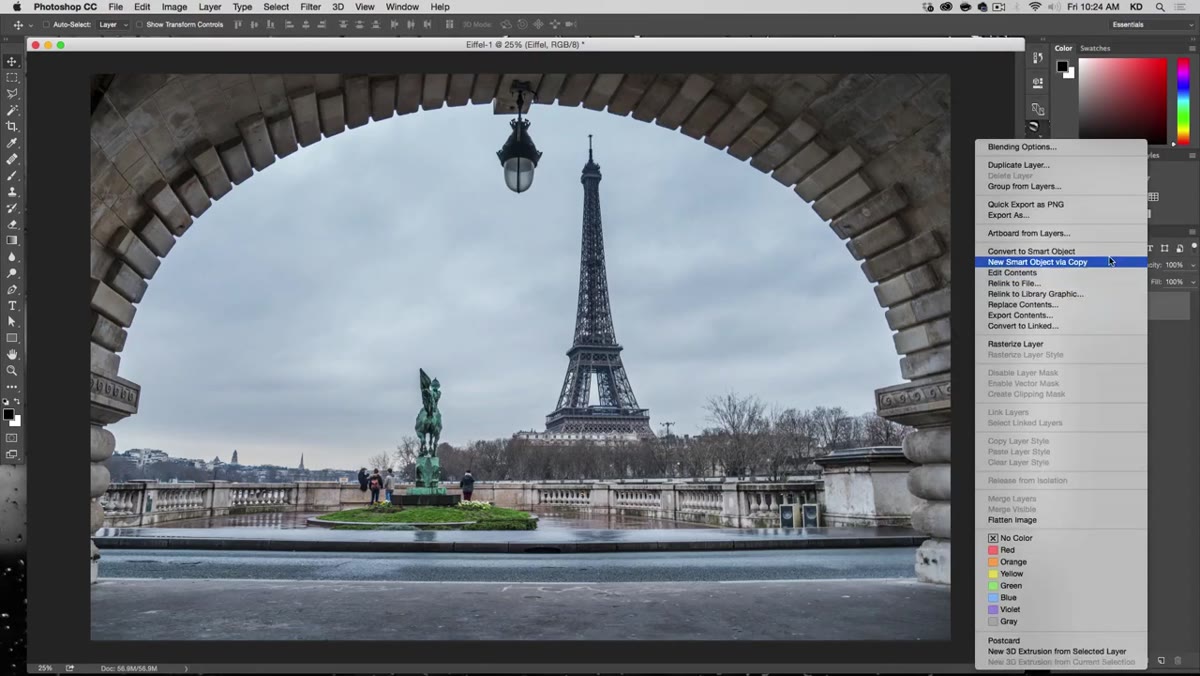 Right-click context menu showing “New Smart Object via Copy” option
Right-click on your base layer in the Layers panel and choose “New Smart Object via Copy.” This is different from a regular duplicate. A normal copy links back to the same smart object source, so changes to one affect the other. “Via Copy” creates an independent smart object with its own data. That matters here because the reflection layer is going to be modified separately from the original.
Right-click context menu showing “New Smart Object via Copy” option
Right-click on your base layer in the Layers panel and choose “New Smart Object via Copy.” This is different from a regular duplicate. A normal copy links back to the same smart object source, so changes to one affect the other. “Via Copy” creates an independent smart object with its own data. That matters here because the reflection layer is going to be modified separately from the original.
If you skip this step and just use Command+J to duplicate, you’ll find that adjustments to the reflection bleed back into your base layer. Not what you want. It’s one of those things that seems like a minor distinction until it isn’t.
Step 4: Flip the Duplicate Vertically and Position It
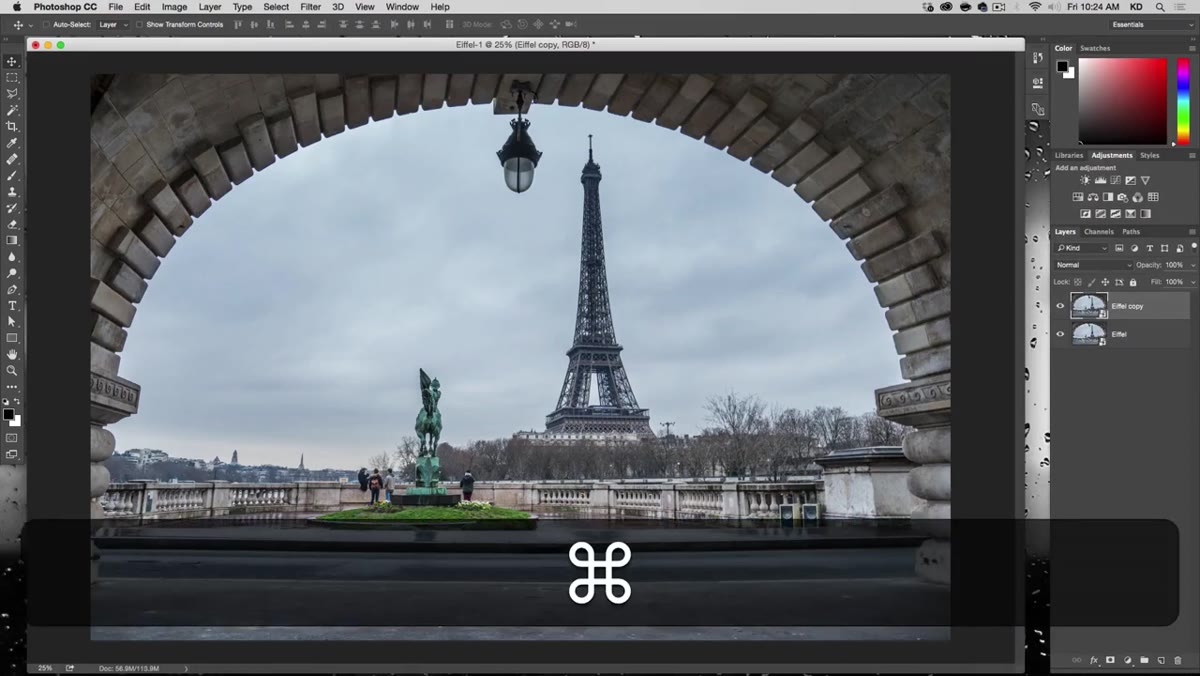 Flipped layer being dragged into position below the original image
With your new smart object selected, hit Command+T (Ctrl+T on PC) to enter Free Transform. Right-click anywhere inside the transform box and choose “Flip Vertical.” Your image flips upside down, which is exactly what a reflection looks like. Now drag that flipped layer downward so it sits just below the original, like the world is looking at itself in a puddle.
Flipped layer being dragged into position below the original image
With your new smart object selected, hit Command+T (Ctrl+T on PC) to enter Free Transform. Right-click anywhere inside the transform box and choose “Flip Vertical.” Your image flips upside down, which is exactly what a reflection looks like. Now drag that flipped layer downward so it sits just below the original, like the world is looking at itself in a puddle.
You’ll probably see a hard seam where the two images meet. Don’t worry about that yet. Getting the vertical positioning roughly right is what matters at this stage. The reflection doesn’t have to be pixel-perfect because water distortion is going to handle the edge believability later.
Step 5: Set the Reflection Layer to Screen Mode and Lower Opacity
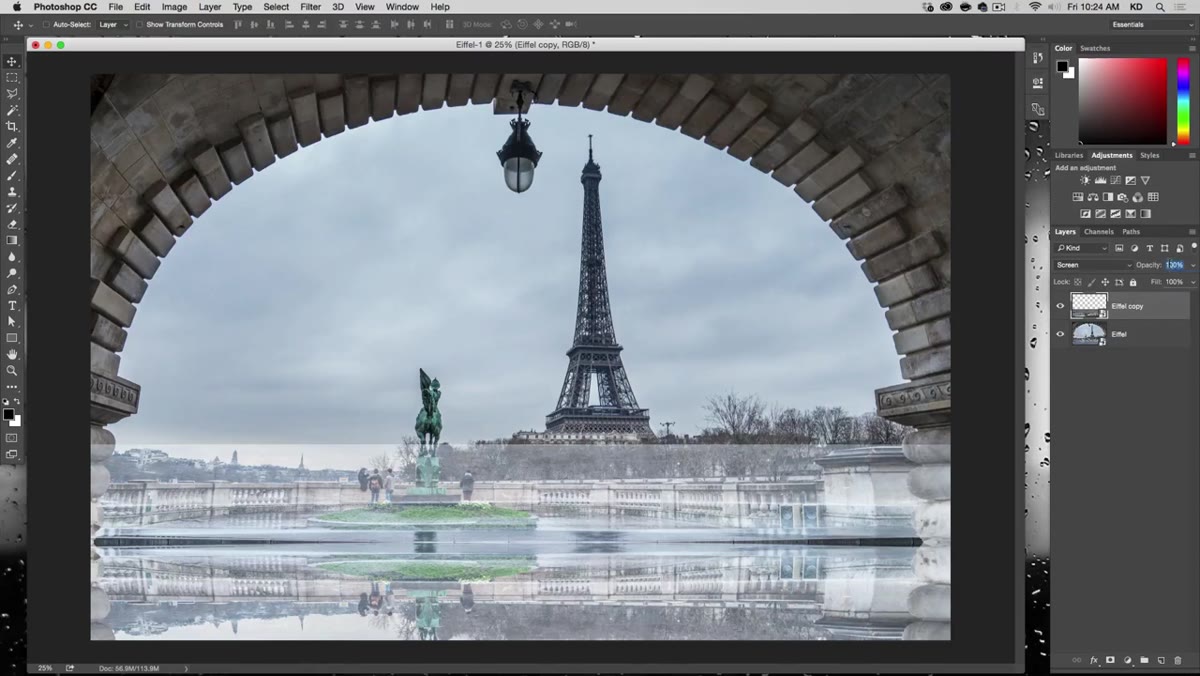 Blend mode dropdown showing Screen selected, opacity reduced to 50 percent
Change the blend mode of your flipped layer from Normal to Screen. Screen mode drops out the dark values and lets the lighter tones of the reflection show through in a way that reads as light bouncing off water rather than a hard copy of the image. It immediately looks more plausible.
Blend mode dropdown showing Screen selected, opacity reduced to 50 percent
Change the blend mode of your flipped layer from Normal to Screen. Screen mode drops out the dark values and lets the lighter tones of the reflection show through in a way that reads as light bouncing off water rather than a hard copy of the image. It immediately looks more plausible.
Drop the opacity down to around 50% as a starting point. This isn’t a fixed rule. Depending on how bright your original image is, you might want anywhere from 40% to 65%. The goal is for the reflection to feel like it’s competing with the texture of the water surface, not sitting on top of it like a sticker.
Step 6: Add a Layer Mask to Fade the Reflection Naturally
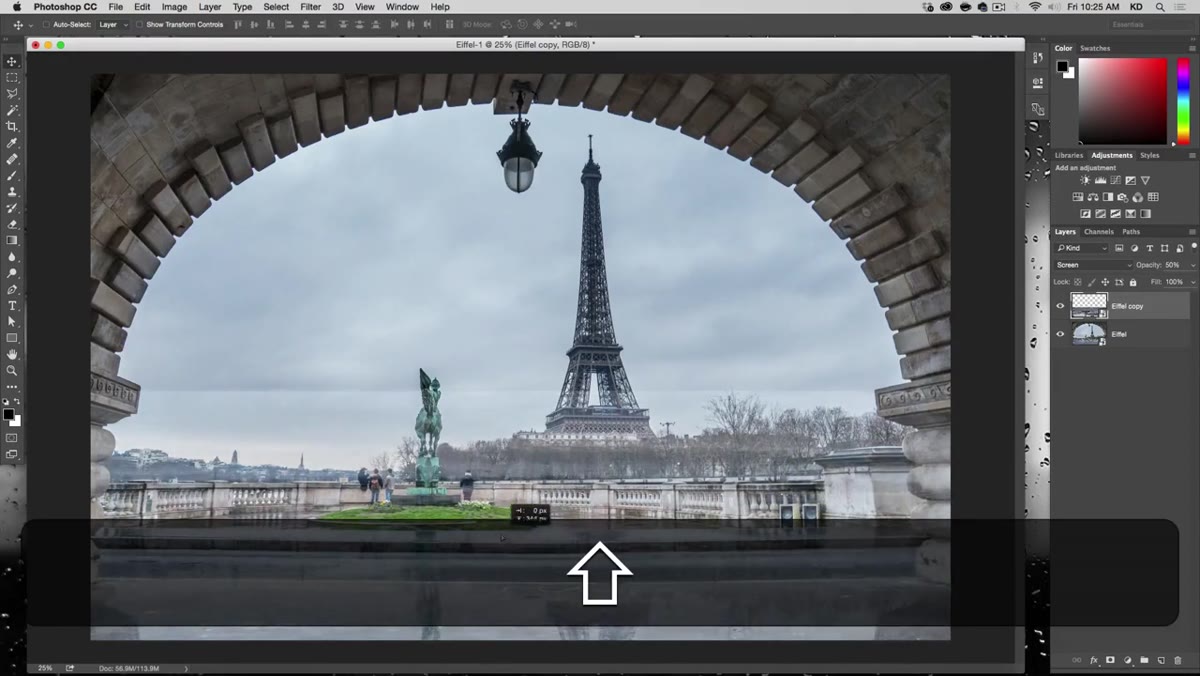 Gradient applied on layer mask fading the reflection toward the bottom
Add a layer mask to the reflection layer. Then grab the Gradient tool, set it to a black-to-transparent linear gradient, and drag from the bottom of the canvas upward. This fades the reflection out as it moves away from the seam, which is how reflections actually behave on water. The further from the source, the more the image breaks apart and softens.
Gradient applied on layer mask fading the reflection toward the bottom
Add a layer mask to the reflection layer. Then grab the Gradient tool, set it to a black-to-transparent linear gradient, and drag from the bottom of the canvas upward. This fades the reflection out as it moves away from the seam, which is how reflections actually behave on water. The further from the source, the more the image breaks apart and softens.
How far you drag the gradient depends on the image. For a tight puddle, a shorter fade keeps more of the reflection visible. For a longer wet road or a wider body of water, pull the gradient further up to let the image dissolve more gradually.
The Part Kelvin’s Tutorial Made Me Think About Differently
I’ve added reflections before by just duplicating and flipping. It works, technically. But treating the reflection layer as an independent smart object and using Screen mode instead of just reducing opacity is a genuinely better approach. Screen mode interacts with the luminosity of your base image in a way that plain opacity reduction doesn’t. The reflection picks up the highlights of the scene beneath it, which adds a layer of realism that opacity alone flattens out.
If you want to push further, once your basic reflection is in place, try applying a displacement map using a water texture file (Kelvin includes one in his downloadable assets). Filters > Distort > Displace with a water image as the displacement source will wrinkle the reflection just enough that it stops looking like a Photoshop trick and starts looking like weather. That final step moves the whole composite from “pretty good” to “wait, was that real?”
The single biggest thing I took away from this tutorial is to stop treating reflections as an afterthought. Setting up your smart objects properly at the start costs you maybe 30 seconds and saves you from a cascade of destructive edits when you inevitably want to change the color grade after the reflection is already built.
Watch the full tutorial on YouTube and grab the free source files from Kelvin’s site to follow along with the exact images he uses. The second method he demonstrates in the video uses a different approach worth seeing on its own.
Comments (1)
I tried this on a client project yesterday and the results were way better than expected.
Leave a Comment