I’ve taken on enough portrait retouching gigs to know that hair is the thing that separates “pretty good” from “actually professional.” Skin? Frequency separation handles most of it. Eyes? A little dodging and burning. But hair, and especially beards, will absolutely expose you if you don’t know what you’re doing. Patchy beards, thin hairlines, awkward shapes that don’t match the light in the scene. Clients notice, even if they can’t articulate why something looks off.
That’s what made this tutorial click for me. In this Aaron Nace (PHLEARN) tutorial, Watch the full tutorial on YouTube, Aaron walks through a workflow that combines the pen tool, basic brush work, and a custom Photoshop brush to build out realistic hair and beard shapes from scratch. It’s not a one-click fix. But it’s a repeatable process, and once you run through it once, you’ll start seeing how to apply it to almost any portrait.
What I like about Aaron’s approach here is that he builds in a proof-of-concept stage before doing any of the real detail work. Instead of committing immediately to the fine stuff, he validates the shape first. That’s the kind of thinking that keeps you from spending two hours on a direction that was wrong from the start. I wish I’d known that trick three years ago.
Step 1: Block Out the Hair Shape with the Pen Tool
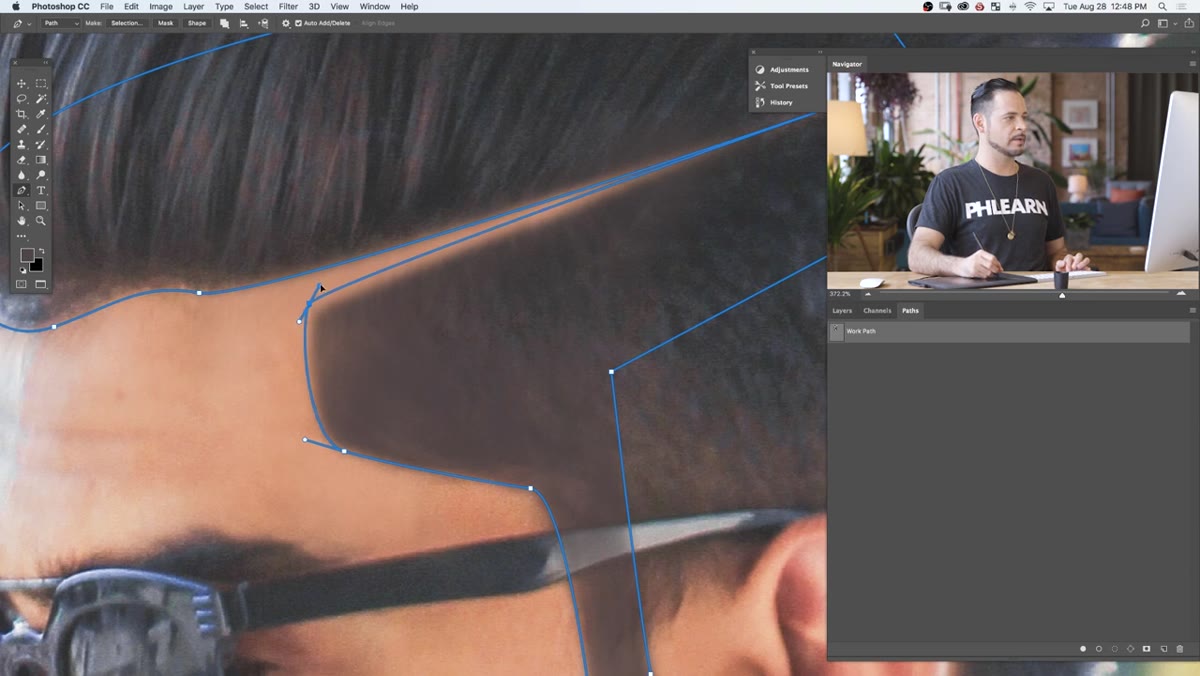
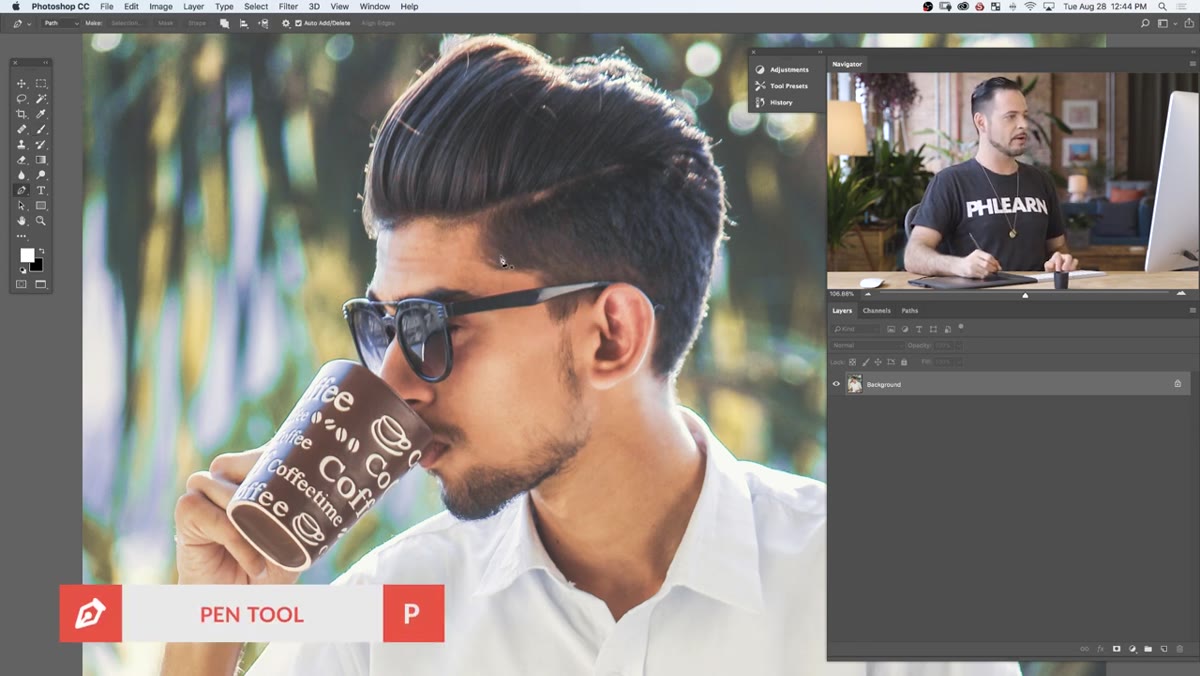 Pen tool tracing subject’s hairline on canvas
Start with the Pen Tool (P) and trace the general outline of where you want the hair or beard to sit. Click and drag to create curved anchor points. If you’re not confident with the Pen Tool, this part can feel slow at first, but don’t rush it. The shape you create here is flexible. You can move anchor points at any time by holding Ctrl (Cmd on Mac) and clicking a point, and you can convert a corner point into a curve by holding Alt (Option) and dragging out a handle.
Pen tool tracing subject’s hairline on canvas
Start with the Pen Tool (P) and trace the general outline of where you want the hair or beard to sit. Click and drag to create curved anchor points. If you’re not confident with the Pen Tool, this part can feel slow at first, but don’t rush it. The shape you create here is flexible. You can move anchor points at any time by holding Ctrl (Cmd on Mac) and clicking a point, and you can convert a corner point into a curve by holding Alt (Option) and dragging out a handle.
The goal here isn’t perfection. You’re drawing a rough boundary for the hairline and beard area. Think of it like sketching with a pencil before you ink anything. Zoom out enough that you can see the full face and judge the proportions.
Step 2: Create a Rough Color Fill to Test the Shape
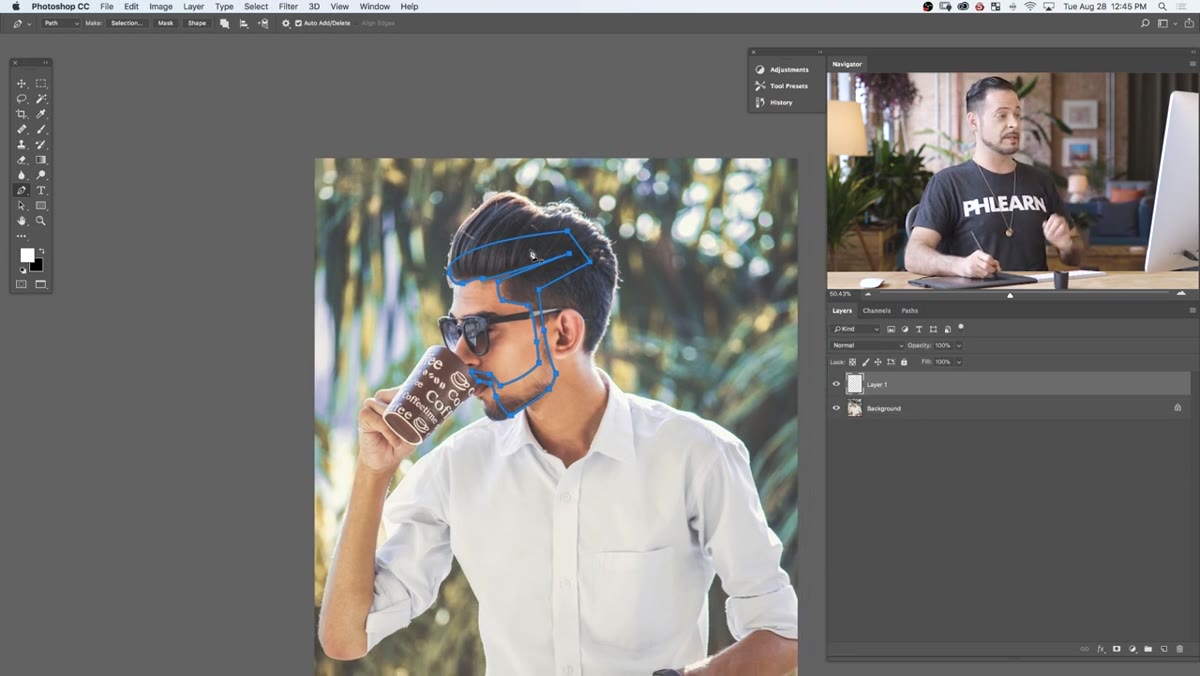 New layer filled with hair color inside pen tool selection
Once you’ve got a closed path, right-click with the Pen Tool active and choose “Make Selection.” Add about 5 pixels of feather to soften the edge. Create a new layer, then hide the selection marquee temporarily with Ctrl+H (Cmd+H) so you can see your work clearly.
New layer filled with hair color inside pen tool selection
Once you’ve got a closed path, right-click with the Pen Tool active and choose “Make Selection.” Add about 5 pixels of feather to soften the edge. Create a new layer, then hide the selection marquee temporarily with Ctrl+H (Cmd+H) so you can see your work clearly.
Now grab the Brush Tool (B), sample the color directly from the subject’s existing hair using the eyedropper, and loosely paint inside the selection. This is not detail work. You’re just filling in the shape to see if the silhouette reads correctly against the face. Aaron is explicit about this: it’s proof of concept, not finished product. If the shape looks wrong, now is the time to fix it. Go back to your path, adjust the anchor points, remake the selection, and try again.
Step 3: Refine the Hairline with Skin Tones
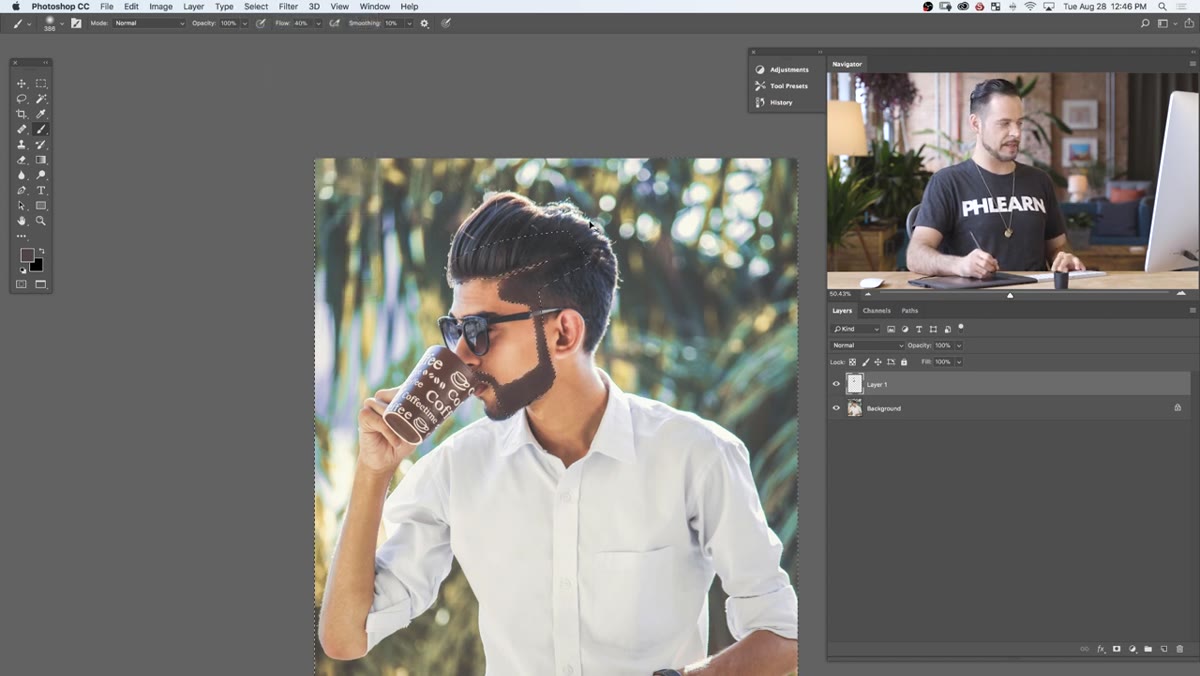 Painting skin color along hairline edge to define part or border
Here’s the step most tutorials skip: defining the inner edge. After painting the hair shape, flip your selection by going to Select, then Inverse. Now sample the subject’s skin tone and paint a thin line along the border where the hairline meets the forehead or face.
Painting skin color along hairline edge to define part or border
Here’s the step most tutorials skip: defining the inner edge. After painting the hair shape, flip your selection by going to Select, then Inverse. Now sample the subject’s skin tone and paint a thin line along the border where the hairline meets the forehead or face.
This creates the visual separation that makes the hair shape feel natural instead of pasted on. It defines things like a part line or the edge of a beard without requiring you to mask every individual strand at this stage. It takes maybe 30 seconds and makes the whole rough comp look 10 times more convincing.
Step 4: Adjust the Path Until the Shape Feels Right
 Dragging anchor point to raise hairline position
Go back to your Paths panel and select your work path. With the Pen Tool active, hold Ctrl (Cmd) to switch to the Direct Selection Tool and click any anchor point to move it. Hold Alt (Option) and drag to pull curve handles out and reshape a segment without affecting the rest of the path.
Dragging anchor point to raise hairline position
Go back to your Paths panel and select your work path. With the Pen Tool active, hold Ctrl (Cmd) to switch to the Direct Selection Tool and click any anchor point to move it. Hold Alt (Option) and drag to pull curve handles out and reshape a segment without affecting the rest of the path.
This is where Aaron raises a section of the hairline that was sitting too low. Small adjustments matter here. A few pixels can be the difference between a hairline that looks natural and one that looks like someone plopped a wig on the subject. Zoom out, squint a little, and trust your eye.
Step 5: Apply the Custom Hair Brush for Detail Work
 Custom Photoshop hair brush being stroked along the hairline
Once the shape is locked in, this is where Aaron’s custom Photoshop brush comes in. You can download it from PHLEARN’s site. The brush is designed to mimic the texture and flow of real hair strands, which means you’re not individually painting every strand. You’re applying a texture that already has strand variation baked in.
Custom Photoshop hair brush being stroked along the hairline
Once the shape is locked in, this is where Aaron’s custom Photoshop brush comes in. You can download it from PHLEARN’s site. The brush is designed to mimic the texture and flow of real hair strands, which means you’re not individually painting every strand. You’re applying a texture that already has strand variation baked in.
Work along the natural growth direction of the hair. For a beard, that means stroking downward and slightly outward from the chin. For scalp hair, follow the direction the existing hair is flowing. Use a low opacity, around 30 to 50 percent, and build up coverage gradually. This keeps the texture from looking stamped and flat.
Step 6: Sample and Layer Colors for Depth
 Multiple brush strokes in varying hair tones building depth
Real hair is never one flat color. Even dark brown hair has highlights, shadow tones, and mid-range variation. After you’ve established the base with your first brush pass, sample a slightly lighter or darker version of the hair color and do another pass with even lower opacity.
Multiple brush strokes in varying hair tones building depth
Real hair is never one flat color. Even dark brown hair has highlights, shadow tones, and mid-range variation. After you’ve established the base with your first brush pass, sample a slightly lighter or darker version of the hair color and do another pass with even lower opacity.
Hit Alt (Option) to eyedrop a color directly from the photo while the Brush Tool is active. Alternate between a few tones. You don’t need many. Three values, dark, mid, and a highlight shade, are usually enough to make the painted hair read as dimensional rather than painted-on.
One Thing I’d Add: Use a Clipping Mask to Stay Non-Destructive
When I tried this technique on a client project, I made the mistake of painting directly on my hair shape layer. Halfway through, the client wanted to shift the beard outline entirely. Starting over was painful. What I do now is create the base shape layer first, then clip all my brush work layers to it using Alt+click between layers. That way I can move the whole shape, reshape it, or scrap it without losing any of the stroke detail I’ve built up. It’s a small habit that saves a lot of backtracking.
The biggest thing this tutorial changed for me is how I approach the planning stage. Don’t touch the detail brush until the shape is right. Use color fills to validate your composition before you invest time in texture. That one shift in thinking makes the whole process faster and less frustrating.
Watch the full tutorial on YouTube and grab Aaron’s custom brush from PHLEARN’s site while you’re there. It’s worth having in your kit even if you only retouch hair a few times a year.
Comments (2)
This is the kind of content that keeps me coming back.
Love this. I referenced a similar technique in one of my recent posts. Always good to see other perspectives.
Leave a Comment