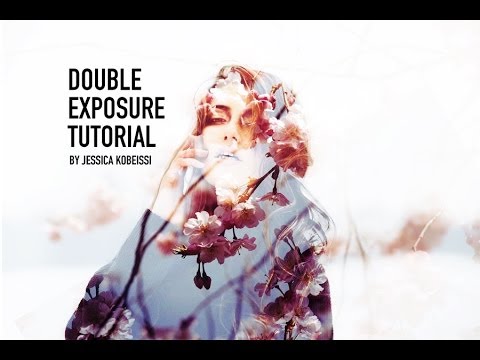
I shoot on what I’ve got, and what I’ve got has never included whatever camera body has the cool new in-camera trick everyone’s talking about. A while back I was drooling over some double exposure portraits online, the kind where a face bleeds into a forest or a cityscape, and my first instinct was to look up whether my gear could do it natively. It could not. Story of my life. But here’s the thing: Photoshop doesn’t care what camera you own.
Watch the full tutorial on YouTube
In this Jessica Kobeissi tutorial, she walks through her personal method for building a double exposure effect entirely in Photoshop after discovering that her camera body didn’t have the in-camera feature she was after. What I like about her approach is that she’s completely upfront about the fact that she figured this out the same morning she recorded it. No pretending it’s some refined, ten-year-old workflow. She’s experimenting in real time and explaining as she goes, which is honestly how I learn best. The result looks genuinely professional, and the technique itself is more approachable than you’d expect.
Step 1: Set Up Your Document with a White Background
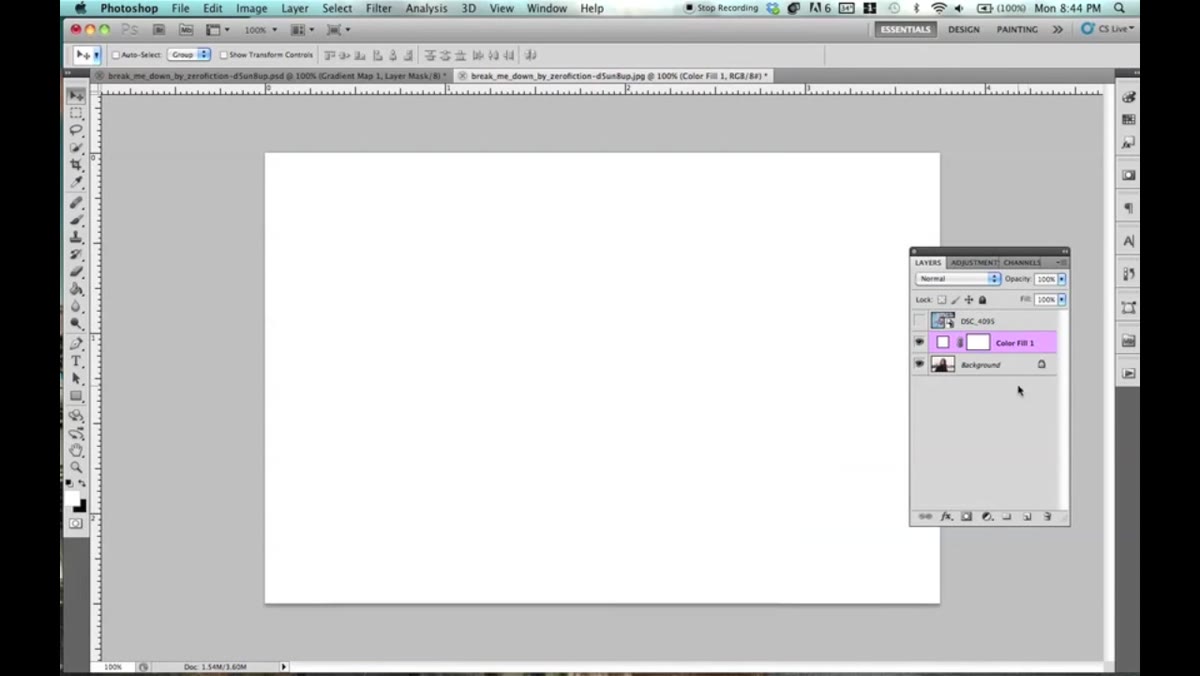 White background layer created beneath portrait photo
Start by opening your portrait photo and placing a solid white layer beneath it. This white base is doing real work here. The double exposure blending you’re about to do depends on having a clean, neutral foundation to merge against. Without it, your blending will fight against whatever color or texture is in the original background.
White background layer created beneath portrait photo
Start by opening your portrait photo and placing a solid white layer beneath it. This white base is doing real work here. The double exposure blending you’re about to do depends on having a clean, neutral foundation to merge against. Without it, your blending will fight against whatever color or texture is in the original background.
Duplicate your main portrait layer twice before you touch anything. Yes, twice. I know that feels excessive. Do it anyway. Jessica duplicates compulsively throughout this tutorial and she’s not wrong to do it. Having those untouched copies sitting below your working layers costs you nothing and has saved me more times than I can count.
Step 2: Create the Silhouette Layer Using Curves
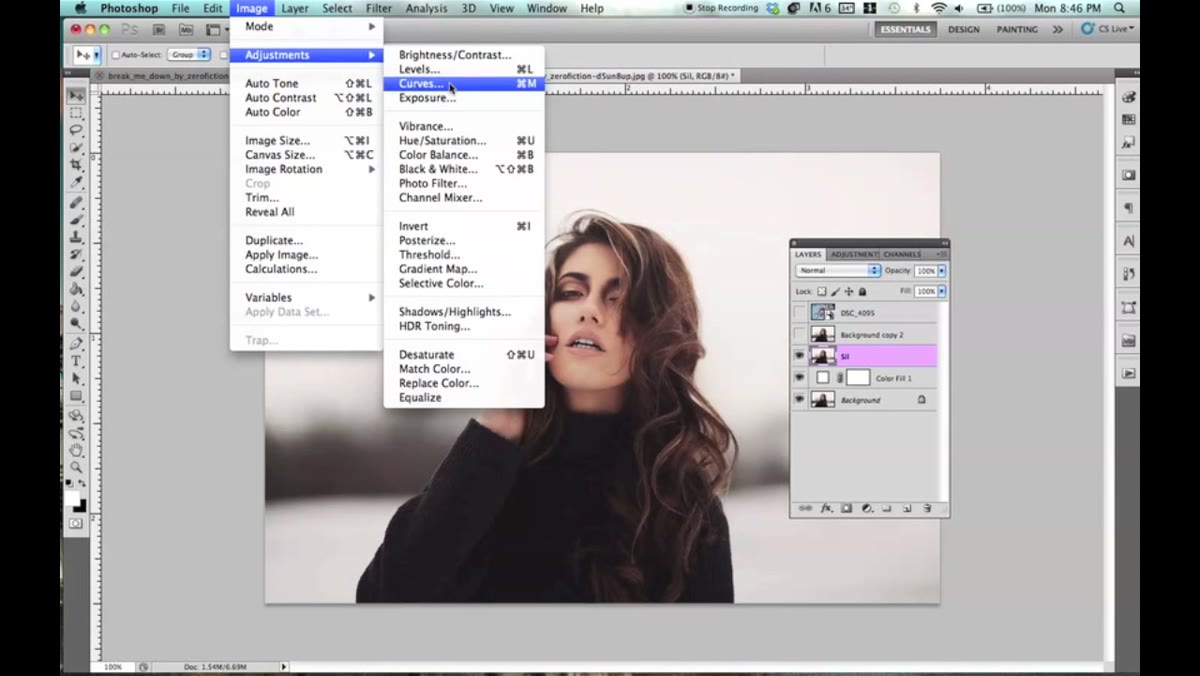 Curves adjustment pushing contrast on portrait layer
Hide your top duplicate and work on the middle copy. Rename this layer something like “silhouette” so you can find it later when your layers panel is a disaster. Now go to Image, then Adjustments, then Curves. You’re not going for a pretty photo here. You’re trying to create maximum contrast between your subject and the background, pushing the subject toward deep shadow and the background toward white.
Curves adjustment pushing contrast on portrait layer
Hide your top duplicate and work on the middle copy. Rename this layer something like “silhouette” so you can find it later when your layers panel is a disaster. Now go to Image, then Adjustments, then Curves. You’re not going for a pretty photo here. You’re trying to create maximum contrast between your subject and the background, pushing the subject toward deep shadow and the background toward white.
Drag the curve aggressively. The goal is to make your subject dark and your background as light as possible. It’s going to look harsh and unflattering, and that’s exactly right. You’re not editing a portrait, you’re carving out a shape. Click OK once the contrast is clearly separated and don’t second-guess the ugly intermediate state.
Step 3: Burn the Subject Into a Solid Dark Shape
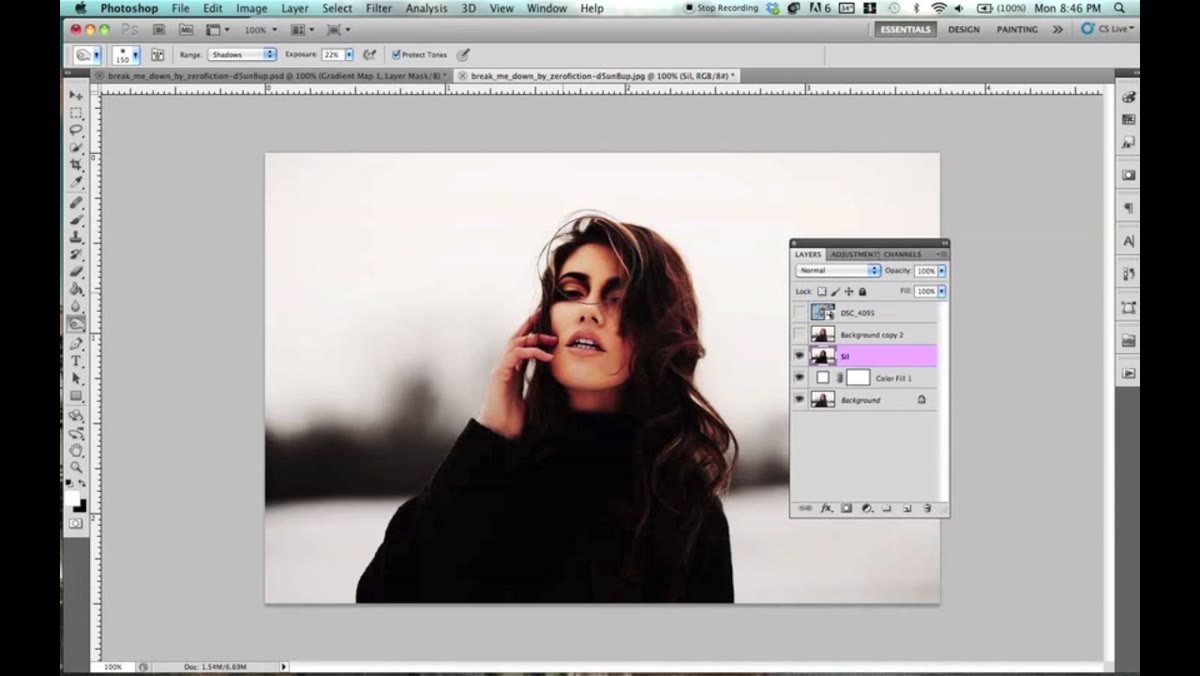 Burn tool darkening subject against white background
Grab the Burn tool from the toolbar. Set the Range to Shadows and push the Exposure up to around 77 percent. Start painting over your subject. What you’re doing is forcing the shadowed areas of the figure into pure black while the already-light background stays white. This gives you a clean silhouette that Color Range can read later.
Burn tool darkening subject against white background
Grab the Burn tool from the toolbar. Set the Range to Shadows and push the Exposure up to around 77 percent. Start painting over your subject. What you’re doing is forcing the shadowed areas of the figure into pure black while the already-light background stays white. This gives you a clean silhouette that Color Range can read later.
Work methodically and don’t stress about perfection on the first pass. Some edges will need a black brush to clean up rather than the burn tool, since the burn tool stops being useful once you’ve hit the limits of what it can darken. The goal is a figure that’s clearly separated from the background, not a pixel-perfect cutout. Feathered, imperfect edges actually help the final blend feel organic.
Step 4: Use Color Range to Build Your Selection
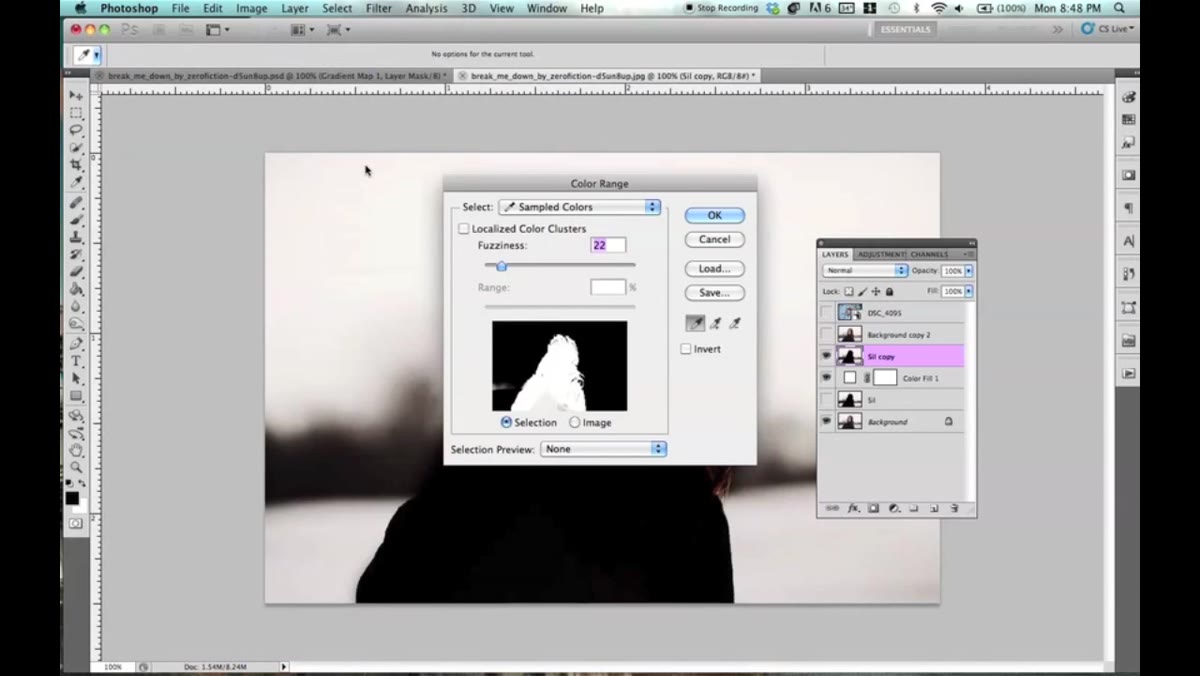 Color Range dialog with white background selected in preview
Duplicate your silhouette layer one more time (paranoia has its uses), then go to Select and choose Color Range. A dialog box opens showing a black and white preview of your image. You want the background to appear as pure white in this preview and your subject as dark. Adjust the Fuzziness slider until the separation looks clean. Jessica lands around 22 on the Fuzziness setting, which is a reasonable starting point.
Color Range dialog with white background selected in preview
Duplicate your silhouette layer one more time (paranoia has its uses), then go to Select and choose Color Range. A dialog box opens showing a black and white preview of your image. You want the background to appear as pure white in this preview and your subject as dark. Adjust the Fuzziness slider until the separation looks clean. Jessica lands around 22 on the Fuzziness setting, which is a reasonable starting point.
Click OK and Photoshop generates a selection based on that tonal difference. You’ll see the marching ants appear around your subject. This selection is the foundation for your mask, and the quality of your silhouette work in the previous step directly determines how clean this selection will be. Sloppy burn work shows up here. Good burn work makes this feel almost automatic.
Step 5: Apply the Mask and Blend Your Second Image
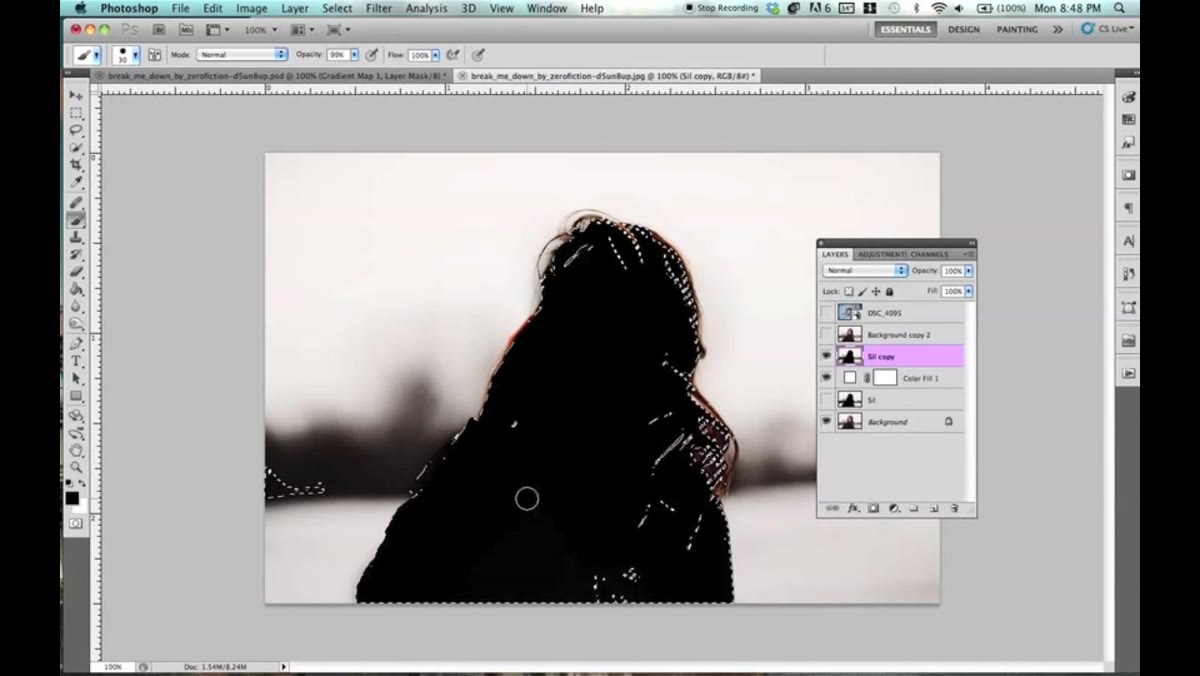 Layer mask applied to silhouette layer, showing subject cutout
With your selection active, add a layer mask to the silhouette layer. Your subject should now appear masked against the white background. From here, bring in your second image, the one you want to blend inside the silhouette. Trees, cityscapes, light leaks, whatever fits the mood you’re after. Place it above the silhouette layer and clip it to the mask using a clipping mask (Alt-click between the layers, or use Layer, Create Clipping Mask).
Layer mask applied to silhouette layer, showing subject cutout
With your selection active, add a layer mask to the silhouette layer. Your subject should now appear masked against the white background. From here, bring in your second image, the one you want to blend inside the silhouette. Trees, cityscapes, light leaks, whatever fits the mood you’re after. Place it above the silhouette layer and clip it to the mask using a clipping mask (Alt-click between the layers, or use Layer, Create Clipping Mask).
Adjust the blending mode on your second image. Screen and Multiply are the two worth experimenting with first depending on your source material. Screen tends to work well when your overlay is lighter. Multiply sinks darker tones into the composition. Move the overlay image around inside the mask until the placement feels balanced. You want recognizable elements from both images, not just a muddy overlap.
What I’d Do Differently (and an Extra Trick Worth Stealing)
Jessica’s method gets you to a great result fast, but if I’m handing this off to a client I want a little more control over the edge quality. After you generate your Color Range selection, before you apply the mask, go to Select, then Select and Mask. Run a small amount of Smart Radius along the edges, especially around hair or soft fabric. It takes maybe 90 extra seconds and makes the difference between a mask that looks exported and one that looks labored over.
Also worth noting: this technique is a lot more forgiving when your portrait is shot against a simple background to begin with. High contrast between subject and backdrop at the shooting stage means less burning, less cleanup, and a cleaner Color Range result. If you have any say in the original shoot, a plain white or grey seamless saves you significant time in post.
The single most important idea in this whole process is that you’re not really cutting out your subject the way you would for a standard composite. You’re building a contrast-based silhouette that Photoshop can read as a selection. Once that clicks, the rest of the technique follows naturally and you can adapt it to any two images you want to combine.
Watch the full tutorial on YouTube to see Jessica walk through both double exposure examples she created, including the second one she shows at the end. Seeing the actual brush strokes and real-time adjustments fills in the gaps that text alone can’t cover.
Comments
Leave a Comment