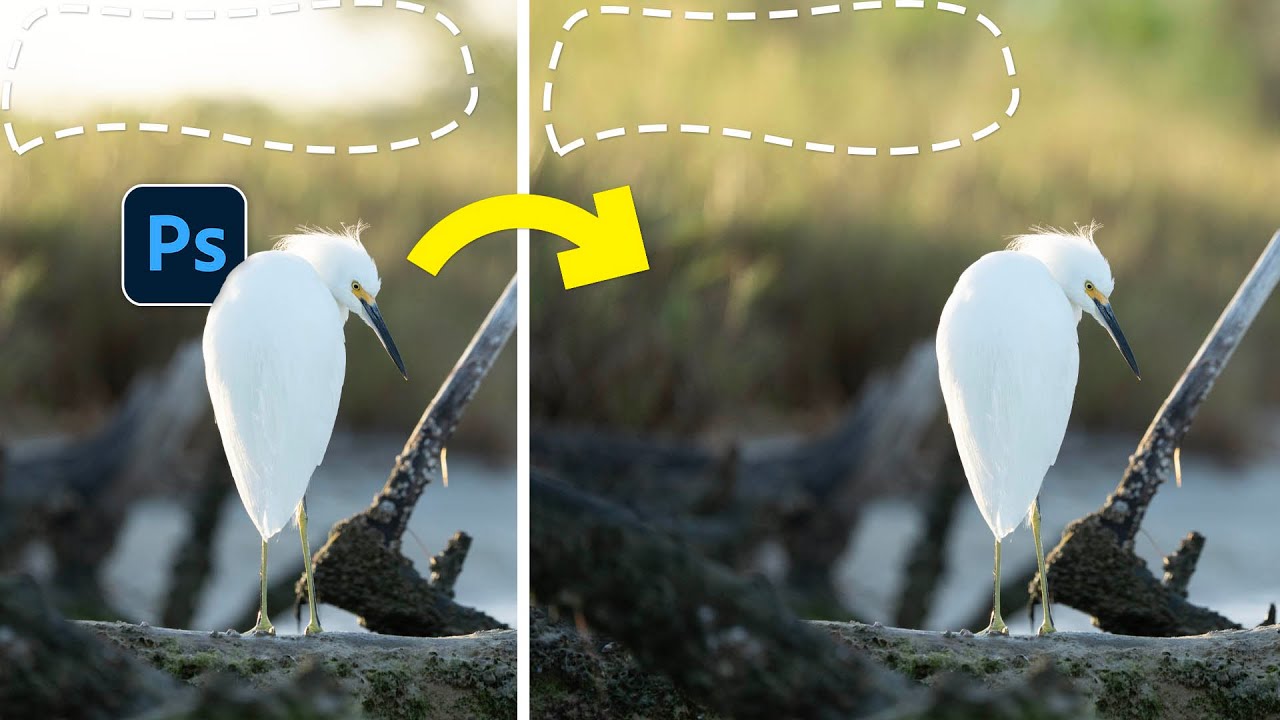
I’ll be honest with you. For the past year or so, I’ve basically been treating Content-Aware Fill like that one keyboard shortcut you memorized years ago and stopped using once something shinier came along. Generative Fill showed up, I became a convert, and Content-Aware Fill quietly got pushed to the back of the toolbox. Then I watched a tutorial from Matt Kloskowski that made me feel genuinely embarrassed about that decision. Watch the full tutorial on YouTube
The problem he was solving is one I’ve hit myself, usually at the worst possible moment. You’ve got a photo that’s almost perfect. A distracting patch of bright sky sneaking into the upper corner. A stray element that kills the mood. Generative Fill swoops in, you leave the prompt blank, and it looks fantastic at screen resolution. You email the client a JPEG preview and they love it. Then you go to export a large print-ready file and suddenly you’re staring at a background that looks like two different photos stitched together by someone who didn’t quite finish the job. That resolution gap between original texture and Generative Fill output is real, and it matters the moment your image is destined for anything larger than an Instagram square.
In this Matt Kloskowski tutorial, he works through a backlit wildlife photo where bright sky is bleeding into the upper portion of the frame. He wanted a darker, more atmospheric background without cropping tight, and the journey from Generative Fill to Content-Aware Fill is genuinely instructive. Here’s how to follow along.
Step 1: Make Your Initial Selection
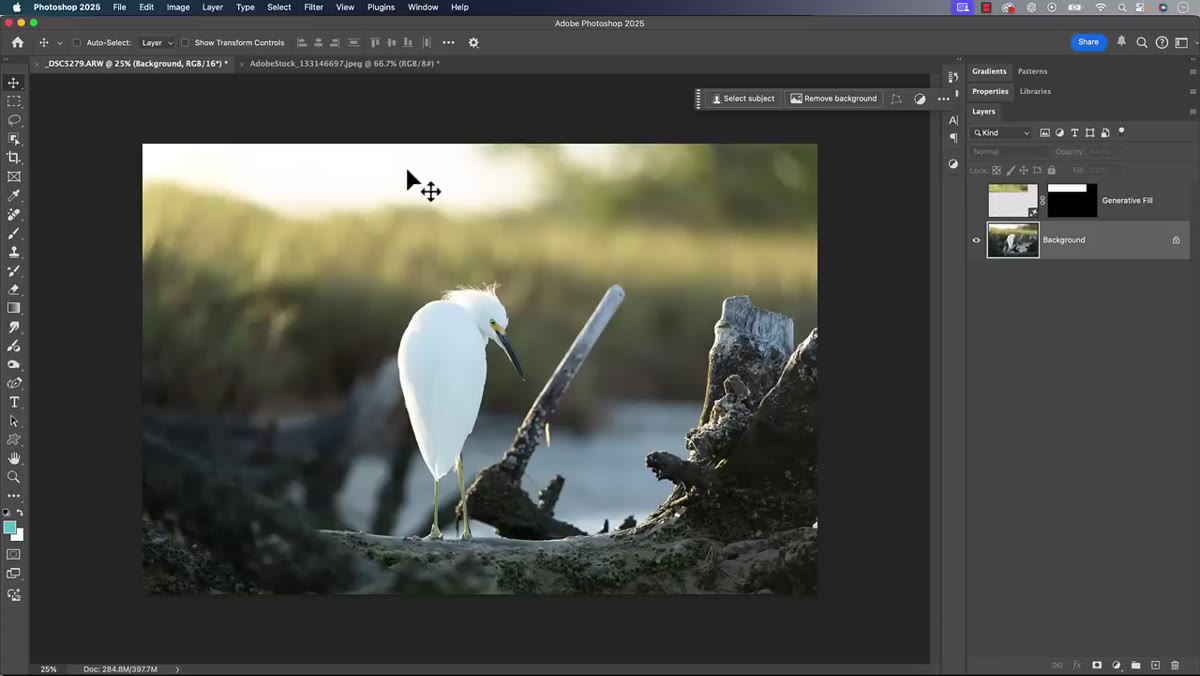 Lasso selection drawn around distracting sky area
Start by selecting the area you want to remove. For something like a soft, irregular patch of sky near the edge of the frame, the Lasso Tool works well because you don’t need precision here. Draw a loose selection around the distraction, slightly overlapping into the surrounding area you want to blend into. Don’t stress about getting it perfect. Content-Aware Fill is going to do a lot of the heavy lifting, and tight, rigid selections can actually work against you by giving the tool less context to sample from.
Lasso selection drawn around distracting sky area
Start by selecting the area you want to remove. For something like a soft, irregular patch of sky near the edge of the frame, the Lasso Tool works well because you don’t need precision here. Draw a loose selection around the distraction, slightly overlapping into the surrounding area you want to blend into. Don’t stress about getting it perfect. Content-Aware Fill is going to do a lot of the heavy lifting, and tight, rigid selections can actually work against you by giving the tool less context to sample from.
Step 2: Try Generative Fill First (and See the Problem)
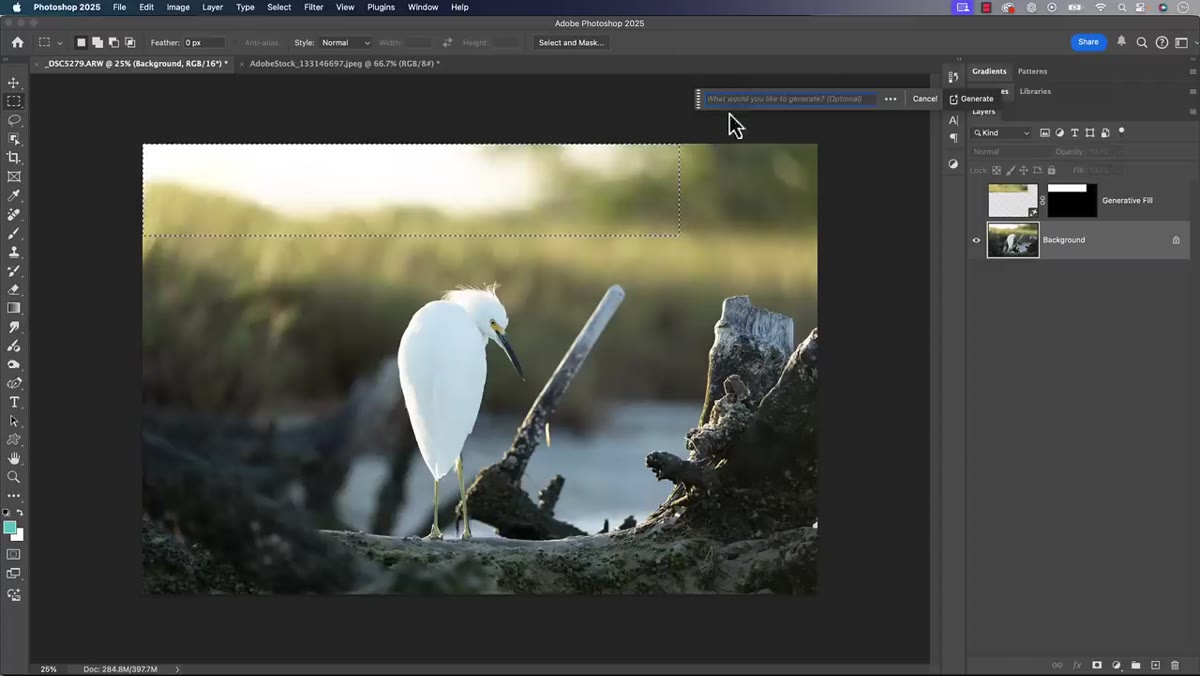 Generative Fill dialog open with blank prompt field
Before jumping to Content-Aware Fill, Matt’s tutorial walks through why Generative Fill is the first instinct and why it sometimes falls short. With your selection active, go to Edit, then Generative Fill. Leave the text prompt completely blank. This tells Photoshop to replace the selected area with something that fits the surrounding context rather than inventing a new element. Hit Generate, let it run, and pick the result that looks most natural.
Generative Fill dialog open with blank prompt field
Before jumping to Content-Aware Fill, Matt’s tutorial walks through why Generative Fill is the first instinct and why it sometimes falls short. With your selection active, go to Edit, then Generative Fill. Leave the text prompt completely blank. This tells Photoshop to replace the selected area with something that fits the surrounding context rather than inventing a new element. Hit Generate, let it run, and pick the result that looks most natural.
At normal viewing size, this probably looks great. The issue only reveals itself when you zoom to 100 percent or higher. The area Generative Fill produced will have noticeably softer, lower-resolution texture compared to the rest of the image. If you’re editing for social media, you can likely get away with it. For print, large exports, or any client who’s going to zoom in on a delivered file, you’ve got a visible seam between original grain and AI-generated smoothness.
Step 3: Undo and Re-Select for Content-Aware Fill
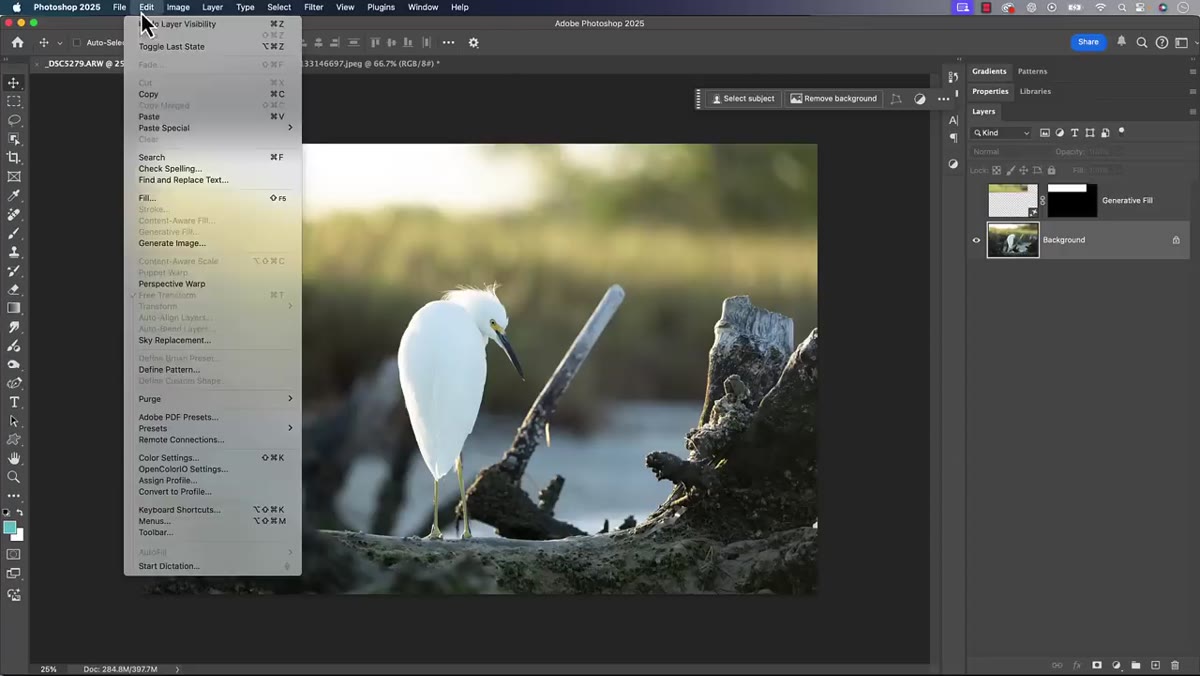 Edit menu open highlighting Content-Aware Fill option
Step back from the Generative Fill result. Undo back to your original image, or simply flatten and start fresh if you’ve been working non-destructively on a duplicate layer (which, please, always be doing). Make your selection again using the Lasso Tool, same loose approach as before. Then go to Edit and look for Content-Aware Fill. This opens a dedicated workspace rather than a simple dialog box, which is where the real control lives.
Edit menu open highlighting Content-Aware Fill option
Step back from the Generative Fill result. Undo back to your original image, or simply flatten and start fresh if you’ve been working non-destructively on a duplicate layer (which, please, always be doing). Make your selection again using the Lasso Tool, same loose approach as before. Then go to Edit and look for Content-Aware Fill. This opens a dedicated workspace rather than a simple dialog box, which is where the real control lives.
Step 4: Work Inside the Content-Aware Fill Workspace
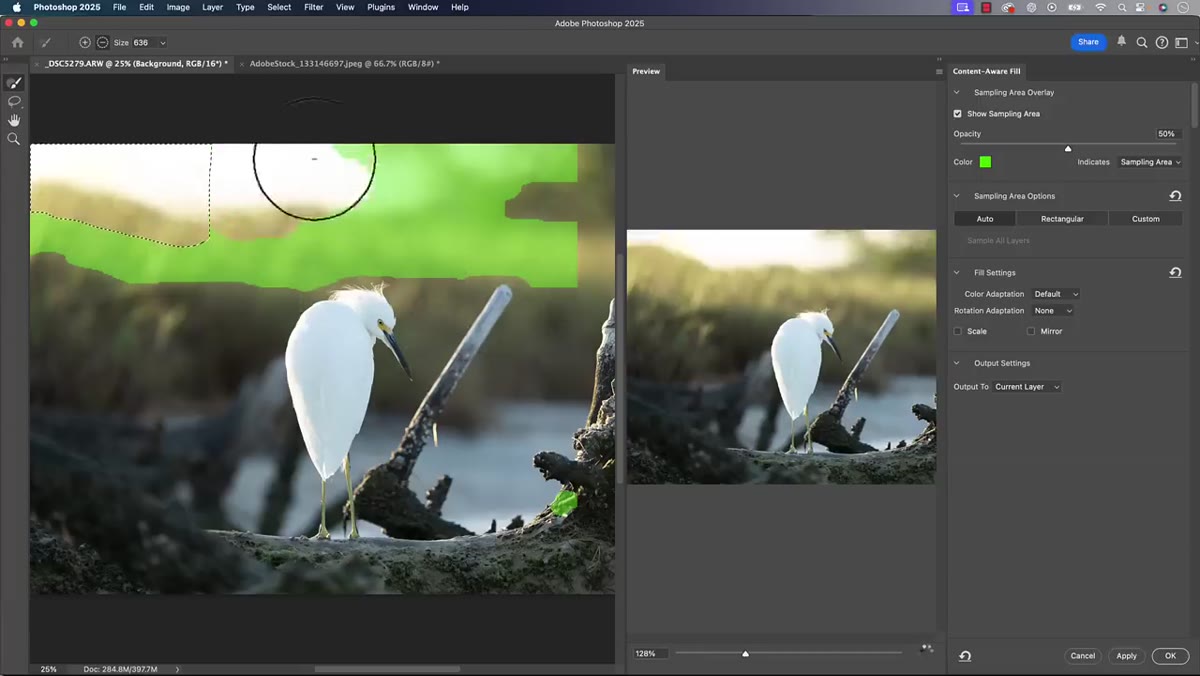
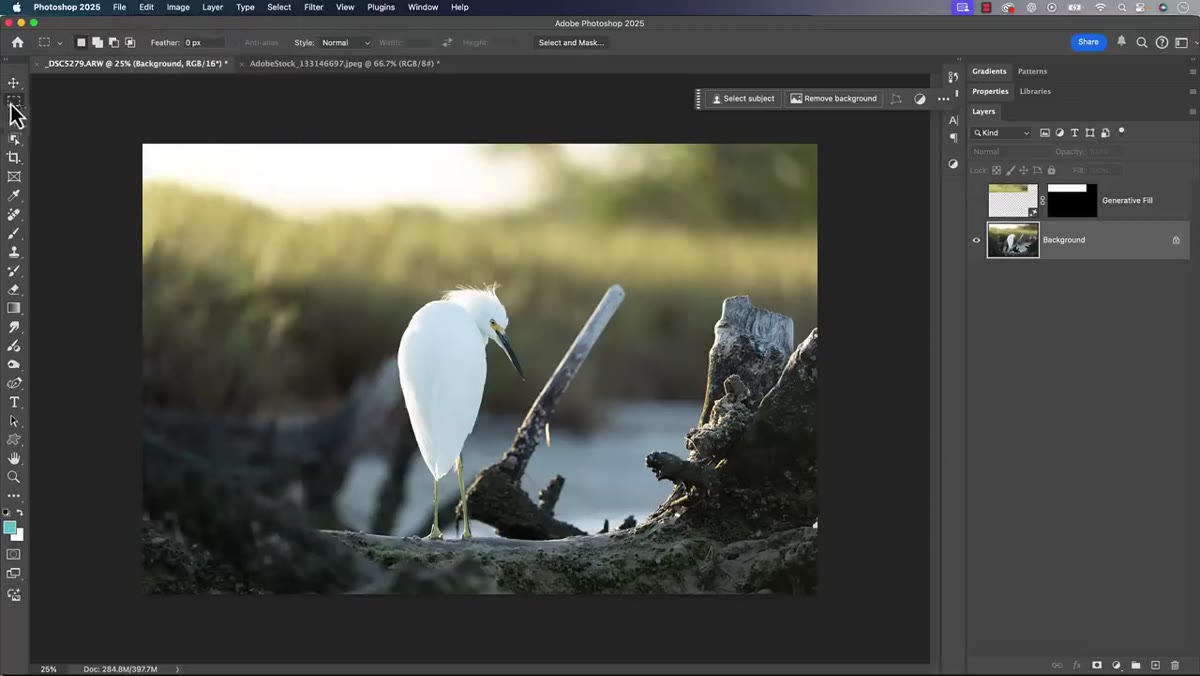 Content-Aware Fill workspace with sampling overlay visible
The Content-Aware Fill workspace has a green overlay that shows Photoshop which parts of your image it’s sampling from to fill the selected area. This is the feature that makes Content-Aware Fill genuinely powerful compared to just hitting Shift-Delete. By default, Photoshop makes a guess at the sampling area, and sometimes that guess is solid. Other times it’s pulling in texture from completely the wrong part of the image.
Content-Aware Fill workspace with sampling overlay visible
The Content-Aware Fill workspace has a green overlay that shows Photoshop which parts of your image it’s sampling from to fill the selected area. This is the feature that makes Content-Aware Fill genuinely powerful compared to just hitting Shift-Delete. By default, Photoshop makes a guess at the sampling area, and sometimes that guess is solid. Other times it’s pulling in texture from completely the wrong part of the image.
On the left side of the workspace you’ll find a brush tool. Use it to paint over areas you want to include in the sampling (they turn green) or exclude (you can remove the green overlay from areas that would confuse the fill, like your subject itself). For a background replacement job, you want to sample from areas with similar tone, color, and texture to what you’re trying to recreate. Steer the brush away from your subject and toward the surrounding background.
Step 5: Adjust Output Settings and Apply
 Output Settings panel showing New Layer option selected
Before you click OK, check the Output Settings panel on the right side of the workspace. You have the option to output the result to the current layer, a duplicate layer, or a new layer. I always choose New Layer. It gives you the same non-destructive safety net you’d want with any significant edit, and if the result needs tweaking or masking, you’re not committed to anything permanent.
Output Settings panel showing New Layer option selected
Before you click OK, check the Output Settings panel on the right side of the workspace. You have the option to output the result to the current layer, a duplicate layer, or a new layer. I always choose New Layer. It gives you the same non-destructive safety net you’d want with any significant edit, and if the result needs tweaking or masking, you’re not committed to anything permanent.
Once you’re happy with the preview, click OK. Photoshop will generate the fill using the sampled areas you defined, and here’s the key difference from Generative Fill: the output matches the resolution and grain structure of your original image. Zoom in to 100 percent and compare. The texture is consistent throughout the frame because Content-Aware Fill is working with pixels from your actual photograph, not synthesizing new ones.
Step 6: Clean Up With a Quick Mask or Clone
 Completed fill result shown at 100 percent zoom
Content-Aware Fill doesn’t always nail every edge on the first try. Check the boundary between your filled area and the original image carefully at full zoom. If there are any artifacts or slightly mismatched patches, a light pass with the Clone Stamp Tool set to a low opacity, around 20 to 30 percent, can blend things out quickly. Work on the New Layer that Content-Aware Fill created so you’re never touching the original.
Completed fill result shown at 100 percent zoom
Content-Aware Fill doesn’t always nail every edge on the first try. Check the boundary between your filled area and the original image carefully at full zoom. If there are any artifacts or slightly mismatched patches, a light pass with the Clone Stamp Tool set to a low opacity, around 20 to 30 percent, can blend things out quickly. Work on the New Layer that Content-Aware Fill created so you’re never touching the original.
One Thing the Tutorial Made Me Rethink
I’ve been defaulting to Generative Fill for almost every removal job over the past several months, and watching this made me realize I’d stopped asking a basic question: what is this image actually for? If it’s going to a client for a print campaign or a large-format display, resolution integrity isn’t optional. Content-Aware Fill has always preserved that and I’d just… stopped thinking about it because the newer tool felt more impressive in demos.
My actual workflow now is to ask that question before picking a tool. Social post with a tight deadline? Generative Fill with a blank prompt gets the job done fast and nobody will ever see the difference once Instagram compresses it into oblivion. High-res deliverable? Content-Aware Fill with a tuned sampling area is still the smarter, cleaner choice.
The core lesson here isn’t that one tool beats the other. It’s that the newest tool isn’t always the right tool, and sometimes the one that got quietly overshadowed still does a specific job better than anything else in the box. Content-Aware Fill earns its place in your workflow the moment resolution actually matters.
Watch the full tutorial on YouTube to see Matt work through the full comparison on a real photo, including how the two results look side by side at high zoom.
Comments (2)
Printing this out and pinning it next to my monitor. That good.
This is exactly what I needed today. Been struggling with this for weeks.
Leave a Comment