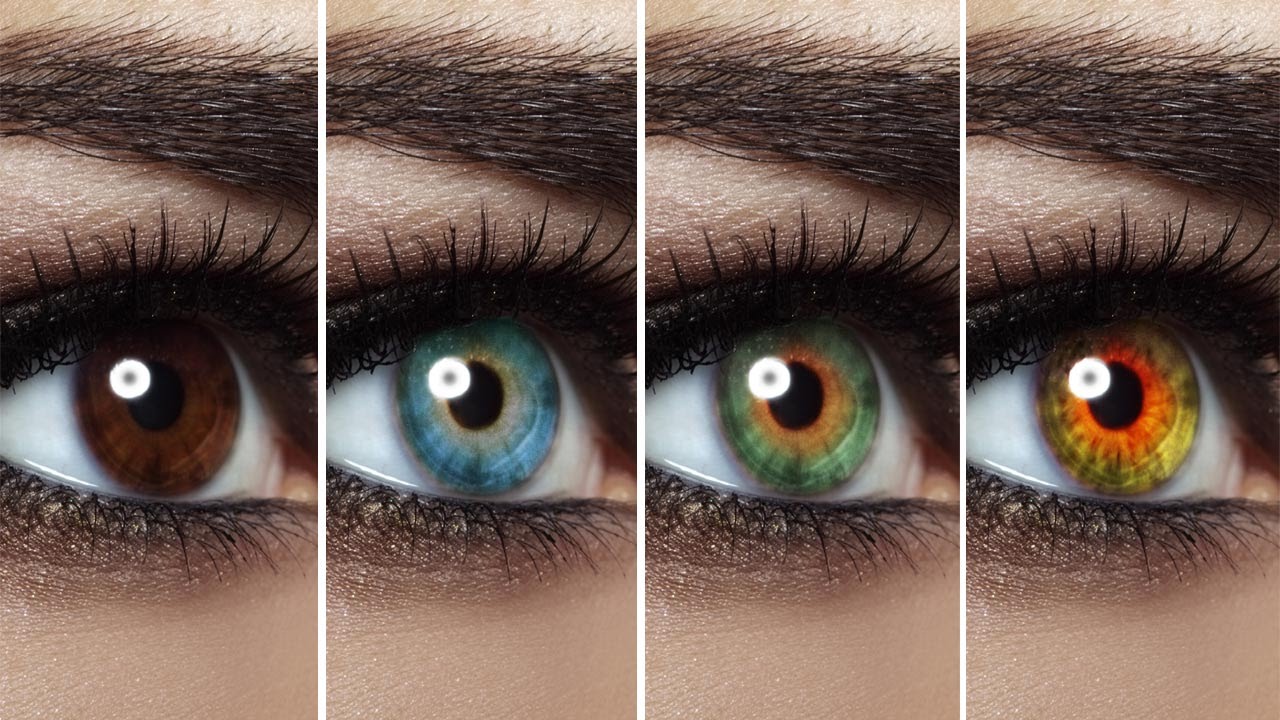
Client retouching jobs have a funny way of surfacing requests you’ve never actually practiced. Someone hands you a portrait and casually mentions, “Oh, can you also make the eyes green?” and suddenly you’re Googling at 11pm from a corner booth at your local coffee shop hoping nobody notices you’re sweating over something that’s supposed to be simple. Eye color changes sound trivial until you try one and end up with something that looks like a Halloween costume filter.
That’s exactly why I was glad I found this tutorial from Aaron Nace over at PHLEARN. Watch the full tutorial on YouTube before or after reading this. What makes his approach worth your time is that he deliberately starts with a dark eye, which is the hard version. Lighter eyes are forgiving. Dark eyes will expose every lazy shortcut. His method is clean, non-destructive, and doesn’t require any third-party plugins.
The whole technique hinges on two things working together: a well-feathered selection and an adjustment layer stack that lets you control lightness and color independently. Get those right and you can shift eye color convincingly. Skip either one and the result will look pasted on.
Step 1: Zoom In and Set Up a Curves Adjustment Layer First
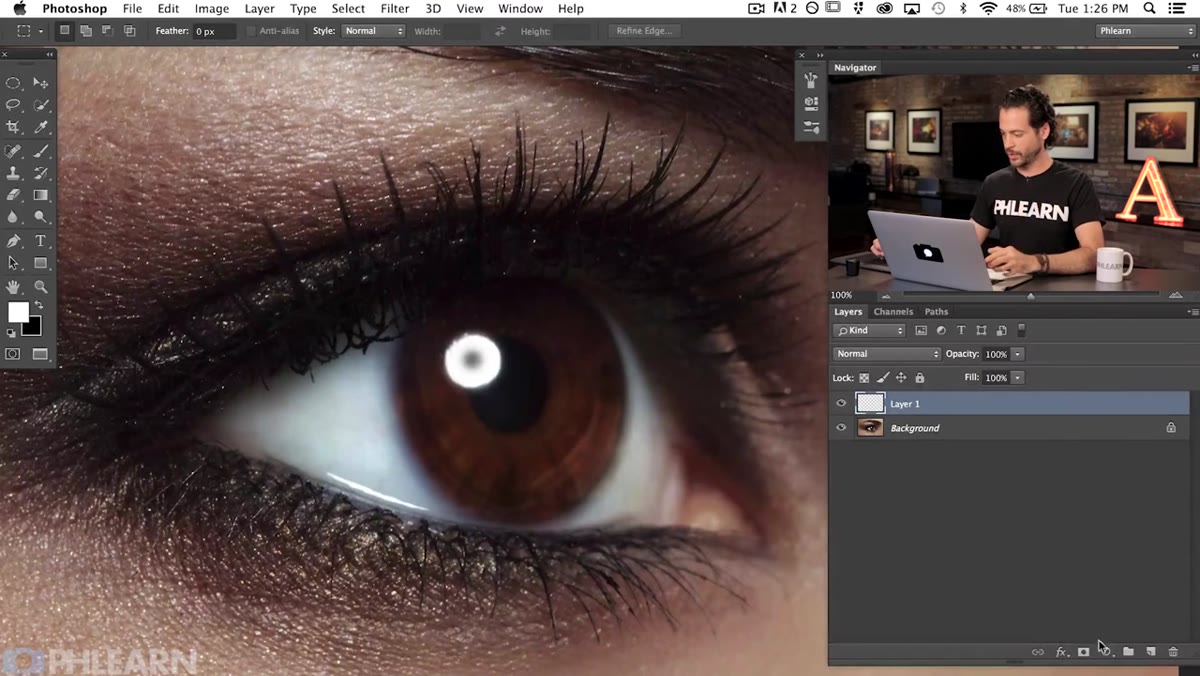 Curves adjustment layer added before any selection is drawn
Before you draw a single selection, add a Curves adjustment layer from the Adjustments panel. Then grab the midpoint of the curve and drag it upward to brighten the image significantly. This isn’t your final edit. It’s a preview scaffold. The reason you do this first is so that when you apply your selection to the layer mask, you can actually see what’s being affected in real time rather than guessing at a marching-ants outline. Working blind on masks is how you end up with halos and missed edges.
Curves adjustment layer added before any selection is drawn
Before you draw a single selection, add a Curves adjustment layer from the Adjustments panel. Then grab the midpoint of the curve and drag it upward to brighten the image significantly. This isn’t your final edit. It’s a preview scaffold. The reason you do this first is so that when you apply your selection to the layer mask, you can actually see what’s being affected in real time rather than guessing at a marching-ants outline. Working blind on masks is how you end up with halos and missed edges.
Step 2: Draw Your Elliptical Marquee Selection Around the Iris
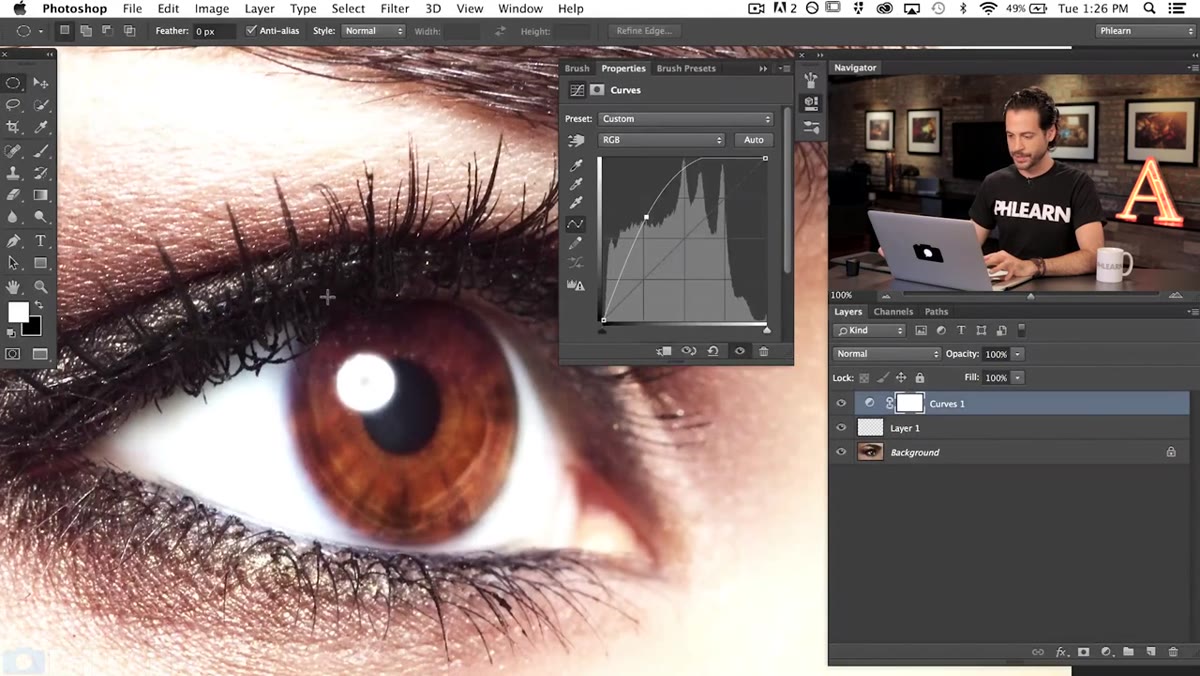 Elliptical marquee tool active, selection being drawn over the eye
Switch to the Elliptical Marquee tool. Draw a selection around the iris, and here’s the thing most people skip: make it slightly smaller than the actual iris boundary. You’re going to blur this mask in the next step, and that blur will expand the soft edge outward. If you start at the exact edge, the blur pushes influence onto the surrounding skin and whites of the eye, which breaks the realism.
Elliptical marquee tool active, selection being drawn over the eye
Switch to the Elliptical Marquee tool. Draw a selection around the iris, and here’s the thing most people skip: make it slightly smaller than the actual iris boundary. You’re going to blur this mask in the next step, and that blur will expand the soft edge outward. If you start at the exact edge, the blur pushes influence onto the surrounding skin and whites of the eye, which breaks the realism.
One genuinely useful shortcut Aaron points out: if you start drawing the ellipse and realize you’ve placed it wrong, hold the spacebar and drag to reposition it without releasing the mouse. Let go of spacebar and keep drawing. This is one of those keyboard behaviors that’s been in Photoshop forever and still saves people from starting over constantly.
Step 3: Apply the Selection to the Curves Layer Mask and Invert
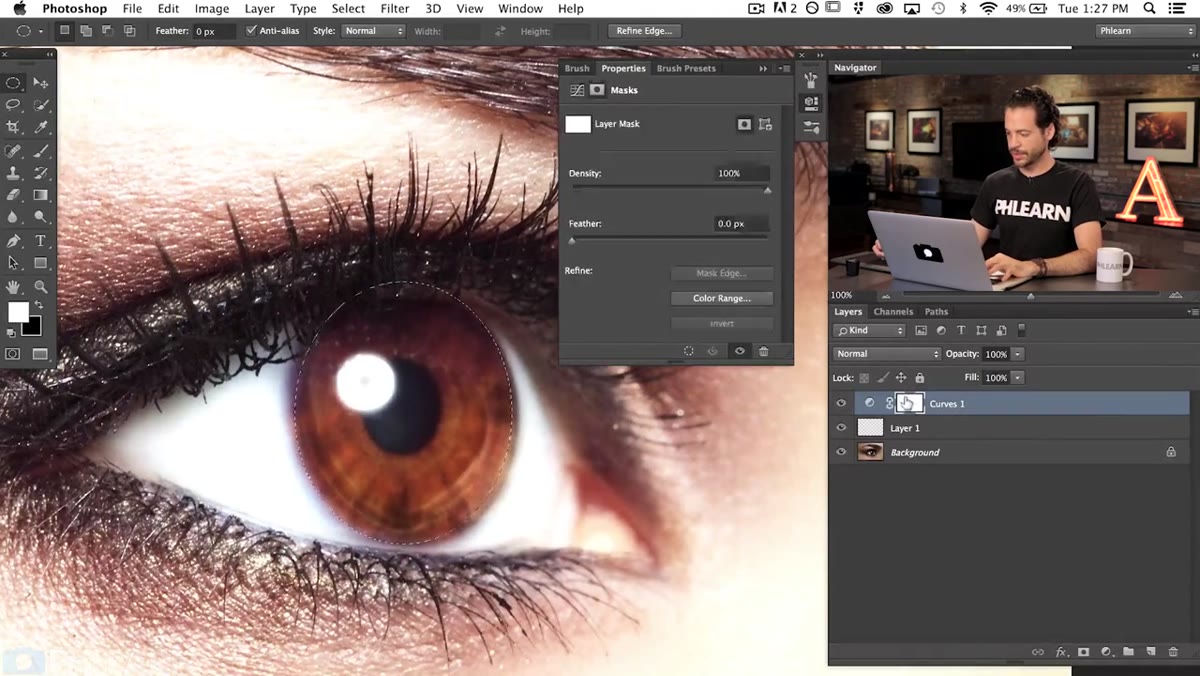 Layer mask applied to curves layer, Command+I being used to invert
With your elliptical selection active, click the layer mask on your Curves adjustment layer. Hit Command+I (Ctrl+I on Windows) to invert the mask. This flips the logic so your curves adjustment is only hitting the inside of your selection rather than everything outside it. If the image gets darker after you do this, don’t panic. Deselect with Command+D, then hit Command+I again directly on the mask thumbnail in the Layers panel. That second inversion is what puts you back in the right place.
Layer mask applied to curves layer, Command+I being used to invert
With your elliptical selection active, click the layer mask on your Curves adjustment layer. Hit Command+I (Ctrl+I on Windows) to invert the mask. This flips the logic so your curves adjustment is only hitting the inside of your selection rather than everything outside it. If the image gets darker after you do this, don’t panic. Deselect with Command+D, then hit Command+I again directly on the mask thumbnail in the Layers panel. That second inversion is what puts you back in the right place.
At this point you should be able to grab the Move tool and nudge the mask around to check that it’s centered over the iris properly.
Step 4: Blur the Mask for a Natural Edge
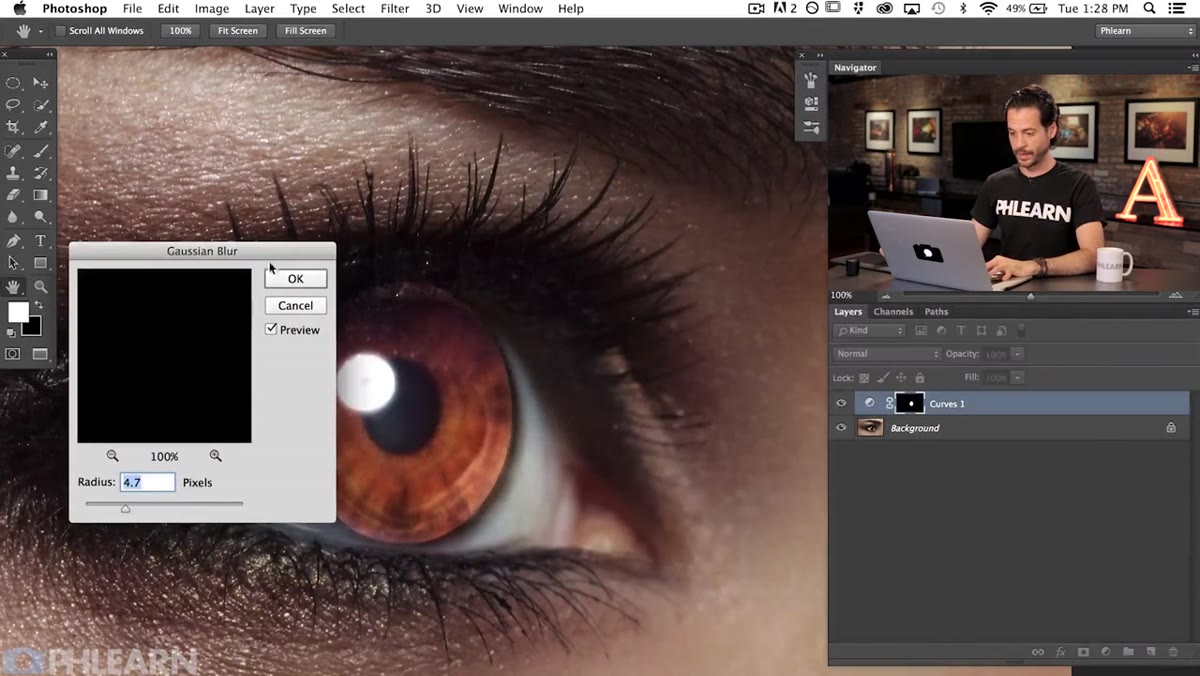 Gaussian Blur dialog open on the layer mask
This step is the difference between a selection that looks composited and one that looks like it belongs. With the layer mask selected in the Layers panel, go to Filter, then Blur, then Gaussian Blur. The amount depends on your image resolution, but the goal is a soft transition that mirrors how the edge of a real iris actually looks. It’s not a hard line. It has a natural falloff.
Gaussian Blur dialog open on the layer mask
This step is the difference between a selection that looks composited and one that looks like it belongs. With the layer mask selected in the Layers panel, go to Filter, then Blur, then Gaussian Blur. The amount depends on your image resolution, but the goal is a soft transition that mirrors how the edge of a real iris actually looks. It’s not a hard line. It has a natural falloff.
Aaron’s guidance here is practical: go far enough that the brightening effect blends seamlessly with the white of the eye and the surrounding skin, but not so far that you’re bleeding the effect into areas it shouldn’t touch. Start low, maybe 3-5 pixels on a standard resolution image, preview it, and adjust. You can always reopen the filter.
Step 5: Refine the Curves to Lighten the Iris
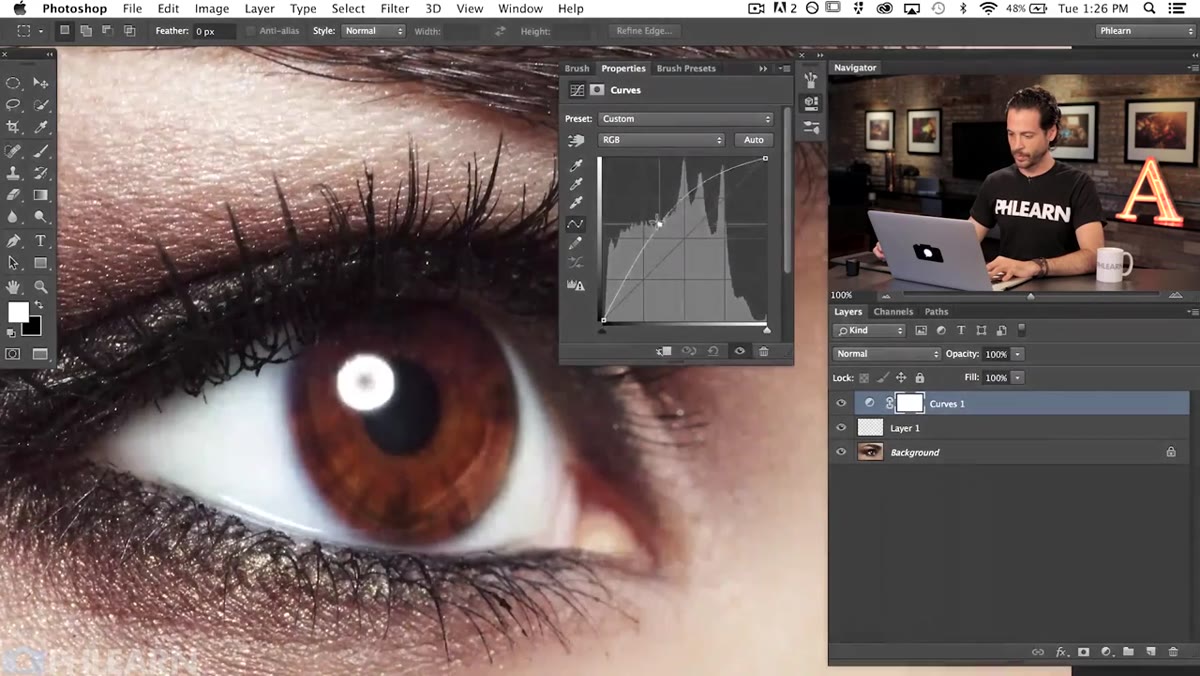 Curves dialog with midpoint raised to brighten the eye
Now that your mask is in good shape, go back to the Curves adjustment itself and dial it to something more intentional. For dark eyes, you need to lift the shadows and midtones significantly to get the iris light enough that a color shift will actually read. A flat S-curve that just targets highlights won’t cut it. You’re essentially reducing the natural pigment density so there’s visual room for the new color to exist.
Curves dialog with midpoint raised to brighten the eye
Now that your mask is in good shape, go back to the Curves adjustment itself and dial it to something more intentional. For dark eyes, you need to lift the shadows and midtones significantly to get the iris light enough that a color shift will actually read. A flat S-curve that just targets highlights won’t cut it. You’re essentially reducing the natural pigment density so there’s visual room for the new color to exist.
Be careful with the upper range of the highlights. If you push too hard you lose the texture and detail of the iris, which is what makes the eye look real. The goal is lighter, not blown out.
Step 6: Add a Hue/Saturation Layer for the Color Shift
 Adjustment panel with new layer being created for color work
Add a Hue/Saturation adjustment layer clipped to the same selection logic, or apply the same layer mask from your Curves layer by Option+dragging (Alt+drag on Windows) it onto the new layer. Turn on the Colorize checkbox inside Hue/Saturation. This is the switch that lets you push the entire selected area toward a single hue rather than just nudging existing color. From there, the Hue slider is your color wheel and Saturation controls how intense the new color reads.
Adjustment panel with new layer being created for color work
Add a Hue/Saturation adjustment layer clipped to the same selection logic, or apply the same layer mask from your Curves layer by Option+dragging (Alt+drag on Windows) it onto the new layer. Turn on the Colorize checkbox inside Hue/Saturation. This is the switch that lets you push the entire selected area toward a single hue rather than just nudging existing color. From there, the Hue slider is your color wheel and Saturation controls how intense the new color reads.
For blue eyes, pull Hue into the 200-220 range. For green, somewhere between 120-150. Saturation around 40-60 usually feels believable. Lower than that and it reads as gray; higher and it starts looking digital.
A Note From My Own Experience: Don’t Forget the Pupil
Something Aaron’s tutorial sets you up for without spelling it out directly: the pupil. If you’re making a dramatic lightness change to a dark iris, check whether your mask is encroaching on the pupil. It shouldn’t lighten. At all. A lightened pupil is one of those subconscious tells that makes a viewer feel like something is wrong with a photo even if they can’t name it.
I learned this after showing a client a version where I’d pushed too much brightness across the whole selection. She said it “looked creepy” and she was right. I’d never thought about the pupil as a separate concern before that. Now I either refine the mask to exclude it or I paint black over the pupil area of the mask with a hard brush. Takes thirty seconds and prevents the uncanny valley effect.
The single most important thing to take away from this technique is that the mask does the real work. A sloppy selection means no amount of adjustment layer finesse will save the result. Invest the extra two minutes on the Gaussian Blur step and the positioning, and the color shift becomes the easy part.
Watch the full tutorial on YouTube to see Aaron walk through the complete version, including how he handles the final color passes.
Comments (3)
Tried this technique this morning. Game changer for real.
Couldn't agree more. I've seen this make a huge difference in landscape work specifically.
Would love to see a follow-up going deeper into this topic.
Leave a Comment