
I started my design career making memes in MS Paint. Genuinely. We’re talking pixelated Impact font, white borders, the whole disaster. When I finally cracked open Photoshop for the first time, I did what most beginners do: I clicked every button until something looked cool, then panicked when I couldn’t undo it. Nobody showed me the foundational stuff. I just stumbled around for months making embarrassing mistakes that a five-minute orientation would have prevented.
That’s exactly why I keep coming back to Aaron Nace’s beginner content from PHLEARN. In this Aaron Nace (PHLEARN) tutorial, Part 1 of his Quick Start Guide to Photoshop, he does something refreshingly practical: instead of jumping straight into tools and filters, he zooms out and covers everything you should understand before you start editing. It sounds obvious. It isn’t. Most tutorials skip this part entirely, and you end up spending your first three months developing habits that actively slow you down. Watch the full tutorial on YouTube and follow along with the breakdown below.
This particular episode covers the pre-editing fundamentals: how to open files, why keyboard shortcuts matter more than most people realize, and how to customize those shortcuts to match the way you actually work. None of it is glamorous. All of it is essential.
Step 1: Open Photoshop and Get Your Bearings
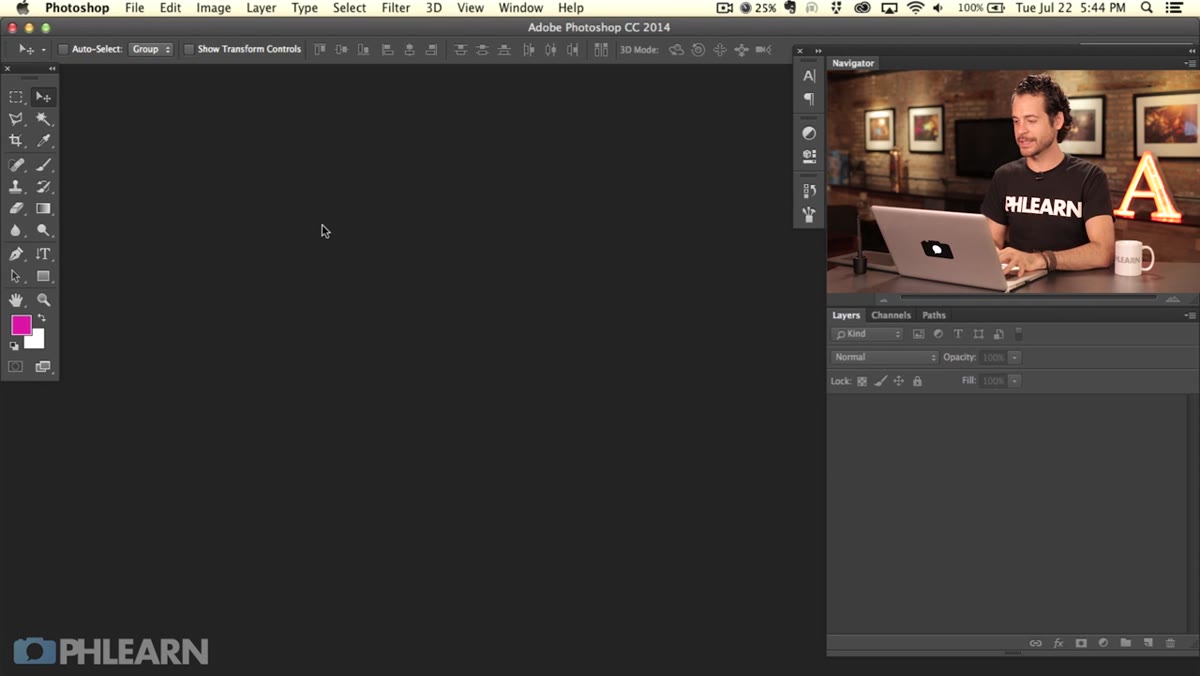 Photoshop workspace open with no file loaded
When you first open Photoshop, you’re staring at a workspace that looks like someone designed it specifically to be intimidating. Panels everywhere, menus stacked on menus, toolbars running down the left side like a cryptic grocery list. Aaron’s first move is to simply acknowledge that reaction and tell you it’s fine. Everyone starts here.
Photoshop workspace open with no file loaded
When you first open Photoshop, you’re staring at a workspace that looks like someone designed it specifically to be intimidating. Panels everywhere, menus stacked on menus, toolbars running down the left side like a cryptic grocery list. Aaron’s first move is to simply acknowledge that reaction and tell you it’s fine. Everyone starts here.
The actual first task is opening an image, which sounds trivial but isn’t. Go to File, then Open. You’ll notice that almost every menu item in Photoshop has a keyboard shortcut listed right next to it. For Open, that shortcut is Command+O on Mac (or Ctrl+O on Windows). This is the moment Aaron plants the seed for the bigger lesson coming next.
Step 2: Understand Why Keyboard Shortcuts Are the Whole Game
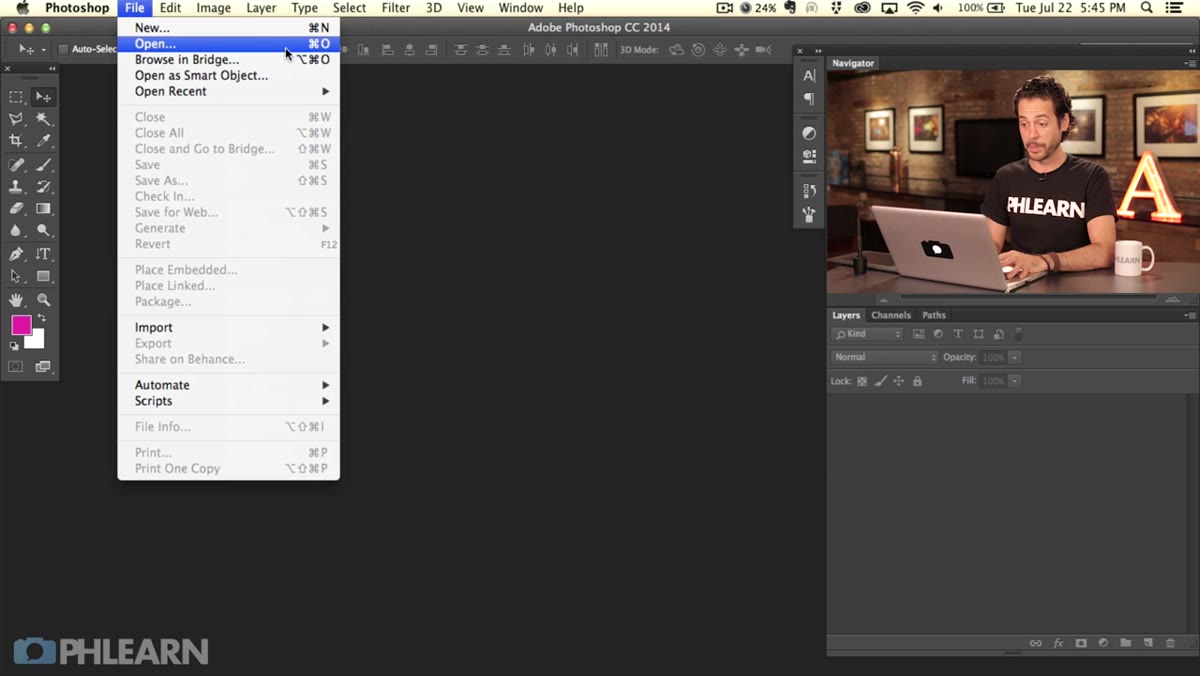 Photoshop File menu open showing keyboard shortcut labels
Here’s the thing Aaron says that I wish someone had told me on day one: if speed matters to you at all in Photoshop, keyboard shortcuts aren’t optional. They’re the difference between a workflow that feels fluid and one that feels like you’re constantly swimming upstream. Every trip up to the menu bar is a small interruption. Stack dozens of those per hour and you’re losing significant time.
Photoshop File menu open showing keyboard shortcut labels
Here’s the thing Aaron says that I wish someone had told me on day one: if speed matters to you at all in Photoshop, keyboard shortcuts aren’t optional. They’re the difference between a workflow that feels fluid and one that feels like you’re constantly swimming upstream. Every trip up to the menu bar is a small interruption. Stack dozens of those per hour and you’re losing significant time.
Aaron keeps this practical rather than preachy. He’s not telling you to memorize 200 shortcuts before you touch a photo. He’s pointing out that the shortcuts are right there in the menus, visible every time you use them, and that over time you’ll absorb the ones you use most just through repetition. Start by noticing them. The memorization follows naturally.
Step 3: Learn How to Access the Keyboard Shortcuts Editor
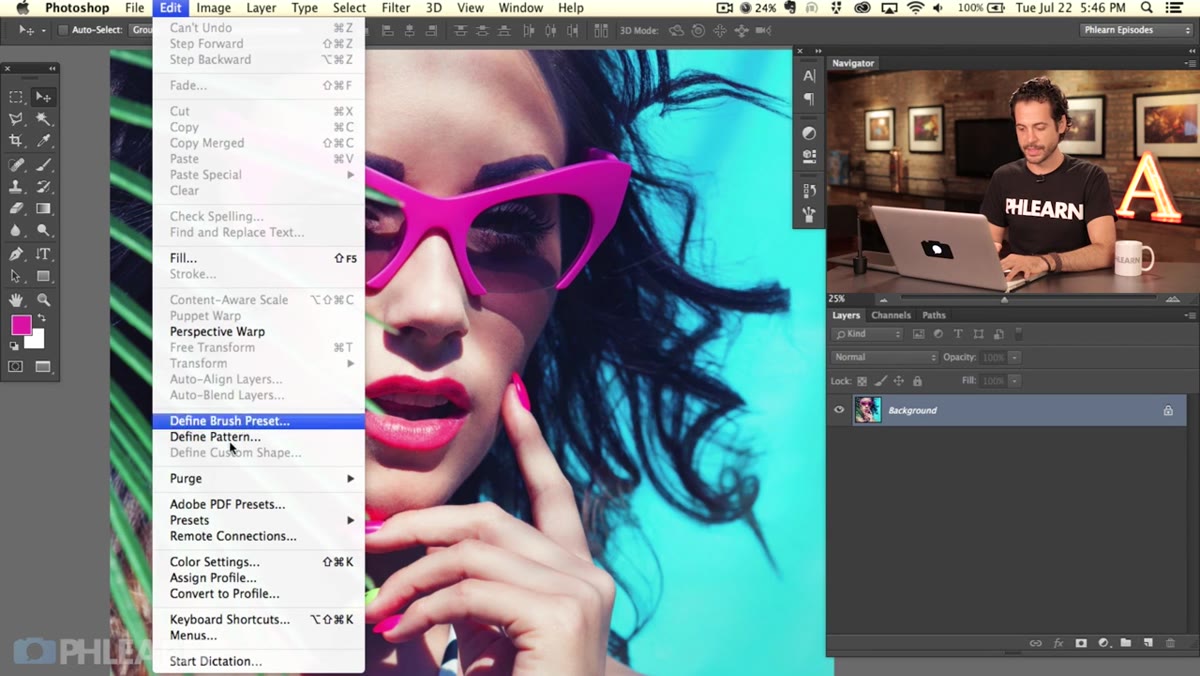 Edit menu open with Keyboard Shortcuts option highlighted
This is the step most beginners don’t know exists, and it’s genuinely a game-changer. Go to Edit, then scroll down to Keyboard Shortcuts. This opens a panel that gives you full access to every command in Photoshop organized by menu, and it lets you assign or reassign shortcuts to any of them.
Edit menu open with Keyboard Shortcuts option highlighted
This is the step most beginners don’t know exists, and it’s genuinely a game-changer. Go to Edit, then scroll down to Keyboard Shortcuts. This opens a panel that gives you full access to every command in Photoshop organized by menu, and it lets you assign or reassign shortcuts to any of them.
Think of it as a control panel for your entire workflow. Everything you see in the menus, File, Image, Layer, Filter, is represented here, and clicking on any command lets you type in whatever key combination you want to trigger it. It sounds complicated but the interface is actually straightforward. Click the command, press your desired keys, hit Accept.
Step 4: Create a Custom Shortcut for Something You Actually Use
 Keyboard Shortcuts panel open, Filter menu expanded showing blur options
Aaron uses Gaussian Blur as his example here, and it’s a perfect one. Gaussian Blur is one of those filters that shows up constantly in real editing work, whether you’re creating depth effects, softening skin, building composite shadows, or a dozen other things. But Photoshop doesn’t assign it a shortcut by default. You have to navigate to Filter, then Blur, then Gaussian Blur every single time.
Keyboard Shortcuts panel open, Filter menu expanded showing blur options
Aaron uses Gaussian Blur as his example here, and it’s a perfect one. Gaussian Blur is one of those filters that shows up constantly in real editing work, whether you’re creating depth effects, softening skin, building composite shadows, or a dozen other things. But Photoshop doesn’t assign it a shortcut by default. You have to navigate to Filter, then Blur, then Gaussian Blur every single time.
To fix this, open the Keyboard Shortcuts panel, switch the category dropdown to Filter, expand the Blur submenu, and click on Gaussian Blur. Then simply press the key combination you want. Aaron uses Shift+Option+Command+G (Shift+Alt+Ctrl+G on Windows). Hit Accept and you’re done. The next time you need a Gaussian Blur, one key combo gets you straight to the dialog. He demonstrates this immediately by applying a blur to a layer, and seeing how fast it is makes the point better than any explanation could.
Step 5: See the Result and Start Building Your Own Shortcut System
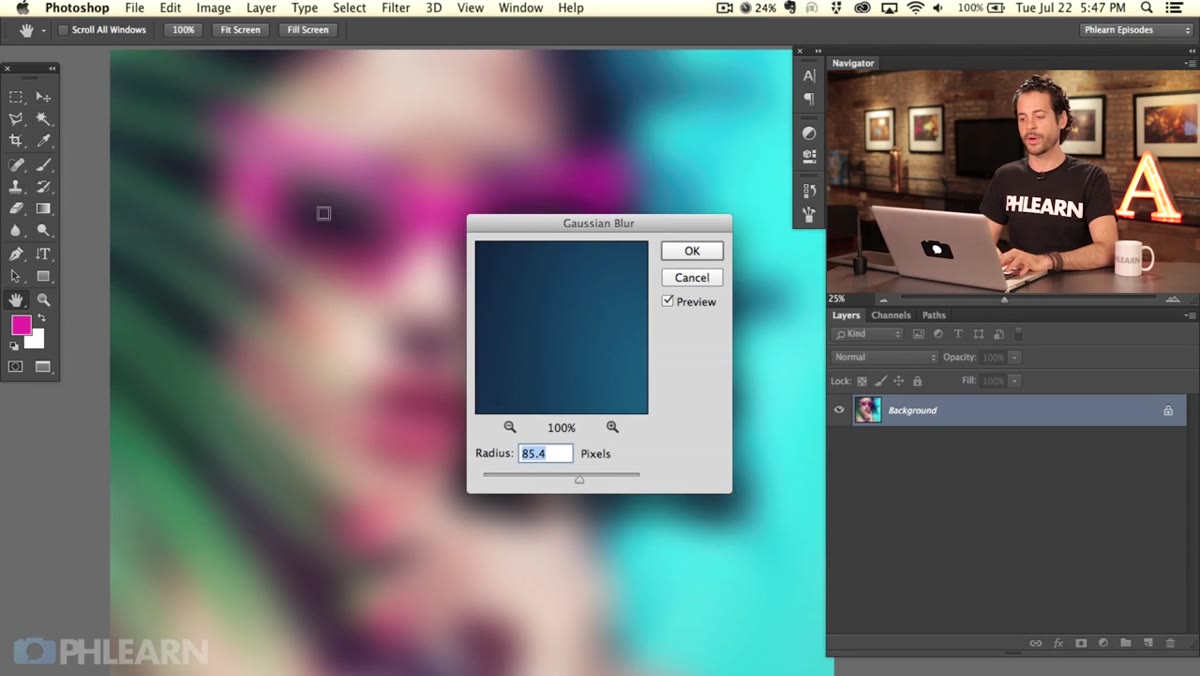 Gaussian Blur applied to a layer via custom keyboard shortcut
Once Aaron applies his custom Gaussian Blur shortcut, the takeaway snaps into focus. The shortcut itself isn’t the point. The habit is the point. Every time you find yourself repeating the same menu journey more than a few times a week, that’s a candidate for a custom shortcut. Over time, your version of Photoshop becomes tuned to how you work, not how Adobe imagined you might work.
Gaussian Blur applied to a layer via custom keyboard shortcut
Once Aaron applies his custom Gaussian Blur shortcut, the takeaway snaps into focus. The shortcut itself isn’t the point. The habit is the point. Every time you find yourself repeating the same menu journey more than a few times a week, that’s a candidate for a custom shortcut. Over time, your version of Photoshop becomes tuned to how you work, not how Adobe imagined you might work.
It’s worth spending fifteen minutes early in your Photoshop life just thinking about which filters and commands you reach for repeatedly, then mapping them to something memorable. Aaron’s framework here is simple: identify the repetitive action, assign the shortcut, build the muscle memory.
My Take: The Shortcut Thing Is Not a Beginner Topic
I want to push back gently on one framing here, which is the idea that shortcuts are something you graduate to once you know the basics. I’d argue the opposite. Learning your most-used shortcuts early means you build good habits from the start rather than having to unlearn slow ones later. I spent a full year reaching up to the Filter menu for Gaussian Blur before someone pointed out I could just shortcut it. That’s a year of unnecessary friction.
The custom shortcuts feature is also underused by intermediate-level users, not just beginners. I’ve talked to designers who’ve been in Photoshop for five years and didn’t know you could reassign shortcuts. If that’s you, spend twenty minutes in that panel this week. Map the five commands you use most. Your future self will be unreasonably grateful.
Keyboard shortcuts feel like a tiny detail until you realize they’re quietly shaping every editing session you’ll ever have. The single most important thing Aaron establishes in Part 1 is this: the time you invest in learning Photoshop’s shortcut system pays back every single day you open the program. That’s not hyperbole, that’s just math.
Watch the full tutorial on YouTube to see Part 1 in action, and stay tuned for our breakdown of Part 2, where Aaron gets into the actual tools and editing techniques.
Comments
Leave a Comment