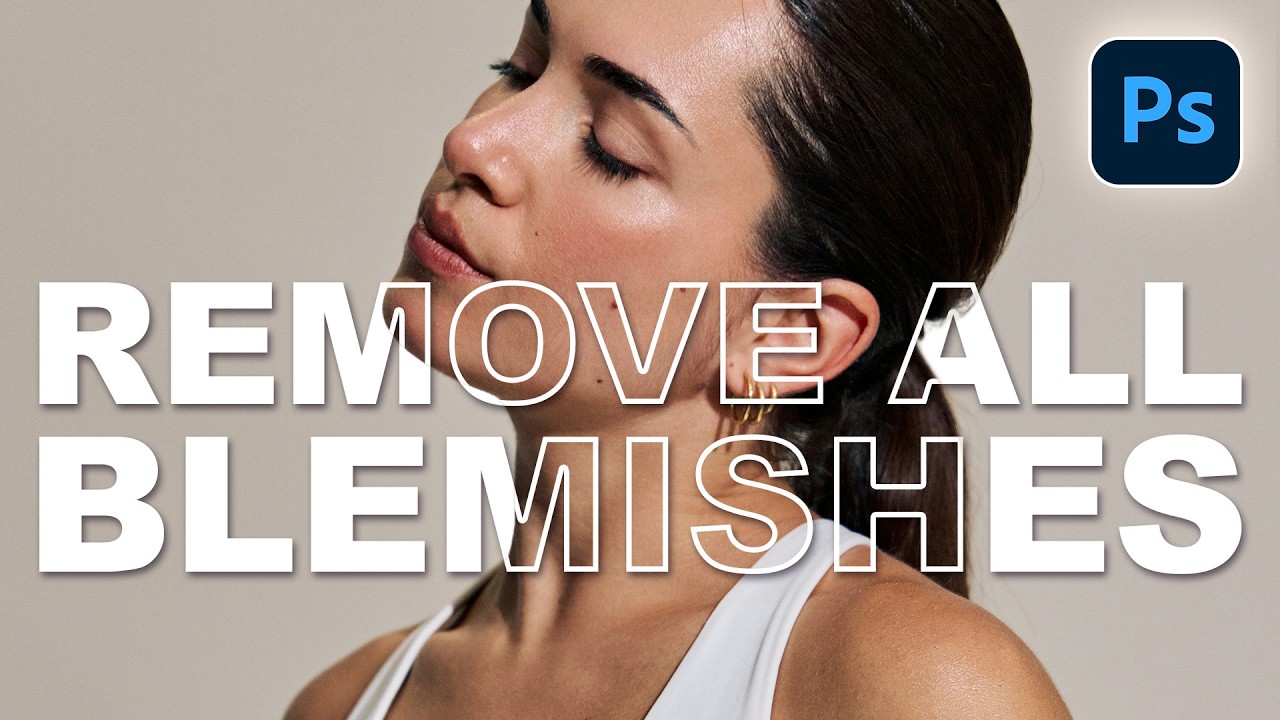
Skin retouching used to be one of those tasks that separated the people who really know Photoshop from everyone else. Frequency separation, healing brushes, clone stamp patches layered on top of each other like geological strata. It works, but it’s slow, and if a client comes back three weeks later wanting changes, good luck unpicking all of that. I’ve been burned enough times that I’ve become borderline fanatical about non-destructive workflows. So when a tool shows up that can handle blemish removal automatically, inside Camera Raw, without touching your base layer, and without eating your generative AI credits, I’m paying attention.
In this Aaron Nace (PHLEARN) tutorial, he walks through the brand-new Blemish Removal tool inside Adobe Camera Raw. Watch the full tutorial on YouTube before or after reading this, but everything you need to follow along is right here. The short version: the tool is fast, the results are genuinely impressive, and the Fade slider alone is worth the price of admission (which is nothing, since you already have Camera Raw).
One thing Aaron makes a point of flagging, and it stuck with me, is the ethics of retouching permanent features versus temporary ones. A pimple that’ll be gone in four days? Sure, remove it completely. Birthmarks, scars, freckles? Those belong to the person in the photo, and pulling them out entirely without being asked is crossing a line. The Fade slider in this tool is what makes that distinction actually usable in practice.
Step 1: Convert Your Layer to a Smart Object
 Background layer being converted to Smart Object in Layers panel
Before you touch anything else, right-click your background layer and choose “Convert for Smart Filters” from the Filter menu. You’ll see a small badge icon appear on the layer thumbnail in the Layers panel. That’s your signal that you’re working non-destructively.
Background layer being converted to Smart Object in Layers panel
Before you touch anything else, right-click your background layer and choose “Convert for Smart Filters” from the Filter menu. You’ll see a small badge icon appear on the layer thumbnail in the Layers panel. That’s your signal that you’re working non-destructively.
I know this sounds like housekeeping, but I learned this lesson the hard way on a client project years ago. Every edit you make through Camera Raw as a Smart Filter gets saved as a separate, editable filter below the layer. You can go back in, double-click, tweak the Fade slider, adjust the intensity, whatever you need. Without Smart Object conversion, those changes are baked in permanently the moment you click OK.
Step 2: Open the Camera Raw Filter
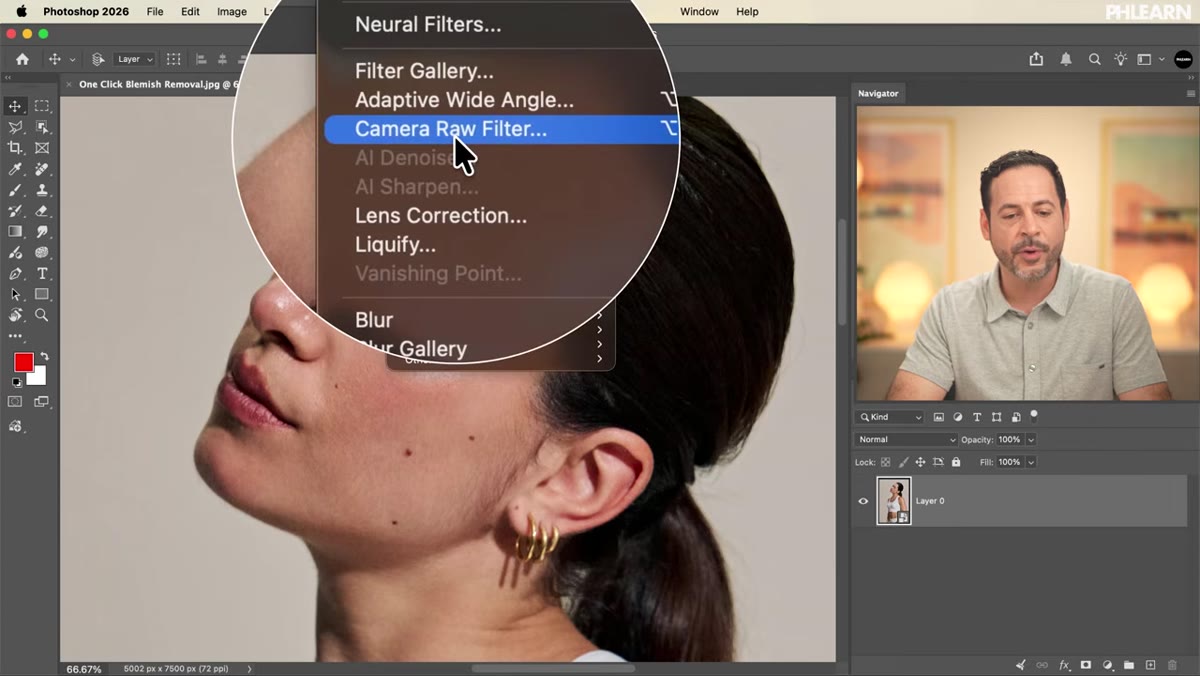 Filter menu open with Camera Raw Filter option highlighted
With your Smart Object layer selected, go to Filter and choose “Camera Raw Filter.” This opens the full Camera Raw interface right inside Photoshop, no round-tripping to Lightroom required. Aaron describes it as basically Lightroom living inside Photoshop, which is pretty accurate.
Filter menu open with Camera Raw Filter option highlighted
With your Smart Object layer selected, go to Filter and choose “Camera Raw Filter.” This opens the full Camera Raw interface right inside Photoshop, no round-tripping to Lightroom required. Aaron describes it as basically Lightroom living inside Photoshop, which is pretty accurate.
Once it opens, zoom into your subject so you can actually see what you’re working with. The panel you want is on the right side. Look for the “Healing” or removal tools section. This is where the new Blemish tool lives.
Step 3: Run the One-Click Blemish Removal
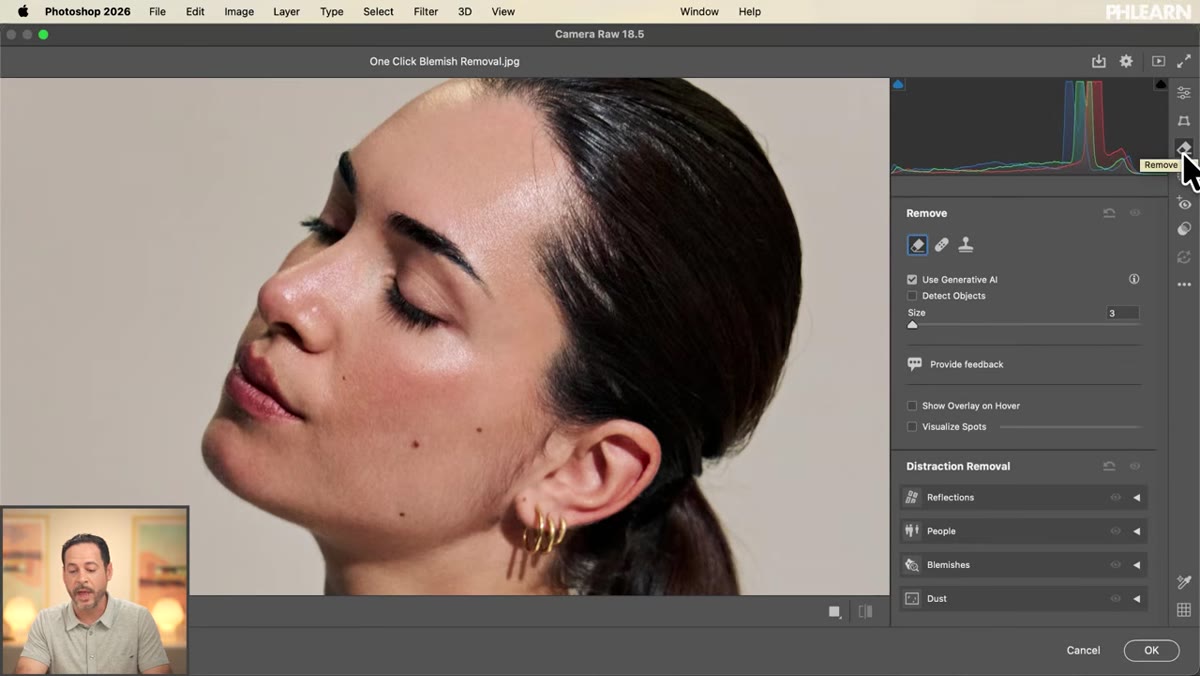 Distraction Removal panel open showing the Blemishes section and Apply button
Inside the Distraction Removal section on the right panel, you’ll find a “Blemishes” option. Click it, and you’ll see a single button labeled “Apply.” Click that button. Seriously, that’s it.
Distraction Removal panel open showing the Blemishes section and Apply button
Inside the Distraction Removal section on the right panel, you’ll find a “Blemishes” option. Click it, and you’ll see a single button labeled “Apply.” Click that button. Seriously, that’s it.
Within a few seconds, Camera Raw analyzes the skin in your image and removes blemishes automatically. The AI doing this work is baked into Camera Raw itself, which means it does not pull from your generative credits pool. Aaron clocks it at roughly three seconds on his image. It’s not magic, but it’s close enough that I had to watch it twice.
Step 4: Use the Fade Slider to Dial In the Right Amount
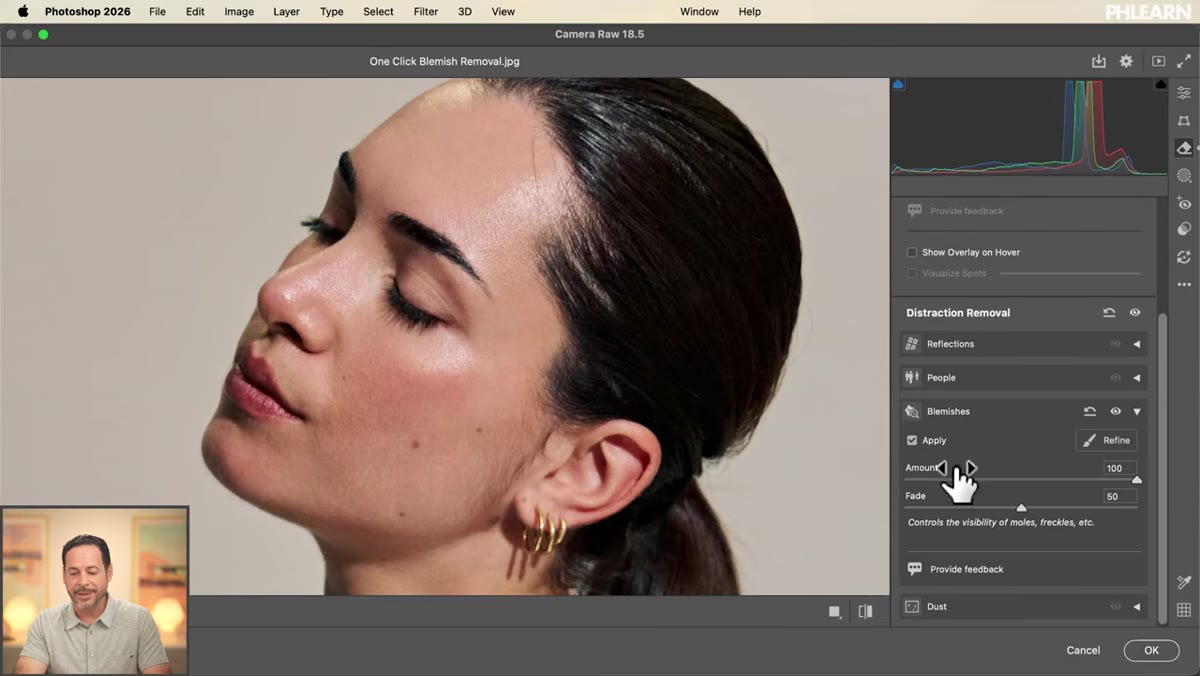 Fade slider being adjusted below the Blemishes tool results
After Apply does its thing, you’ll see a Fade slider appear below the results. This is the feature that makes the tool actually usable for professional work rather than just impressive in a demo.
Fade slider being adjusted below the Blemishes tool results
After Apply does its thing, you’ll see a Fade slider appear below the results. This is the feature that makes the tool actually usable for professional work rather than just impressive in a demo.
Drag it toward zero and blemishes disappear completely. Drag it toward 100 and they come back at full strength. Anywhere in between and you’re subtly reducing their visibility without erasing them entirely. For anything that’s a permanent part of someone’s appearance, Aaron recommends landing somewhere in the middle range unless your client explicitly asks for full removal. I’d agree. A face with every mark removed can start to look like a stock photo of a face rather than an actual human being.
Step 5: Click Refine to Catch What the First Pass Missed
 Refine button clicked with new detection pins appearing across the image
Once you’re happy with the initial Fade setting, hit the “Refine” button. This triggers a second, deeper pass across the image. New pins will appear, often in places you wouldn’t have thought to look. Aaron’s image turned up spots on the subject’s shoulder and chest, as well as a highlight on the skin that was blown out and needed correction.
Refine button clicked with new detection pins appearing across the image
Once you’re happy with the initial Fade setting, hit the “Refine” button. This triggers a second, deeper pass across the image. New pins will appear, often in places you wouldn’t have thought to look. Aaron’s image turned up spots on the subject’s shoulder and chest, as well as a highlight on the skin that was blown out and needed correction.
Hold the spacebar to pan around the image and see what Refine flagged. Some of what it finds will be genuinely useful. Some of it might be things you want to keep. That’s where the next step comes in.
Step 6: Use Restore and Remove to Customize the Results
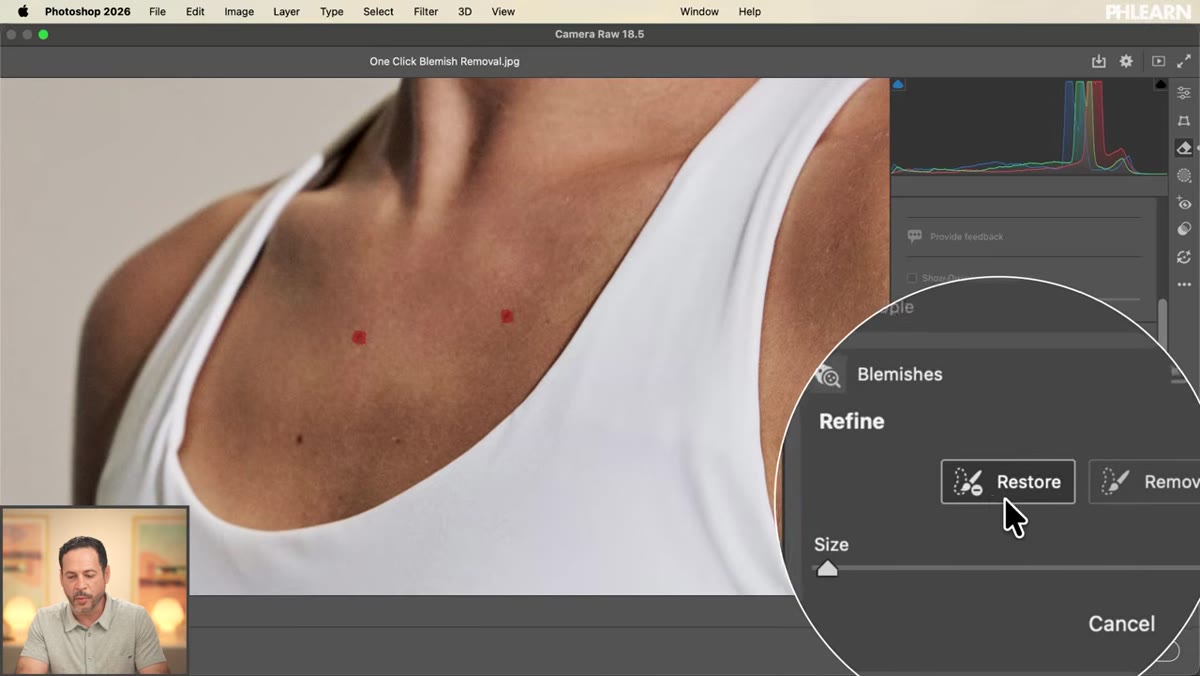 Restore and Remove tool options visible with painted areas on skin being restored
After Refine runs, you have two manual brushes available: Restore and Remove. Think of them as a yes/no system for each area the AI flagged.
Restore and Remove tool options visible with painted areas on skin being restored
After Refine runs, you have two manual brushes available: Restore and Remove. Think of them as a yes/no system for each area the AI flagged.
Restore lets you paint back over areas where the tool removed something it shouldn’t have. Aaron demonstrates this on features that are permanent to his subject, painting them back in so they aren’t wiped from the final image. Remove works the opposite way: paint over anything the first pass missed and you want to clean up. You can also use Remove with Generative AI enabled for more complex problem areas like wrinkles in clothing, which Aaron demonstrates later in the video on a jacket seam. For fabric and fabric texture, the Generative AI version of Remove does a noticeably better job than the standard content-aware approach.
Step 7: Close Camera Raw and Confirm Your Smart Filter
 Layers panel showing Smart Object with Camera Raw Filter listed as an editable Smart Filter
When you’re done, click OK to close Camera Raw. Back in Photoshop, look at your Layers panel. Beneath your Smart Object layer, you’ll see “Camera Raw Filter” listed as an editable Smart Filter. Double-click it at any point to reopen Camera Raw and adjust anything you did in this session, including the Fade slider.
Layers panel showing Smart Object with Camera Raw Filter listed as an editable Smart Filter
When you’re done, click OK to close Camera Raw. Back in Photoshop, look at your Layers panel. Beneath your Smart Object layer, you’ll see “Camera Raw Filter” listed as an editable Smart Filter. Double-click it at any point to reopen Camera Raw and adjust anything you did in this session, including the Fade slider.
This is the part that makes the whole workflow worth it. The retouching is completely non-destructive. Nothing is merged, nothing is flattened, and nothing is permanent until you say so.
One Thing Worth Knowing Before You Go All-In
The Blemish Removal tool works best when the skin tones in your image are relatively consistent and well-exposed to begin with. I tested it on a few different images after watching Aaron’s tutorial, and on a shot with harsh mixed lighting that created strong shadows across the face, the tool occasionally flagged shadow edges as blemishes. Not often, and Restore cleaned those up quickly, but it’s worth doing one manual pass with the spacebar after running Refine just to confirm the AI didn’t get overzealous. It’s a minor caveat on an otherwise impressive tool.
The single biggest takeaway here is that non-destructive workflow and fast automatic tools are no longer mutually exclusive. Converting to a Smart Object first costs you about ten seconds and saves you from every “can we go back to how it looked before” conversation with a client. The Blemish tool does the heavy lifting, the Fade slider keeps you from going too far, and Refine plus Restore gives you the manual control to catch the edge cases.
Watch the full tutorial on YouTube to see Aaron walk through the clothing wrinkle section, which is worth sticking around for even if skin retouching isn’t your main focus.
Comments
Leave a Comment