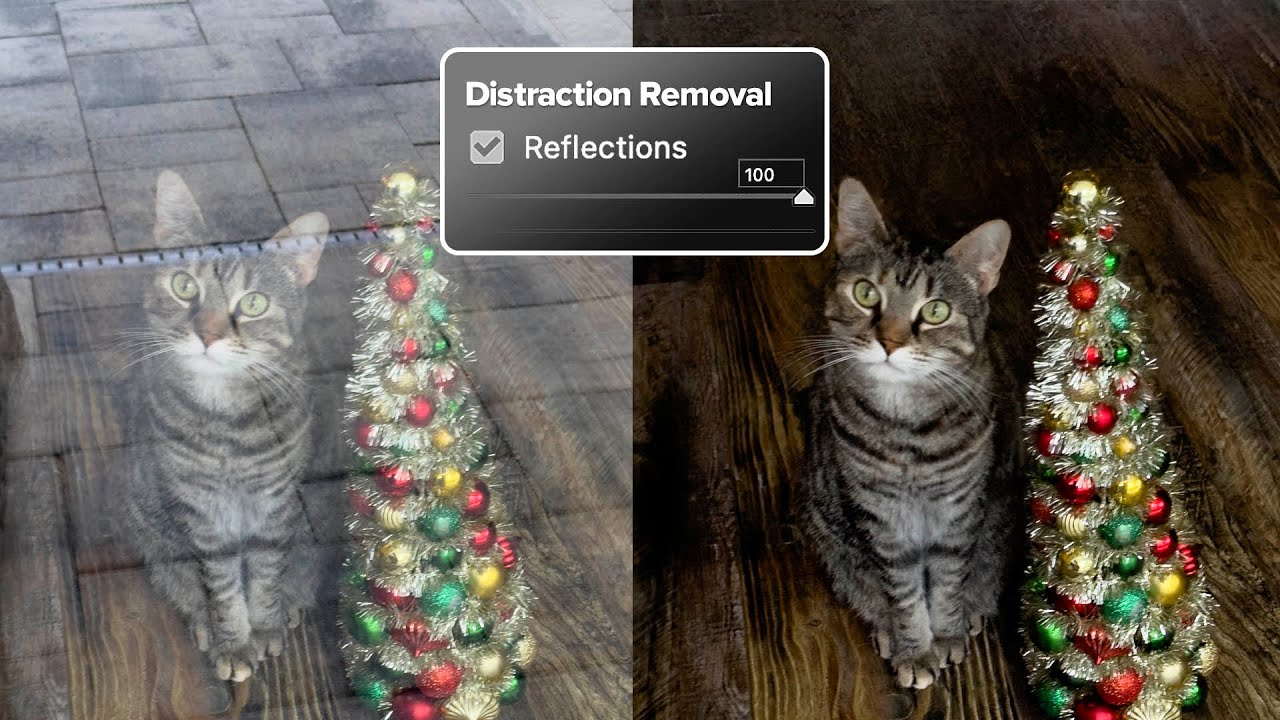
There’s a specific kind of photograph that lives rent-free in my head: the one that’s almost perfect. Good light, good composition, and then a big fat window reflection smeared right across the subject like the universe is personally trolling you. I’ve got a few of those buried in old client folders from my early freelance days, back when I was still figuring out that “I’ll fix it in post” is mostly a cope. For years, my honest answer to reflection problems was “you probably can’t.” Either shoot around it or accept your fate.
Then I watched Watch the full tutorial on YouTube from Matt Kloskowski, and I had one of those annoying moments where I realized Adobe had quietly shipped something genuinely useful and I’d completely missed it. He walks through a one-click reflection removal feature tucked inside Adobe Camera Raw’s Technology Previews, and it’s the kind of thing that makes you immediately scroll through your old photo library looking for victims to test it on.
The important framing here, which Matt makes clear upfront: this is not a license to shoot carelessly. You’re not going to walk around a glass building and just blast away. But for those photos you can’t reshoot, the old ones you wish you’d handled better, or the situations where the reflection was genuinely unavoidable, this tool is worth knowing about.
Step 1: Shoot in RAW (Non-Negotiable)
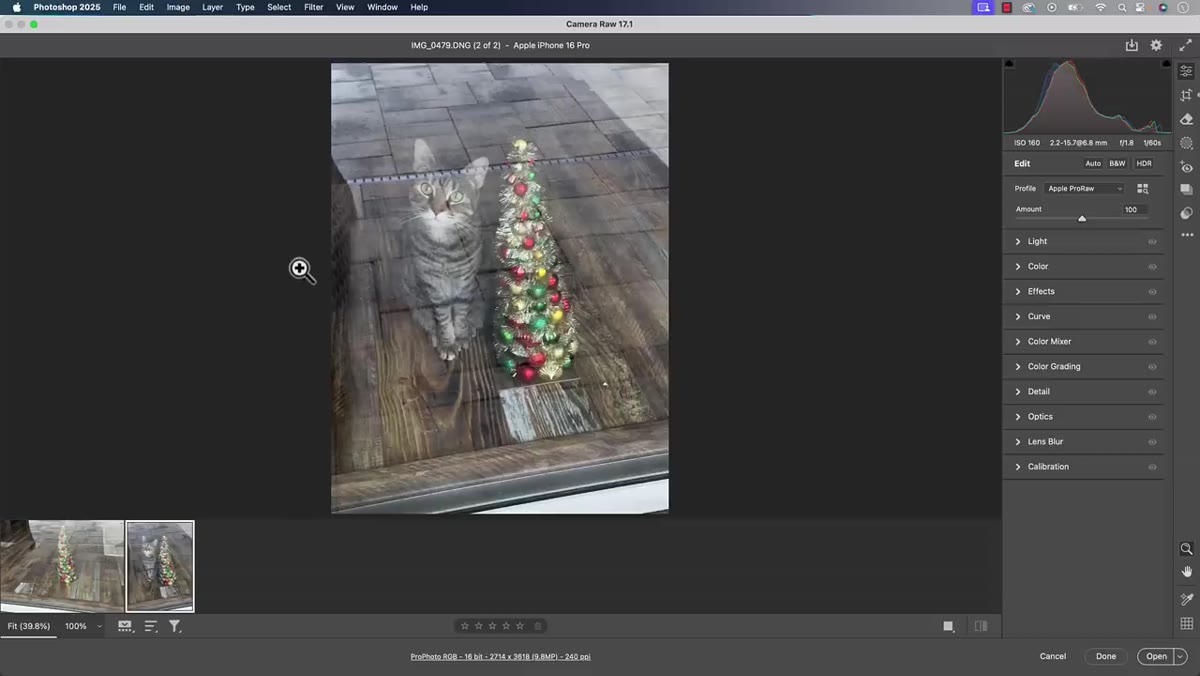 Camera raw badge visible as photo opens in Photoshop
This feature only works on RAW files. Not JPEGs, not TIFFs. RAW. If you’re shooting on a phone, you’ll need to dig into your camera settings and enable RAW or DNG capture before you shoot. Most modern iPhones and Android flagships support this, but it’s usually off by default. Matt shot his test photo on his phone specifically in RAW mode for this reason. If you’re working with an existing photo that’s already a JPEG, this particular tool isn’t going to help you. That’s the hard line.
Camera raw badge visible as photo opens in Photoshop
This feature only works on RAW files. Not JPEGs, not TIFFs. RAW. If you’re shooting on a phone, you’ll need to dig into your camera settings and enable RAW or DNG capture before you shoot. Most modern iPhones and Android flagships support this, but it’s usually off by default. Matt shot his test photo on his phone specifically in RAW mode for this reason. If you’re working with an existing photo that’s already a JPEG, this particular tool isn’t going to help you. That’s the hard line.
Step 2: Open the File in Adobe Camera Raw
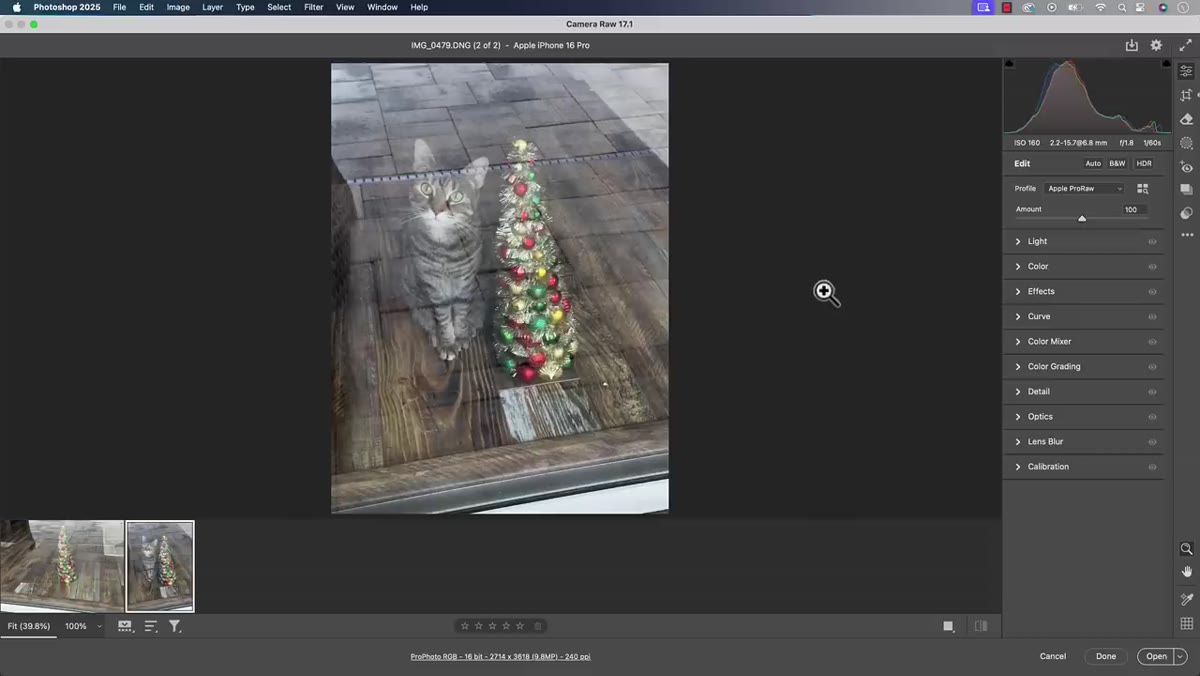 File opening into Adobe Camera Raw from Photoshop
From Photoshop, go to File, then Open, and select your RAW file. Photoshop will automatically route it into Adobe Camera Raw rather than opening it directly onto the canvas. If you’re a Lightroom user day-to-day, you can technically do this in Lightroom too once the feature graduates out of preview status, but right now Camera Raw is where it lives. Don’t start making exposure adjustments or doing any other edits yet. Matt’s advice is to go straight for the reflection removal first, before you’ve done anything else to the file. That’s the order of operations here.
File opening into Adobe Camera Raw from Photoshop
From Photoshop, go to File, then Open, and select your RAW file. Photoshop will automatically route it into Adobe Camera Raw rather than opening it directly onto the canvas. If you’re a Lightroom user day-to-day, you can technically do this in Lightroom too once the feature graduates out of preview status, but right now Camera Raw is where it lives. Don’t start making exposure adjustments or doing any other edits yet. Matt’s advice is to go straight for the reflection removal first, before you’ve done anything else to the file. That’s the order of operations here.
Step 3: Enable Technology Previews
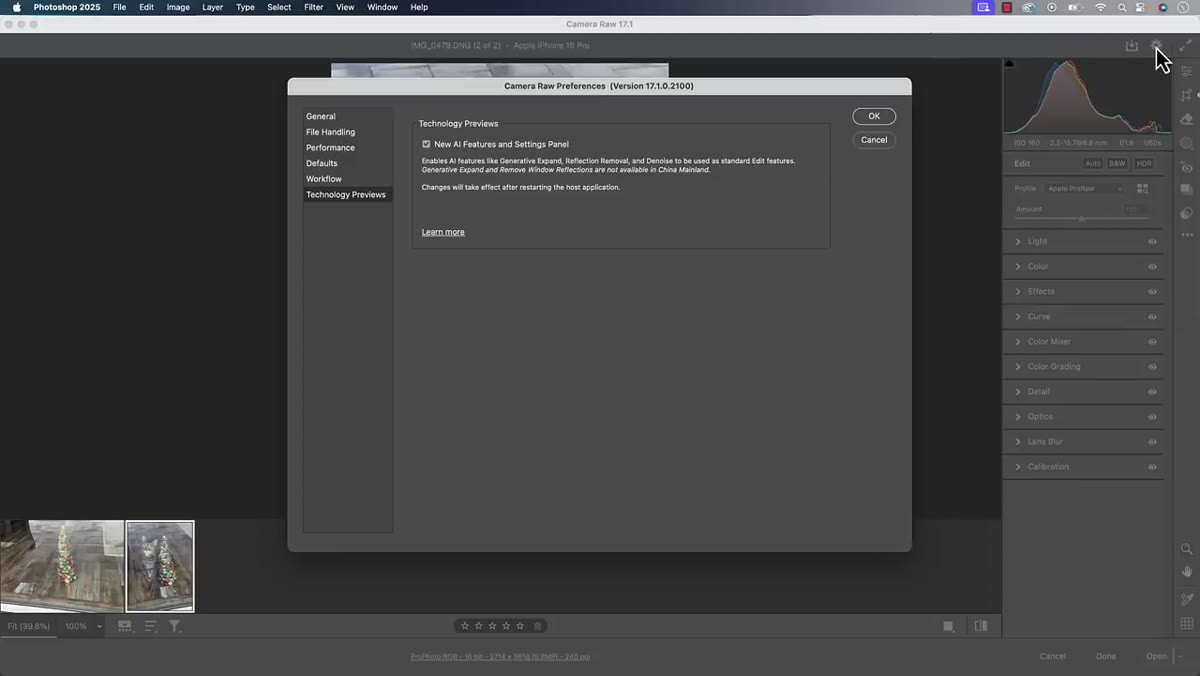 Gear icon in top-right corner of Camera Raw interface
Look for the small gear icon in the top-right corner of the Camera Raw interface. Click it, and you’ll see an option for Technology Previews. Enable it if it isn’t already checked, then click OK. Think of Technology Previews as Adobe’s way of shipping beta features to people who want to test them without forcing everyone to use unfinished tools. Matt describes it as a testing ground, and that’s pretty much right. The feature isn’t officially “done,” which is why it’s gated behind this toggle rather than sitting in the main panel. Once you’ve turned it on, you’re good to go.
Gear icon in top-right corner of Camera Raw interface
Look for the small gear icon in the top-right corner of the Camera Raw interface. Click it, and you’ll see an option for Technology Previews. Enable it if it isn’t already checked, then click OK. Think of Technology Previews as Adobe’s way of shipping beta features to people who want to test them without forcing everyone to use unfinished tools. Matt describes it as a testing ground, and that’s pretty much right. The feature isn’t officially “done,” which is why it’s gated behind this toggle rather than sitting in the main panel. Once you’ve turned it on, you’re good to go.
Step 4: Find the Distraction Removal Tool
 Eraser tool selected in Camera Raw toolbar, showing distraction removal panel
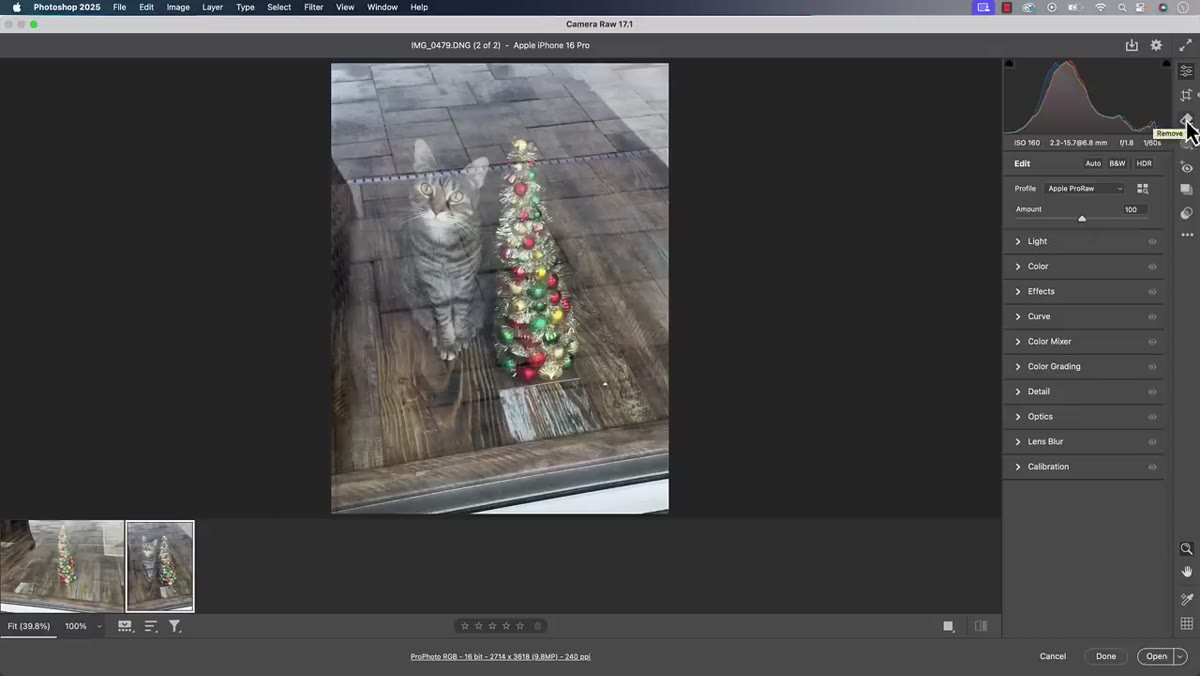
In the toolbar running down the right side of Camera Raw, find the eraser icon. Click it, and you’ll see the Distraction Removal panel open up. Inside that panel, you should now see a “Reflections” option listed as one of the removal types. If you’ve completed Step 3 and the Reflections option still isn’t showing up, that’s a Camera Raw version issue and something to take up with Adobe support. But assuming everything’s current and the preview is enabled, it should be right there.
Eraser tool selected in Camera Raw toolbar, showing distraction removal panel
In the toolbar running down the right side of Camera Raw, find the eraser icon. Click it, and you’ll see the Distraction Removal panel open up. Inside that panel, you should now see a “Reflections” option listed as one of the removal types. If you’ve completed Step 3 and the Reflections option still isn’t showing up, that’s a Camera Raw version issue and something to take up with Adobe support. But assuming everything’s current and the preview is enabled, it should be right there.
Step 5: Click Reflections and Let It Run
 Reflection removal processing on photo with Christmas tree and cat
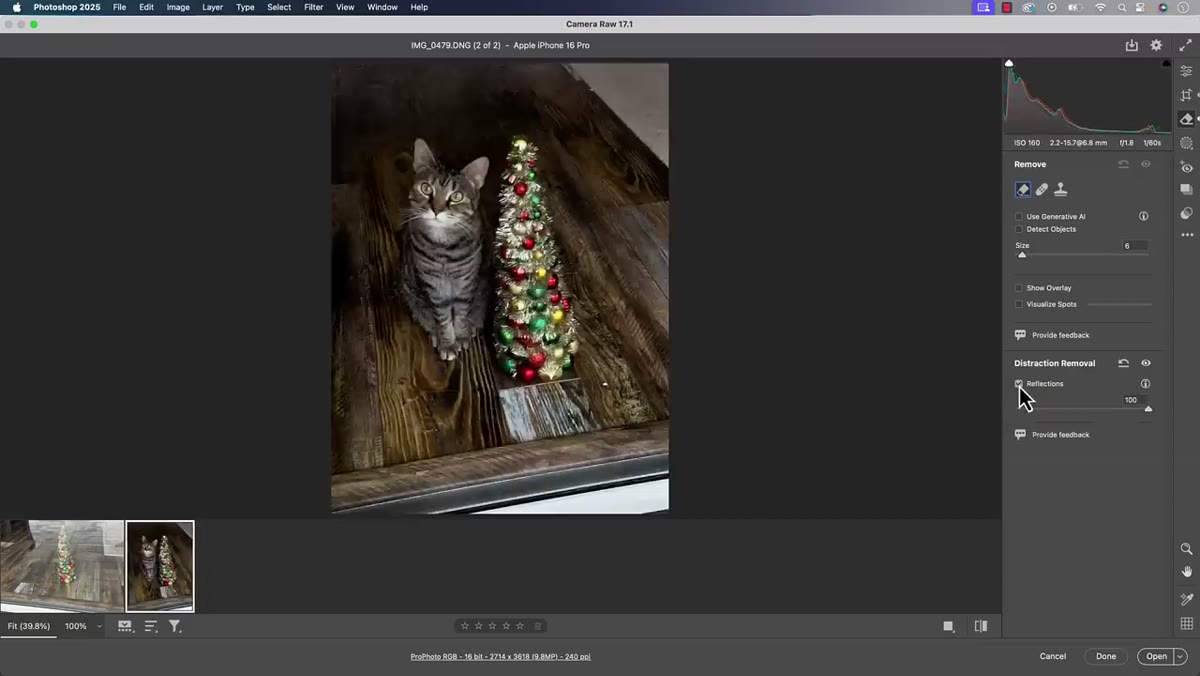
Just click “Reflections.” That’s genuinely it. Adobe’s AI analyzes the image and goes to work. Matt notes it took around ten seconds on his test photo, though it appeared faster in the video because he’d already run it once before recording that portion. The processing time will vary depending on your image size and machine, but you’re not waiting around for minutes. Once it finishes, you’ll see the before and after using the eyeball icon in the panel. The difference in Matt’s example is pretty striking. The reflection is gone and the underlying scene reads cleanly.
Reflection removal processing on photo with Christmas tree and cat
Just click “Reflections.” That’s genuinely it. Adobe’s AI analyzes the image and goes to work. Matt notes it took around ten seconds on his test photo, though it appeared faster in the video because he’d already run it once before recording that portion. The processing time will vary depending on your image size and machine, but you’re not waiting around for minutes. Once it finishes, you’ll see the before and after using the eyeball icon in the panel. The difference in Matt’s example is pretty striking. The reflection is gone and the underlying scene reads cleanly.
Step 6: Compare Before and After
 Before and after comparison using eyeball toggle in Camera Raw
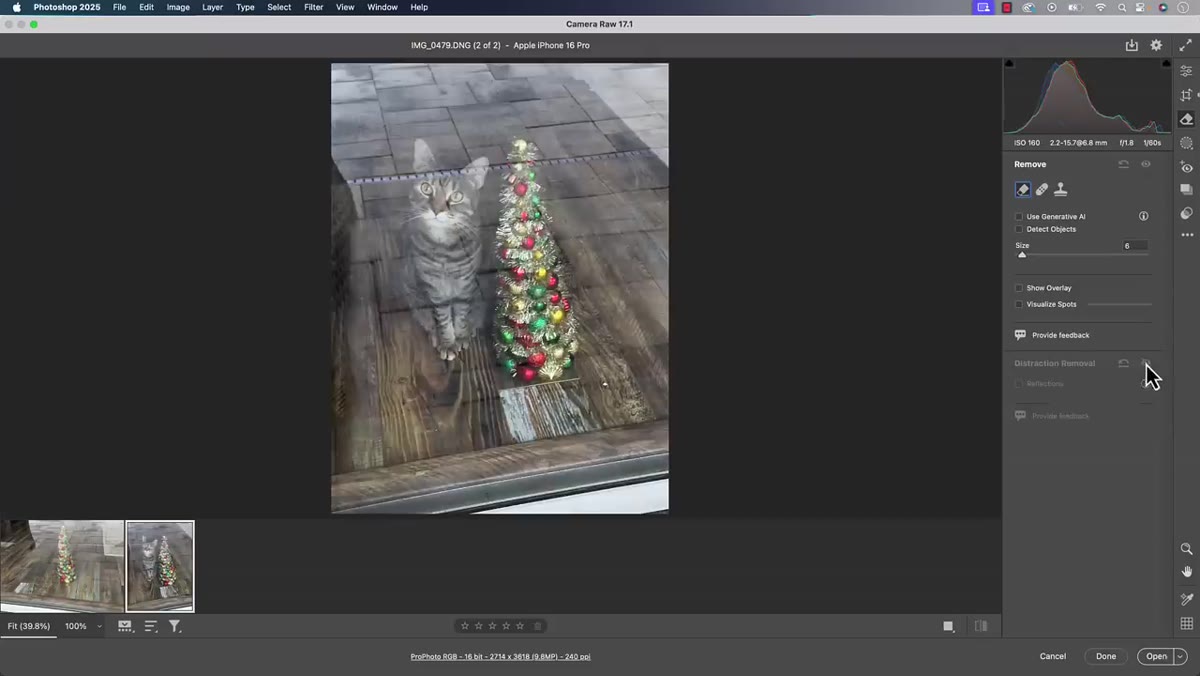
Use the eyeball toggle in the Distraction Removal panel to flip between your original and the processed version. This is your sanity check. The AI doesn’t always nail every pixel perfectly, especially around complex edges or areas where the reflection is heavy and the underlying detail is murky. Take a close look at the result before you commit and continue editing. If it’s done the heavy lifting well, you can proceed with your normal adjustments. If there are small artifacts around the edges, those can usually be cleaned up with the Healing Brush or Clone Stamp later after you’ve opened the file fully into Photoshop.
Before and after comparison using eyeball toggle in Camera Raw
Use the eyeball toggle in the Distraction Removal panel to flip between your original and the processed version. This is your sanity check. The AI doesn’t always nail every pixel perfectly, especially around complex edges or areas where the reflection is heavy and the underlying detail is murky. Take a close look at the result before you commit and continue editing. If it’s done the heavy lifting well, you can proceed with your normal adjustments. If there are small artifacts around the edges, those can usually be cleaned up with the Healing Brush or Clone Stamp later after you’ve opened the file fully into Photoshop.
What I’d Add From My Own Experience
The thing nobody really talks about with AI-powered tools like this is how much they reward clean source material. The reflection removal works best when the reflection is somewhat distinct in tone or color from the subject underneath. When both the reflection and the underlying scene are similar in luminosity, the AI has a harder time knowing which layer of reality it should preserve. I tested this on an old photo I dug up from a window display shoot where I was working with harsh midday light, and the results were about 80% there. Impressive, but not invisible. In those borderline cases, I’d still go in with a healing pass afterward.
It’s also worth remembering that this is labeled a Technology Preview for a reason. The tool is going to get better. What we’re using now is early. The fact that it already handles a lot of real-world reflections reasonably well is the encouraging part. By the time it graduates to a standard Lightroom and Camera Raw feature, it’ll probably be the kind of thing you just run reflexively on any photo that might have glass in it.
One-click reflection removal sounds like marketing copy. After actually running it on a handful of problem photos, I’ll admit it mostly delivers. It won’t rescue every shot, and it’s never a substitute for good shooting habits. But for the images you can’t reshoot and the ones you’d otherwise just delete, this is a real option now, not a pipe dream.
Watch the full tutorial on YouTube to see Matt walk through the whole thing with his own test photo. The before and after on his example is genuinely worth seeing.
Comments (1)
Printing this out and pinning it next to my monitor. That good.
Leave a Comment