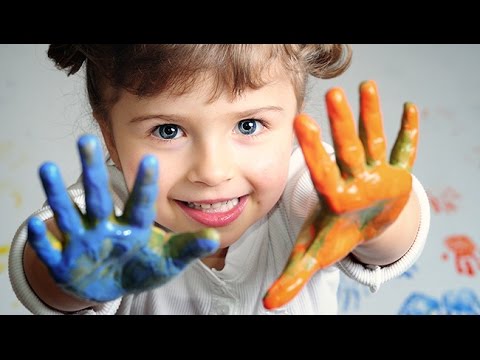
Kids are basically impossible to photograph well. They’re moving, they’re squinting, they’ve got something unidentified on their face, and the lighting is whatever chaos the universe handed you that afternoon. So when the photo technically comes out okay, you want the edit to actually do it justice without spending two hours in Photoshop wrestling with it.
That’s exactly what this tutorial from Aaron Nace over at PHLEARN delivers. Watch the full tutorial on YouTube before or after reading through this breakdown. Aaron walks through three targeted edits, a vignette to focus attention, a warming filter to bring life to skin tones, and eye enhancement to create that magnetic quality that makes a portrait feel intentional rather than accidental. I’ve been doing a lot of family shoot edits for clients lately and these three moves have become a reliable part of my workflow. They’re fast, non-destructive, and they work.
What I appreciate about this approach is that it doesn’t require any fancy plugins or five adjustment layers stacked on top of each other. It’s built on tools you already have open. Here’s how to do all three.
Step 1: Create a New Layer for the Vignette
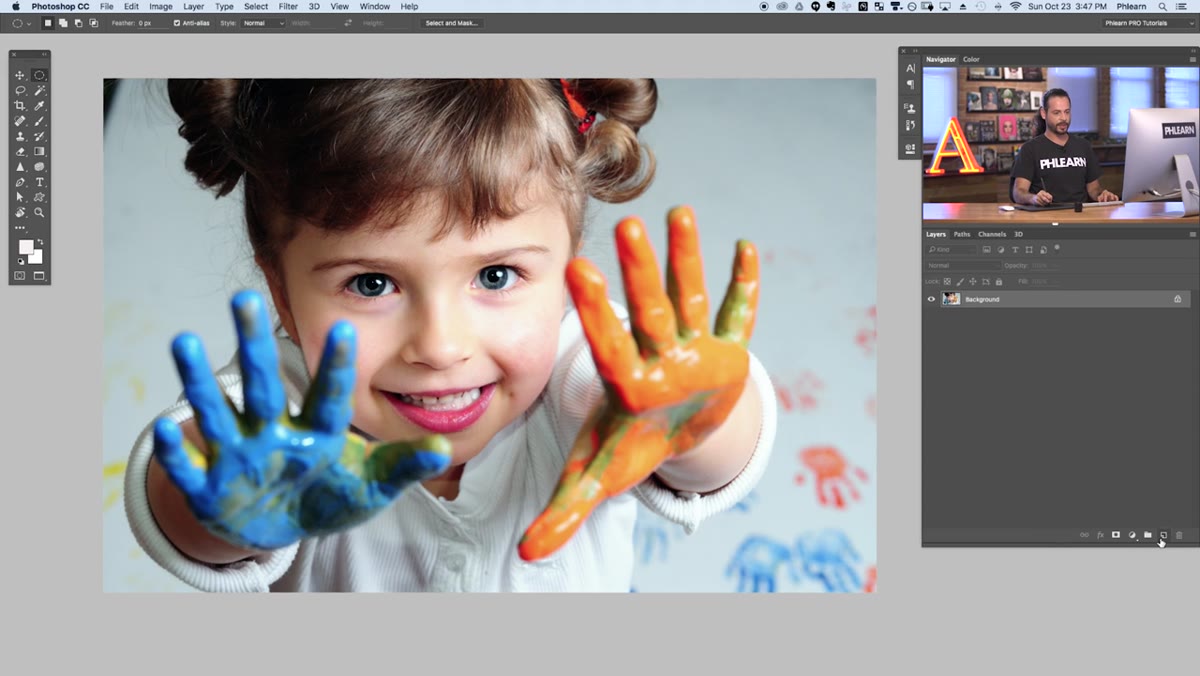 Blank new layer added above the portrait in Layers panel
Before touching any gradients, create a fresh empty layer above your image. This keeps the vignette completely separate from your original photo, which means you can tweak or trash it later without redoing anything. It’s a small habit that saves a lot of grief. Hit the new layer button at the bottom of your Layers panel or use Shift+Ctrl+N (Shift+Cmd+N on Mac).
Blank new layer added above the portrait in Layers panel
Before touching any gradients, create a fresh empty layer above your image. This keeps the vignette completely separate from your original photo, which means you can tweak or trash it later without redoing anything. It’s a small habit that saves a lot of grief. Hit the new layer button at the bottom of your Layers panel or use Shift+Ctrl+N (Shift+Cmd+N on Mac).
Step 2: Apply a Radial Gradient in Black and White
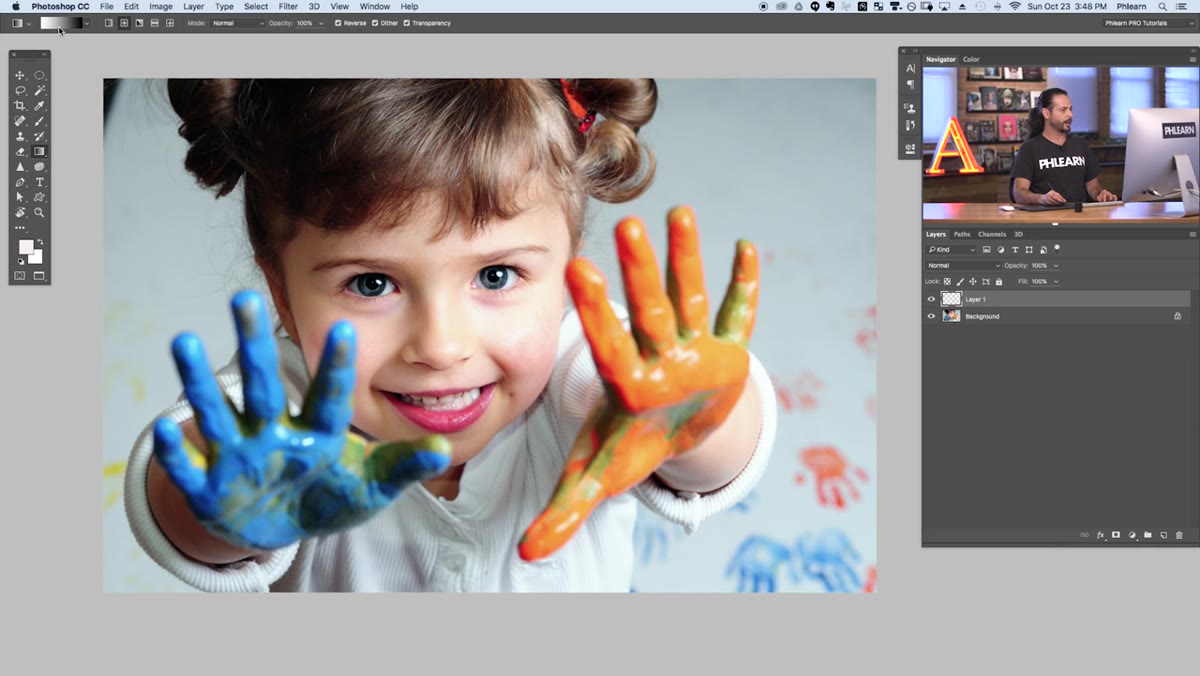 Gradient tool selected, black-to-white radial gradient shown in options bar
Grab the Gradient tool by pressing G. Up in the options bar, click the gradient preview thumbnail to open the Gradient Editor. You’re looking for the basic black-to-white preset, which should be near the top of the default list. Select it and hit OK. Now, critically, look at the row of gradient type icons in the options bar and choose the Radial Gradient option. That’s the one that radiates outward from a center point, not the linear one that sweeps side to side.
Gradient tool selected, black-to-white radial gradient shown in options bar
Grab the Gradient tool by pressing G. Up in the options bar, click the gradient preview thumbnail to open the Gradient Editor. You’re looking for the basic black-to-white preset, which should be near the top of the default list. Select it and hit OK. Now, critically, look at the row of gradient type icons in the options bar and choose the Radial Gradient option. That’s the one that radiates outward from a center point, not the linear one that sweeps side to side.
Also check whether the “Reverse” checkbox is ticked. You want white in the center and black around the edges, so the bright area sits over your subject. If your first drag produces a dark blob in the middle, just check that Reverse box and try again. Click somewhere near the center of your subject and drag outward to roughly the edge of the frame. You’ll see a live preview update as you drag.
Step 3: Set the Blend Mode to Soft Light and Dial Back the Opacity
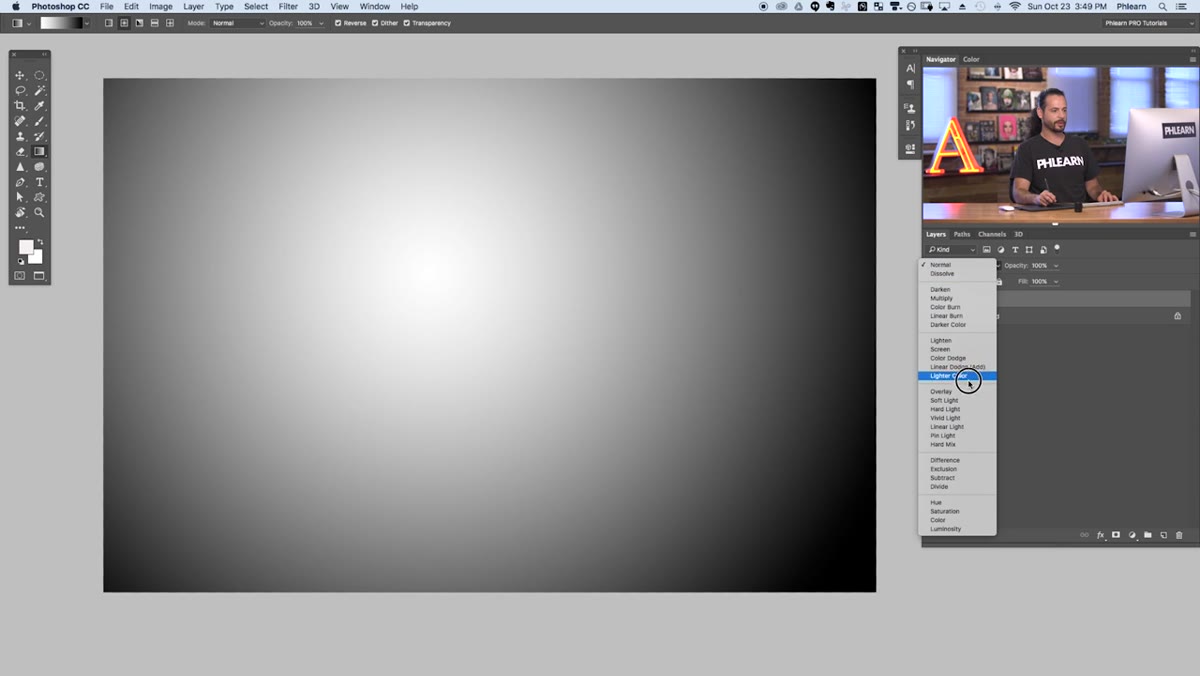 Layer blend mode dropdown showing Soft Light selected
With your gradient layer selected, open the blend mode dropdown in the Layers panel (it says “Normal” by default) and switch it to Soft Light. This is where the magic actually happens. Instead of a harsh black-and-white overlay sitting on top of your photo, Soft Light uses the luminosity of the gradient to gently brighten the lighter center area and deepen the darker edges. It integrates into the photo rather than sitting on top of it.
Layer blend mode dropdown showing Soft Light selected
With your gradient layer selected, open the blend mode dropdown in the Layers panel (it says “Normal” by default) and switch it to Soft Light. This is where the magic actually happens. Instead of a harsh black-and-white overlay sitting on top of your photo, Soft Light uses the luminosity of the gradient to gently brighten the lighter center area and deepen the darker edges. It integrates into the photo rather than sitting on top of it.
It’ll probably look too strong at 100% opacity. Bring it down to somewhere in the 50-60% range and check how it reads. You can also re-drag your gradient at any time on the same layer to reposition where the bright spot falls. Aaron’s tip here is useful: aim to place the bright center directly over the child’s face, then drag out to the edge of the frame to set the falloff. Toggle the layer on and off to compare. If the effect reads immediately but doesn’t feel heavy-handed, you’re in the right place.
Step 4: Add a Warming Filter
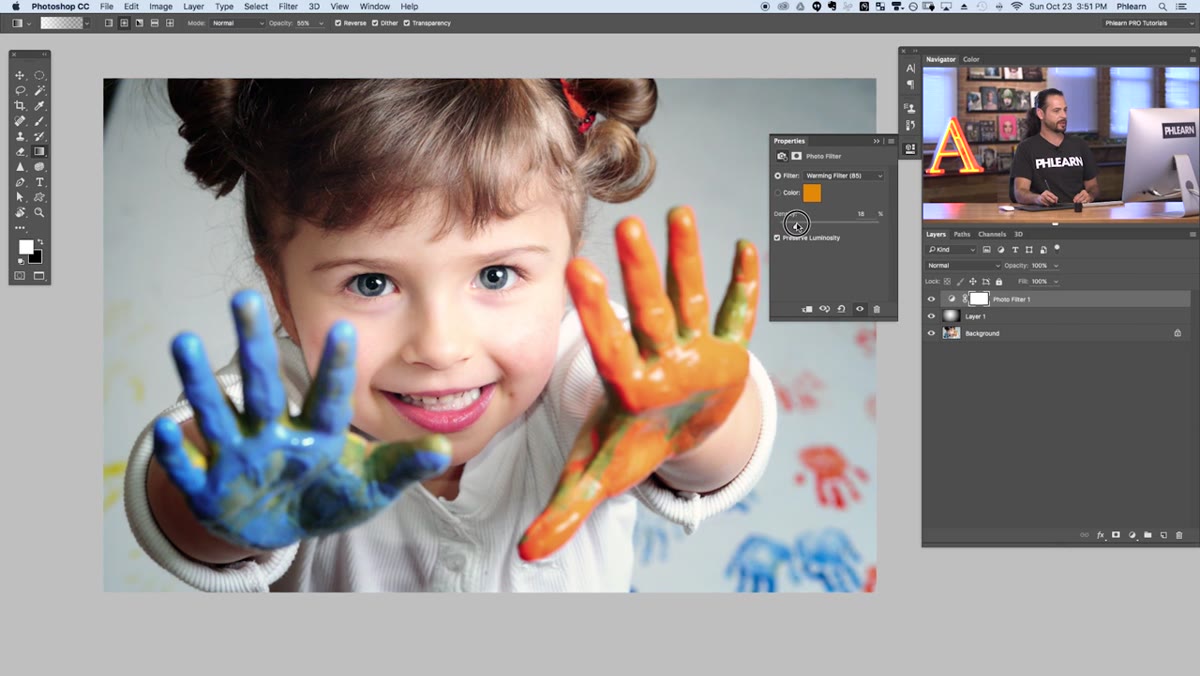
 Photo Filter adjustment layer dialog with Warming Filter 85 selected
Go to Layer > New Adjustment Layer > Photo Filter. In the dialog, choose Warming Filter (85) from the filter dropdown. This pushes the image toward orange-amber tones, which mimics the quality of warm afternoon light and adds a healthy glow to skin. It’s subtle but it makes a real difference on kids especially, since their skin tones tend to sit in that warm peachy range already.
Photo Filter adjustment layer dialog with Warming Filter 85 selected
Go to Layer > New Adjustment Layer > Photo Filter. In the dialog, choose Warming Filter (85) from the filter dropdown. This pushes the image toward orange-amber tones, which mimics the quality of warm afternoon light and adds a healthy glow to skin. It’s subtle but it makes a real difference on kids especially, since their skin tones tend to sit in that warm peachy range already.
The default density is around 25%. That’s usually a reasonable starting point, but don’t be afraid to push it to 30-35% if the photo was shot in flat or cool light. You can always mask this adjustment layer if you want the effect concentrated on the subject rather than the whole frame. But for most kids’ portraits, applying it globally works fine.
Step 5: Enhance the Eyes - Brighten and Sharpen
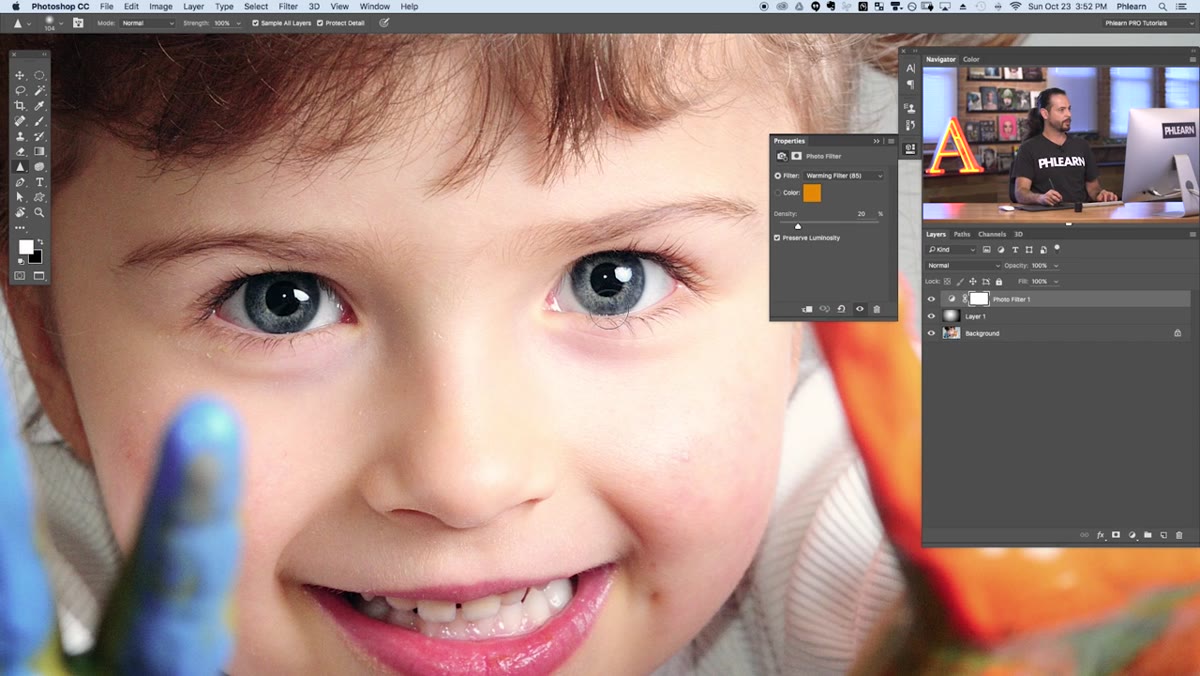
 Dodge tool being applied over the subject’s iris area
Eyes are where a portrait lives or dies. Aaron’s approach here is to handle brightness, sharpness, and color as separate targeted adjustments, all focused on the iris. Start by creating a new merged layer (Ctrl+Shift+Alt+E / Cmd+Shift+Option+E) or work on a duplicated layer. Use the Dodge tool set to Midtones with an exposure around 10-15% and gently brush over the iris. This lifts the brightness of the eye without blowing out the highlights. Keep your brush small and confined to the colored part of the eye.
Dodge tool being applied over the subject’s iris area
Eyes are where a portrait lives or dies. Aaron’s approach here is to handle brightness, sharpness, and color as separate targeted adjustments, all focused on the iris. Start by creating a new merged layer (Ctrl+Shift+Alt+E / Cmd+Shift+Option+E) or work on a duplicated layer. Use the Dodge tool set to Midtones with an exposure around 10-15% and gently brush over the iris. This lifts the brightness of the eye without blowing out the highlights. Keep your brush small and confined to the colored part of the eye.
For sharpening, use the Sharpen tool (same tool group as Blur and Smudge) with a low strength and brush carefully over the iris and the edge detail of the pupil. The goal is to make the eyes look like they’re in sharp focus even if the original shot has a tiny bit of softness. A little goes a long way here. Over-sharpen and it starts looking like a 2008 DeviantArt edit.
Step 6: Add a Hue/Saturation Boost to the Eyes
 Hue/Saturation adjustment layer with mask clipped to eye area
Add a Hue/Saturation adjustment layer and boost the Saturation slider for the eyes. Mask this adjustment so it only affects the iris area. Painting a rough mask with a soft brush at full opacity works fine for this. Even a small saturation bump of 20-30 points can make blue, green, or brown eyes read with a lot more presence in the final image. Pair this with the brightening from the Dodge tool and the eyes become a natural anchor point for whoever looks at the photo.
Hue/Saturation adjustment layer with mask clipped to eye area
Add a Hue/Saturation adjustment layer and boost the Saturation slider for the eyes. Mask this adjustment so it only affects the iris area. Painting a rough mask with a soft brush at full opacity works fine for this. Even a small saturation bump of 20-30 points can make blue, green, or brown eyes read with a lot more presence in the final image. Pair this with the brightening from the Dodge tool and the eyes become a natural anchor point for whoever looks at the photo.
One Thing I’d Add From My Own Experience
Aaron keeps this workflow tight and I respect that. If I’m adding anything, it’s this: save a version of this as a Photoshop Action before you close the file. Once you’ve dialed in your vignette opacity and warming filter density for a particular lighting condition, an Action lets you one-click apply a close approximation to the next ten photos from the same shoot. I’ve built up a small library of these for different scenarios - overcast outdoor, indoor warm light, harsh midday sun - and it’s cut my batch editing time down significantly. It’s not a perfect substitute for per-image tweaking, but it gets you 80% of the way there in about three seconds.
These three techniques work because they address the specific problems that show up in kids’ portraits: unflattering flat lighting, skin that looks a little washed out, and eyes that don’t grab you. Each adjustment is non-destructive, reversible, and takes maybe five minutes total once you’ve done it a couple of times.
The vignette focuses the viewer’s attention. The warming filter adds life. The eye work closes the deal.
Watch the full tutorial on YouTube to see Aaron walk through all three techniques with the actual photo in real time - his pacing makes it easy to pause and follow along step by step.
Comments
Leave a Comment