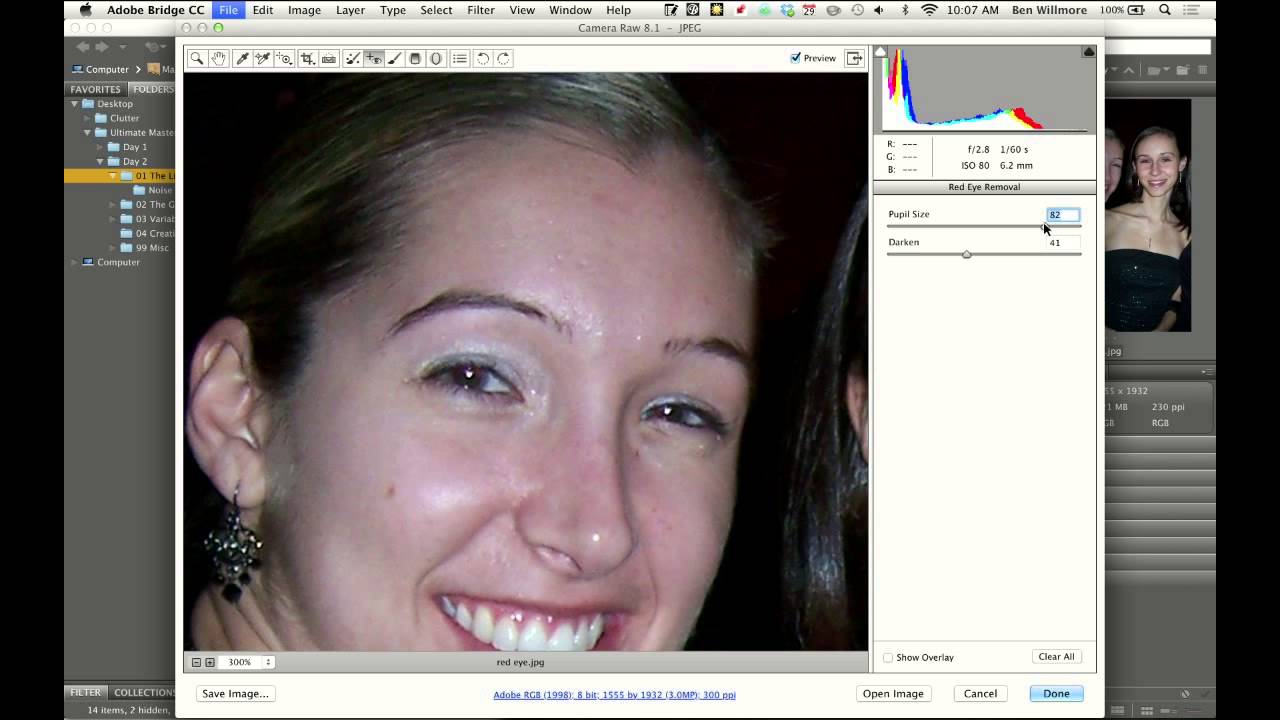
Portrait retouching has a way of humbling you. You can spend an hour perfecting skin tones, dodging and burning like a fine art printer, and then someone points out the glowing demon eyes in the background that you somehow stopped noticing. Red eye is one of those problems that feels embarrassing to have and equally embarrassing to fix badly. A heavy-handed correction leaves you with flat black blobs where pupils should be, and that looks almost worse than the original.
In this CreativeLive tutorial, Photoshop educator Ben Willmore walks through the red eye removal process in both Camera Raw and Photoshop itself. Watch the full tutorial on YouTube - it’s short, sharp, and covers something a lot of people assume they already know how to do correctly. Spoiler: there’s a setting most people ignore that makes the difference between “fixed” and “actually fixed.”
What I appreciate about Willmore’s approach here is that he doesn’t just show you one path. He shows you two, and explains why you might reach for one over the other depending on where you are in your workflow. That kind of contextual thinking is what separates a useful tutorial from a button-clicking demo.
Step 1: Open the Image in Camera Raw
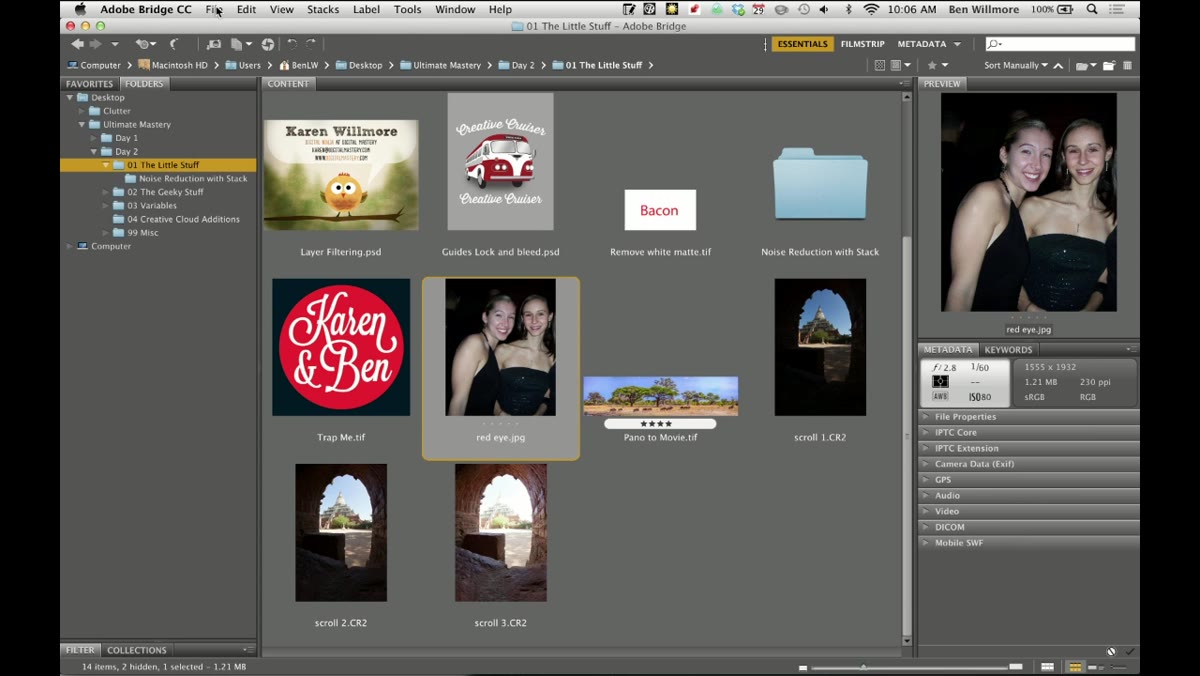 Opening a photo through File menu into Camera Raw
If you’re starting from the raw file, go to File and choose Open in Camera Raw. This is the preferred entry point if you haven’t done any retouching yet, because everything in Camera Raw is non-destructive and the red eye tool there gives you interactive controls you can tweak after the fact.
Once the image is open, zoom in on the eyes so you can actually see what you’re working with. Trying to fix red eye at full zoom on a wide portrait is a good way to miss the edge of the pupil and wonder why nothing changed.
Step 2: Select the Red Eye Tool in Camera Raw
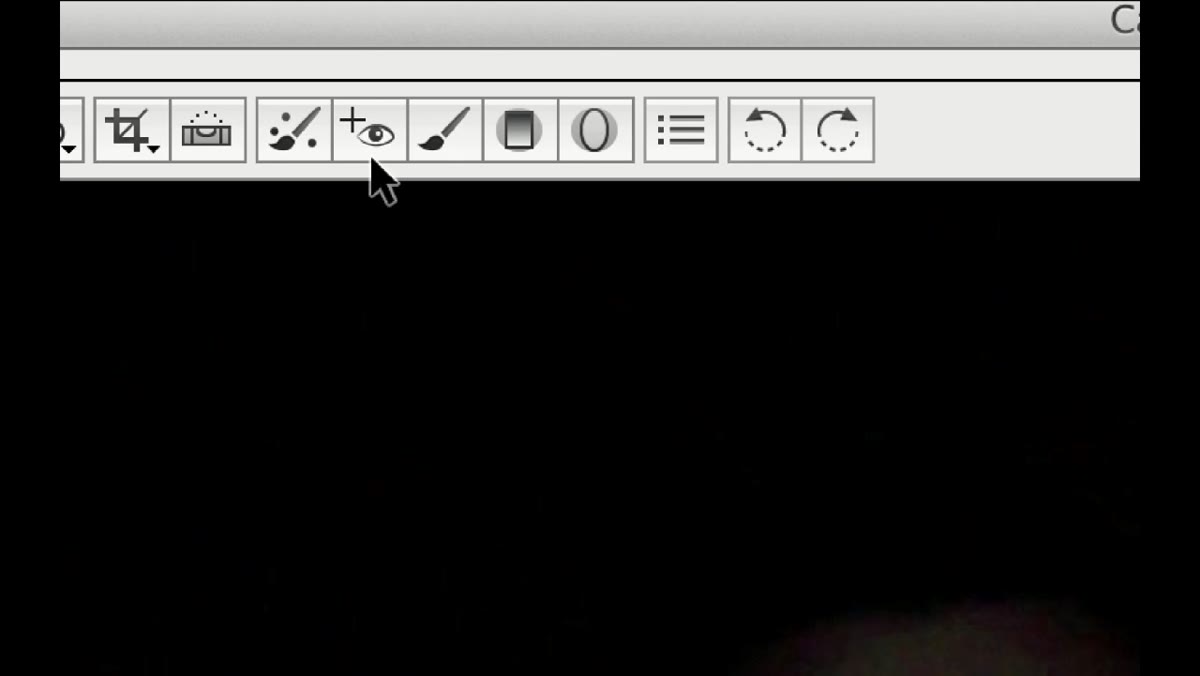 Red eye tool icon highlighted at top of Camera Raw interface
At the top of the Camera Raw toolbar, look for an icon that resembles an eyeball with a small plus sign next to it. That’s the red eye tool. Click it to activate it.
The icon is easy to overlook if you’re not specifically hunting for it. It sits in the top bar rather than the side panel where most tools live, which trips people up the first time. Once you’ve spotted it, you won’t forget where it is.
Step 3: Draw a Rectangle Around the Entire Eye
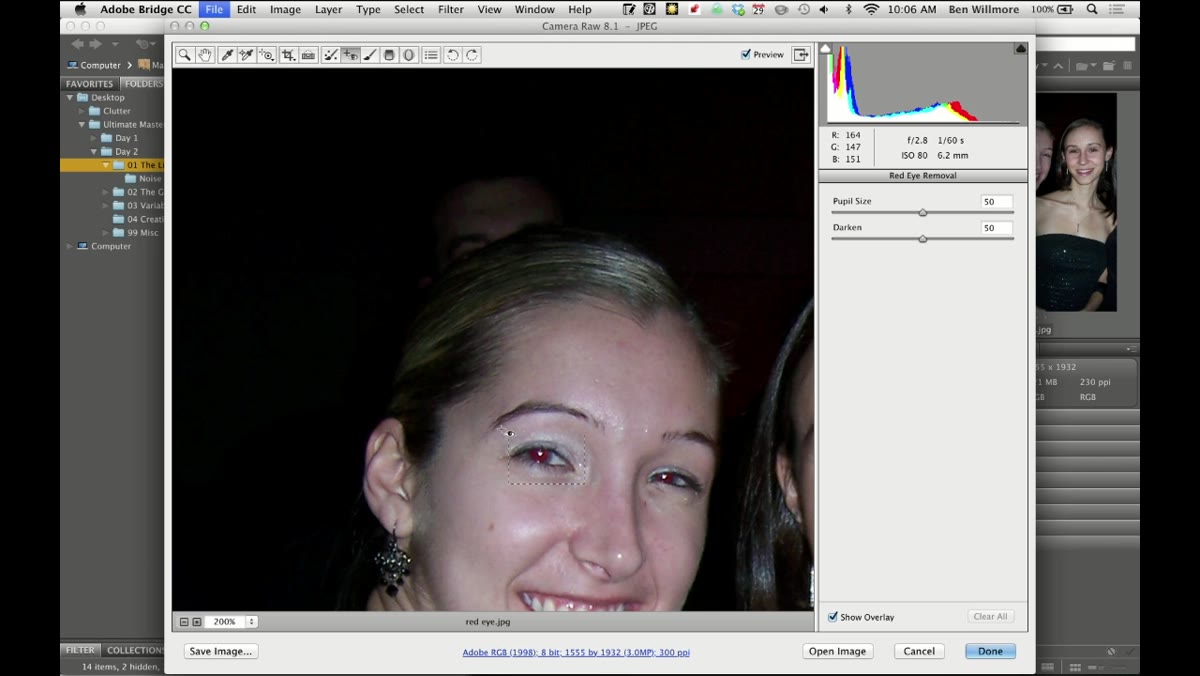 User dragging a rectangle selection around the full eye area
This is where Camera Raw’s approach differs from what most people expect. Don’t click directly on the red area. Instead, click and drag to draw a rectangle that surrounds the whole eye, lashes and all. Camera Raw then searches within that box for the reddish area and targets it automatically.
After you draw the box, a smaller selection overlay appears on the detected area. If that overlay is distracting, there’s a checkbox labeled “Show Overlay” in the panel that you can toggle off to see just the corrected result. This is useful for doing a quick before-and-after check without committing to anything.
Step 4: Adjust the Darken and Pupil Size Sliders
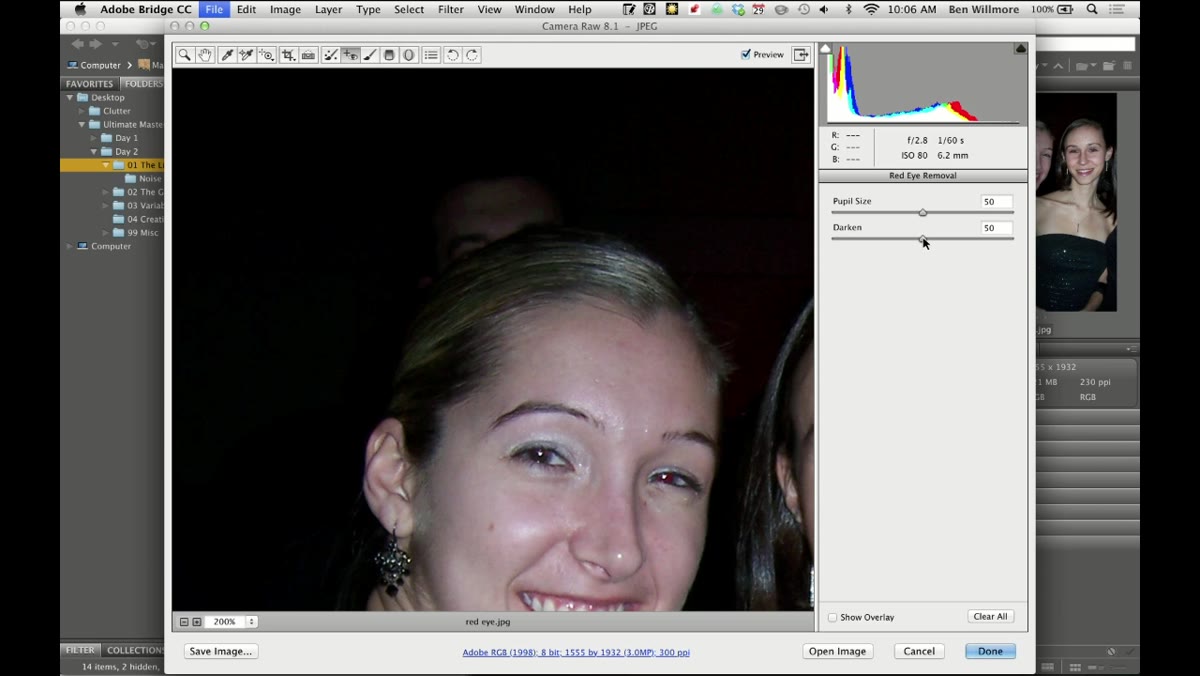 Darken and Pupil Size sliders visible in Camera Raw panel
Once the tool has made its detection, you get two sliders to work with. Darken controls how dark the corrected pupil becomes. Push it too high and you lose all pupil detail, which looks fake. Pull it back and the result sits at a more natural dark gray that reads as a real eye in the final image. There’s no universal right setting here. It depends on the lighting in the original shot.
Pupil Size controls how large of an area the tool searches and corrects. If the red eye covers a bigger area than the tool initially catches, bump Pupil Size up. If the tool is bleeding into surrounding eyelid skin or catching something it shouldn’t, bring Pupil Size down to tighten the detection zone. Repeat the process for the second eye by drawing a new rectangle around it.
Step 5: Switch to the Red Eye Tool Inside Photoshop
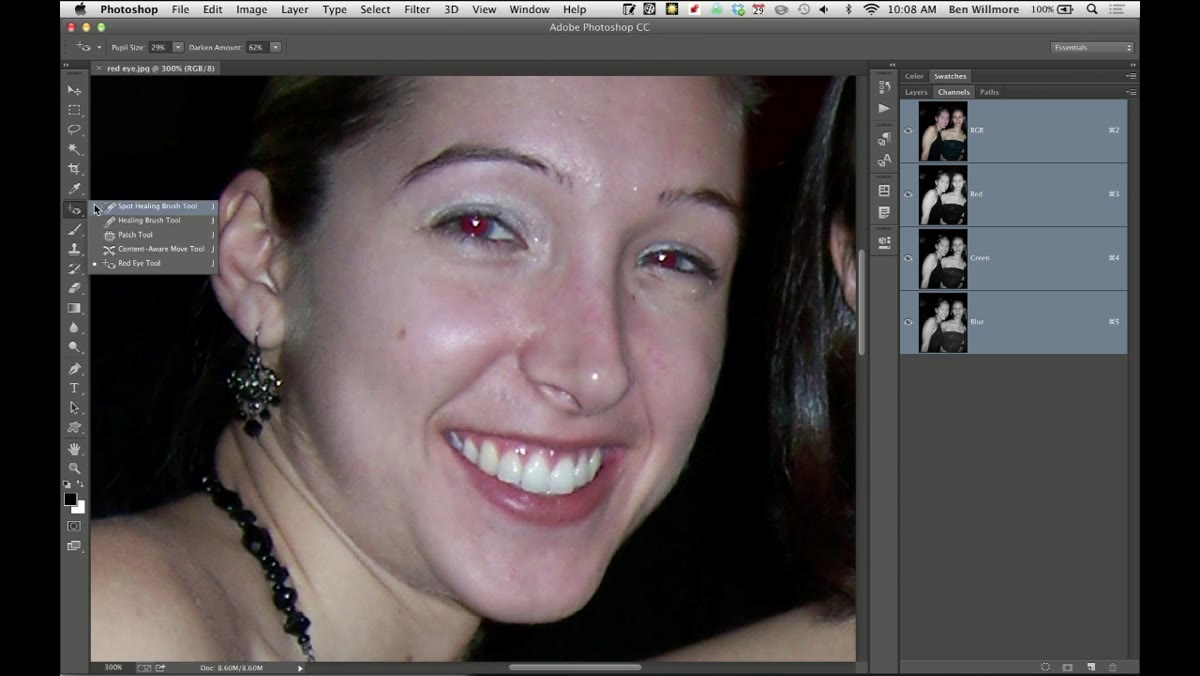 Red eye tool selected from healing brush flyout menu in Photoshop toolbar
If you’ve already opened the image in Photoshop and have a layer stack going, Camera Raw isn’t really an option without flattening and starting over. The good news is Photoshop has its own red eye tool, and it lives in a slightly unexpected spot. On the left toolbar, click and hold on the Spot Healing Brush. A flyout menu appears with several tools grouped together, and the Red Eye tool is one of them.
The icon looks like an eye with crosshairs. Select it, and you’ll see options appear in the options bar across the top of the screen: Pupil Size and Darken Amount. Same concepts, different location.
Step 6: Click Directly on the Red Eye (No Rectangle Needed)
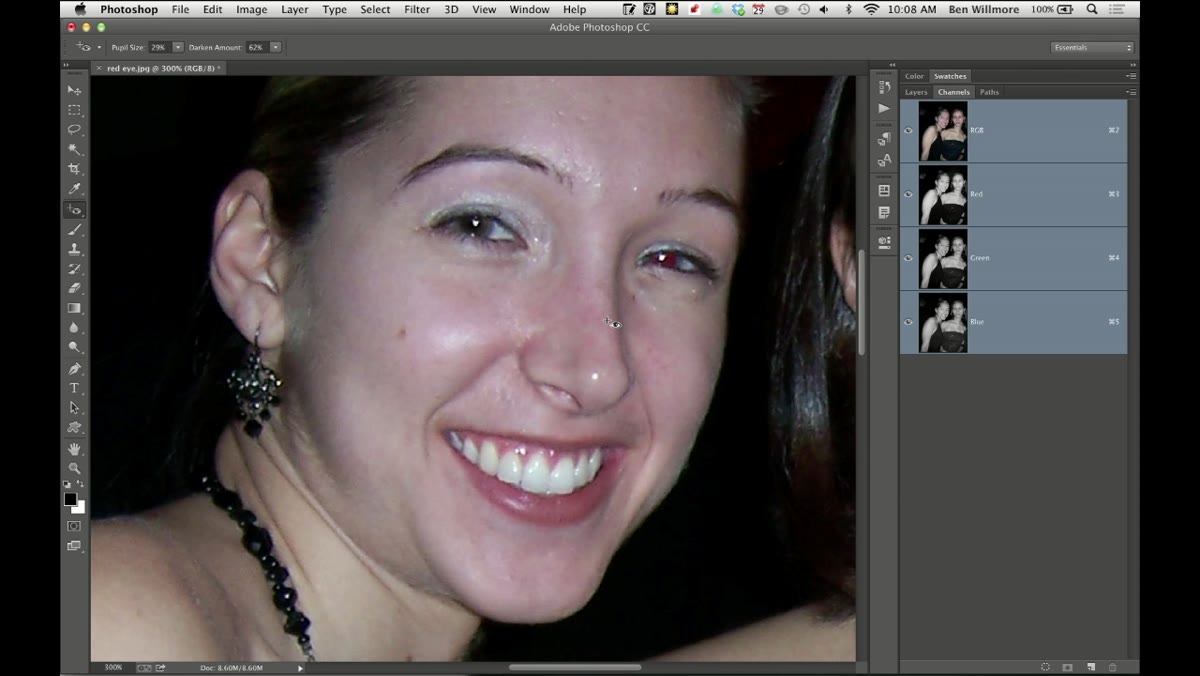 Single click on red eye area in main Photoshop canvas
In Photoshop, you don’t have to draw a rectangle. You can just click directly on the red area and the tool does its thing. Simple. Fast. The catch is that the Darken Amount setting isn’t live or interactive the way it is in Camera Raw. You have to set it before you click.
If you click and hate the result, undo it, adjust the Darken Amount or Pupil Size in the top bar, and click again. It’s a slightly less forgiving workflow than Camera Raw, but if you’re three adjustment layers deep into a retouch, it’s the right call.
A Note on Layer Discipline
Here’s something the tutorial doesn’t cover but that I’d add from experience: when you’re using the red eye tool inside Photoshop, do it on a duplicate of your background layer rather than directly on the original. The tool makes direct pixel edits. There’s no smart object magic happening here. If you decide six steps later that you pushed the Darken Amount too hard, you want to be able to go back without nuking the rest of your retouch work.
I learned this kind of thing the expensive way early in my freelance days. Making a duplicate layer takes two seconds. Rebuilding a retouch because you have no undo history does not.
The most important thing to take away here is that Darken Amount is the setting most people ignore and most often get wrong. Corrected red eye shouldn’t look like someone painted a black circle on the photo. Back that slider off until the pupil has texture and depth, and the fix will hold up at any print size.
Watch the full tutorial on YouTube and see Willmore demonstrate both methods side by side. It’s under three minutes and worth every second.
Comments (3)
Tried this technique this morning. Game changer for real.
Finally someone explains this in a way that actually makes sense.
Couldn't agree more. I've seen this make a huge difference in lighting work specifically.
Leave a Comment