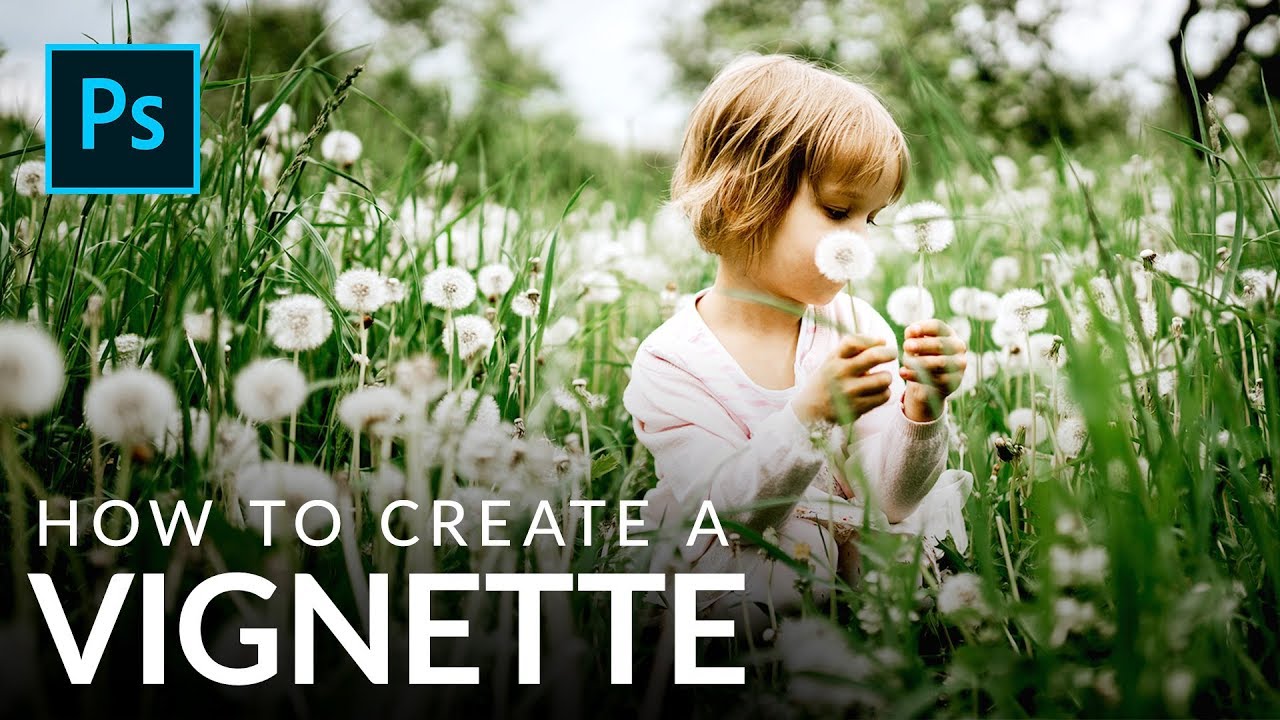
I used to add vignettes the lazy way. Throw a black-to-transparent radial gradient on top, drop the opacity to taste, call it a day. It worked well enough for meme graphics back when I was just making stuff for friends’ band pages, but the moment I started doing actual client work, that flat gradient approach looked exactly like what it was: a shortcut. The edges felt pasted on. Photographers noticed. Art directors noticed. My imposter syndrome noticed.
Then I found myself watching Aaron Nace over at PHLEARN break down his two-layer vignette method, and I’ll be honest, I was annoyed at how simple it was. Watch the full tutorial on YouTube if you want to see it straight from him. But if you want the walkthrough you can actually follow step by step without pausing every 30 seconds, keep reading.
The core idea is this: a convincing vignette doesn’t just darken the corners. It also brightens the center. Those two adjustments work together to pull the viewer’s eye inward, and because both are driven by Curves adjustment layers with heavily blurred masks, the whole thing feels like it belongs to the photograph rather than sitting on top of it.
Step 1: Zoom Way Out Before You Do Anything
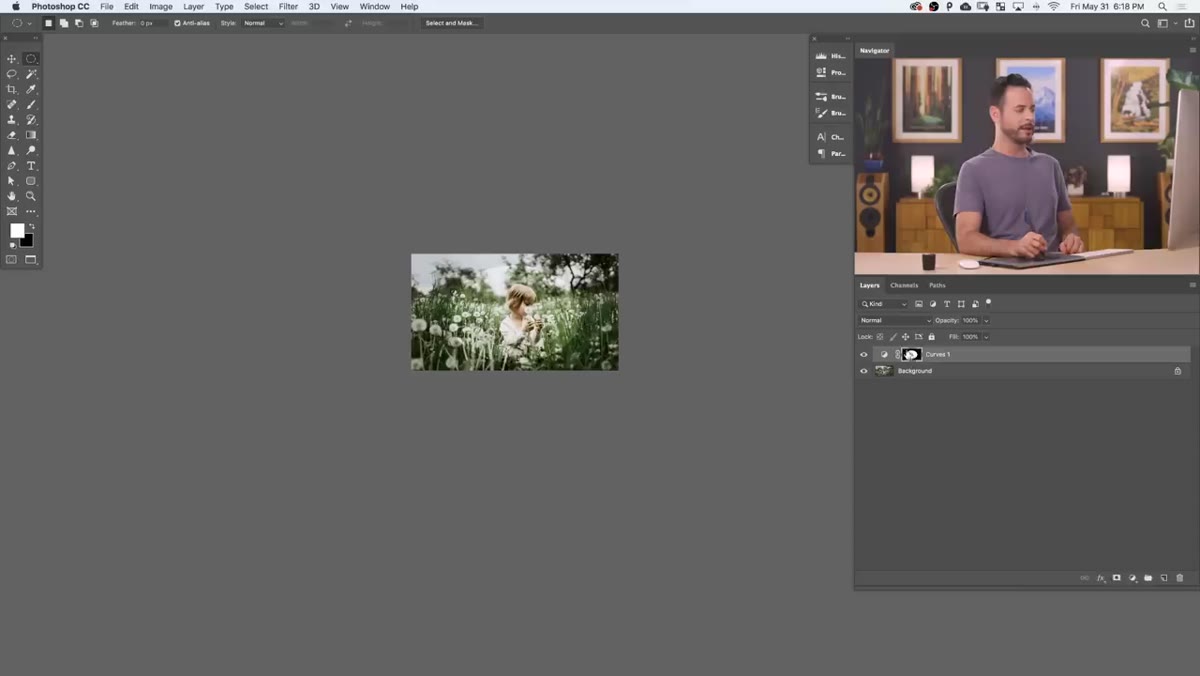
 Zooming out the image with keyboard shortcut
This is the tip I wish someone had stapled to my monitor years ago. Before you draw a single selection or apply any adjustment, zoom out until the image is small on your screen. Use Ctrl/Cmd and the minus key a few times.
Zooming out the image with keyboard shortcut
This is the tip I wish someone had stapled to my monitor years ago. Before you draw a single selection or apply any adjustment, zoom out until the image is small on your screen. Use Ctrl/Cmd and the minus key a few times.
The reason is practical: Gaussian blur values that look subtle when you’re zoomed in to 100% look absolutely absurd when you step back. You’ll end up with a halo that screams “I did this in Photoshop” and not in a good way. Zoomed out from the start, you’re judging the effect at the scale it’ll actually be seen.
Step 2: Draw an Elliptical Marquee Around Your Subject
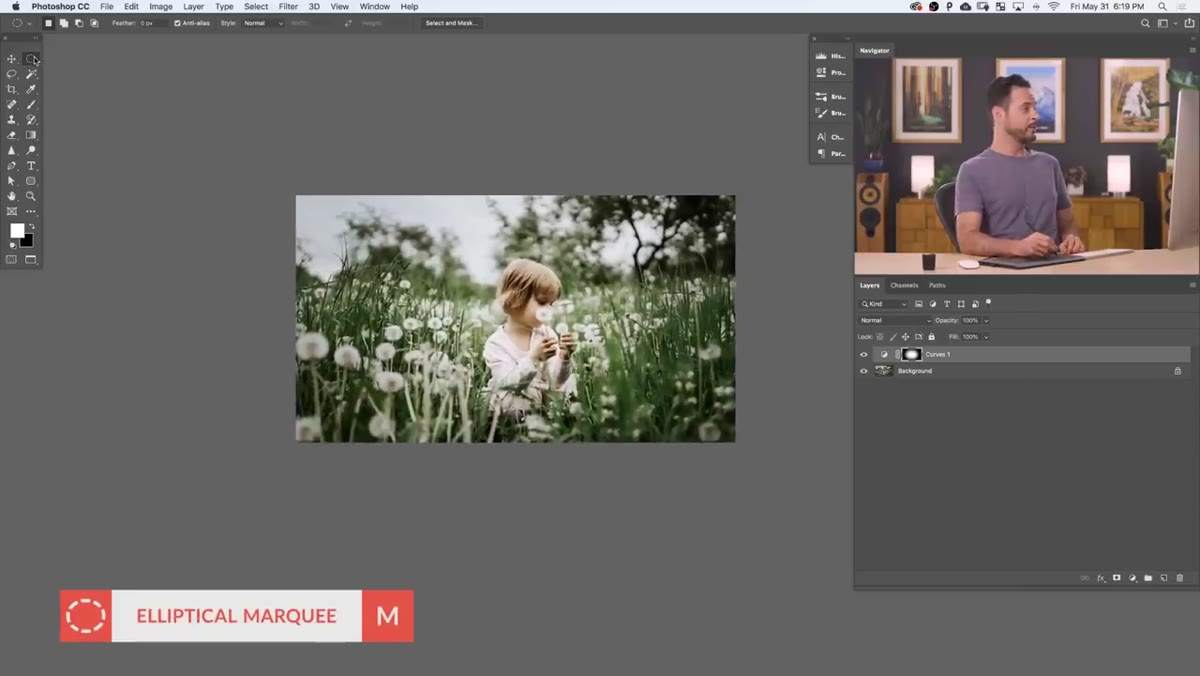
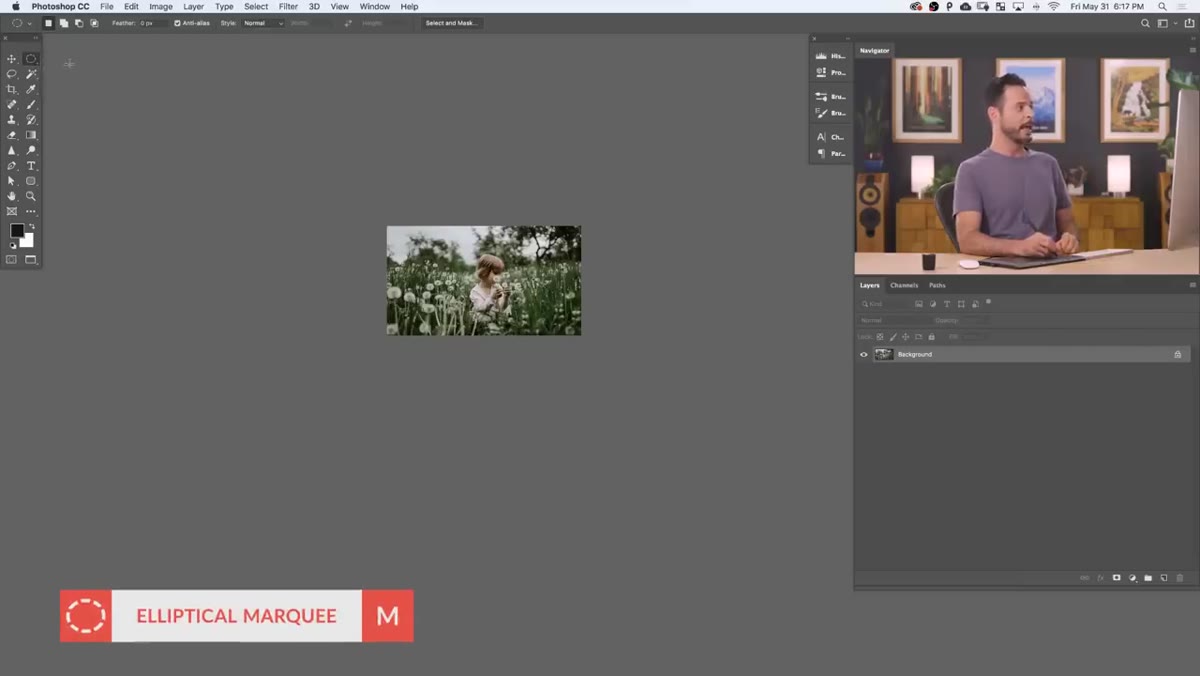 Elliptical Marquee Tool selected in the toolbar
Grab the Elliptical Marquee Tool (M) and draw an oval selection that surrounds your subject with some breathing room. You don’t need to be surgical about it. Loose is better here because everything gets blurred out anyway.
Elliptical Marquee Tool selected in the toolbar
Grab the Elliptical Marquee Tool (M) and draw an oval selection that surrounds your subject with some breathing room. You don’t need to be surgical about it. Loose is better here because everything gets blurred out anyway.
The useful trick Aaron points out: hold the spacebar while you’re still dragging the selection to reposition it on the fly. You don’t have to nail the placement on the first drag. Get the size roughly right, then slide it over your subject. Once you’ve got it centered and comfortably larger than the subject itself, let go.
Step 3: Add a Curves Adjustment Layer
 New Curves adjustment layer created with selection active
With your selection still active, go to Layer, then New Adjustment Layer, then Curves. Hit OK. Photoshop automatically uses your active selection as the layer mask on that adjustment layer, which means any curve adjustment you make will only affect the area inside your ellipse. That’s the mechanic the whole technique is built on.
New Curves adjustment layer created with selection active
With your selection still active, go to Layer, then New Adjustment Layer, then Curves. Hit OK. Photoshop automatically uses your active selection as the layer mask on that adjustment layer, which means any curve adjustment you make will only affect the area inside your ellipse. That’s the mechanic the whole technique is built on.
In the Curves panel, grab the midpoint of the diagonal line and pull it upward. You’re brightening the center of the image where your subject sits. Don’t go crazy. A subtle lift is enough. If it looks obviously brightened when you’re zoomed out, you’ve gone too far.
Step 4: Blur the Layer Mask (While Zoomed Out)
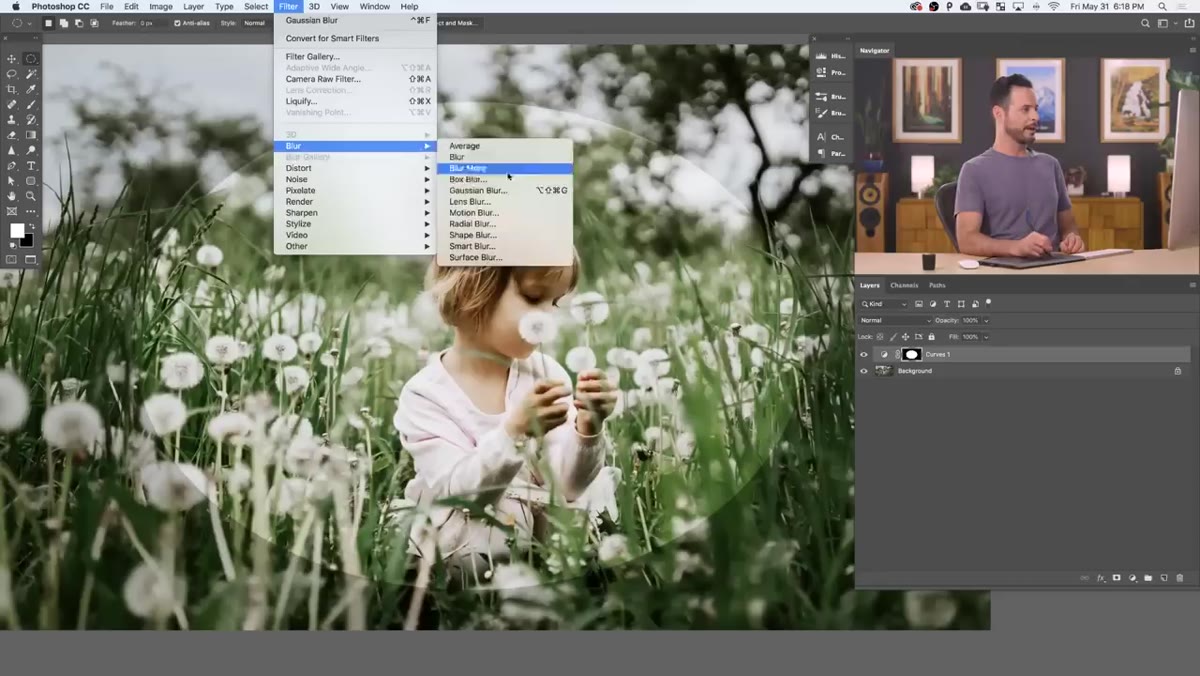
 Gaussian Blur dialog applied to layer mask
Click directly on the layer mask thumbnail in the Layers panel to make sure it’s selected, not the adjustment layer itself. Then go to Filter, Blur, Gaussian Blur. This is where that zoomed-out view earns its keep.
Gaussian Blur dialog applied to layer mask
Click directly on the layer mask thumbnail in the Layers panel to make sure it’s selected, not the adjustment layer itself. Then go to Filter, Blur, Gaussian Blur. This is where that zoomed-out view earns its keep.
Crank the radius up until the hard elliptical edge completely disappears and the brightness transition looks gradual and organic. Aaron demonstrates exactly why this matters by intentionally applying the blur while zoomed in first. The number looks reasonable up close. Zoom out and it looks like someone glued a spotlight to the image. Work zoomed out, keep raising the radius until there’s no visible edge at all.
Step 5: Draw a Second, Larger Ellipse for the Dark Vignette
 Large elliptical selection drawn near image edges
This is the second half of the technique and the part most people skip. Grab the Elliptical Marquee Tool again and draw a much larger ellipse this time, one that nearly fills the entire canvas with just a sliver of the image outside the selection boundary.
Large elliptical selection drawn near image edges
This is the second half of the technique and the part most people skip. Grab the Elliptical Marquee Tool again and draw a much larger ellipse this time, one that nearly fills the entire canvas with just a sliver of the image outside the selection boundary.
Use the spacebar trick again to center it up. The selection edge should land somewhere around the outer 10 to 20 percent of the image. This is going to become the mask for your darkening adjustment.
Step 6: Add a Second Curves Layer and Darken the Edges
 Second Curves adjustment layer darkening image borders
Same process as before. With the large selection active, go to Layer, New Adjustment Layer, Curves. This time, drag the midpoint downward to darken. Because the mask covers most of the frame, the darkening happens everywhere except the center where your subject lives.
Second Curves adjustment layer darkening image borders
Same process as before. With the large selection active, go to Layer, New Adjustment Layer, Curves. This time, drag the midpoint downward to darken. Because the mask covers most of the frame, the darkening happens everywhere except the center where your subject lives.
The interplay between the two layers is what makes the effect feel photographic. Center is slightly brighter, edges are slightly darker, and both transitions are so gradual you can barely identify where one ends and the other begins. Toggle the adjustment layers on and off and you’ll immediately see how much the image depth changes.
Step 7: Blur the Second Mask
 Filter Blur Gaussian Blur menu path shown
Click the layer mask on your second Curves layer, go back to Filter, Blur, Gaussian Blur, and repeat the same process. Zoomed out, keep pushing the radius until the transition is invisible. The two blurred masks should now work together seamlessly.
Filter Blur Gaussian Blur menu path shown
Click the layer mask on your second Curves layer, go back to Filter, Blur, Gaussian Blur, and repeat the same process. Zoomed out, keep pushing the radius until the transition is invisible. The two blurred masks should now work together seamlessly.
At this point you can fine-tune the brightness and darkness of each Curves layer by going back in and adjusting the curve points. Non-destructive all the way through, which means you can revisit this a week later and tweak without starting over.
My Extension: Clip a Hue/Saturation Layer for Moody Color Shifts
This two-layer structure opens a door Aaron doesn’t go through in this particular video, and it’s become one of my favorite ways to push the effect further. After the dark outer Curves layer, I’ll sometimes clip a Hue/Saturation adjustment to the same mask and drop the saturation slightly toward the edges. Real-world lens vignetting often desaturates slightly as light falls off, so this detail makes the whole thing feel even more optically believable.
The other move I use constantly: if the image has a warm subject against a cool background (or vice versa), I’ll add a slight color temperature shift in that outer Curves layer using the individual RGB channels rather than the composite. Pull the blue channel up slightly in the shadows of the outer layer and the whole frame gets a cinematic push. Doesn’t work for every image, but when it does, clients think you shot it with a $10,000 lens.
The single most important thing to take away from this technique is the zoom-out rule. Every vignette mistake I’ve ever made, and I’ve made a lot of them, came from judging a blurred mask at the wrong zoom level. Work small, judge the whole image, then zoom in to fine-tune the Curves values once the mask itself looks right.
Watch the full tutorial on YouTube to see Aaron walk through the whole thing with a sample image you can download and follow along with.
Comments (5)
I've watched a dozen tutorials on this and yours is the clearest by far.
Printing this out and pinning it next to my monitor. That good.
I've been looking for exactly this kind of tutorial. Perfect timing.
Really solid breakdown. This pairs perfectly with the business work I've been writing about.
Would love to see a follow-up going deeper into this topic.
Leave a Comment